Most of the desktop 3D Printers are based on Fused deposition modeling, commonly known as FDM.
Extruder in FDM printers is responsible for carrying the filament to the hot end and then extruding the filament, one layer at a time until the object is completely printed.
Extruder, being one of the most important components of the FDM 3D printers, must be properly set up for best results. Among the two extruder types available, the Bowden extruder setup is a bit tricky.
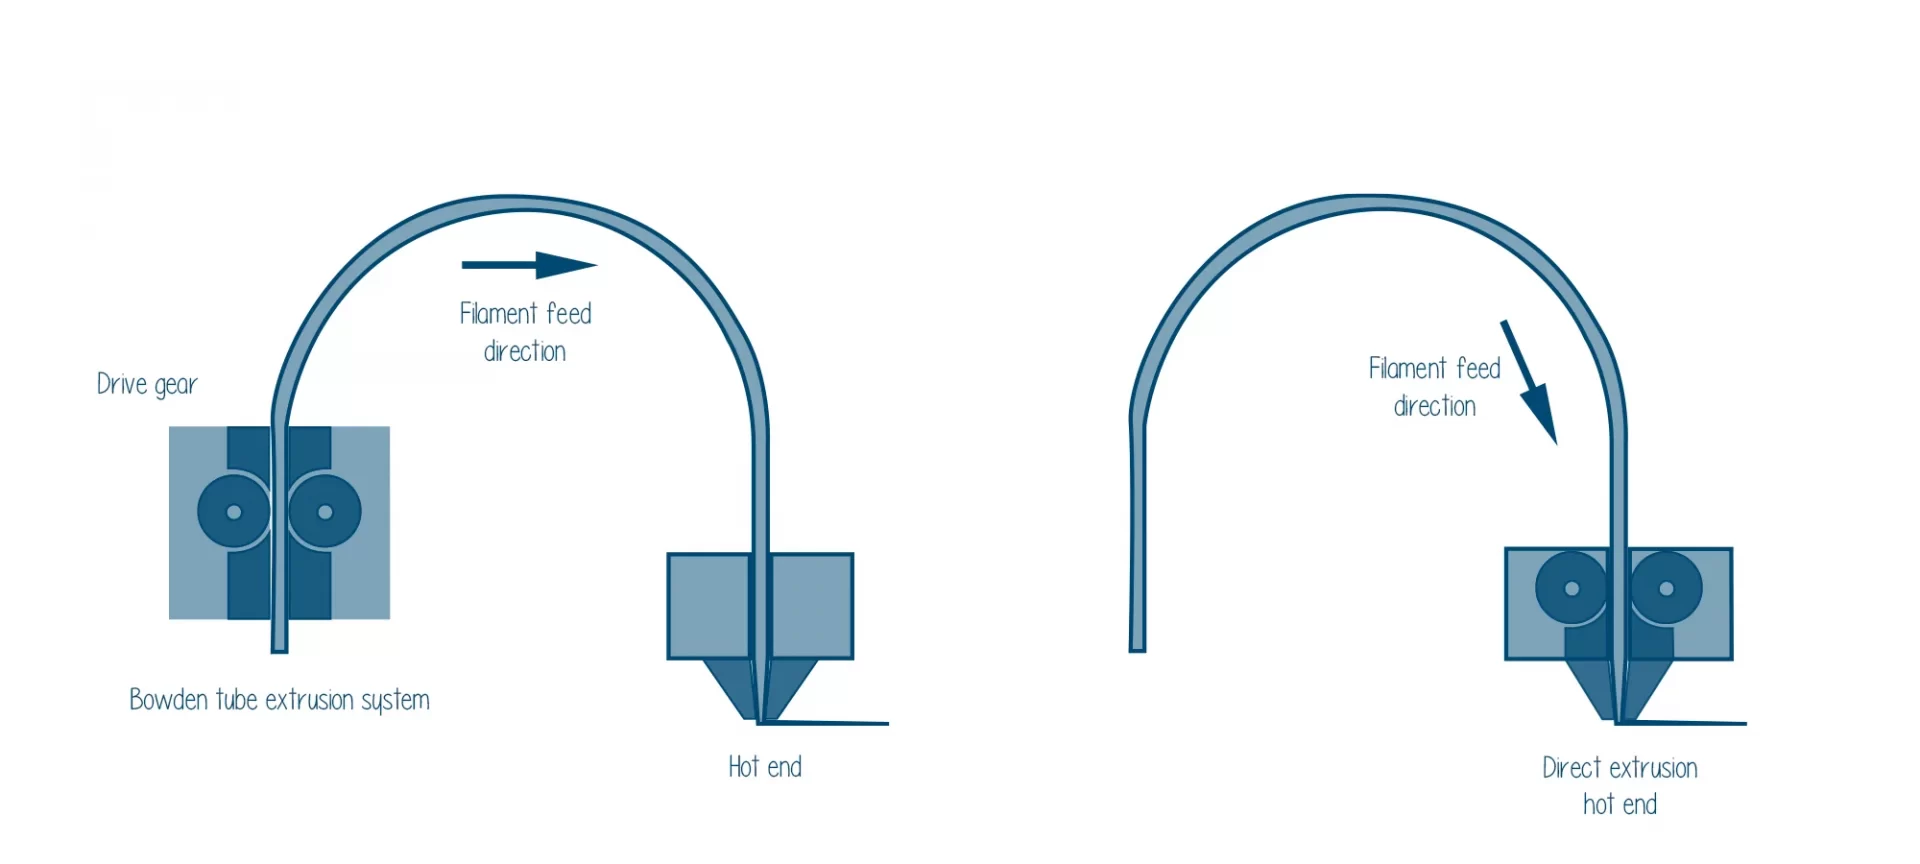
This is because the filament has to cover longer distances before it reaches the hot end. Hence, providing more time for the filament to bend and wobble.
This is the prime reason why those working with flexible filament must make changes to the retraction settings to prevent oozing. There are many things that users must consider if decide to work with a Bowden style extruder.
What is a Bowden Extruder?

The difference between a direct extruder and a Bowden extruder is the placement of the extruder motor. The cold end is mounted to the frame of the 3D printer.
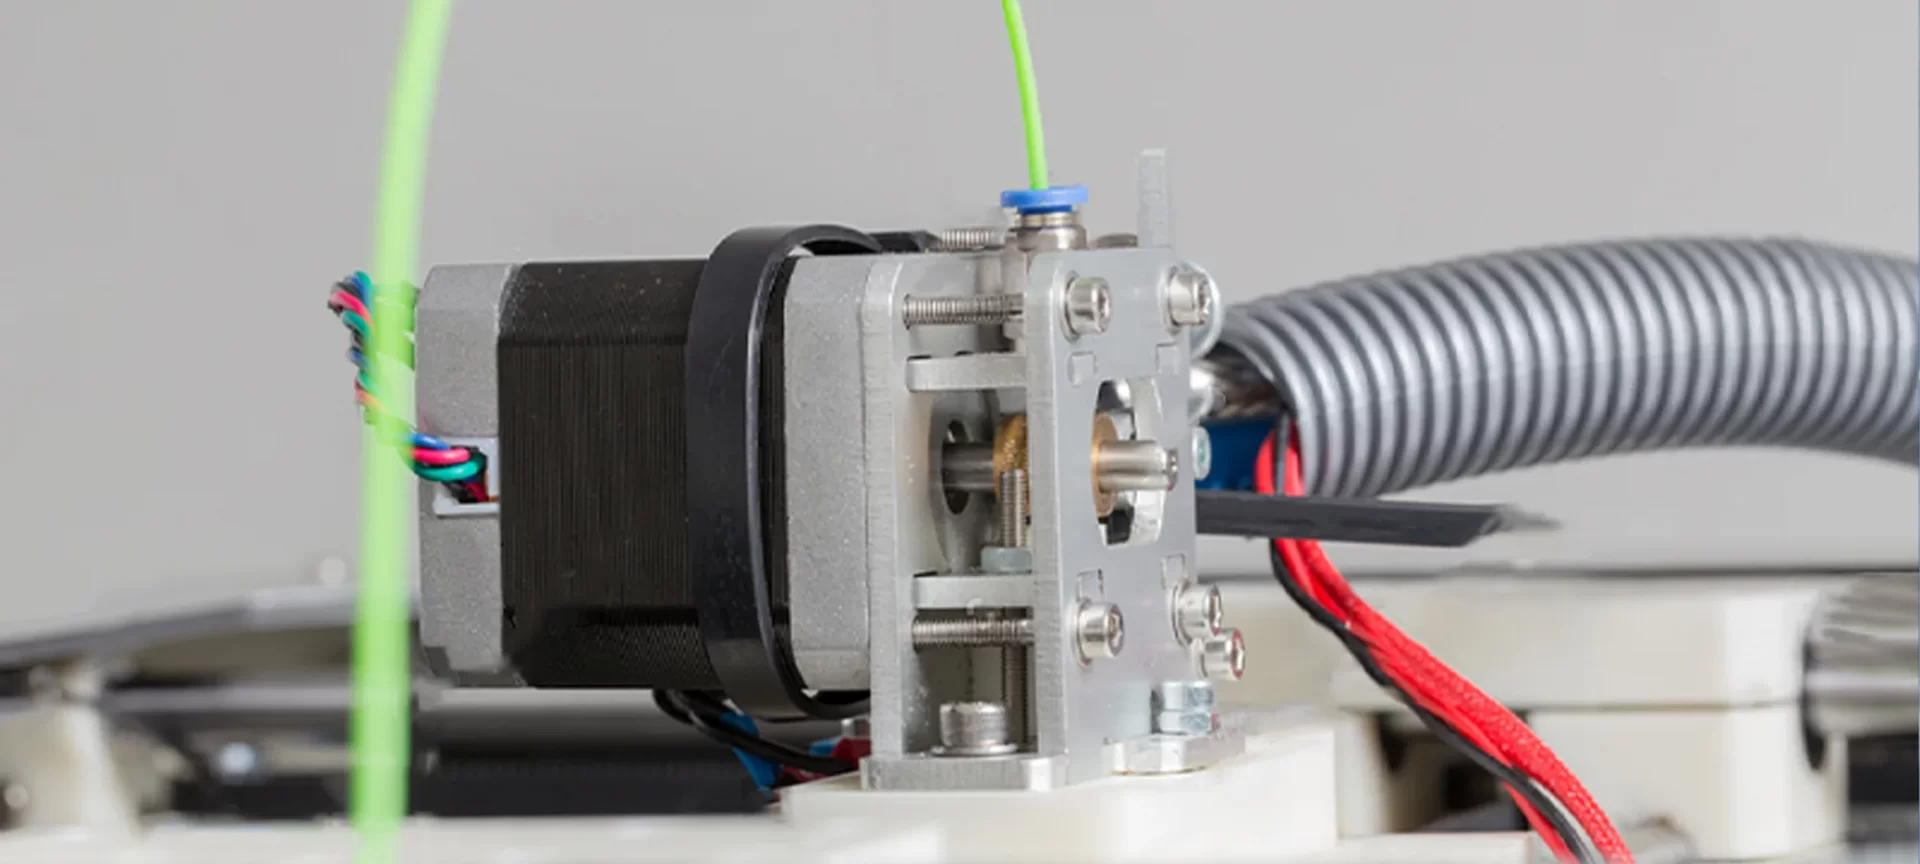
In a Bowden extruder, the motor that is placed away from the hot end is connected through a PTFE tube. This is a flexible Teflon tube long enough to connect the two components together.
The 3D printer extruder assembly is divided into two major components, the cold end, and the hot end.
Many believe that the hot end is not a part of the extruder and extruder simply means the cold end. However, without confusing things, let us understand the complete assembly of the hot and cold end.
Cold End
The cold end is where the cold process happens. That is the feeding of the filament to the hot end. Cold end forms the upper portion of the extruder setup. This is where the filament is fed. Later, the filament reaches the hot end where it is melted and deposited on the build plate.
Motors: Motors are an important component of the cold end. The most commonly used stepper motors in desktop printers is NEMA 17 with 1.7” x 1.7” faceplate.
There could be different types of NEMA motors available in a 3D printer. Some are geared or 0.9 degrees per step or 1.8 degrees per step, etc.
These also come with varying voltage ratings, differing current ratings and different lengths. Different types of motors produce differing torque as well. The motor requirements would depend on what kind of extruder assembly you are using for your 3D printer.
Filament Drive Gear: Once the filament is fed to the cold end, it would require something to hold the filament and further send it to the hot end.
These are also available in different varieties. Among all, there are two most commonly used filament drive gears: hobbed, and hobbed bolts.
Idler: This is a mechanism used for holding the filament against the drive gear. To make this possible. A number of different fixes are used, Bearings, printed plastic, PTFE tubing, and rubber wheels.
There are extruders that also make use of two 2 drive gears. One thing must be noted though, idler must be set up to provide appropriate pressure. Or else, it can lead to extrusion problems.
Bowden Tube: We have already talked about the PTFE tube before. This is the Bowden tube that connects the cold end to the hot end. It is not present in the direct extruder and is only found with the Bowden extruder setup.
Hot End

Moving down to the hot end, this is where the filament is melted and extruded, hence the name. The hot end assembly consists of a heated chamber, where the filament is passed for melting it from solid to liquid form.
It is comparatively an easy process when compared to the cold end, however, there is more to the machine than it appears.
To keep the liquid form silky and perfect for deposition, the optimum temperature, and many other things matter. Once the filament is in the liquid state, it is deposited on the build plate.
To understand the hot end design, specifically the all-metal hot end, here is what to expect. The first thing to notice is the filament feed tube connected to the cold end attaches to the heat sink.
Hence, the filament is fed to the heat break, a non-heat conducting metal tube, through this heat sink.
The heat break enables the filament to move smoothly through the nozzle, hence allowing the proper extrusion of filament.
As mentioned before, the management of temperature is highly crucial at this stage. Hence, the job of the heat break along with heat sink is to create a consistent temperature for optimal extrusion of filament.
The hot end’s upper portion is rigorously cooled by a dedicated fan to prevent heat from escaping the hot end. If the cooling isn’t appropriate, the filament can become weak before it could reach the print bed, resulting in heat creep.
The lower portion of the heat break sits within a heater block, along with a heater cartridge, temperature relaying thermistor, and nozzle.
There are various other components that come into play when ensuring the proper extrusion of filament. It includes the heater block for ensuring the filament travels seamlessly through the heat break tube to reach the nozzle.
The high temperature is a result of a heater cartridge. Using the electric current, the heater cartridge temperature is increased. Then again, there is a thermistor placed inside the heater block.
Lastly, it’s the nozzle that contains a small opening and a chamber to store the molten filament. The opening of the nozzle is very precise and can differ in diameter to provide varied print results.
Most commonly, the 3D printers are shipped with 0.4mm nozzles. However, users can choose among other sizes as well. One can decide how precise the prints need to be created. And, accordingly, choose the nozzle as preferred.
How to Calibrate Bowden Extruder Setup?
Here is a step by step process to understand 3D printer extruder calibration.
- Ensure that the printer is connected to the slicing software compatible with your 3D Printer. Let us take the example of MatterControl, an open-source application. Also, make sure that the hot end along with the heated bed isn’t on.
- Take out the Bowden tube from the side that is connected to the hot end while leaving it connected to the cold end.
- Start feeding the filament to the extruder to the end of the Bowden tube until it pops a little.
- Make a cut to the part that is popping out of the tube making a flat cut. This will help in measuring things appropriately in the later stages.
- Under the Extrude/Retract button settings, available with your slicing software or the corresponding setting of other software that you use, select “100mm” to extrude 100mm.
- Once the process finishes, make note of the measurement taken from the filament end side to the Bowden tube’s end. Make sure to repeat the step multiple times for around 4-5 times. Once completed, take an average of the measurements. If the resulted amount is greater than 100 mm, the printer is over extruding. If those results are less than 100mm, the printer is under extruding.
- The next step is to find out the value that the printer is considering for measuring the extrusion distance. To do that, find the ‘EEPROM Settings Configure’ in MatterCOntrol and locate the “Extruder Steps/MM” box.
- Using a formula, calculate the new value for Extruder Steps/MM. The formula is New Steps per mm = (Current steps per mm) x (100 / (the calculated distance that the filament traveled)).
- After calculating the results, update the Extruder Steps/MM. Do not forget to save changes.
- The steps aren’t completed yet. Although the calibration is done, you must confirm that the results are favorable. Start by extruding 100 mm filament and measure the same way as we did in the first step. If the measurement is exact, we are done. If it isn’t, you must repeat the calibration again.
The Conclusion
3D printers are precisely designed to ensure that the settings are perfect to produce best results. Otherwise, the printed models won’t be able to fulfill the expectation of users.
That is the reason, 3D printing is thought to have a steep learning curve. With an introduction to automated features, companies may have come up with an easy machine to work with, however, it still is important to learn the basic calibration and setup of each component.
Users must put effort to understand how these printers work. Especially those who are looking to engage themselves in professional applications.
It is not only exciting to learn the technology but also rewarding. Components like extruder play a very crucial part in the working of the 3D printers.
Hence, Bowden extruder setup is among the few major skills that experts must own. This would help stay tuned with the latest updates and would provide freedom when setting the printer to the best of its settings.


