3D printing is full of surprises. You cannot expect to stay informed at all times. There could be nuances of problems that may occur in between the printmaking things difficult to manage.
One common mistake that often leads to failed prints is the improper first layer printing. And, many times, users realize the problem when the print is halfway through done.
Sometimes, it’s even later. However, if you 3D print the first layer with caution, ensuring you keep every setting as apt as possible, you can minimize these surprises to a great extent. The first layer is the foundation of the entire model. One mistake could cause you great harm.
Think about the bad first layer adhesion. By simply not applying enough adhesive to the print bed, you expose the entire print to shifting and concluding with errors.
It might even fall down in between, destroying the entire effort, time and material. So, isn’t it wise to stay vigilant and include every tip that could help keep the first layer in place and intact?
By minimizing the 3D printing first layer problems, you can achieve great results, less prone to unexpected failures.
Either it’s the 3D printing first layer not sticking to the bed or 3D printing first layer height settings, visiting all the smaller details would help save your model from getting spoiled.
How Do I Print a Perfect First Layer?
Now that we have discussed the importance of the first layer printing, why not learn about the different stages where you must look a bit harder.
This would keep your first layer as perfect as possible. Hence, providing you better chances to succeed with your overall 3D model.
Ensure that the Nozzle Is Clean

Without needing to mention, you must take care of the nozzle cleanliness. Any blockage in the path of filament deposition could turn your first layer into a disaster. Your extruder with blockages could lead to unwanted results.
There are various reasons for ending with a clogged nozzle. A foreign object such as the cooled material left of the last print could block the paths of the filament when printing the next time.
So, how could you save your print from this foreign material? 3D print first layer with Skirt. You can change the settings through slicer software. By setting the Skirt in your Slicer, you allow the nozzle to print a circle before going for the first layer print.
In case, the Skirt comes out clean, you do not have to worry about the clogged material. If the opposite is true, you must go with unmounting the extruder and cleaning the inside of it after disassembling it.
The process would depend on the make of the 3D printer. So, you must access the guides on your specific Printer model’s website. And, find out how to accomplish this task with precaution.
3D Print First Layer with Consistent Filament deposition
You must ensure that the filament is leaving the extruder right from the beginning of the 3D print. This would help the inconsistent application of the 3D print first layer.
There are times when the material shortage leaves a gap in the first layer. The probability is higher at the start of the 3D print.
There are two main reasons for this to happen. Either, the extruder preheats way before the printing starts or the extruder hasn’t cooled properly after the previous printing.
In such cases, the filament stays in the liquid form inside the nozzle, during the early period. Hence, giving way to oozing. The leakage of plastic could occur even before the printing of the first layer.
The problem is serious and must be tackled with all the gears you have. The filament may not come out properly and on time. It is only after the fresh material heats and liquefies, the deposition would start. leaving gaps in the first layer.
To make sure this does not happen, you must ensure that the nozzle stays filled with filament as soon as the first layer printing initiates.
To solve the problem, you can again set Skirt in the slicer software. You can find the probable problem beforehand, safeguarding your actual model.
There are other ways to do this too. Using the 3D printer’s control panel, you can manage the nozzle feed as well.
In case, your 3D printer is equipped with a freely movable feeder, you can insert the filament manually taking necessary precautions not to damage the printer permanently.
The problem of under extrusion could also arise because of other problems. Such as the incorrect alignment of the print bed. We would discuss the problem in the next pointer.
Ensure the 3D Printer Bed is Aligned Properly
The alignment of the print bed is a huge challenge for beginners. And, the starters always struggle to hit the nail in the first go.
The bad news is that the improper alignment may get you into a plethora of problems. So, why not learn about the tactics to set the bed correctly as early as possible.
For example, if your printing bed is aligned excessively to one side, your extruder’s nozzle would stay too close to the other side. This could ultimately lead to clogged nozzles.
It would either deposit too little of material or you may not see any of it. While your nozzle will be too close to one end, it would become too far away from the other end.
Plus, it would also lead to poor adhesion. As you must know that the proper adhesion of the first layer is something you must not miss, your alignment matters a lot.
In case your printer is equipped with an adjustable printing bed, you can verify the alignment from time to time to avoid any mishap later. It may take some extra effort in the beginning but would save you from a lot of trouble later.
Every 3D printer has its own bed leveling procedure. You must follow those instructions properly as specified within the leveling function. This would help you keep your 3D printer’s bed aligned at all times.
Is It Essential to Clean the Print Bed Before Starting the Next Print?
Do you know that the dust particle lying over the build surface could destroy your first layer by challenging its adhesion?
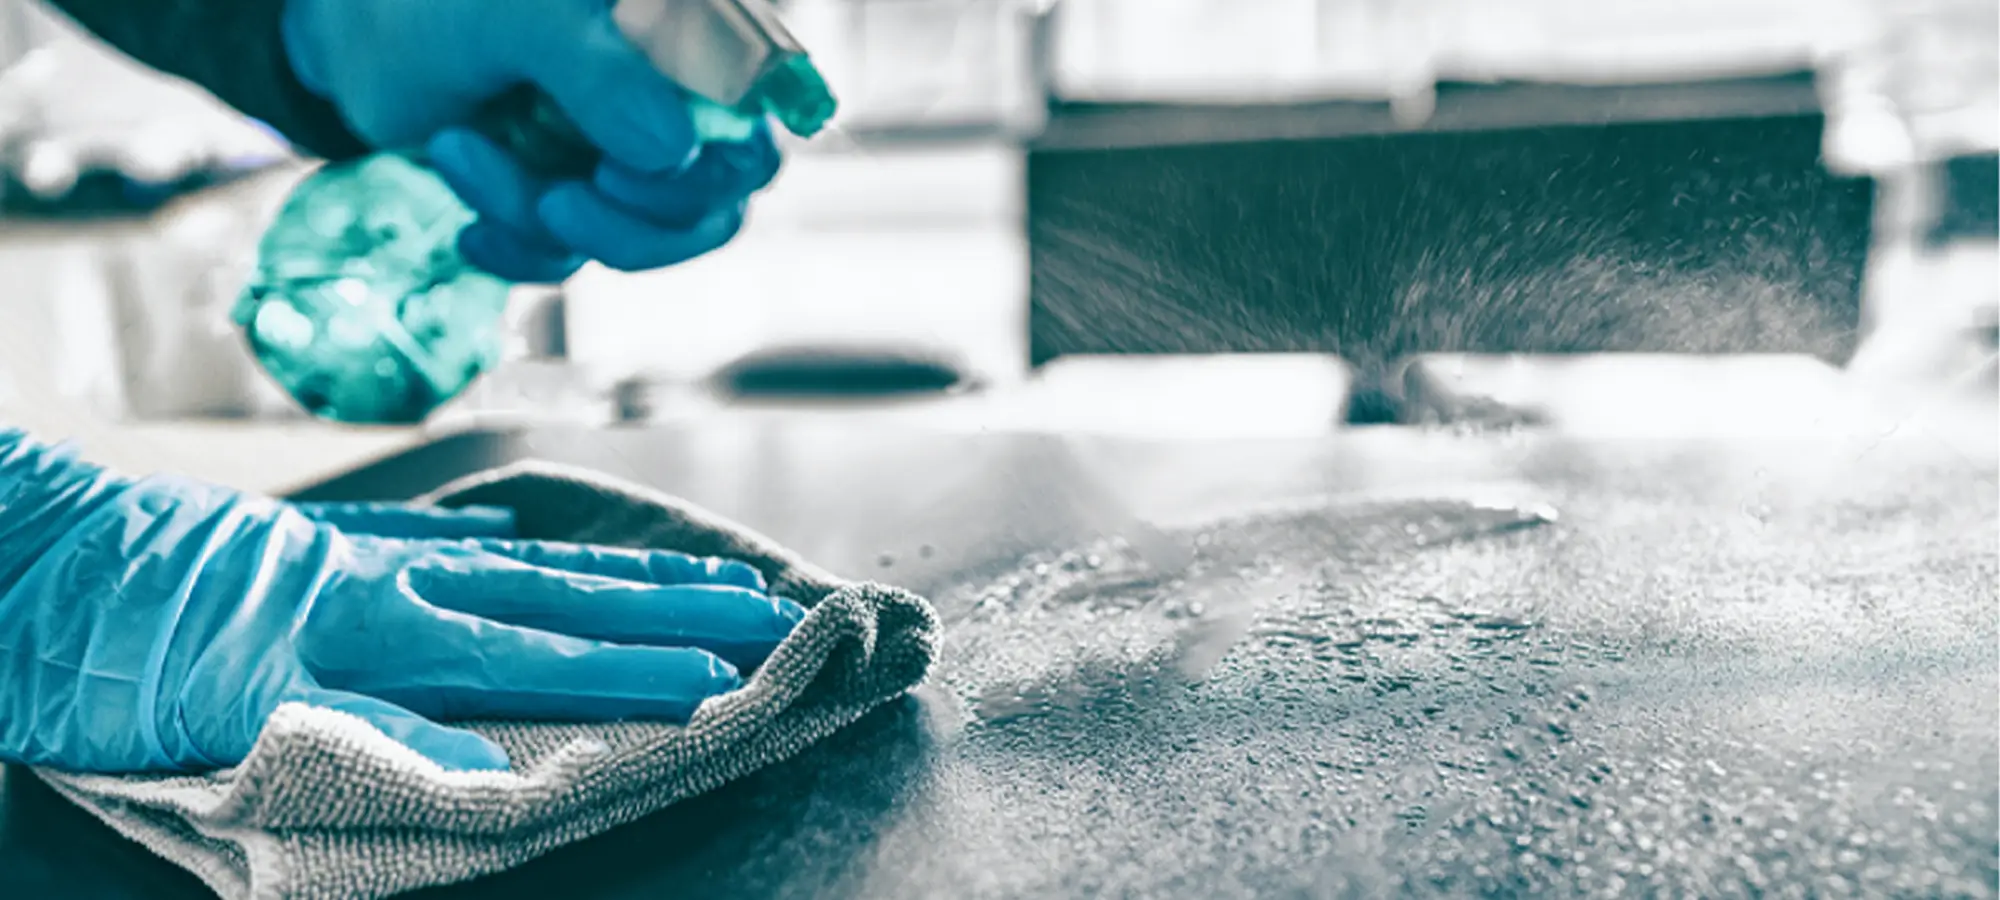
Hence, you must take the necessary steps to keep your build surface clean and free of dust and substances. To clean the plate, you can make use of clean water or even a dry cloth would do the job.
To be safe, do not forget to check the manual included for cleaning your printer’s bed. Especially, when you are planning to use alcohol or other strong chemicals to clean your print bed.
Sometimes, cleaning the bed can also increase the problems related to improper adhesion of the first layer. In such cases, using coatings could be a great aid.
Things like adhesive tapes, temporary spray, and even glue could do the trick. When using a spray, remember to keep other parts of the printer at a safe distance to avoid contamination at the wrong places. Or else, you may end up damaging your entire 3D printer.
Set the Correct Distance from Nozzle to the Printing Bed
We are not there yet. You must take care of a few other things before you start to 3D print the first layer. For a strong first layer to hold on till the print completes, you must measure the right distance between nozzle and printing bed.
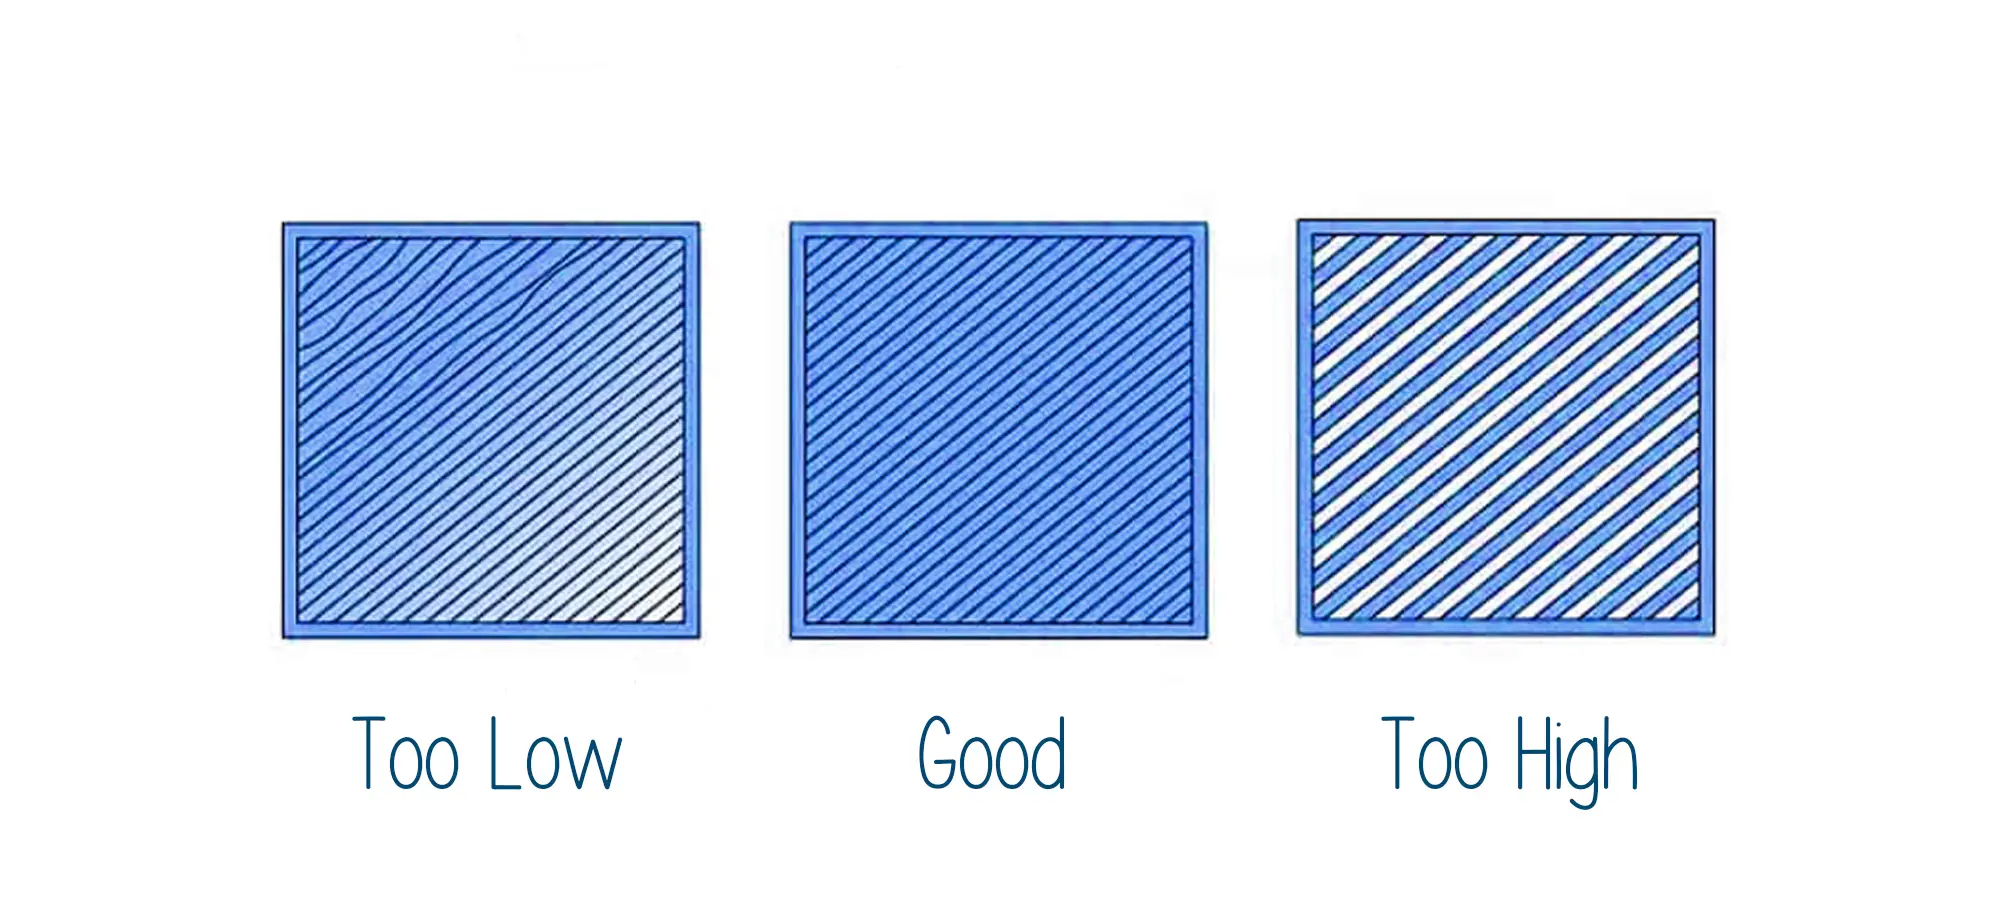
There could be two scenarios in this case. In case the printing bed is too much away from the nozzle, the proper adhesion won’t happen.
Leaving your first layer weakly attached to the print bed, causing shifting or even print failure. With less than the correct distance between the nozzle and the print bed, the sufficient flow of filament would become a challenge.
The nozzle would seem blocked even if it isn’t. After the print bed moves away after the completion of a few layers, the filament would start depositing, making your 3D model useless.
You must, from time to time, check the distance between the nozzle and the print bed before starting the print. It is not necessary to repeat the step every time you embark on a new 3D printer. But, essentially when you are going to print a bigger model.
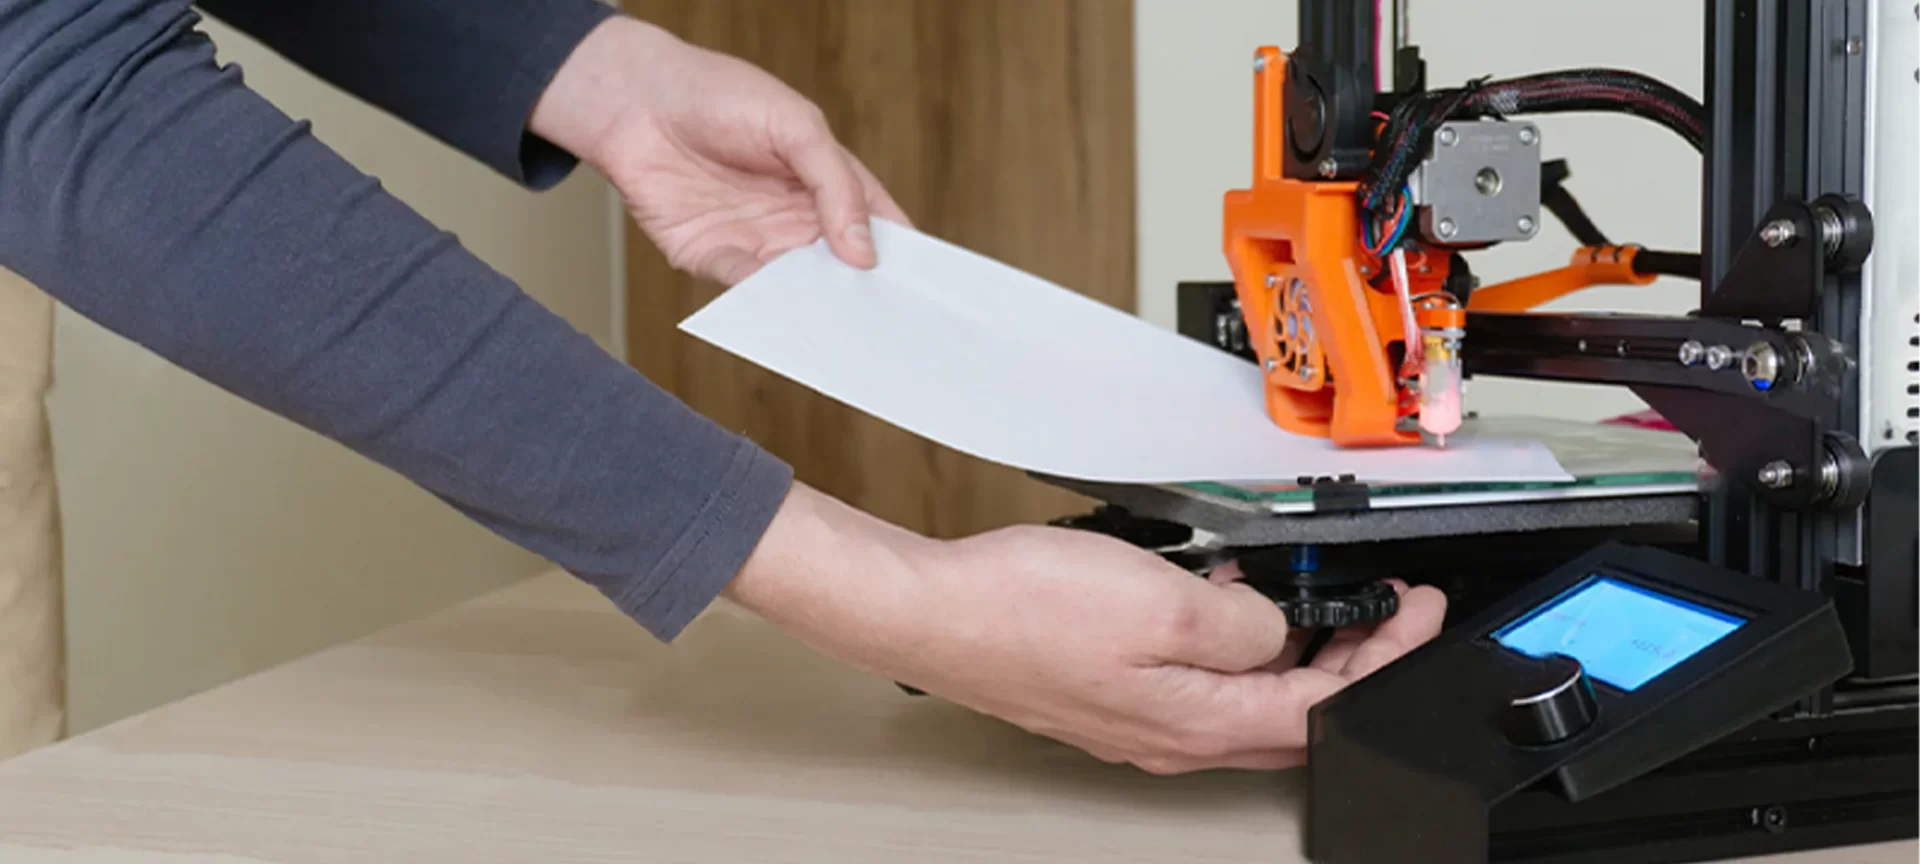
To set the distance, you can either use the automatic functions available with few of the 3D printers. If your printer is not equipped with an automatic nozzle to bed distance leveling, you can use the piece of paper to make the settings manually.
Just place the paper in between the printer’s bed and the nozzle and adjust the distance of the two so that the paper could merely come out without a scratch. However, the paper isn’t always of the same thickness. So, take care of which one you use.
What Else Can be Done?
As mentioned, paper cannot be the right choice at all times, you must keep a measuring instrument handy. Not only these provide accurate results, but you would also stay away from mistakes and failed prints. You can use a feeler gauge.
Check the Speed of the 3D Print First Layer
Usually, you must set the speed of the first layer lower as compared to the print speed of the rest of the layer.
This is done to make sure that the first layer gets enough time to stick to the build plate. In case you miss this part from including in your 3D print recipe, your first layer may not adhere properly to the print surface, causing enough problems for the remaining print.
In case, you want to keep the speed consistent for all the layers, you must keep the speed that is favorable for the first layer adhesion. This may increase the time to complete the print though. But that would be far better from experiencing a failed print.
So, make sure to use the best setting that helps you keep the first layer intact and settle on the build plate for the rest of the print layers.
This would certainly help you avoid bigger problems. Using the slicer, you can turn down the first layer speed to a few percentages. A quick way to get the desired results, isn’t it?
How to Print Objects with Smaller First Layer Area?
It is a normal understanding, the smaller the area of touch to the build space, the more difficult it becomes to adhere it properly in place.
And, as you know, the first layer is what the complete model depends on for stability. Hence, there must be a way to enhance the adhesion of the 3D print first layer when printing smaller 3D models.
So, how do we do it? Plain and simple, there are two options: brim and raft. The brim is like beads that you model around the actual layer to provide it more space for adhesion. It looks like a hat brim and works efficiently in reaching the goal.
A raft, on the other hand, is like a plate. In other words, 3D print a plate or platform underneath the first layer.
This could dramatically improve the first layer adhesion. It may not look very attractive but would help complete your print successfully, which is what matters most.
The Conclusion
No one can guarantee you complete success, unless you actually 3D print the model without any flaw, practically.
There are a number of issues that could occur while you take on the 3D printing projects. But we can always take a few extra precautions to stay away from the expected troubles.
When printing the first layer, we often make silly mistakes with the settings. Which, if handled wisely, would save us from failed prints later. You can do that too.
Follow the thumb rule. Keep your settings precise and accurate. Look for the right leads to find out any problems that may seem too obvious.
If you take care of all those pointers, you may never have to face problems that are often connected with the 3D print first layer.


