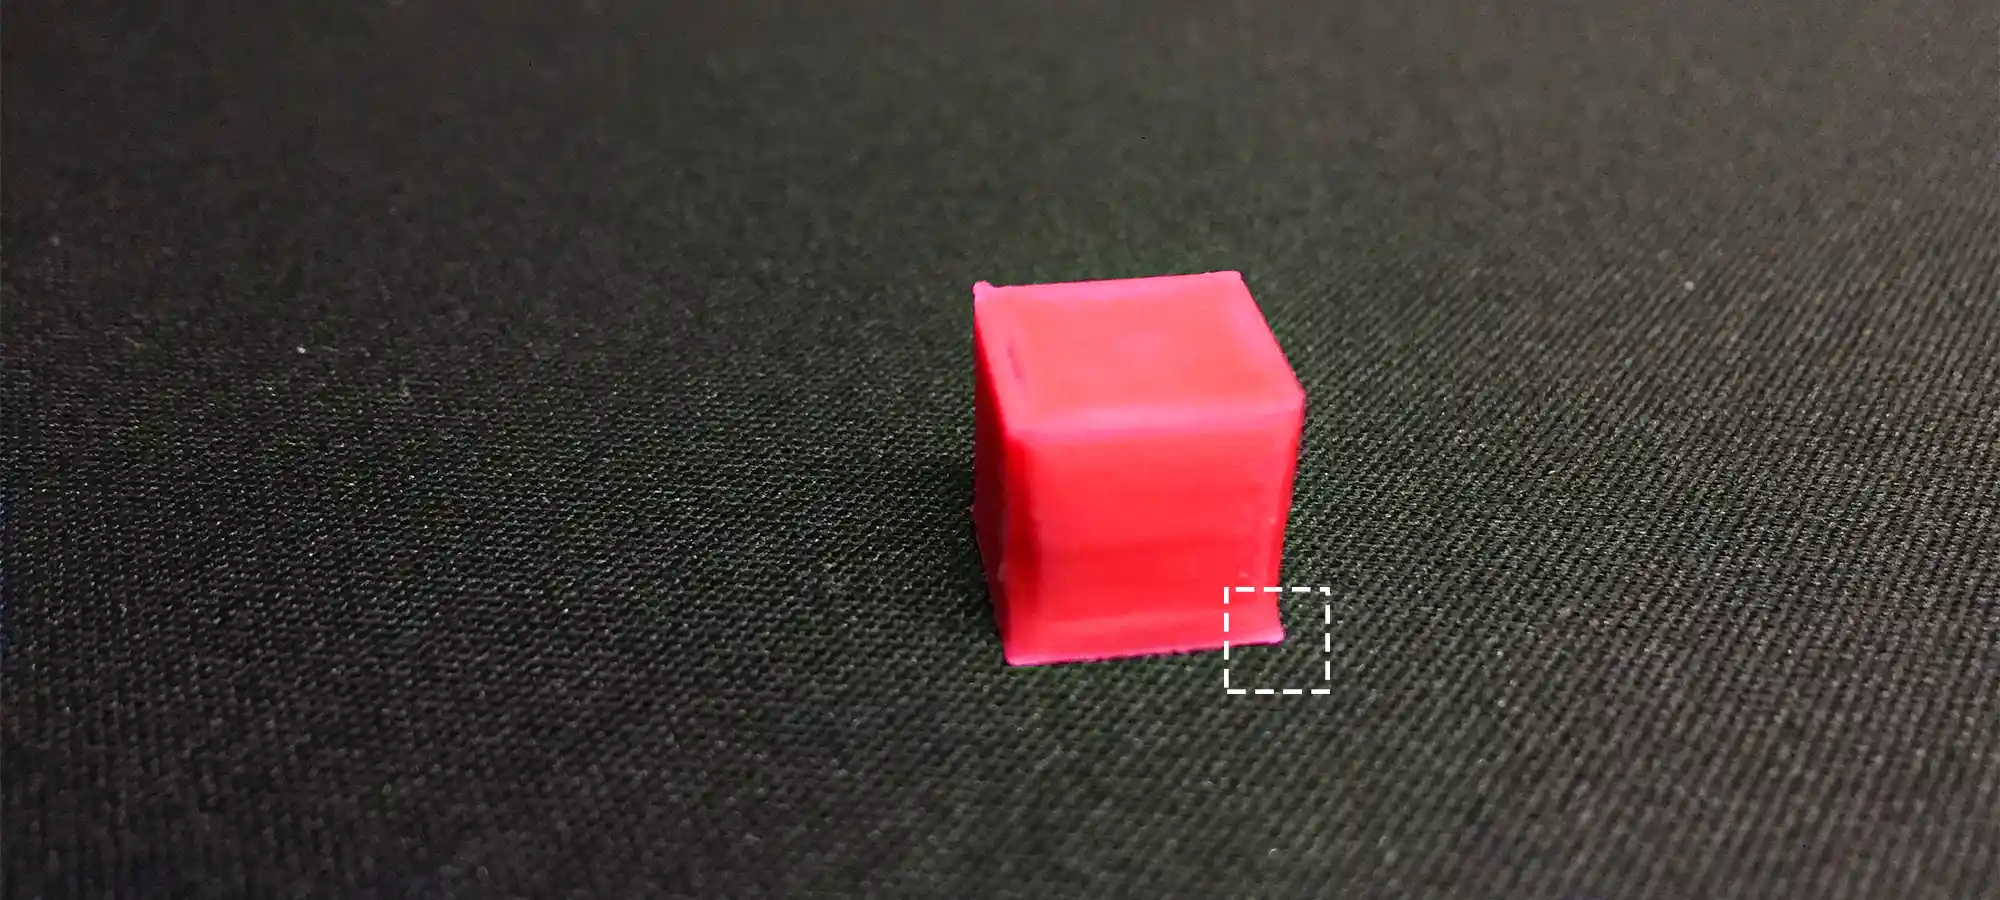
There are times when you feel the first layer is slightly larger than the rest of the layers. Usually, this can be ignored as it does not affect the visual appearance a lot.
However, when it comes to practical applications, the problem can pose serious issues. What if you wish to fit your part with some other part and the larger first layer won’t adjust?
You would end up throwing your part, or in some cases, a few post-processing methods may help. But ultimately, it would ruin the finish of your part, forcing you to discard the model. This problem is known as a 3D printing elephant foot problem.
Among all the many limitations and challenges that users face when 3D printing, this one remains one of the easiest to resolve. Only if you dedicatedly work to find the reason for the problem.
It not only looks ugly and seems out of place, but it does also affect the models in many other ways. These parts aren’t useful for practical applications.
The reason this problem isn’t acceptable for practical applications is that it further decreases the tolerance of the parts and making them unusable.
Elephant foot is caused by the excess weight of the object on the first layer. As the object keeps growing with each layer, the weight increases even more.
If not cooled properly, the first layer tends to bulge and cause the elephant foot problem. That is why the problem is most common in large prints.
A lot of users face this issue every now and then. Hence, it is important to understand why these happen and how we can fix it.
Although the problem isn’t very scary, it would be, if not fixed. It would be frustrating to see parts getting wasted because of their incapability to fit your needs.
What Causes 3D Printing Elephant Foot?
Termed as 3D print elephant foot is a common problem that many users face with their large prints. As you may perceive, the reason is quite simple.
The larger prints carry with itself heavier weight. When the models are being printers, the initial layer is created at first. And, in FDM 3D printers, each layer is cooled before the next layer is laid down.
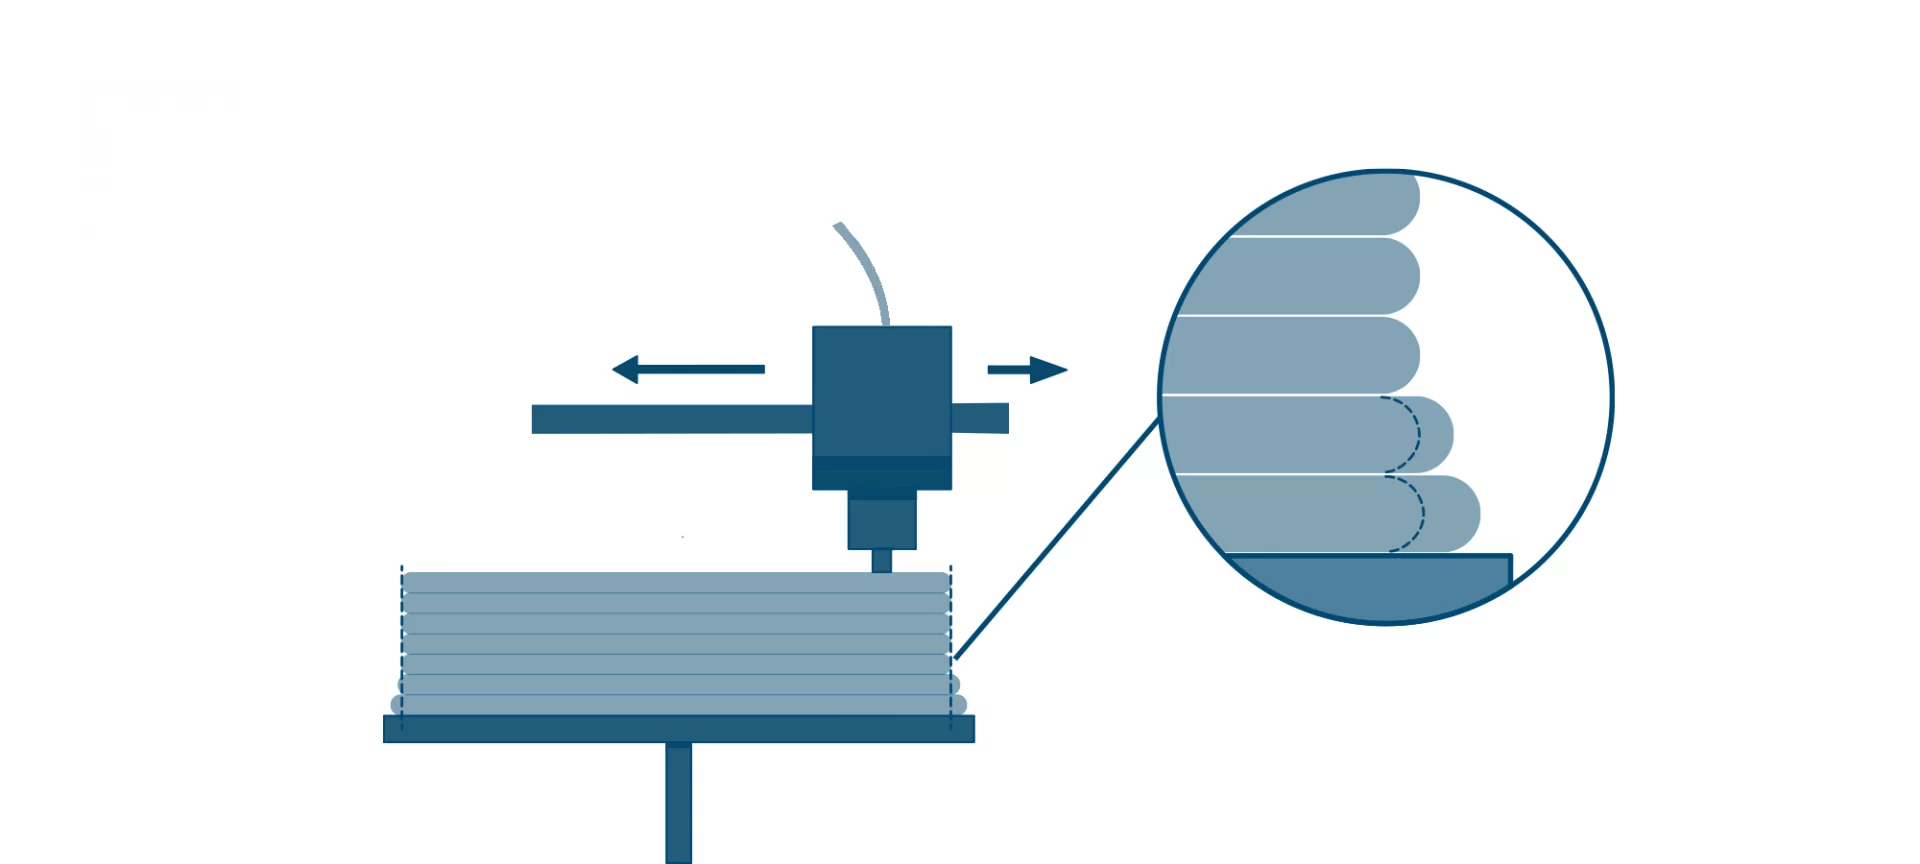
The cooling is done to ensure that the molten plastic sets before meeting the next layer.
However, in some cases, the cooling isn’t proper or enough to set the plastic. Hence, the first layer isn’t able to sustain the weight of the object being printed.
Hence, the first layer bulge at the bottom as the object keeps growing. This is why the larger first layer deforms the entire print, especially, if the model is for a practical application.
The elephant foot problem leads to failed prints and can end up in a loss of money, time and effort. So, it must be checked before it keeps happening every other time.
How to Fix Elephant Foot?
There are many ways to fix the issue. And, it can be done by the users themselves. There is no need for technical help. You can manage to work with a few settings and the problem would certainly be resolved.
Here are a few ways to check the issue and completely get rid of it.
Bed Leveling
Yes, it is true. The problem may happen because of improper bed leveling settings of your printer or the incorrect nozzle height. The reason could be as basic as this one.
Because of the said reason, the first layer is crushed too far down, further resulting in a bulged bottom layer. So, you must start with the fixing procedure by checking the bed leveling and ensuring that everything is set properly.
It is tiring to go with all the manual bed leveling processes once again along with the Z height adjustment to ensure the correct nozzle gap.
However, this could highly be helpful in solving the problem in the first shot itself. The good thing is that you would be able to understand the basic settings, helping you get the best at this skill.
Even if the 3D printer has automatic or semi-automatic bed leveling features instilled in it, manual leveling is a must to achieve an expected bottom layer. Hence, carry the steps below to adjust the settings.
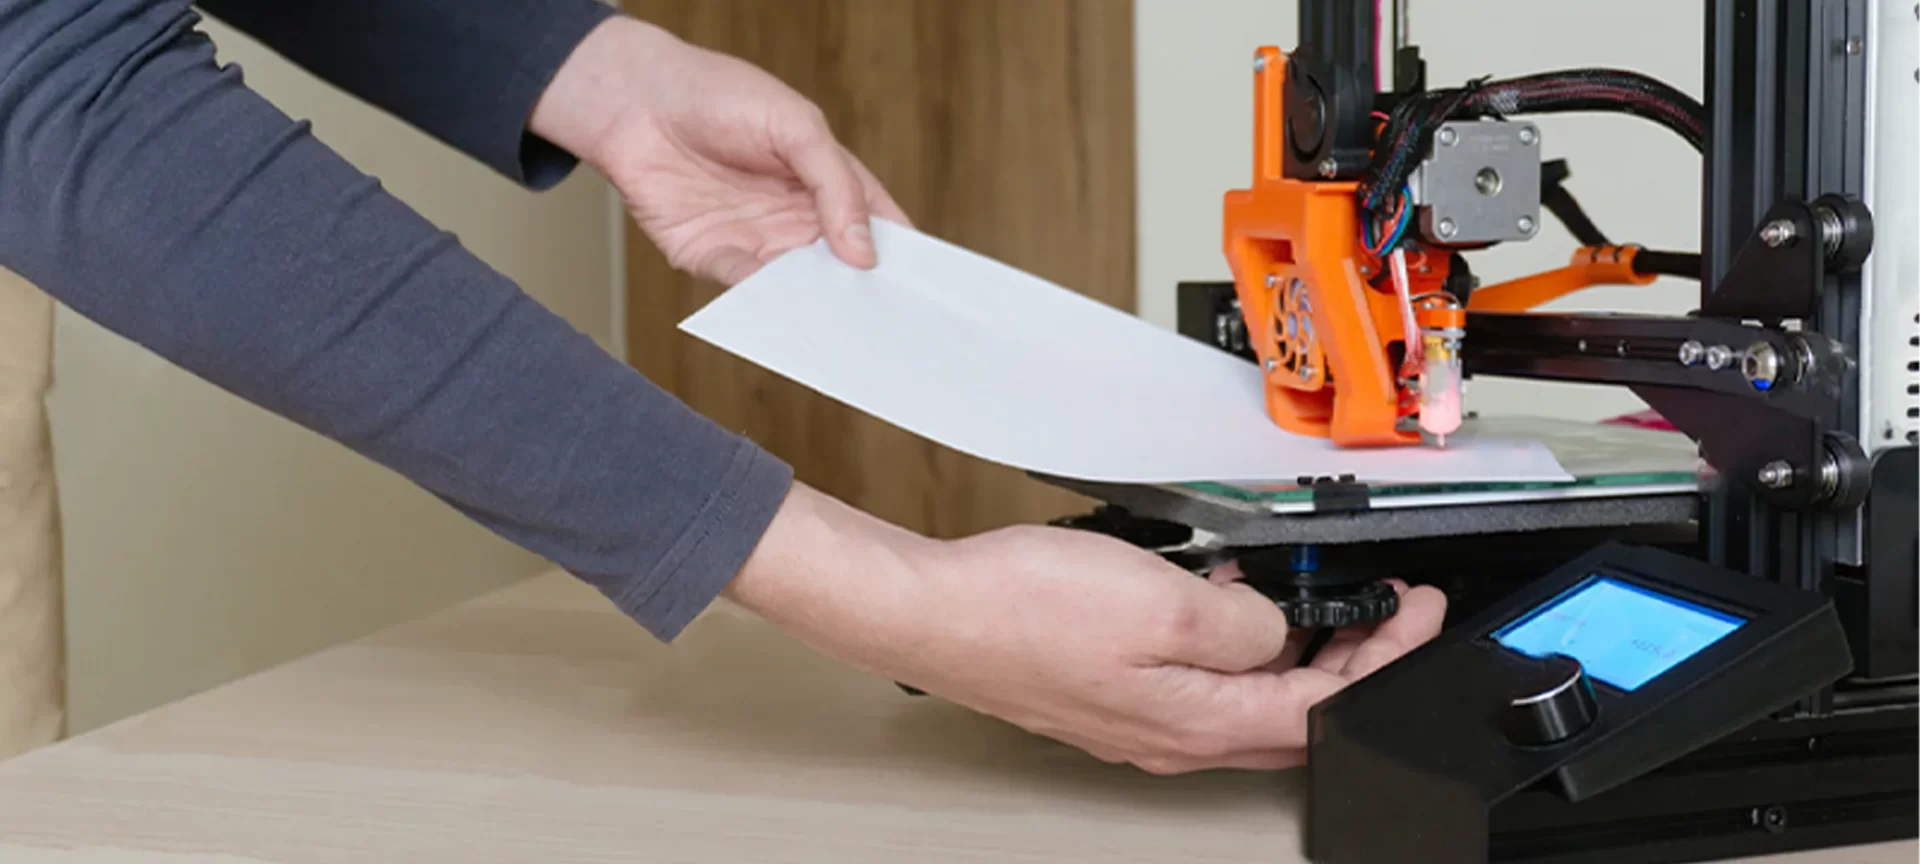
- The first thing that you need here is the index card. This tool is very helpful and the most important one when adjusting the bed leveling of your 3D printer. You can choose the paper thickness of about 120-160 gsm.
- To start the adjustments, you would need some room around the build plate to work with the settings. Hence, turn each screw a couple of times to get more room between the build plate and the nozzle. You would find these screws either at the corners or along the side of the build plate. These are used for mounting the printer’s build plate.
- The next thing would be moving the build plate and getting the nozzle closer to it. To do so, you can either use your hands or you can even use the app to make the adjustments to the 3D printer.
- To calibrate the build plate, carry the print head to one of the corners and measure the resistance between the tip of the nozzle and your bed. This can be done by placing the index card between the nozzle tip and the build plate and dragging it back and forth.
- Turn around the closest screw to stiffen the gap. Make sure to carry the steps carefully without placing any external pressure on the bed. Or else, it would only increase the distance, further worsening the problem. Once you tighten the screw, check the resistance using the index card again. You must repeat the step until you start feeling a slight drag when moving the index card back and forth between the nozzle and the bed.
- Carry the same process for all the corners. Once that is completed, use the same process to adjust the print head to the center of the build plate. You may have to carry the steps a few times for all the five corners. This is because of the constant adjustments affecting other corners.
- After the bed is leveled, you must check the nozzle height and adjust it accordingly. Bed leveling does affect the nozzle gap. Hence, it must be adjusted later. To do so, save the newly calculated value for the adjusted Z height to your printer’s settings. You can do this with the help of the index card again along with the printer’s control software. The precise height is gained when the drag is felt while leveling when moving the index card between the nozzle and the build plate.
- Completing the settings isn’t enough. You must test the same for ensuring everything is working as expected. Start with printing the first layer, first. This would help verify the settings. In case you find the first layer looking the same from all sides and is uniform, you have successfully completed the bed leveling. In case of perfect nozzle adjustment, the lines depositing would only touch and won’t overlap a lot to create a build-up over the bed or the nozzle.
After you have completed the settings and the prints are still not improving, there are other few things that you must verify to resolve the problem.
Lower Down the Print Bed Temperature
There could be many other reasons for 3D printing elephant foot. The high print bed temperature is one of them. Hence, you must try lowering the print bed’s temperature to verify the same.
Do not rush when carrying this process. Never ever lower down the temperature with a huge difference. It is important to decrease the temperature with a constant difference and in an incremental fashion.
This would help understand the correct temperature suitable for printing models without an elephant foot problems.
It is recommended to lower the temperature by 5 °C incrementally each time until you start getting correct prints.
Keep lowering until you reach the minimum recommended temperature for the print bed. If the problem does not get any better and you keep getting the bulged foot, you must look at other options.
Add a Raft with your Model
What is a raft? Those who do not know, a raft is a horizontal mesh created with the deposition of filament on the build platform.
After the raft is printed on the build plate, the first layer is deposited. Although you may have to work a little bit later after the print completes to get the raft off, the solution does work and is very handy.
Think of this as an alternative for the first layer which can be separated later to get you the problem-free prints later.
As you know that the problem is with the layer that is deposited close to the build plate, you can shift that danger to the raft and keep your prints free from elephant foot issues.
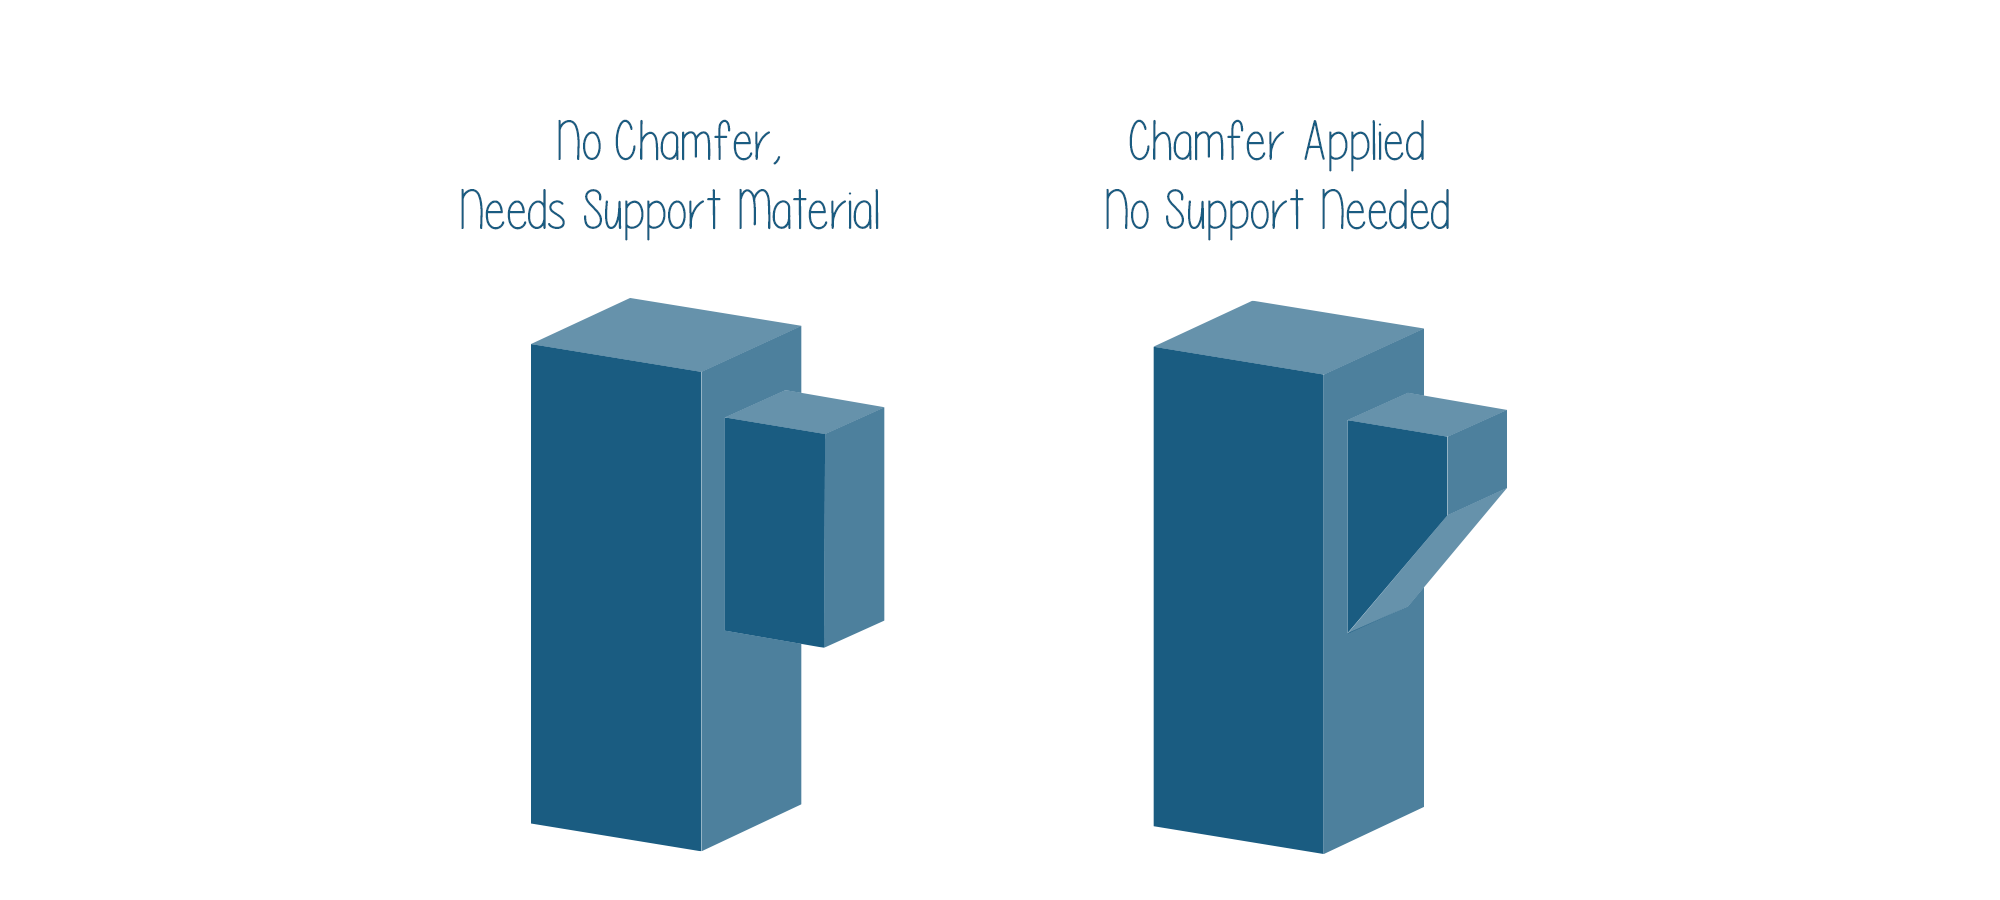
Use Chamfers for your Print
There are times when getting rid of elephant foot does not seem possible at all. All the resolutions seem incapable of getting the expected results.
The good news is that you can still make this happen and get things sorted by using chamfers. If you feel that changing the settings of your printer is a tedious job as compared to tinkering the model itself a little bit, you will find it rather easy to accomplish.
To do this, simply add a small 45° chamfer on the bottom edge of the print. This would highly be helpful in clearing the problem of a 3D printing elephant foot.
To add the chamfer to the model, you can add the 3D design software. The one that you use must contain the option for adding the chamfer.
If you are not sure how to do that, you can access various online guides for your particular 3D design software. It is easy to add and you would be able to do only after completing a few steps with your design software.
The Conclusion
3D printing has brought us to new heights. A lot of things seem simpler and easy when looked through the lens of this revolutionary technology.
However, the fact that the challenges to bring the best out of these 3D printers still remains questionable, a lot of users aren’t able to experience the real potential of the technology.
There are many users who are unable to work out the problems and print successful models.
Some even decide not to replace their existing work techniques because of the steep learning curve that is connected with 3D printing. All this is certainly making difficult to bring the technology to the forefront.
However, this is not impossible. With proper guidance and knowledge, companies and even individuals can realize the best side of the technology.
Problems like an elephant foot may hinder the motivation for a little while, but cannot stop those who are focused enough to achieve the expected results.
There are ways to fix the problem and with time, it would keep becoming easier to tackle. It is important to get the basic straight and fight the problem from its root.
The fixes discussed above may seem difficult for beginners. But these are easy to process if you keep working on it until you find the solution that best suits your problem.
3D printing elephant foot isn’t a very serious problem and can be taken care of with the right solution.
If you wish to uncover the hidden possibilities of 3D Printing, you must come out of these small issues on your own. Learn and grow as you go on printing amazing designs.


