Designing a 3D model isn’t impossible. However, to ensure that the right strategies are involved in ensuring the precision and highest quality of the prints, one must adopt the best design practices. 3D designing may sound like a tough job for those who haven’t tried it.
And, it is, to be honest. But the learning curve isn’t that steep.
If you know where to start with and what major mistakes to avoid, you can certainly print your first model with little to no problem. The requirements for 3D printing do differ from printer to printer. But a few tricks always remain the same.
Before you start 3D printing, you must realize that it may be one of the best inventions so far, however, it still is a production technique. And, like all other methods, it does have its limitations and challenges.
Before progressing towards the design considerations, talking about problems that may occur during the printing process is very crucial.
There are reasons why we always stress on the design part. This is because the design part makes a lot of differences in the way the final product is created.
There are certain issues that one can avoid when following the right procedures and design guidelines. Many of us fail to consider the 3D printer’s limitations, hence forget to focus on the requirements for 3D printing.
And, optimizing the design for maximum tolerance against such problems remains a mystery.
But you can avoid these. You can certainly create and optimize your design considering the challenges. Hence, can achieve the best results.
List of Possible 3D Print Failures
As discussed before, there are certain problems that may be avoided. But what are those problems? It is important to note down the issues that cause print failures.
After knowing what could ruin the final model, one can devise optimize the design to minimize the same or even to avoid them completely.
Warping
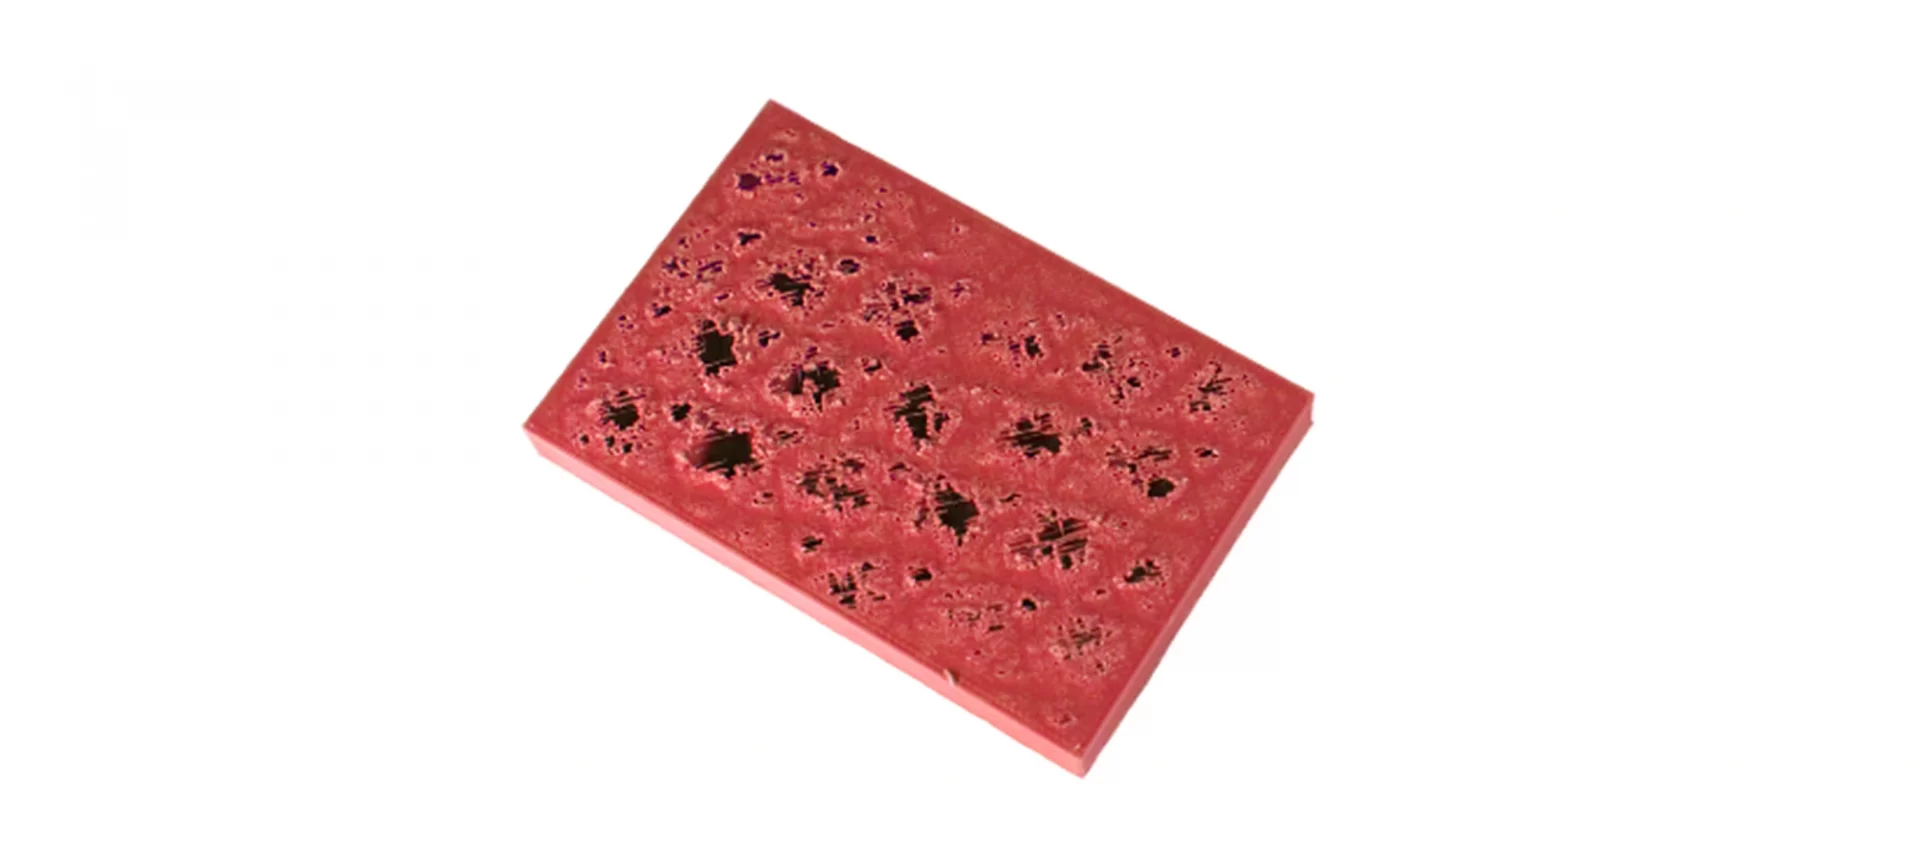
This is a very common limitation that most of the designers keep experiencing when trying to print even with the best 3D printer. What is warping? Warping causes the entire model to deform or twist once the part is 3D printed and cooled.
This often is irreversible and makes the entire print impossible to use. Warping occurs because of the temperature difference that takes place when the 3D printing is completed or ongoing. After the part cools down, the surfaces retract causing distorted models.
Invisible Details
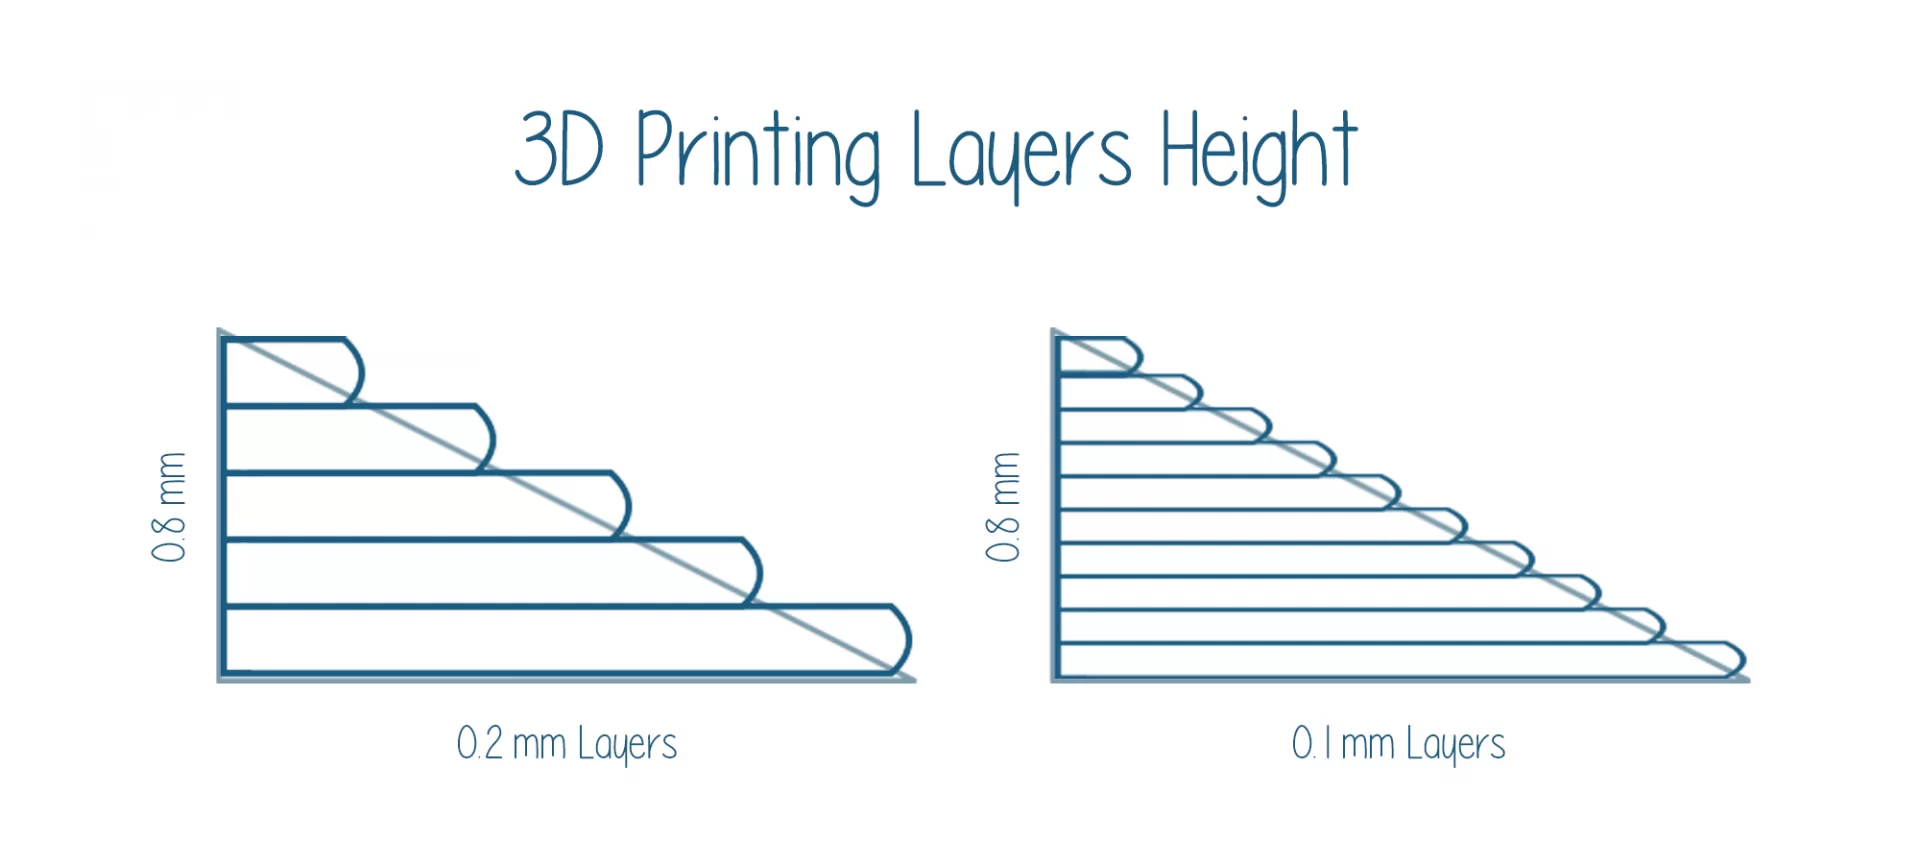
There are times when the parts are printed properly but the details are not highlighted to the desired levels. These can destroy the entire model if the details are necessary for the entire model. Among many reasons, the incorrect resolution choice makes the work go for a toss.
Improper Dimensions
Have you tried to create multiple parts that connect together and experienced problems with parts not fitting together after bring printed from the 3D printer? If that is so, you have been getting improper dimension issues.
And, sorting problems is very important. As the parts not fitting together would cause a complete failure.
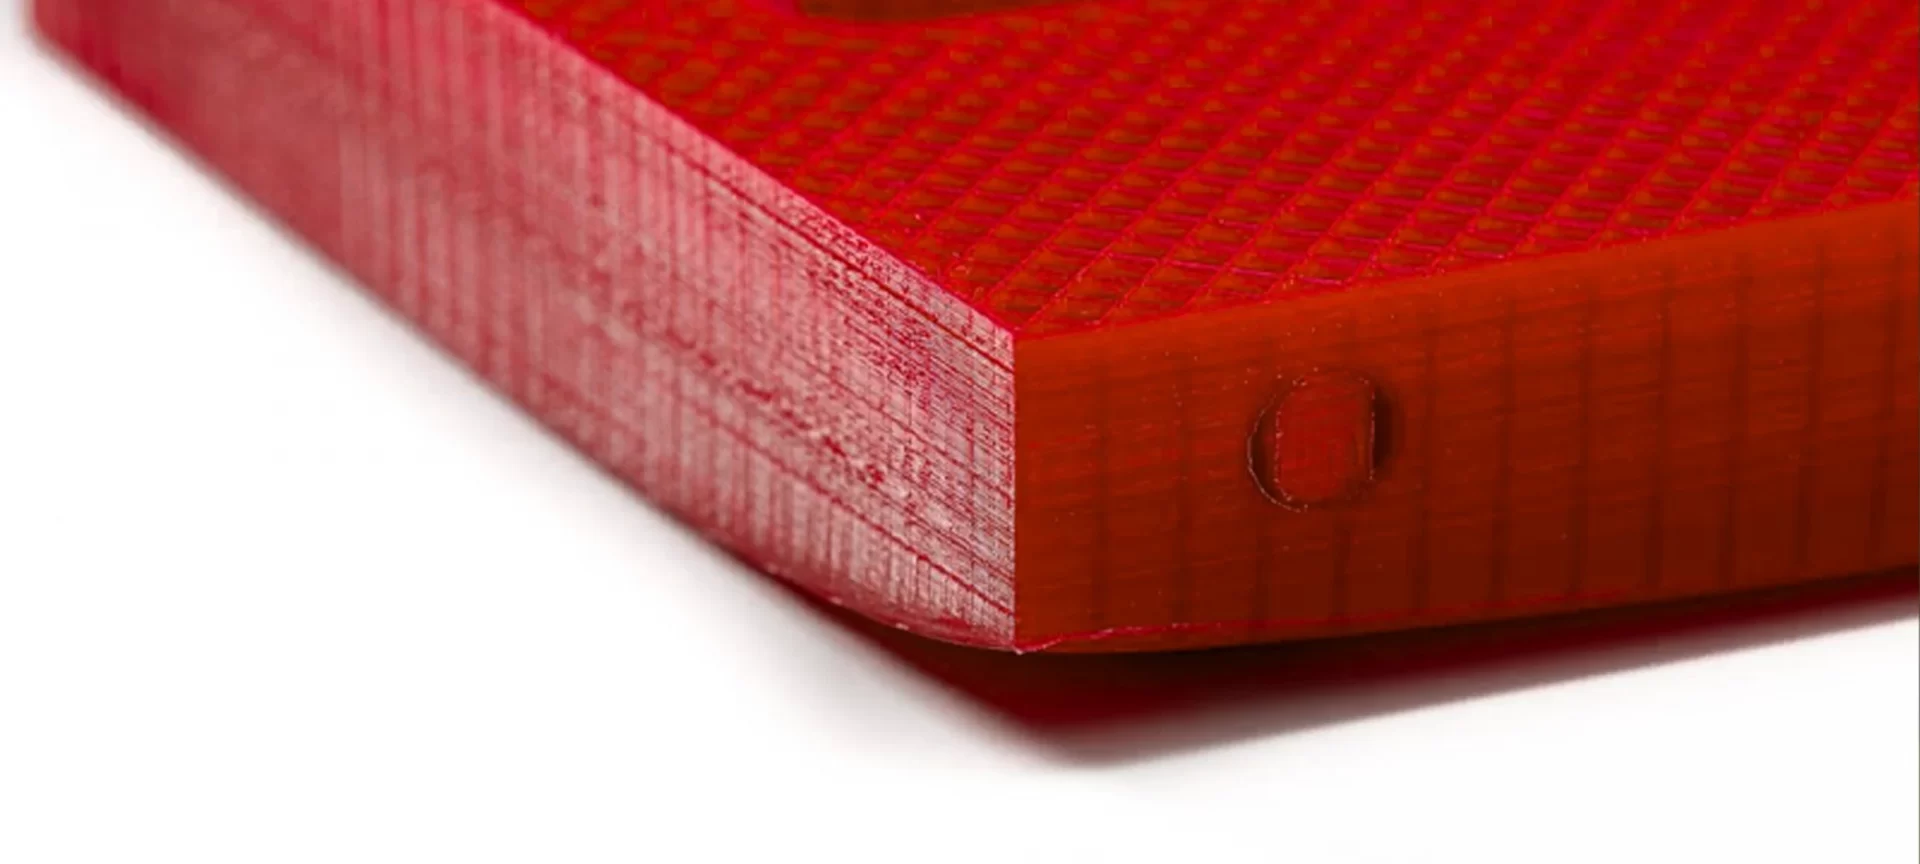
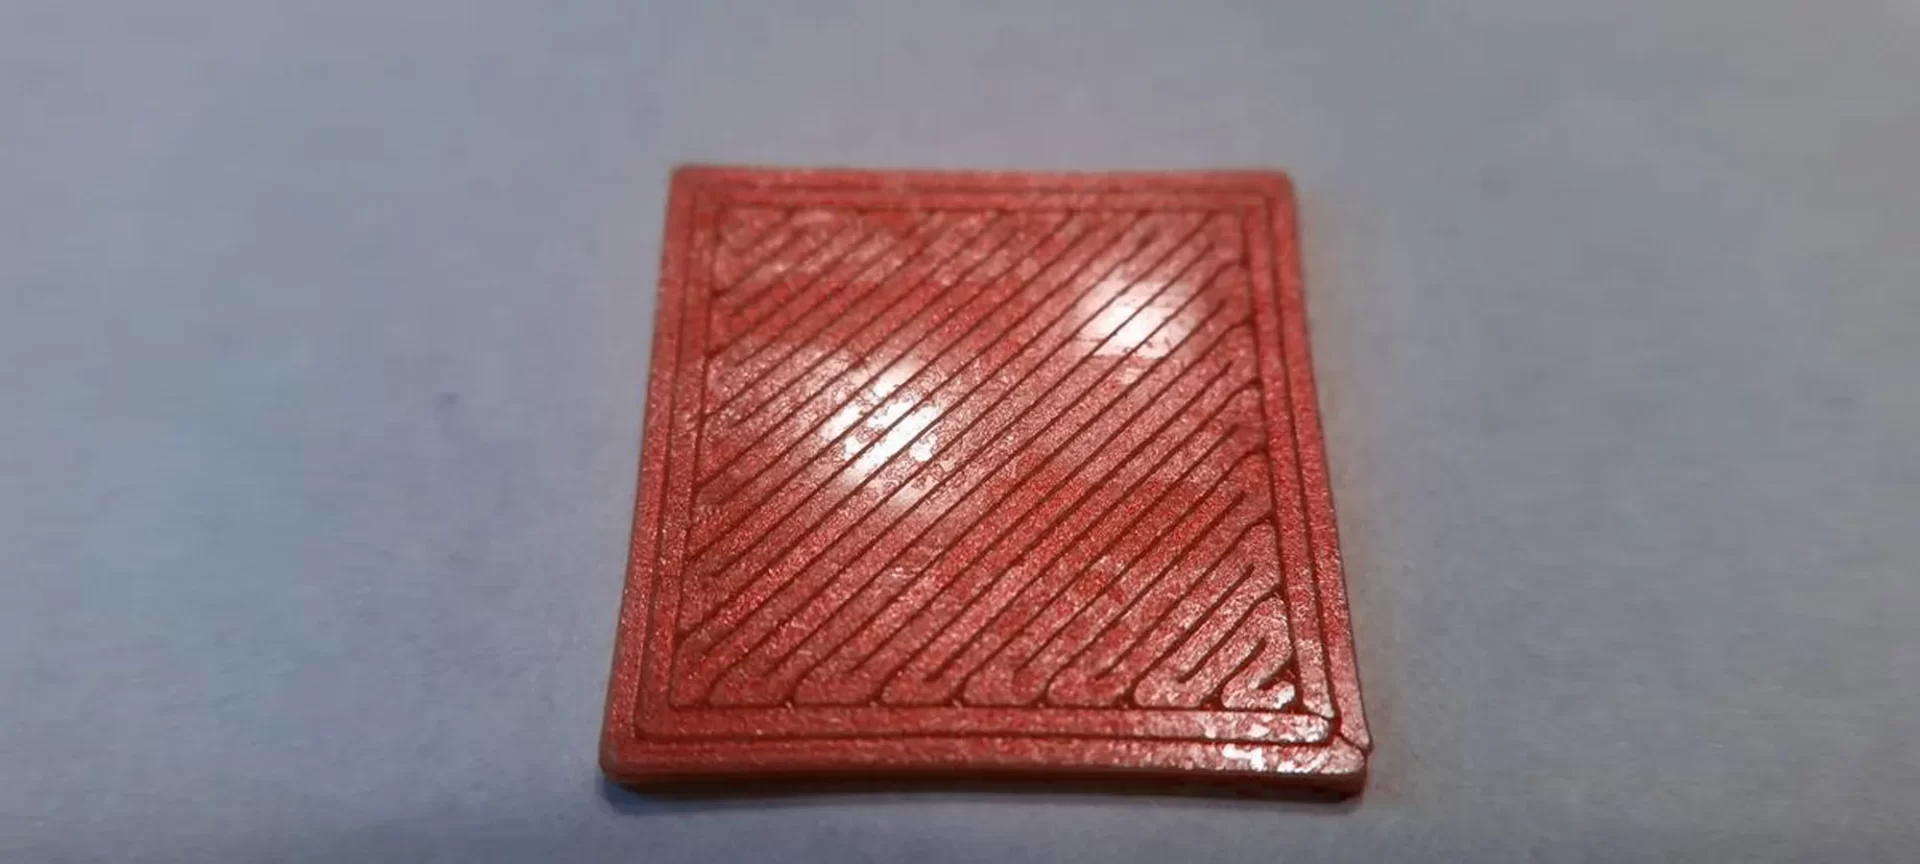
Unfinished Surfaces
This again is a big problem that is very common with 3D printing. It means that the layers are highly visible, taking away the perfection out of the equation of the design.
The visibility of layers creates noticeable differences. And hence, ruin the appearance of the entire design.
While it mostly depends on the 3D printer you use, you still can minimize the problem by including a few design specifications. There is a number of ways to do that which we would be discussing later.
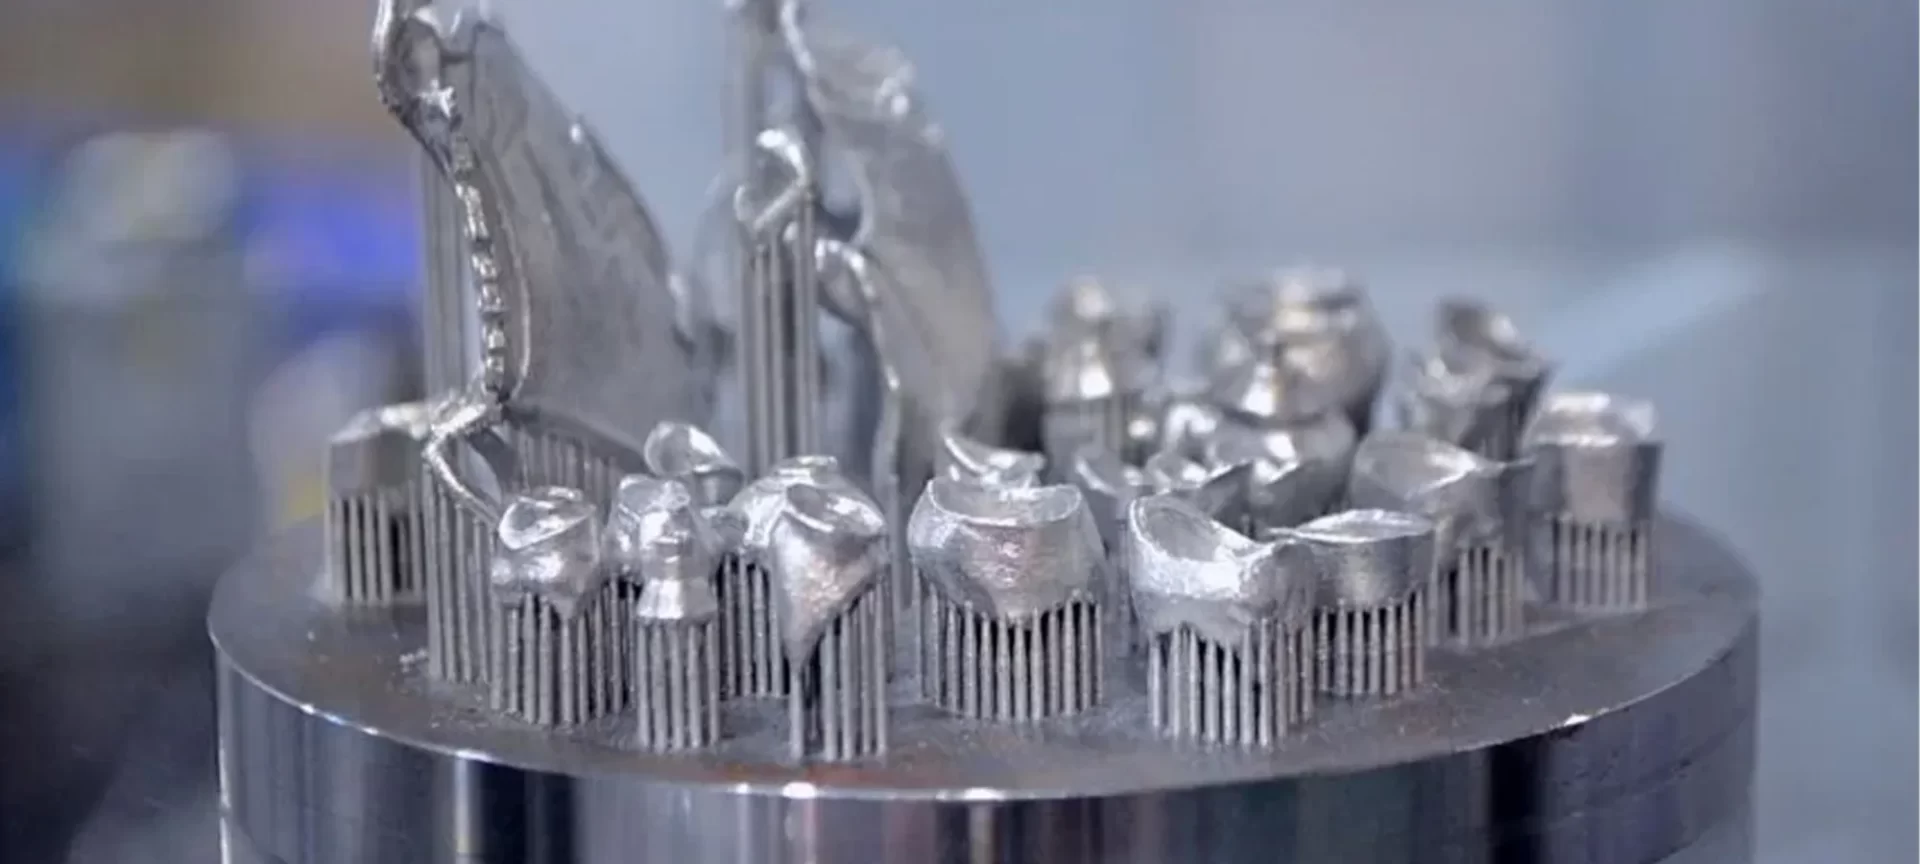
Marks of Support
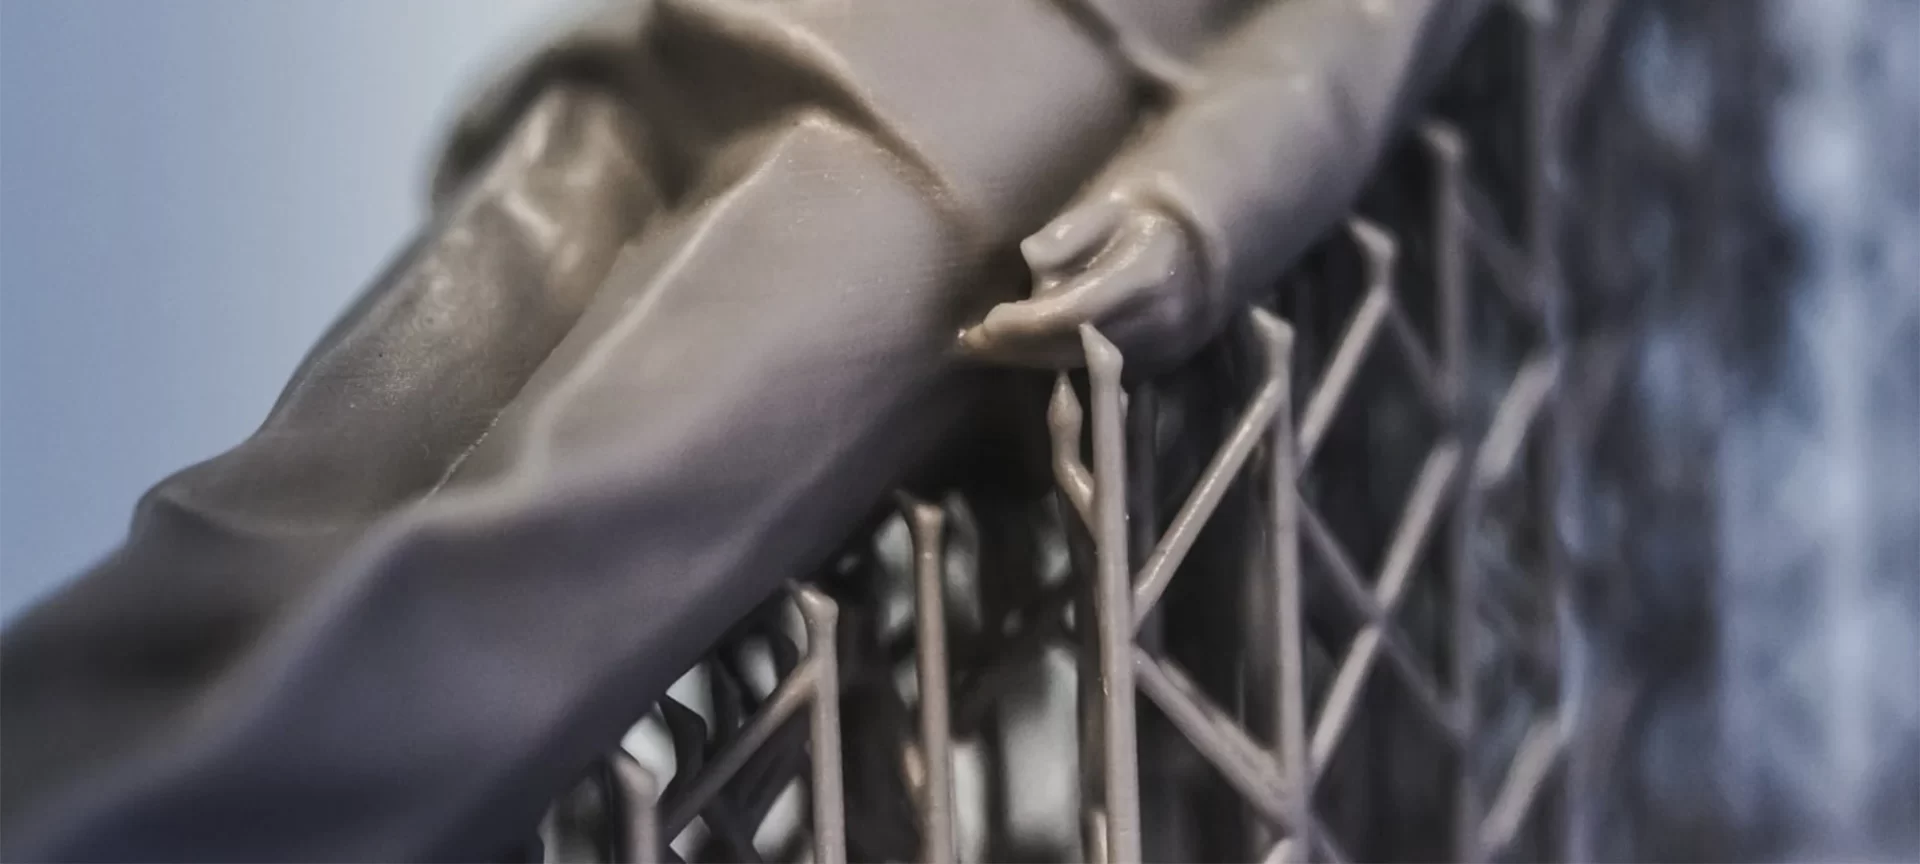
Have you been printing using the 3D printer without considering the amount of support you use? This not only creates a mark on your parts but cost you time and material.
There are many users who do not even know that parts can be optimized for using minimum support. Not every software or application is equipped for generating supports and even when they do, it is not important that they produce the best possible alternative.
Depending on the orientation of your design, the supports are generated. But you can control that. Avoiding support would help in minimum marks and even none of it. You will also save yourself from a lot of post-processing steps.
These are time-consuming and sometimes, very cumbersome. So, give yourself the ease of job and avoid the design mistake.
All these issues are very serious for those who are 3D printing for specific applications. Because of these problems, a lot of times, the models fail and cause individuals time and money. Our article about 5 Critical 3D Printing Problems and Their Solutions might help you understand this more.
In this competitive world, one cannot lose customers by delaying services. And, one failed print can certainly put you through that problem.
So, devising the right strategies for design is the only way to lessen the effects of these problems.
7 3D Design Strategies for Best Results
Now that you know the major problems and limitations disturbing most of the 3D model designers, it is time to talk about the resolution. There are times when you are stuck with your design and cannot print the model even when you take all the right measures. This is because some of the slightest design practices are ignored.
After the introduction of plug and play 3D printers, most of the users feel it a waste of time to halt to pay attention to the details of 3D designing. Automation is not a bad thing, but that should not stop you from learning.
So, here are the 7 design hacks that would help you a lot in diminishing the effect of problems listed above.
How do I Choose a Nozzle Size?
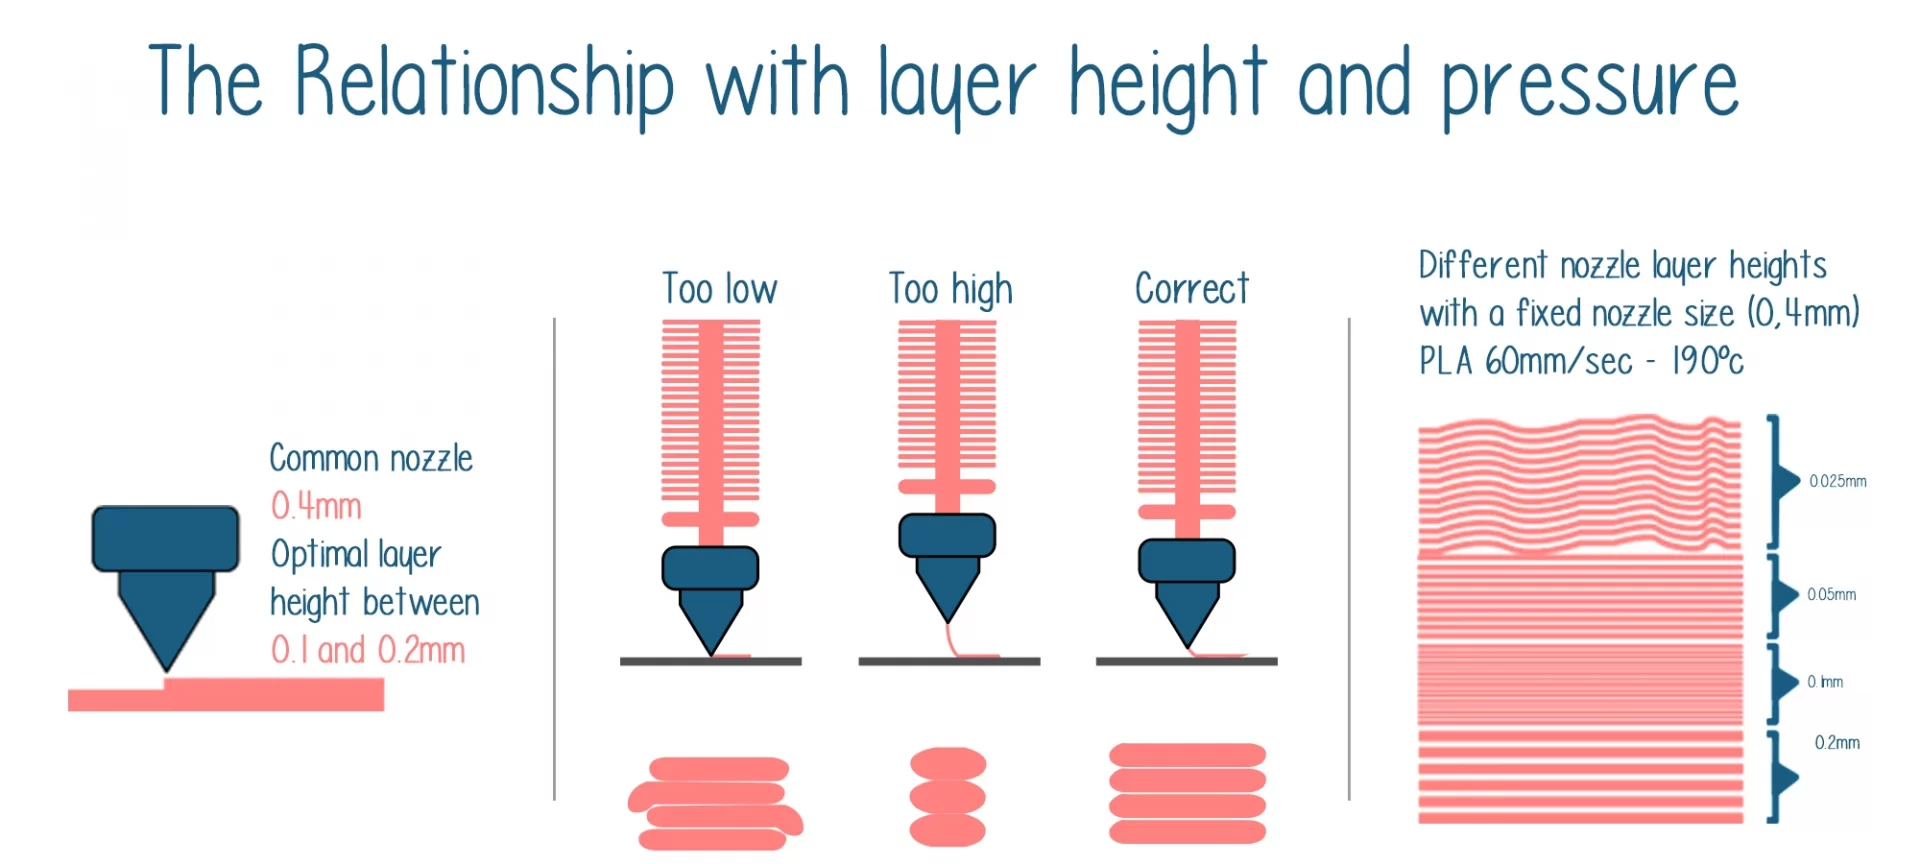
How many times you have checked the nozzle diameter and have optimized the wall thickness based on the same? There are designers who follow the thumb rule of nozzle diameter and the wall thickness proportion.
However, there are those who do not. Precisely saying, the wall thickness of your design must be equal to or greater than the size of the diameter of your nozzle.
Although there may be a lot of misconceptions around the theory, you must follow this thumb rule for ensuring the quality of your print.
Reduce or Eliminate Support
Because the problems of having support aren’t obvious to the beginners, they pay little to no attention to the design specification. And, sometimes, even include support for the design which may be printed without one, if designed properly. Even when working with dual extruder, do not print support, if it is avoidable. So, what are the ways to reduce support?
Avoid angles more than 45 degrees: Support is required for overhangs that angles equal to or more than 45 degrees. If possible, and if your design can still hold after avoiding any angle beyond 45 degrees, make sure to use that alternative. Doing so would take away the support quotient from your design and you would be able to print without support, hence enhancing your print’s surface quality.
Build the model into parts: This again is a great design practice. If you are a designer you would know the pain of watching your part messed up. Sometimes, the removal of support isn’t simple. And, the aftermath leaves a mark and make the entire model look clumsy. Who would want such part? Appearance matters a lot and support removal can ruin that for worse. If you think that the part if broken down into different pieces can be printed without support, do that. This can also be used for larger prints and designs that are highly complex to print in one go.
Anchored designs: This also is not for every design, but you can choose to do this when it suits the model appearance. Instead of leaving the arms of your model hanging sideways, why not put it together and connect it to an anchor at the back. It completely depends on your design style. If you can include such supports that look like the part of the design, you do not have to remove it later.
Using Proper Orientation: You may not notice, but sometimes, just by changing the orientation, one can completely remove the need of support. This is not possible for every design but would work for some. You will have to clearly visualize which orientation can work without support. For example, if you are printing anything that is shaped like T, you will need support to get the model printed properly. However, what if, you turn the model upside down? Once you do that, you would no more need support to print the design. So, be attentive when finalizing the orientation of your design.
Larger Bottom Layer
If possible, maintain a larger bottom layer. This not only supports adhesion but the entire design overall. If the bottom layer is large, it would stick better to the build plate.
Also, note to keep the bottom layer thicker for taking care of warping. The changes in temperature won’t affect the layer to wrap if it is thicker enough.
What is the Function of Ribs in Product Design?
There are other ways to tackle warping. By including perpendicular surfaces or by creating ribs, one can ensure the bottom layer is beyond warping. This helps a lot in maintaining the posture of the design.
Use Larger Nozzle Diameter for Fast Print
Sometimes, print turnaround time is important that all other factors. In such a case, if you own a 3D printer that prints slower than average printers, you do not need to buy a new one.
Almost for half of the users, the problems can be sorted by replacing the nozzle with another one having a larger diameter. The print time can also be reduced by reducing the thickness of the wall.
But, consider the above guidelines when choosing to do so, for maintaining the quality of the print. You must note, that 3D printers with high speed, many times, leave quality behind. So, choose wisely.
Perfect Smaller Details
As you know that many designs have finer details that most of the printers are unable to print. While there could be many reasons for the same, sometimes, you can just opt for a smaller size nozzle diameter to curb the problem.
If the finer details are invisible and you feel there is a need for a better 3D printer, try changing the nozzle first. Who knows you can save hundreds or even thousands of dollars that you are planning to spend on another 3D printer?
Use Spaces Between Two Elements of Connected Parts
Are you working with parts that connect together? To avoid fitting issues, ensure to keep a minimum of 0.4 mm space between the elements of parts.
The Conclusion
3D printing is a huge boon for those in the production industry. It has given freedom of design and speed. One can now print parts that were not possible before.
Thanks to 3D printers that have made the job easier for many industries. One does not need to invest months in finalizing a prototype design and then working on it for another couple of months.
And, for a successful print, 3D modeling is something that must be accomplished with best practices. Only by making a slight mistake in the 3D design, one can fail to obtain the best possible result. It can cost money and time. Moreover, efforts would be wasted on top of everything.
The 3D design is not just one of the many requirements for 3D printing, but a deciding factor of what the final product would be. And, running the design could cost the entire part to fail.
Can you afford to lose your model? No one would like that to happen. Instead of using 3D printing technology for reducing the cost and efforts, one can turn it into a liability by ignoring the best 3D designing practices.
Hence, focusing on important guidelines concerning 3D designing is an inevitable part of 3D printing technology. So, be productive by utilizing all the information you have got to design the best-optimized model.


