Laser engraving glass is one of the easy and quick ways one can use to personalize wine glasses, carafes, beer mugs, vases, and other glass products. How will you feel when you finally engrave your favorite picture, wordings, or even a drawing on your glass? I am sure you will feel proud as this technique creates elegance and sophistication.
Glass is delicate and fragile in nature and this usually makes laser engraving a challenge. But if you know what you are doing and have the right tools with you, you will be able to produce convenient and quick results when compared to other traditional methods like sandblasting and mechanical engraving.
But for those who are still new to this technology, might find it difficult and time-consuming. But in this article, you will be able to learn everything that you need in order to laser engrave on your glass and open new possibilities for customizing glass as per your needs.
But before we go ahead, let’s have a look at how laser engraving glassworks briefly.
How Does Laser Engraving Glass Work?
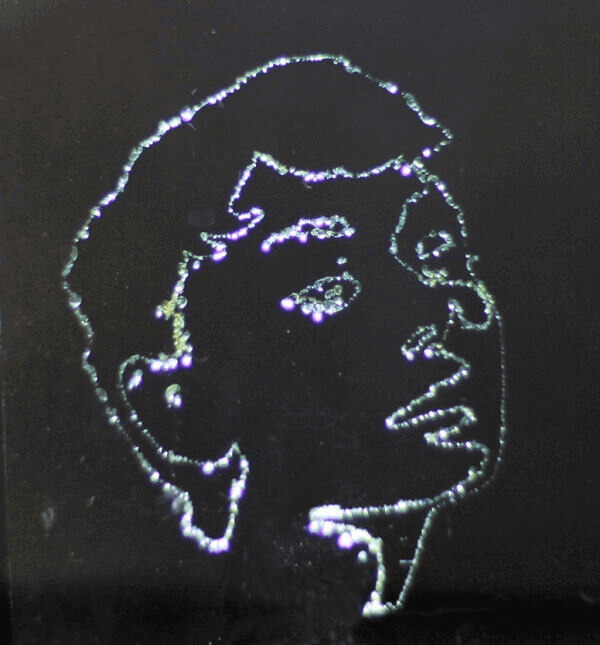
 Laser engraving on glass using Endurance Lasers
When the glass surface is hit by a laser beam, the air and moisture trapped in the silica elements expands and this results in microscopic fractures in the surface of the glass because it’s rigid in nature. The microscopic fractures are what we see as engravings.
Just like any other laser engraving project, you start with an idea. Your idea can be in the form of a text or image.
To begin the process, you will need to have your files ready. If you have a raster or vector file (prepared using Illustrator, CorelDraw, or any other software), you will need to prepare the G-Code, which is the file format that is understood by a 3D printer or CNC machine.
There are various tools that you can use, but we recommend using Inkscape software. It has two plugins; Endurance Laser G-Code and J Tech Photonics Laser Tool and you can be able to prepare a G-code at a click of a button. You can watch the video below to learn how you can achieve this.
Before sending it to the machine, you can adjust various settings like depth of the cut, speed, laser strength, etc. Once you have the G-Code you will be able to send it to your 3D printer with laser engraver attachment or CNC machine.
There are various laser engravers available that you can attach to your 3D printer, but we recommend using our Endurancer lasers because of the reasons listed below.
Why You Should Consider Buying an Endurance Laser
- Endurance lasers are reliable. They can run continuously for 48 hours.
- They can engrave on acrylic, leather, fabric, and even felt.
- With Endurance Lasers, you can engrave on glass using different colors as shown in the video on Youtube.
- All the endurance lasers can cut plywood, fabric, leather, and acrylic.
- The lasers with an output of 5.6W, and 8 can engrave on anodized and painted aluminum, glass, and stone.
- There are a good number of video tutorials and guides to help you get started with much ease.
- There is a lifetime warranty.
- We have dedicated support; always ready to attend to the needs of our customers. We help you in choosing the right engraving machine or laser as per your requirements either through phone, email, Facebook Messenger, WhatsApp, telegram, or Viber.
- After helping you in selecting the best product, we also provide qualified after-sales services.
- The Endurance attachments can support most of the common 3D printers and CNC machines.
- All the Endurance laser users have the ability to upgrade their lasers by exchanging them with a new one even if it’s from a different manufacturer with an extra payment.
- Endurance attachments are easy to install and it doesn’t require any changes or adjustments.
Having looked at the general overview of how laser engraving glass works and the best lasers to buy for your 3D printer or CNC machine, we would like now to have a look at an example of how you can engrave glass using Endurance Lasers.
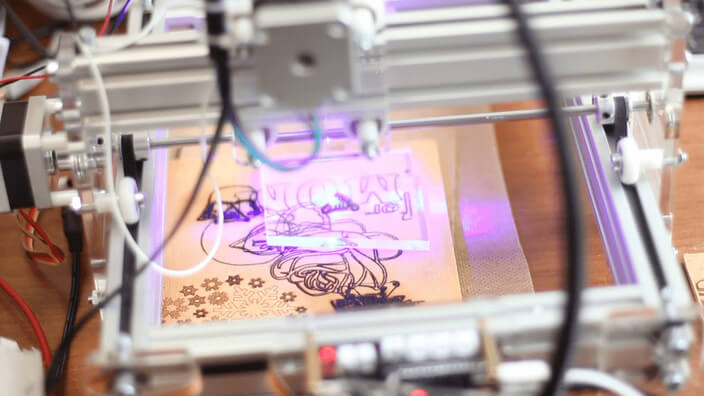
Laser Engraving on Glass using Endurance Lasers
 Laser Engraving on glass using Endurancelaser. Image source: Youtube
After you have prepared your files, you need to install a semiconductor (diode) Endurance Laser on your 3D Printer or CNC machine.
As you begin the glass engraving process, we advise that you use a base layer where the layer beam will be focused. This is because glass is transparent and it’s not very possible to engrave directly on its surface as the beam goes through the glass and it might be difficult focusing the power on a desired point on the surface.
During the glass engraving process, the base layer automatically melts and because of the high temperatures, the adjacent layers of the glass will also melt sequentially and this results in an engraving.
When laser engraving on Glass, you need to make sure that the nominal output of the laser is at least 3.5W.
Check out the attached vide below to learn how to laser engrave glass using Endurance diode Laser with 10 watt 445nm diode laser.
5 Key Tips for Laser Engraving Glass
-
Reduce the Engraving speed
To achieve the best results, it’s recommended to engrave with minimum speed but high power. This is because when working with curved surfaces you might encounter hard and soft spots and if there are not proper parameters set you can end up with heavy and light frosted surfaces on the glass.
-
Use a Damp towel
During laser engraving, high temperatures are one of the main causes of breaking and fractures in glass. Placing a moist paper towel around the engraving area can help avoid the breakage of the glass by dissipating heat well. Using a damp paper towel will also produce a white engraving result and a smooth surface.
When using the damp paper towel, ensure that there are no air bubbles or wrinkles as these can appear on the final product. Application tape or a damp sheet of newspaper can also be used instead of a paper towel. These alternatives are great when measuring surface roughening but the end result looks grey and not bright.
-
Use Lower Dots per Inch (DPI)
Lower resolution (around 300 DPI)engraves a bit far from each other and this produces a better frosting effect. One can’t tell the final product was engraved at a lower resolution as it will just look great.
-
Use the Correct Grayscale Rasterization
If you are laser engraving an image on glass, you need to use a rasterization grayscale of 70% black for better results as it reduces the amount of heat applied to the glass. The final product is smoother as the engraving isn’t black.
-
You can use Laser Engraving with Sandblasting together for great results
If you would like phenomenal results, you can combine these two techniques. To achieve this, you laser engrave on glass and then later use sandblasting to deep etch the glass.
You do this by placing a mask material on the surface of the glass then you laser through it. When you are done, you remove the glass from the sandblast and the laser engraver and you will be able to get a laser engraved/sandblasted item.
-
Use a Mask
Using a mask helps absorb heat in the glass that was created during laser engraving and it also results in a design with high resolution as fracturing in the edges is reduced. Placing a mask is easier. You only place it on top of the glass and then you laser engrave normally. The only disadvantage of using a mask is that removing it requires a lot of work.
Now that you know how to laser engrave glass, the recommended laser that you can use as well as the various tips and tricks for better results, you can also check out the five important points that you need to follow when operating your Endurance lasers.


