The ever-favorite Pi company finally made its way to achieve the remarkable. On 28 February 2017, the company launched its more compactable version of the credit-card-sized computer, also known as the Raspberry Pi Zero W.
This mind-blowing invention by the Pi company is capable of building embedded IoT (Internet of Things) projects. Raspberry Pi Zero W, being the highly flexible and economical member of the Pi family, also includes other versatile utilities such as Bluetooth and Wireless LAN.
These stunning pros of the miniature hardware have helped in gaining the attention of many DIY enthusiasts, giving way to a range of newer projects to be tried.
So, now we will begin with our impressive list of Raspberry Pi W projects, hope you enjoy it!
DIY Smart Speaker – Powered by Amazon Alexa
Who does not want to have a virtual assistant to make their lives easier? We all dream of having the Amazon Alexa devices like Echo or Echo Dot at our home so that she would sing lullabies to our children or perhaps tell us about the weather outside, but only a few of us manage to buy this $100 device.
Surprisingly, the Raspberry Pi Zero W can help you create a DIY version of the Amazon Alexa!
Hardware Requirements
All you need is a:
- Suitable power supply (5V @ 2.5A mostly recommended)
- Speaker
- USB microphone
- PC to set up an Amazon account for Developers along with an SSH client
Steps To Complete the Project
All you have to follow in order to achieve your goal are the following five steps:
- Creation of an Amazon Developer Account and a Security Profile
- Downloading the Amazon Assistants Pi Script from the Pi Gather Repository
- Installation of PIP for Pre-configuration using Python
- Now comes the time to run the installation script for this project
- Final configuration along with the testing
Voila! As soon as you are done with the above simple steps, your dream of having the Amazon Alexa would be fulfilled!
Wi-Fi Repeater
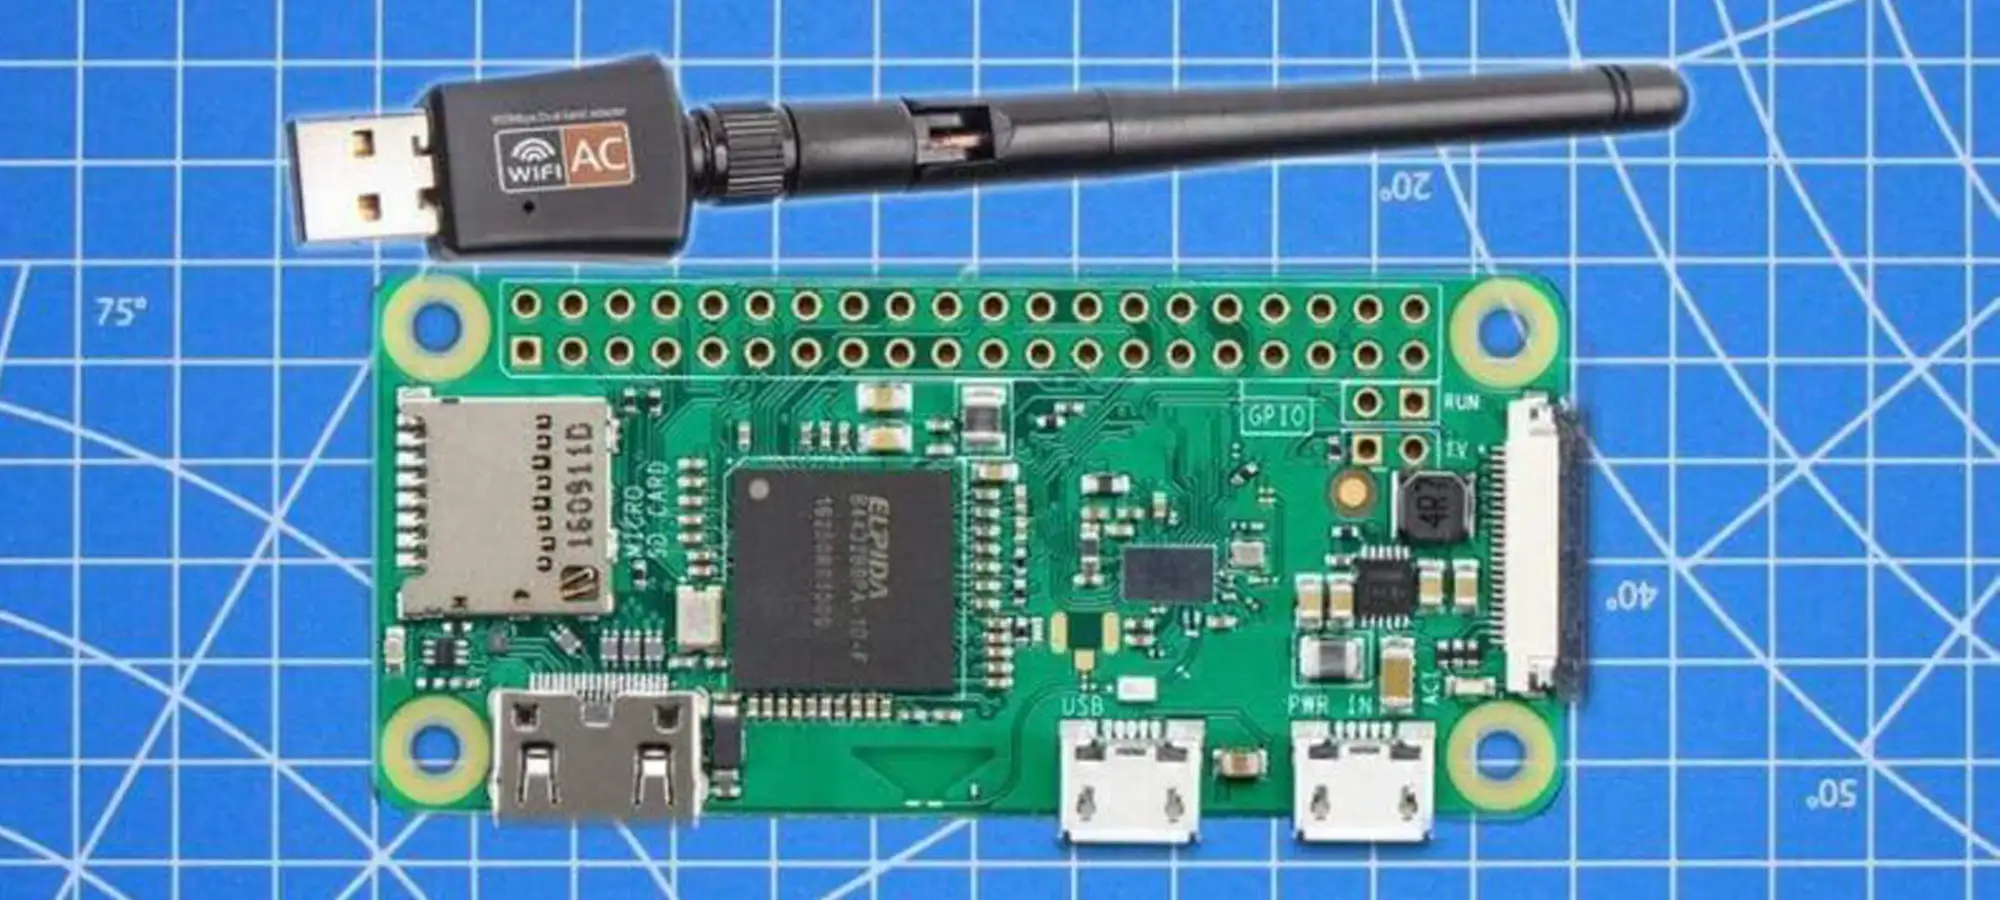
Here is another low-budget project for you to try by using the ultimate Raspberry Pi W. This project will help your Wi-Fi adapter to gain the capability of relaying network traffic that is beyond the reach of the router!
Hardware/Software Requirements
The creators and demonstrators of this project have mentioned the following simple hardware and software requirements for creating a Wi-Fi repeater:
- Two Wi-Fi adapters
- A Raspberry Pi Zero W Board (pretty obvious, I know 😉)
- A USB to OTG Adapter
- A software named Raspbian Stretch Lite
Steps To Complete the Project
The steps required to complete the project include:
- Set up a web UI to dynamically connect to a Wi-Fi AP just by using the browser
- Connect to access point created by Raspberry Pi
- AutoStart Server on Boot
- Set up the system-network
- Finally, configure the WPA-supplicant
For better understanding and complete instructions, you could watch the videos at hackaday. And since this project is quite advanced, it is highly recommended for technical experts.
Portable Game Console
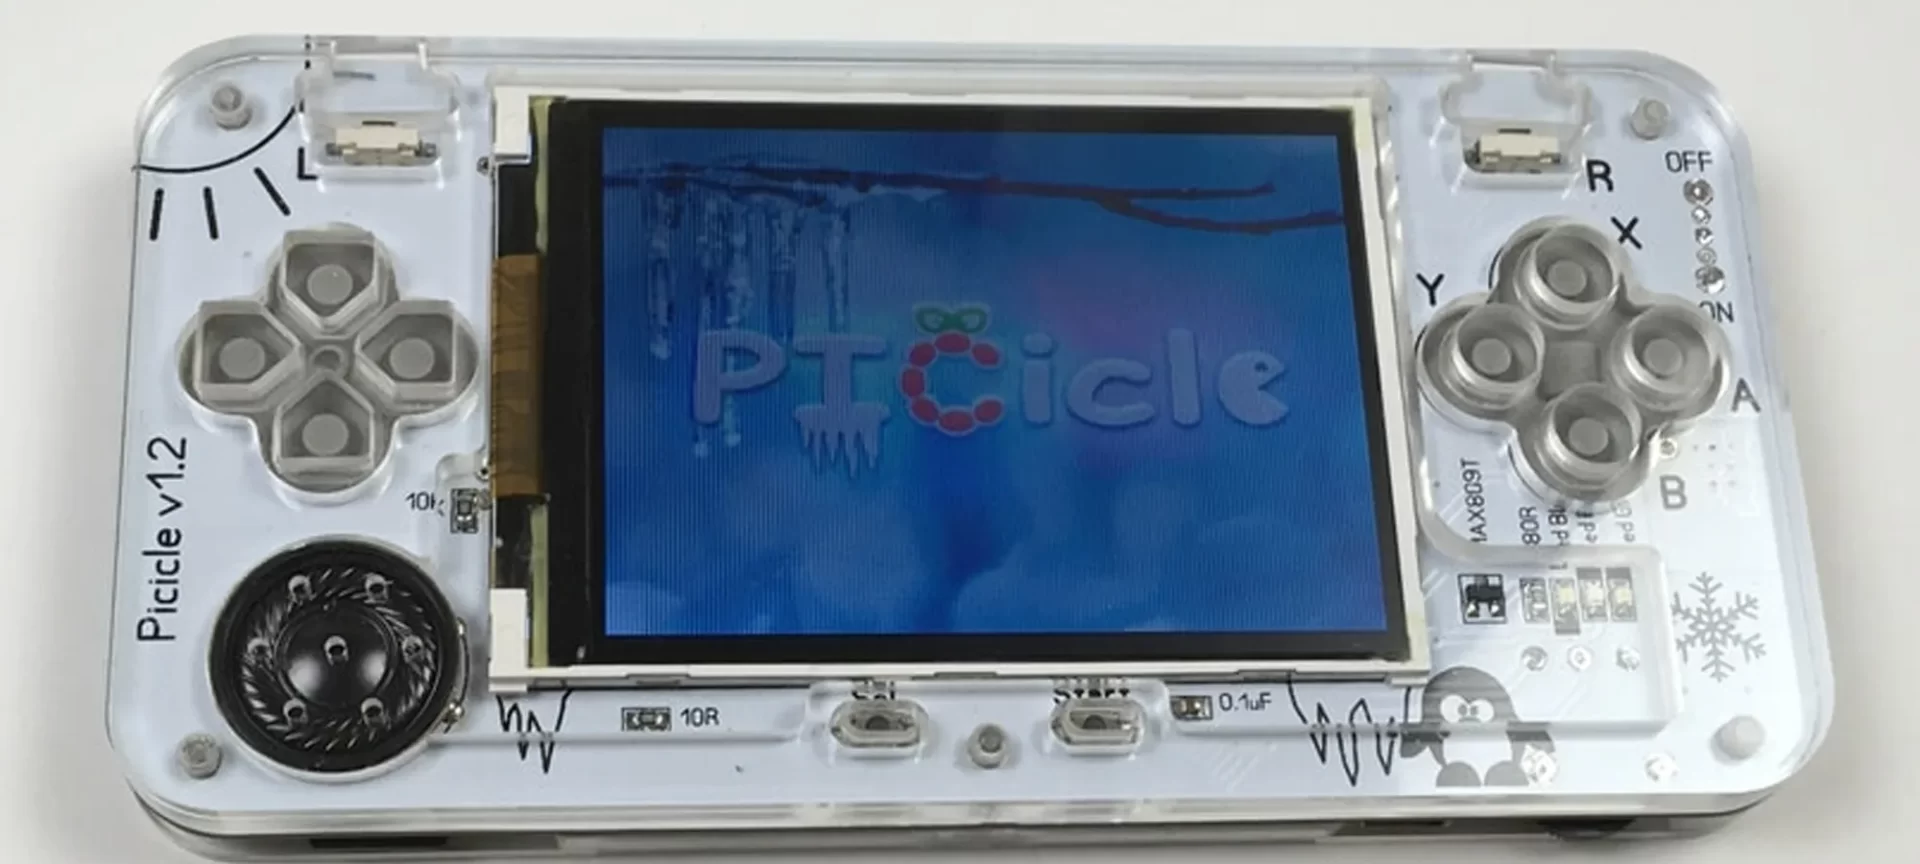
Now, this is an interesting project for the kiddos! One of the best uses of the Raspberry Pi Zero W is that it enables you to build game consoles, hence, giving way to remote gaming.
This project can help you emulate most of the retro game consoles such as the Atari 2600, Atari 7800, Nintendo 64, Nintendo Super NES, GCE Vectrex, NEC TurdboGrafx-16, etc.
Hardware Requirements
The hardware requirements for this project include:
- A Raspberry Pi Zero (just to remind you again XD)
- NiMH batteries
- A homemade over-discharge protection circuit
- An audio amp
- A rearview LCD
Steps To Complete the Project
Now to get on with the configuration, here are the steps to be taken:
- Firstly, connect all the electrical components
- Build the over-discharge protection circuit
- Create a Prototype
- Modify the case and house the components
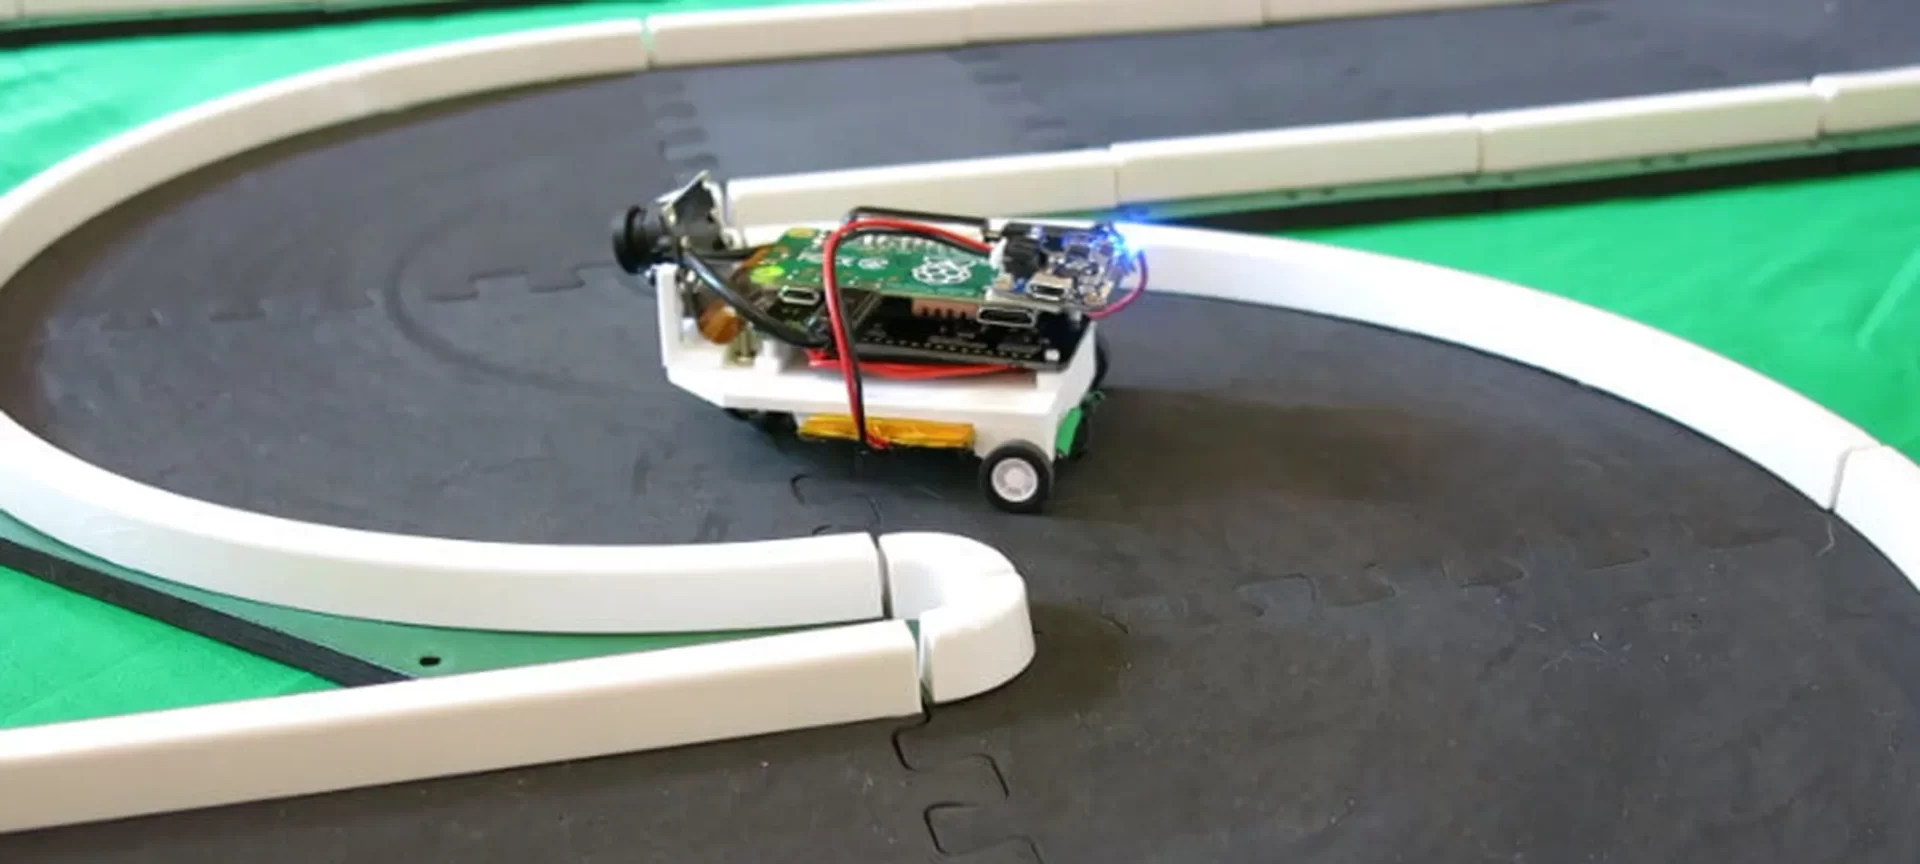
Self-Driving Car
Vroom Vroom! Here comes the car that you are dreaming to build with Raspberry Pi Zero W. Imagine flexing your first step into machine learning through this cool project.
This may sound strange, but you could really build an autonomous miniature vehicle yourself that can recognize tracks and steer itself in real-time.
It works by sending data in the form of an image to a machine-learning algorithm online. Apart from this, you can even self-design the car’s model by 3D printing its parts.
Hardware Requirements
The components required include:
- Lots and lots of Nuts and bolts
- USB to MicroUSB data cable
- Power hook-up wires
- Pololu Wheels and Ball Caster
- STL files for 3D printing the bodywork
- Valve Steam Controller
- Other mechanical tools
Steps To Complete the Project
As for the instructions, a brief overview of the steps is:
- Build parts through 3D printing
- Mount the battery, front ball caster along with the motor
- Solder the heads into the device
- Start to set up the RPI camera module
- Solder the motor cables to the Explorer pHAT accordingly
- Give a final check to all the connections
- Join all the 3D parts and complete the assembly
- Install software
And you are done!
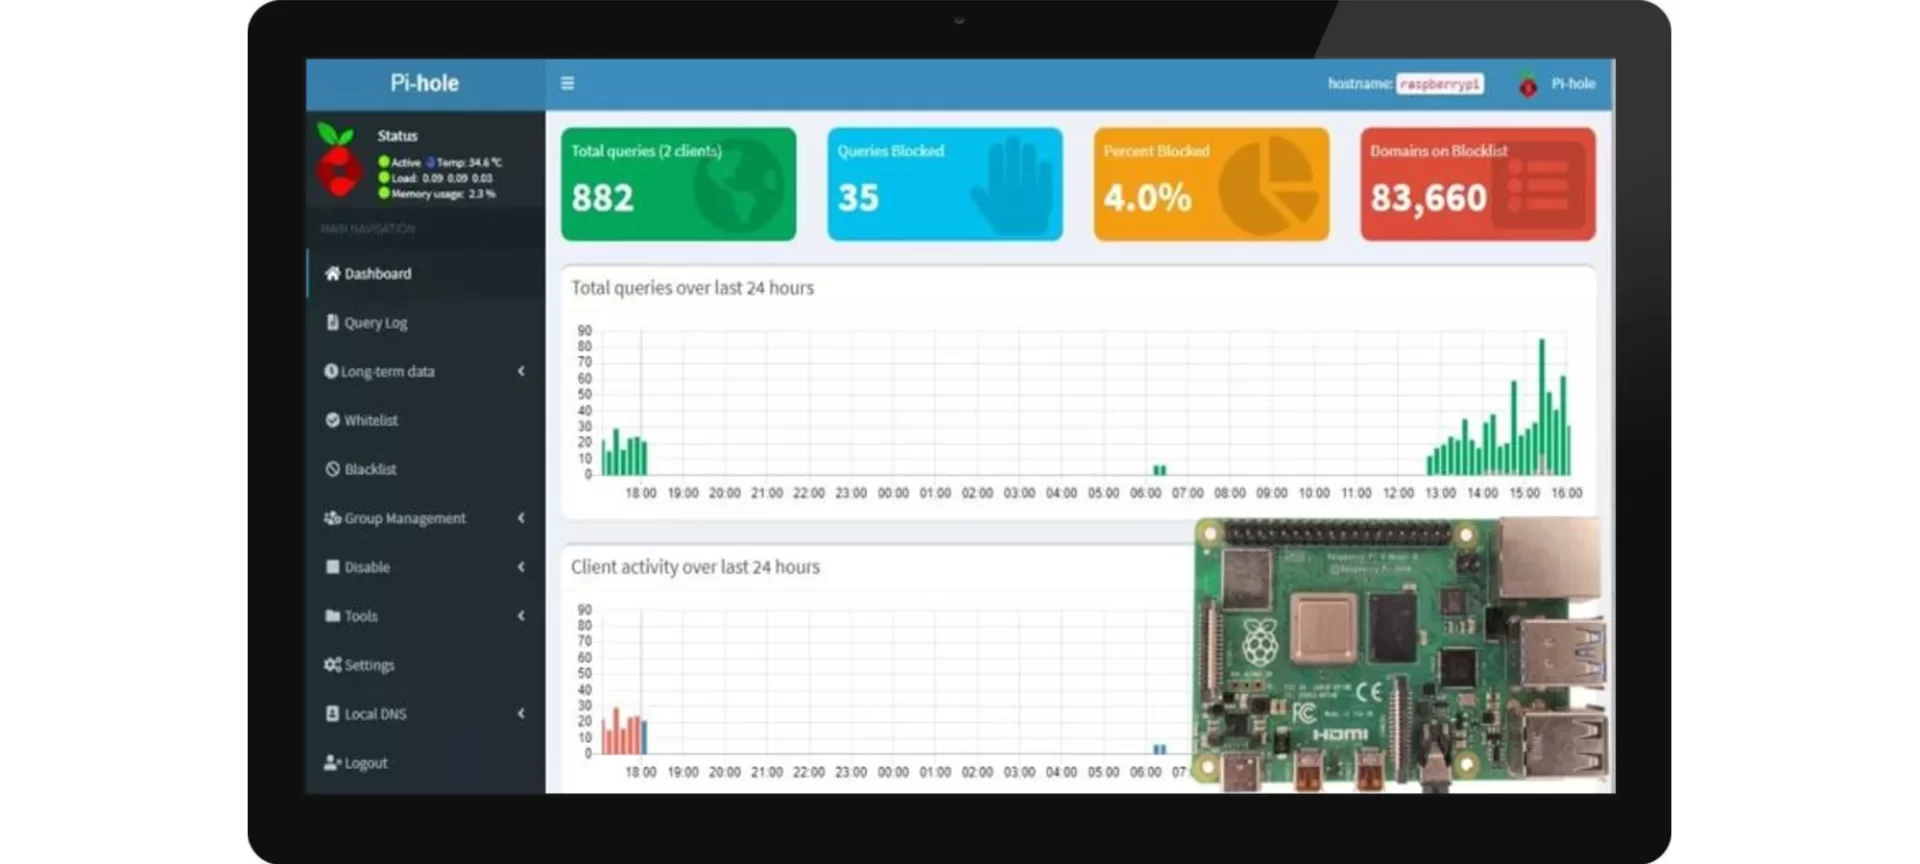
Pi-hole
Are you sick of the ads that keep interrupting your web surfing experience? Well, thanks to Raspberry Pi Zero W, you can find a DIY solution to this too.
Pi- hole at its most basic is a network ad-blocker that protects your network from trackers and ads without the haste of building setups on individual devices. This software has the ability to block ads on any type of network device or software.
But here, let us mention that it is not necessary to block all the ads, as doing so would stagger a large number of funds that your favorite website and dozens of other sites need to keep progressing.
Therefore, to help you find a more website-friendly solution, pi-hole could be configured with a “white-list” for the ads that you would not mind seeing and, of course, a “black-list” for all those ads, which disturb you a lot.
This formatting could help you achieve a better networking experience along with a fast page load time and a large amount of saved bandwidth.
Hardware Requirements
This project will not require a lot of hardware. The only things you will need include:
- Ethernet adapters
- A Raspberry Pi Zero W (oops!)
- A Windows PC
Yup, that is it!
Steps To Complete the Project
Now, to set up this software, the steps required include:
- Set up your Raspberry PI
- Install Pi-Hole over SSH
- Set network connections for Pi-hole
- Whitelist the ads for the websites you trust
Tobot
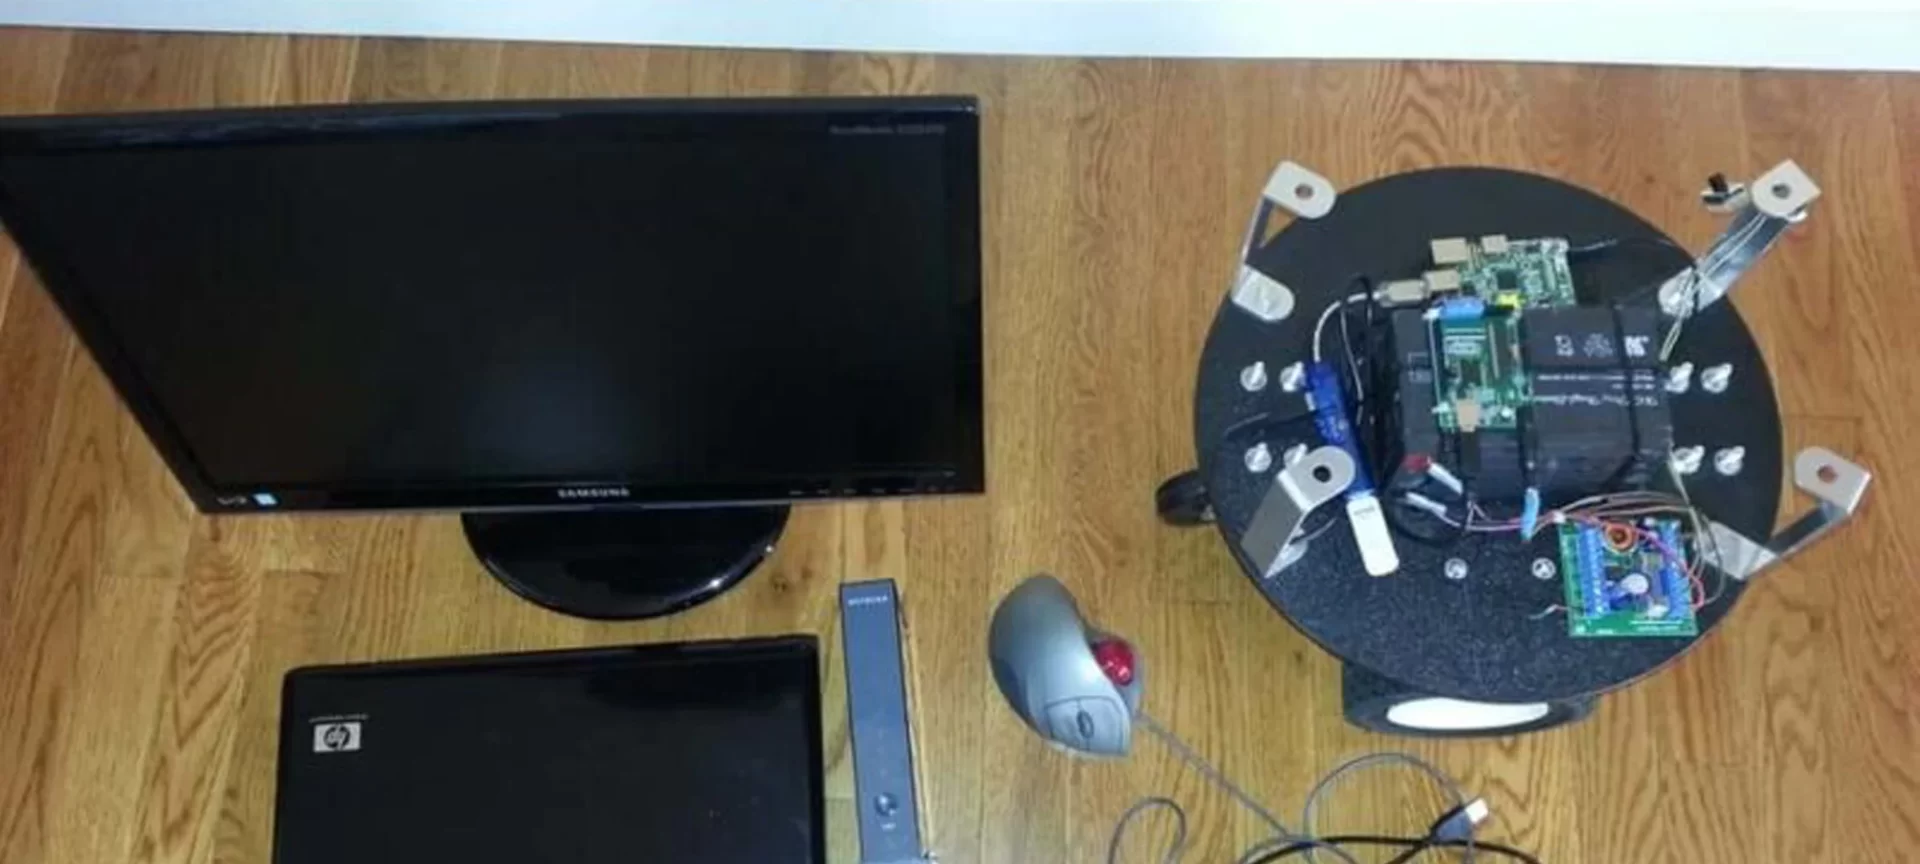
Tobot is another project for the technical geeks out there who are willing to create a bot that could handle high-level logic, video, audio interfacing, and networking.
This project could help you create a tic-tac-toe playing robot with the help of coding, 3D printing, CAD (Computer-Aided Design), and the Tic-Tac-Toe strategy.
Although it is a bit too advanced and complex, the step-by-step technical, explanation on Instructables can get you to your goal. Apart from the rest of the project, you must first have enough knowledge about the object-oriented high-level programming language named Python, as it serves as the base to build this project.
Hardware Requirements
The hardware requirements may include:
- Arduino UNO or a USB Cable
- Wi-Fi Router
- Robot Base
- Power Distribution Board
- Motor Driver
- 12V – 7A battery
Steps To Complete the Project
As far as the steps are concerned, a brief overview could be stated as:
- Execution of several programs
- Setting up of Raspberry Pi with VNC (Virtual Network Computing)
- Play Tic-Tac-Toe!
FPV Robot
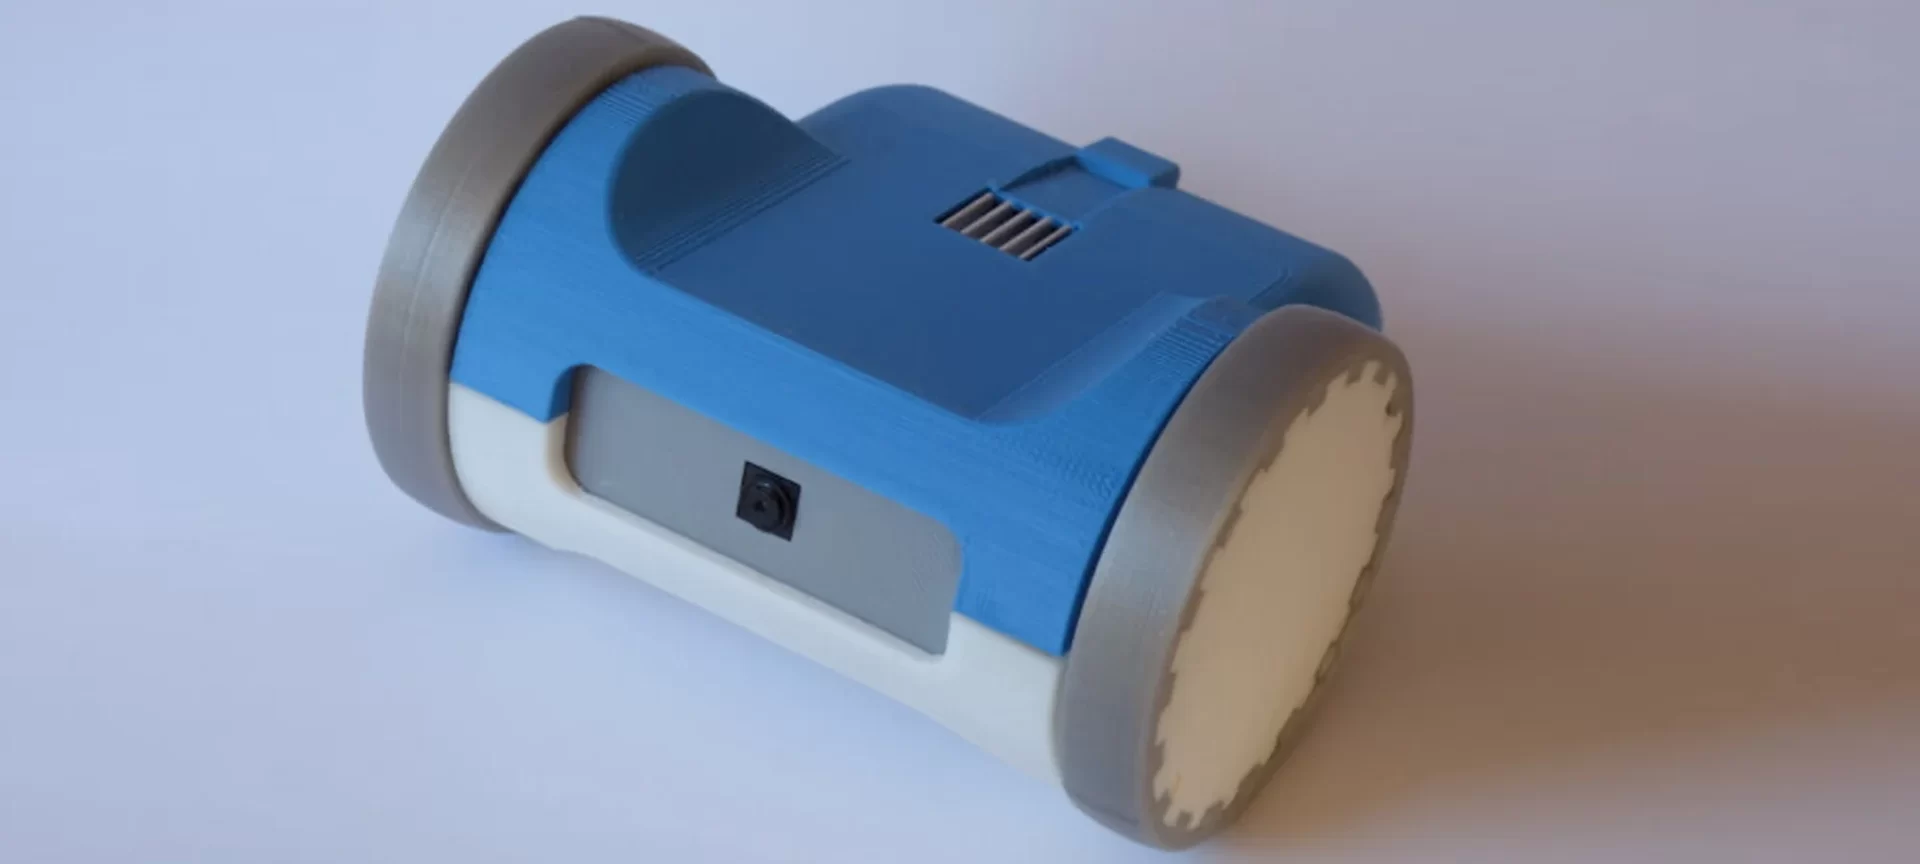
The Raspberry Pi W-based FPV Robot or the Zero bot is a bot that could be controlled via any device or browser. The camera used by it helps in the low-latency video stream whereas, the Raspberry Pi used within it works as a Wi-Fi access point eliminating the need for a router.
Its most important features include the analog control ability through a joystick, CAD simulations that could be 3D printed to form its physical parts, a simple battery solution as it only requires a standard power bank and, economic due to cheap component integration. The STL files required for building this project can be downloaded from Thingiverse.
Hardware Requirements
The hardware requirements for this project are mentioned as:
- Dual Channel DC Motor Driver
- Raspberry Camera Module
- 2600mAh Power Bank
- DC 3V-6V Gear Motor (Dual-Axis)
- Adhesive Raspberry CPU Heatsink
Steps To Complete the Project
Now the setup overview can be given as:
- Installation of the latest Raspbian Image
- Install the updated software
- Install the mjpg-streamer
- Integrate the components
PIX-E GIF Camera
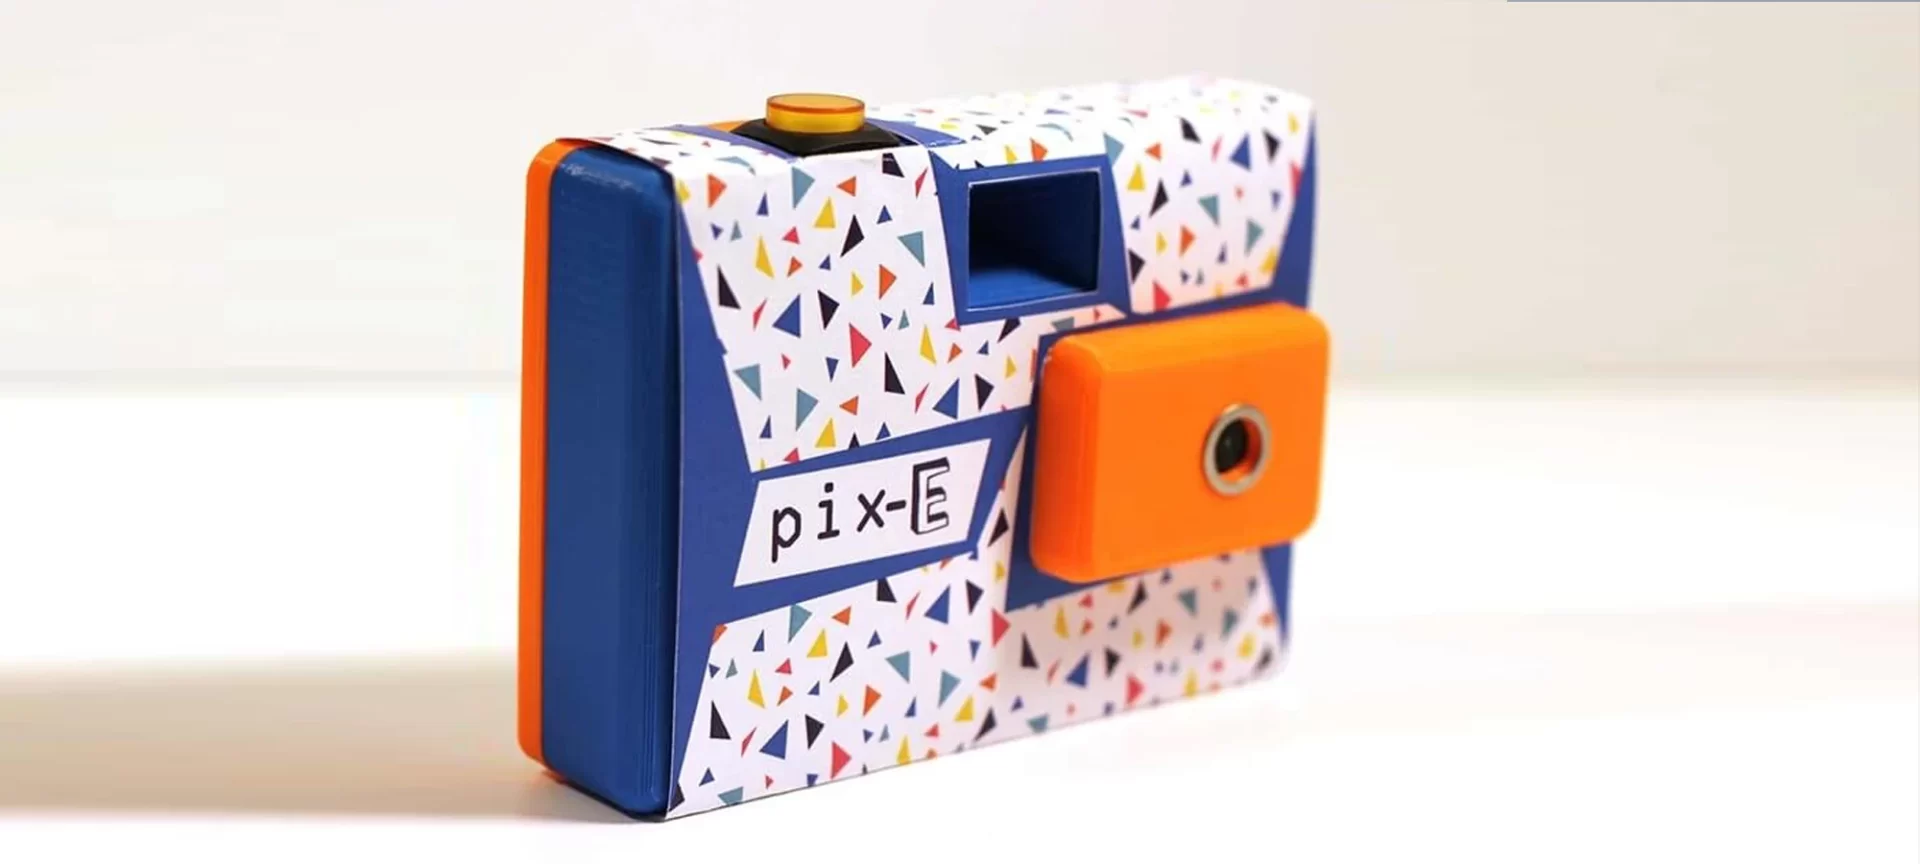
Pix-E GIF Camera is another trendy project to give a try. This miniature camera can capture short gif-like videos that can be posted on social media. The vibrant PDFs of the decorative wraps to be used in the physical customization of this project can be downloaded free from Moontowerlabs.
You can play around with the design formats or even make longer videos by customizing and editing the code, you can save those gifs on your SD Card or upload them on Twitter, you can do anything, and post the gifs anywhere you want just by creating this amazing Pix-E Gif Camera by yourself!
Hardware Requirements
The hardware components required for this interesting project include:
- USB Wi-Fi Card
- PowerBoost 500c
- 2500mAh LiPo Battery
- An Illuminated Pushbutton
- Raspberry Pi Zero (umm… In case you forgot)
Steps To Complete the Project
This project is mostly concerned with the correct assembly of all its parts; the details of which can be availed from hackaday.
Wearable Timelapse Camera
This blissful and economical project will not only help you save your money but will also let you capture the beautiful moments you enjoy throughout the day!
The best part about this project is that it is completely portable and customizable. All you need to do is simply hang it around your neck and, it will keep on capturing the moments you spend after every few seconds.
Hardware Requirements
Following are the total hardware components you will need for the project:
- Micro USB power pack
- Pi Camera or Pi NoIR Camera
- Raspberry Pi Zero (this time, it should be soldered on the header)
- Micro USB power pack
- Blinkt (optional)
Steps To Complete the Project
- 3D print the rest of the components
- Insert the SD card into the camera
- Connect the camera to Raspberry Pi
Nah Nah! It ain’t that easy. There are a few more configuration steps that you will have to follow in order to achieve your project goal. A brief summary could be found at Adafruit.
Telescope Camera
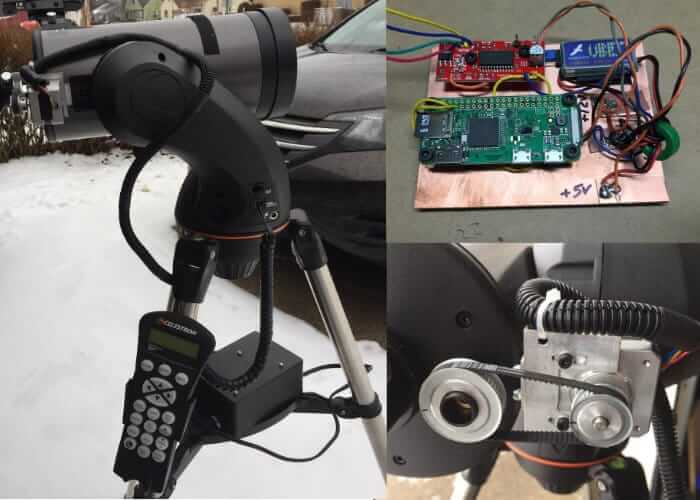 Credit: geeky-gadgets
Well, who does not have the lust for clicking some aesthetic pictures every day? But imagine the pride you could experience if the camera you use is made by you!
Raspberry Pi Zero W grants you the ability to capture thousands of your favorite astronomical sceneries with the help of a DIY telescope camera.
Hardware Requirements
First, we will discuss the electronics and hardware required for the project:
- USB Wi-Fi Dongle
- MicroSD Card
- SPDT (Miniature Slide Switch)
- LiPo Battery
- Some STL, 123Dx, and STP files
- NinjaTek NinjaFlex Filament
- PLA Filament
- Socket Cap Screws
- Hex Spacers
Steps To Complete the Project
Now, to continue with the basics, here are a few steps:
- Prepare all the parts for designing the rest of the structure
- 3D print the Files
- Download the Jessie Lite Image File
- Assemblification of the parts
- Become an Astrophotographer!
If you are ready to hope into this project’s manufacture, you could use a complete detailed step-by-step explanation of its build from here.
OctoPrint for Wireless 3D Printing Experience
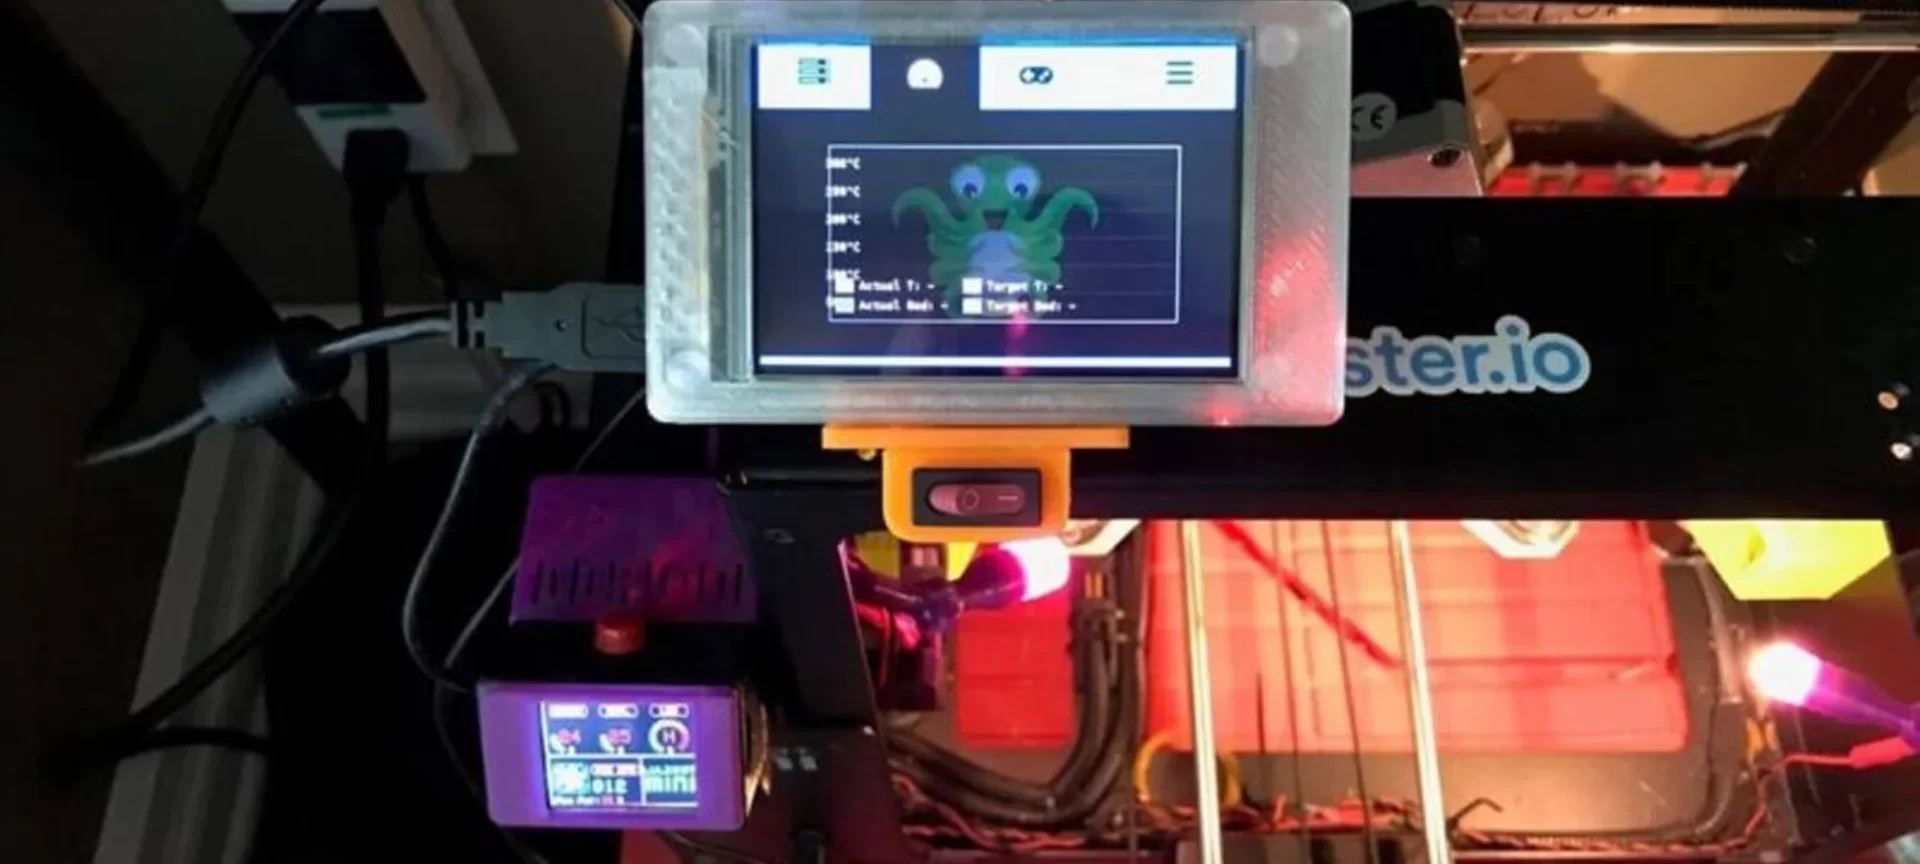
OctoPrint is controller application software for your 3D printer. It was built by Gina Häußge in 2012 who had initially taken the step to create it for her first 3D printer. This software application is compatible with Python 3. Its most essential use is for monitoring the print status remotely.
After setting up OctoPrint on Raspberry Pi, you will be able to manage the printers remotely, change print settings remotely, customize the operations by using plug-ins or self-written code, wirelessly, slice the 3D models using CuraEngine, monitor the print temperature, upload g-code files from your computer to a 3D printer, set up a webcam to monitor the progress online, regulate the temperatures of the warm end and the extruder.
Hardware Requirements
The hardware requirements for this project may include:
- Full-Sized or MicroSD Cards: According to your pi model requirement, you will need an SD Card (MicroSD or Full-sized) along with an SD adapter
- Power adapter: Since voltage deprivation during the printing process can cause a lot of performance issues, power adapters are extremely necessary to ensure the optimum delivery of electric power to the board.
- 3D printer: Lastly, you will require a 3D printer that is compatible with the OctoPrint software and the Pi model. And of course, the most important thing required now is your passion to print.
- USB Cable: this is for you to connect the Raspberry Pi to the 3D Printer. The Pi end is a USB Type-A. The USB cable selection would depend upon the 3D printer end type.
Steps To Complete the Project
Again, a brief overview for setting up OctoPrint on your Raspberry Pi Zero W is given below:
- Setting up the OctoPi Image or Etcher
- Setting up the Wi-Fi
- Building up the communication Security
- Setting up the Pi connection with your 3D Printer
- Setting up the Interface
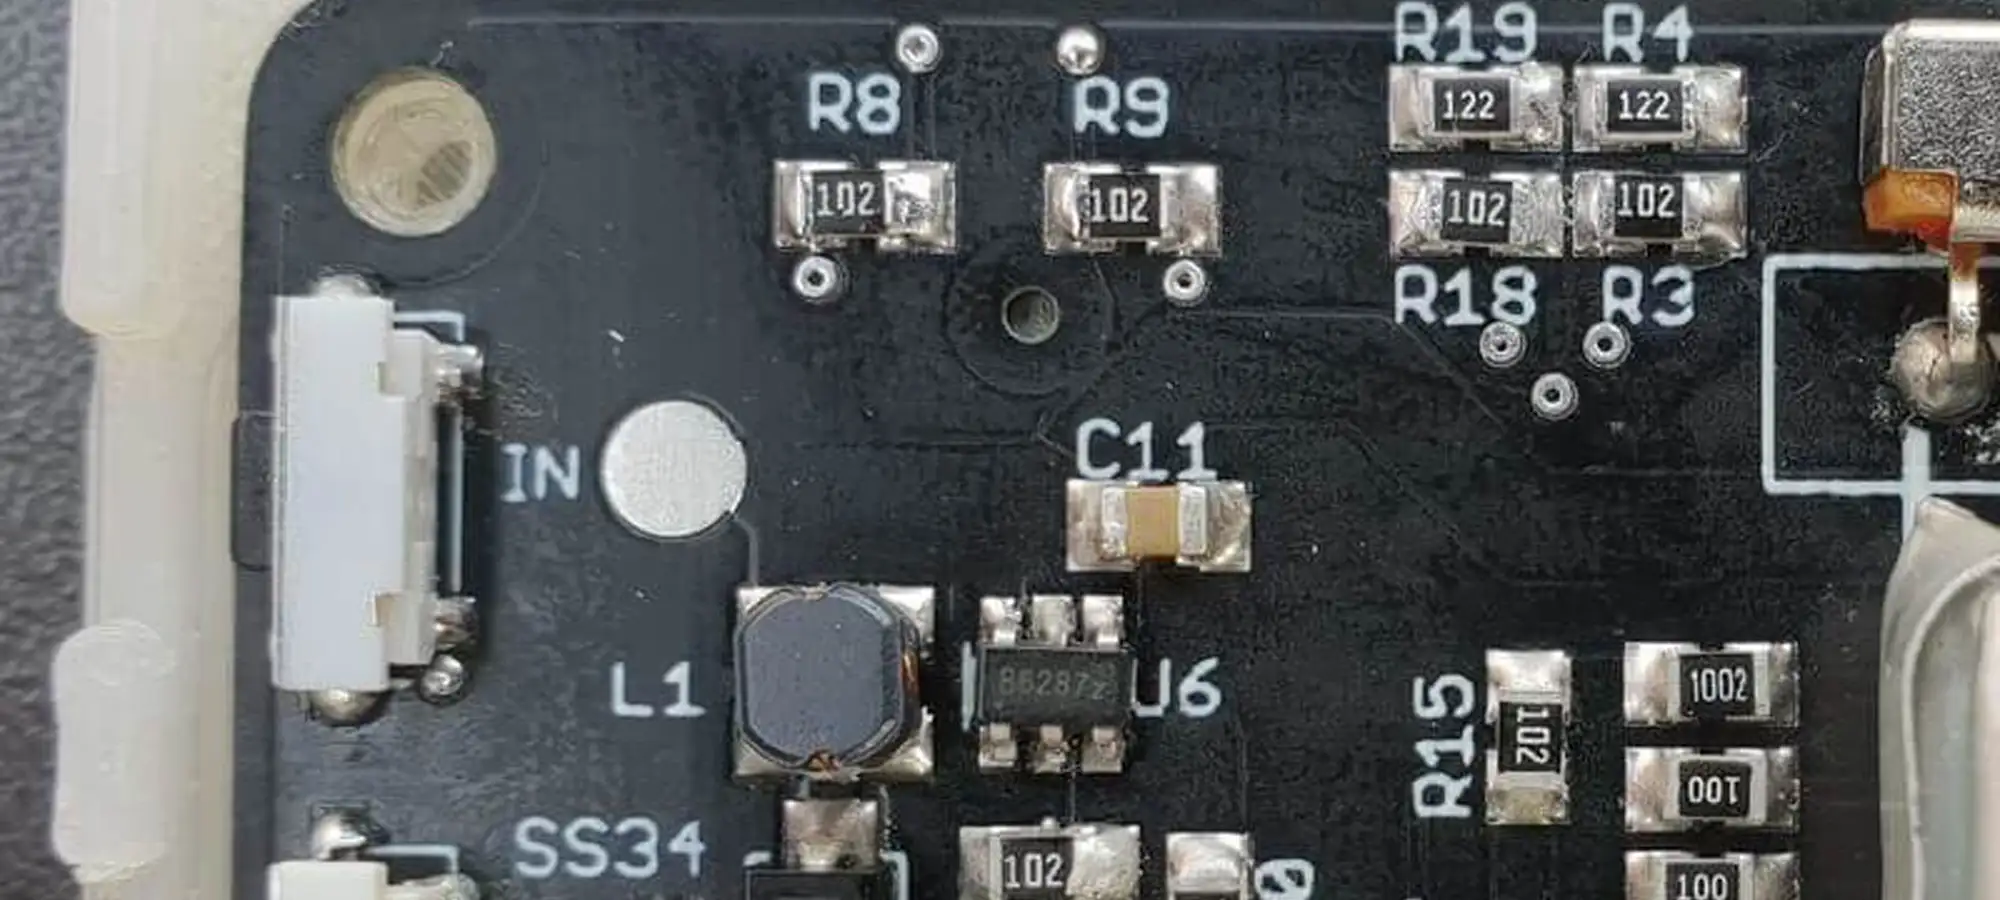
Pi Pod – The Raspberry Pi Zero Music Player
Of course, you must be wondering who needs a music player in 2021 when phones are there for this purpose.
But there are still a lot of people out there who love to have a device that is completely dedicated to listening to songs. And such a sophisticated device such as Pi-Pod, which seems so neat and appealing in appearance is, certainly, a must-have.
Hardware Requirements
The basic hardware components required for this project, include:
- 2.2” TFT screen
- PCM5102A Data Convertors
- A 3.5mm jack
- DW01 (A battery Protection integrated Chip)
- An ADC to detect charging and measure the battery voltage (ADS1115)
- Lithium-Ion Battery
- TP4056 Battery Charger
- M2 4mm screws
Steps To Complete the Project
Now for the assembly, the steps are:
- Placement of the Components
- Align the Raspberry Pi Zero W
- Assemblification of the Case
- Insertion of the SD Card
- Logging in to the RPi
For a much-detailed explanation and visual understanding of this project, you could check out Hackaday.
Network Performance Monitoring by Pi-Zero

This project is for those folks who like to keep a check on their stats. The Raspberry Pi Zero W Powered Network Performance Monitor is a bandwidth monitor featuring a stylish little screen, which could display important statistics. This way, you would be able to spot and troubleshoot any network inefficiency that takes place, immediately.
The Raspberry Pi, running in the background, will be responsible for keeping the log of all the network traffic and performance. This will help you enjoy smooth networking and network maintenance experience.
Hardware Requirements
Following things are required to complete this project:
- NEMS for Raspberry Pi
- Etcher Flash Software
- A 16GB MicroSD Card
Steps To Complete the Project
For this project, you could:
- Install an Operating System on Raspberry Pi or
- Install the Nagios Core on Raspberry Pi
More details can be speculated through MUO.
Pi Zero Cluster
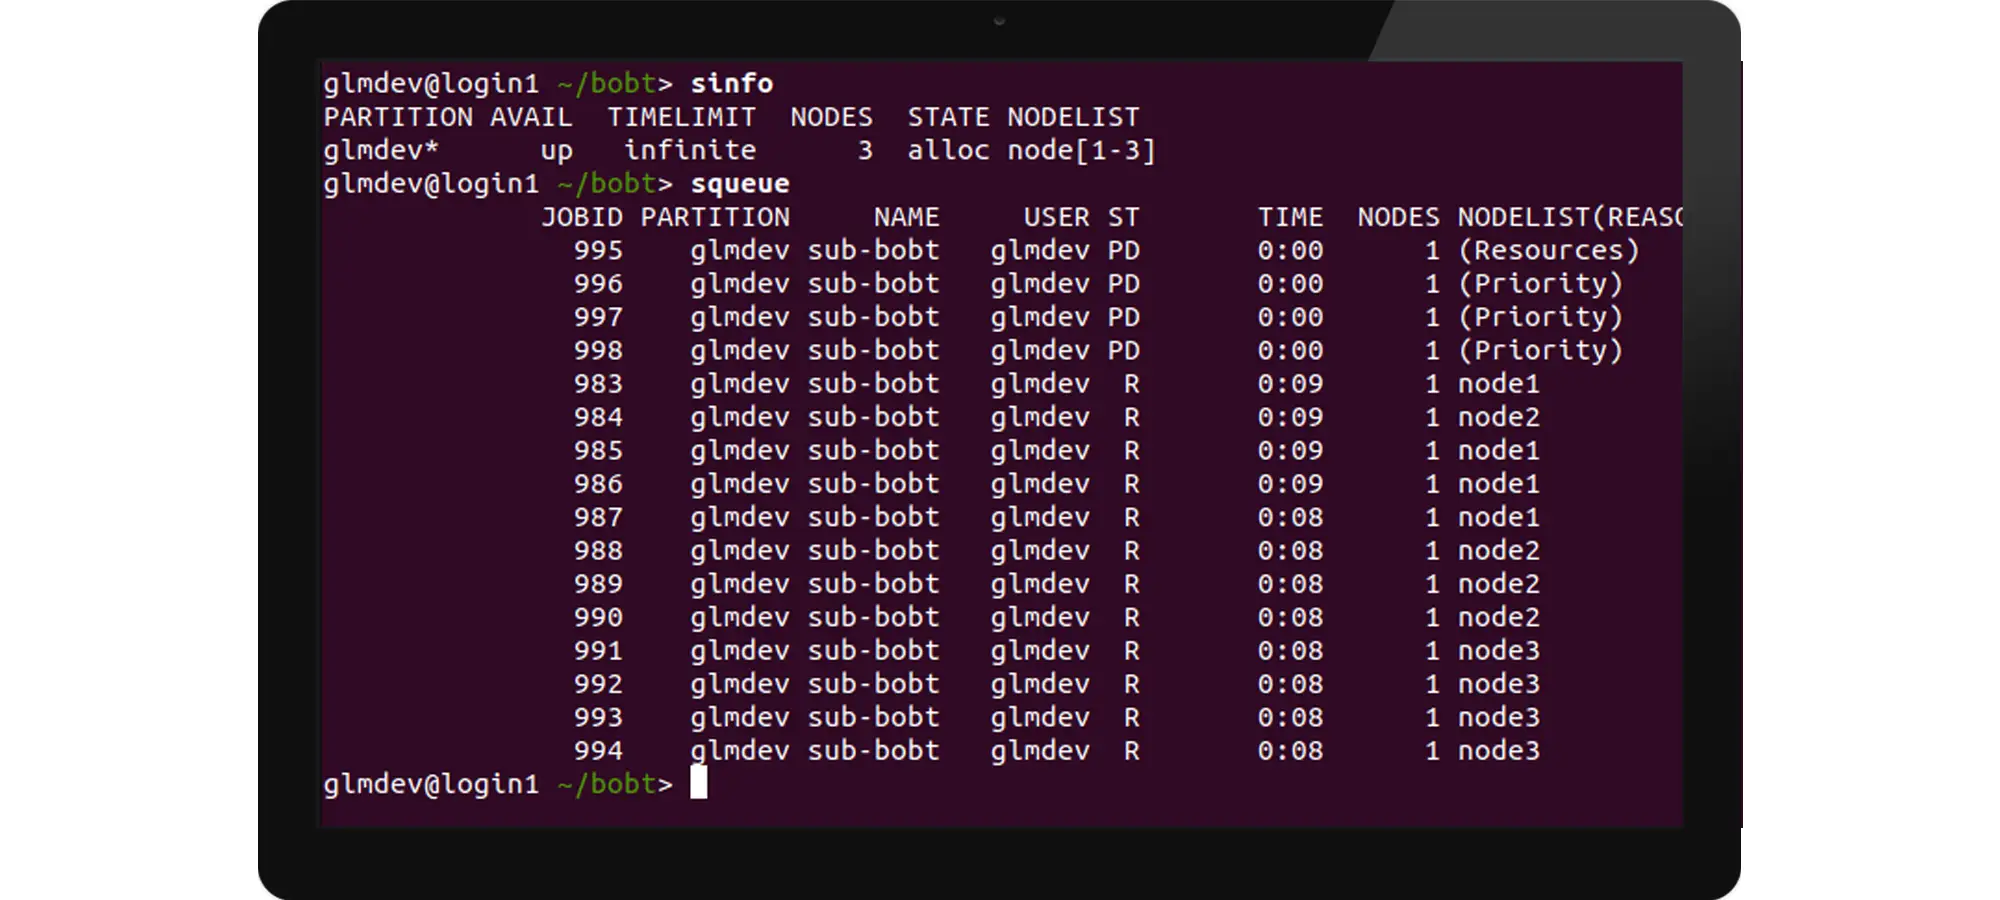
Pi Zero Clusters, as the name implies, are built by integrating several Pi Zero chips onto a single board. This enables a large amount of parallel processing, which is a significant factor for powerful computers, such as the Raspberry Pi Based Super Computer. These computers have almost hundreds of thousands of Pi Chips integrated onto the circuit boards.
An important point to note is that due to their smaller size, the number of Pi Chips mounted increases, proving it to be more economical than the other options. And since the ability to create clustered boards is one of the most appreciated talents in the world of computing and technology, this DIY project will surely earn you a lot of admiration.
Hardware Requirements
To build a Pi Zero Cluster under $100, you will need:
- MicroSD Cards
- Micro-USB power cables
- 6-port USB power-supply
- 64GB USB Drive
8-port network switch
Steps To Complete the Project
The completion of this project involves the following steps:
- Flash the Raspberry Pis
- Create the network Setup
- Set up the Raspberry Pis
- Configure the Master Node
- Finally, Configure the Computer Nodes
Hence, these simple steps can be used to create the project! For further details, you could hop into Garrett Mills.
Home Network Music System
Usually, the creation of a home network Music System is very expensive, but with the advent of the Pi technologies, newer methods could be engaged to come up with cheaper solutions.
Here again, the Raspberry Pi Zero W comes in handy as with its help, you can create a network music system, simply by utilizing your MP3 Collection. Through this device, you can also stream via different services or play local music for the whole family to enjoy during a BBQ night!
Hardware Requirements
Here is the list of the hardware required to create this project:
- 16-Gauge Speaker Wire by AmazonBasics
- Pi Drive Node Zero enclosure
- Pi Drive Node Zero
- 5V – 3A power supply
- Wi-Fi USB adapter
- Pi MusicBox Software
Steps To Complete the Project
- Download Raspbian
- Setup Raspbian
- Format the PiDrive
- Transfer the music
- Create the Music Box
- Set up The Speaker
- Listen to the songs!
A further step-wise explanation can be found on Instructables.
Conclusion
This list is just the beginning of your amazing dreams that you are about to change into reality!
Several other projects such as the clock controller, Footpedal, Contact Tracer, Ambient TV light, etc. can be created through Raspberry Pi Zero W! And we are sure for you to create the best of the best through your creative ideas and innovations. So long, reader! Hope you enjoy a great day ahead of you!


