If you got a new Raspberry Pi but are confused about what to do with it? Don’t worry, we have listed down a few projects that you can make up by following their steps carefully. Most of them can be made with any Raspberry Pi model (even the older ones).
We have also stated the difficulty level of each project to enable you to select one based on your skills. Whether you are a beginner or an expert, we tried to cover all types of projects to ensure you can find something great to try or build at your home like a walkie-talkie, camera, etc.
Raspberry Pi
A British company, Raspberry Pi foundation, developed a series of small credit-card-sized circuit boards that have all the basic hardware components of a computer (i.e. memory, processor, etc.) and other features (i.e. HDMI, video, sound, USB, etc.). These were invented with the purpose to assist people in learning basic programming and how to program the computer.
The low cost of Raspberry Pis and few features make them ideal for beginners and young people who are interested in web designing and electronic product development.
Soon they gained popularity and became one of the best British best-selling microcomputers of all time. They also captured the interests of innovators and hobbyists, who greatly explored their potentials and tested various new ideas.
The word ‘Raspberry Pi’ was inspired by the tradition set by IT manufacturers who incorporated a fruit as their company name, such as Apple, Acron, and Blackberry, etc. However, it also indicated its function.
‘Pi’ is a short form of Python Interpreter, which is the main programming language of Raspberry Pi. However, those who are not familiar with Python can use Scratch, which is a visual and easy programming language.
A Raspberry Pi serves as a hard drive with an integrated Central Processing Unit (CPU). It is recommended to use Debian-based Raspbian, however, you can also use other Linux and Windows versions.
For power supply, a micro USB charger can be used. You can set up an internet connection with a network cable over LAN. In addition, it is easy to connect different external devices such as a keyboard, mouse, or an external hard drive through HDMI. Several pins can be programmed for extra features.
The manufacturer has launched various models. All these features vary according to the model type. Raspberry Pi 1 was launched in February 2012 and is the most powerful and latest model.
It is best for projects that require extensive processing. It boosts performance and increases memory. It is reliable, versatile, energy-efficient, and open source. It was launched in June 2019 with a 1.5 GHz 64 bits CPU, WLAN, Bluetooth (5.0), Gigabit Ethernet, and two 4K HDMI screen connections. You can choose between 2, 4, and 8 GB processing memory.
Raspberry Pi 3 B+ is also great for a variety of projects due it enough processing power and ease of access. It offers a 1.2 GHz 64 bits CPU, USB Wi-Fi, and Bluetooth connectivity.
Raspberry Pi Zero is compact, cheap, and less powerful than other models. This makes it ideal for portable and small projects. Other models include Pi 1, Pi 2, etc. all with a face value of around $35.
You can create a great range of projects using these Raspberry Pi products.
Raspberry Pi Projects Chart
| Projects | Links | Difficulty Level |
|---|---|---|
| Wearable Time Lapse Camera | Easy | |
| Walkie Talkie | Easy | |
| PiRate Radio | Easy | |
| Classic Mini NES | Easy | |
| Quadcopter | Hard | |
| Laptop | Medium | |
| Pip Boy | Hard | |
| Google Glass | Medium | |
| Security Camera | Easy | |
| Robot | Hard | |
| Desktop PC | Medium | |
| Retro Gaming Station | Easy | |
| Sky Cam | Medium | |
| 3D scanner | Difficult | |
| Telescope | Medium | |
| Game Boy | Medium | |
| Dashboard Navigatio | Hard | |
| Developer’s Case | Easy | |
| Robot Tank | Hard | |
| Server Farm | Easy | |
| Smart Clock | Easy | |
| An Internet of Things Printer | Hard | |
| Apple IIe | Easy | |
| Cam Tank | Hard | |
| Pokemon Finder | Medium | |
| Computer Controlled Plotter | Medium | |
| Camera Monster | Easy | |
| TV Mount | Easy | |
| OctoPrint | Easy | |
| Cigar Box Pi | Medium | |
| Automated Cooling Control | Easy | |
| Matrix Touchscreen Keypad | Easy | |
| Solar Powered Bitcoin Miner | hard | |
| Laptop Connection | Easy | |
| Shutdown/ Restart Button | Easy | |
| Use any Display Type | Medium | |
| YouTube Boombox | Easy | |
| A.I. Air Guitar | Easy | |
| File Server | Easy | |
| Video Doorbell | Easy | |
| Photo Frame | Easy | |
| Zoom Meeting Station | Easy | |
| Air Quality Monitor | Easy | |
| Very Slow Movie Player | Easy | |
| Streaming Device | Easy | |
| Office Software | Easy | |
| Minecraft | Easy | |
| Learn JavaScript | Easy | |
| Wi-Fi Extender | Easy | |
| Wall Mounted Google Calendar | Easy | |
| Blood Pressure Monitor | Medium | |
| Project Alias | Medium | |
| Office Clock | Medium | |
| Hydroponic Farm | Hard | |
| A.I Cereal Dispenser | Hard | |
| A.I Thermometer | Hard | |
| Smart Mirror | Medium | |
| Autonomous Cleaning Robot | Hard |
Lists of Great Raspberry Pi Projects
Wearable Time Lapse Camera
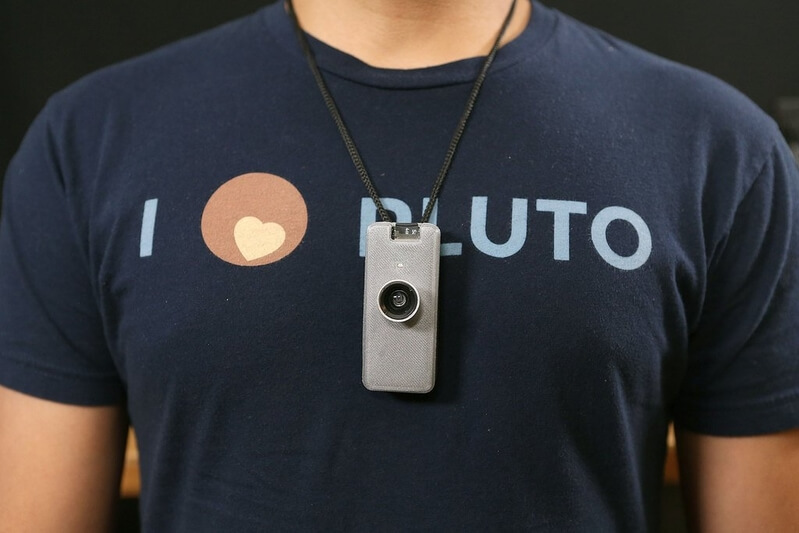
This project was first initiated by Adafruit Industries. You can program this tiny wearable camera to capture and make time-lapse recordings of your precious moments. You will need a 3D printer and Raspberry Pi Zero to produce this compact and portable gadget at your home.
The detailed instructions along with ready-to-download files, step-by-step tutorials, and user guides are available online that you can easily follow to build the camera.
Uses:
- It is ideal for capturing events like weddings, parties, or even vacations.
- It is great for people with memory impairment by serving them as a bionic memory and supporting them by reviewing things.
- Easy to build
- Portable
- Record events
- Limited card capacity
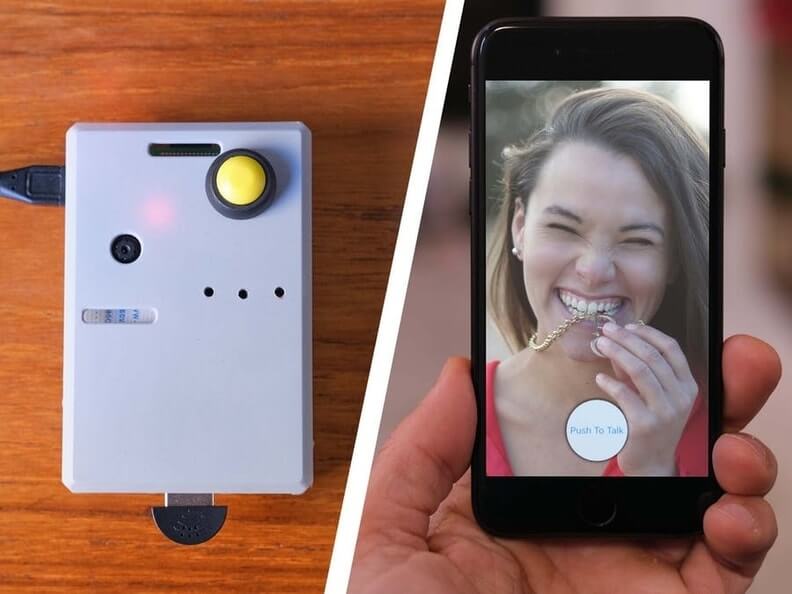
Talkiepi
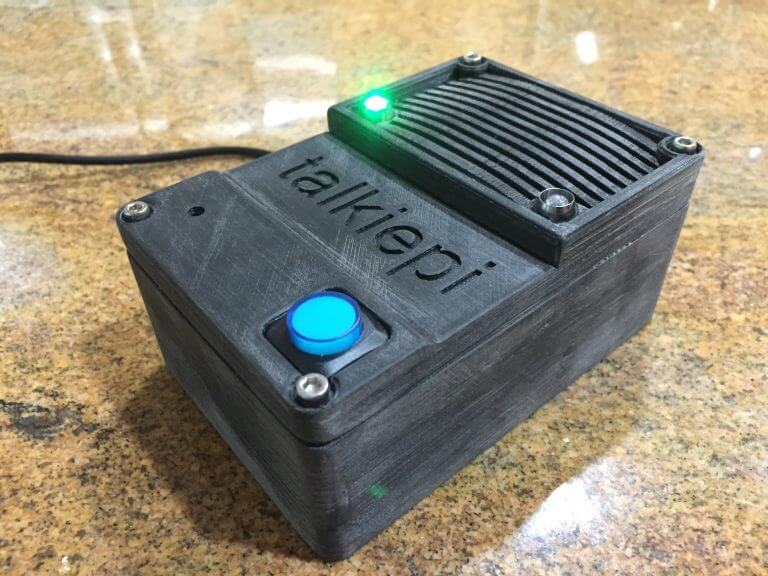
The next exciting 3D printing project on our list is Talkiepi. This single-button walkie-talkie runs primarily on Mumble. Daniel Chote, a New Zealand native, decided to build a walkie-talkie for his child by himself.
He used a few 3D printed components, USB speakerphone, Raspberry Pi 3, LED, GPIO header connector, nuts, and bolts to create this simple and easy-to-use the device.
For your convenience, Daniel has provided all the files needed for 3D printing and building the Talkiepi. If you do not have a 3D printer, you can use any tin or Eggo box that is easily available.
Uses:
- It is ideal for children to use it as their phones to communicate with their friends over Wi-Fi.
- The push button with a built-in LED enables you to operate and control the walkie-talkie.
- It can be used as an easy means of communication by professionals.
- Low maintenance
- Simple to operate
- Safe for children use
- Requires Wi-Fi connectivity
PiRate Radio
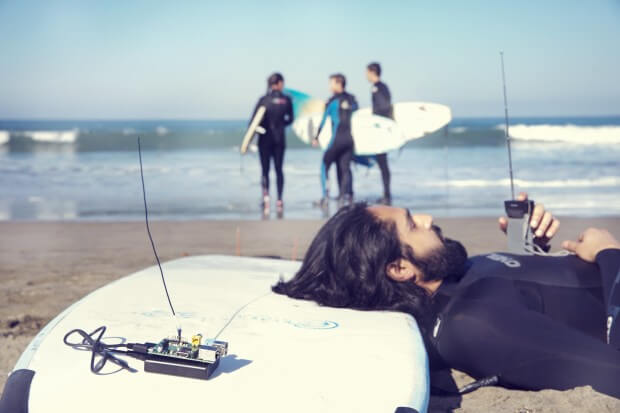
You can also convert your Raspberry Pi into a powerful radio transmitter by simply following the guidelines thoroughly. It requires very few materials. These include a board, SD card, and a power source.
The radio is primarily based on PiFM software that is available online for free. All the Pirate Radio scripts and files can easily be downloaded. The frequency of Raspberry Pi’s broadcast ranges from 1 MHz to 250 MHz It is ideal to keep the frequency between 87.5 to 107.9 MHz to avoid interference with the licensed broadcasters.
Uses:
- It can be used to broadcast your voice or music over a short distance.
- It has enough range to cover your home, bike parade, silent disco, or DIY drive-in movies with a proper antenna. It is also best for educational use.
- To safely use it either print or buy a 3D printed case for the board.
- Easy to build
- Enough frequency to cover your locality
- Portable
- Not require much wiring
- It is offensive/illegal to interfere with local broadcasters.
Classic Mini NES
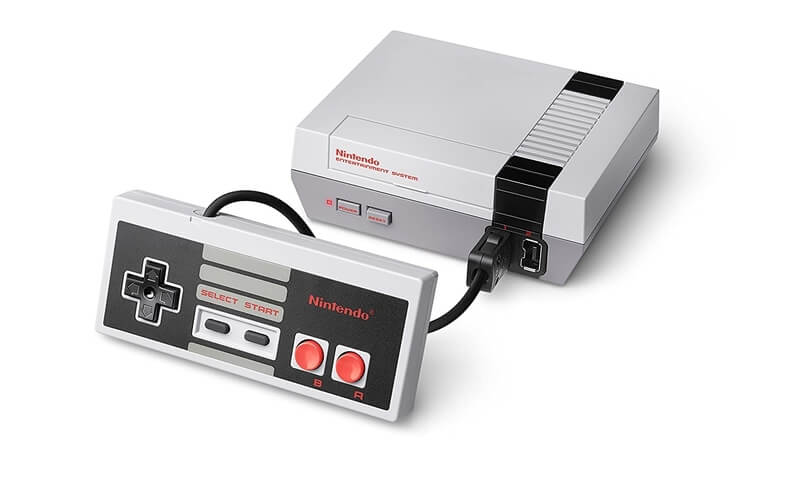
You might have played with the NES classic edition that has over 30 classic games from the 80s and 90s. These include Donkey Kong, the Legend of Zelda, Dr. Mario, PAC MAN, Mega Man, and many more. It is fun to play!
Now, you can make your own mini NES classic by using a Raspberry Pi, NES case (you can either 3D print it or buy one), and the free Retropie emulator. With Raspberry Pi 4, you can also run those games that were previously not possible as it offers fast processing speed and great performance.
Uses:
- It is ideal for children who are interested in computer and indoor games.
- Best for those who love to play NES games.
- Fun to make and play with
- Free old school games
- The software is easy to install.
- Customizable sleek design
- Not suitable for Arcade games
Quadcopter
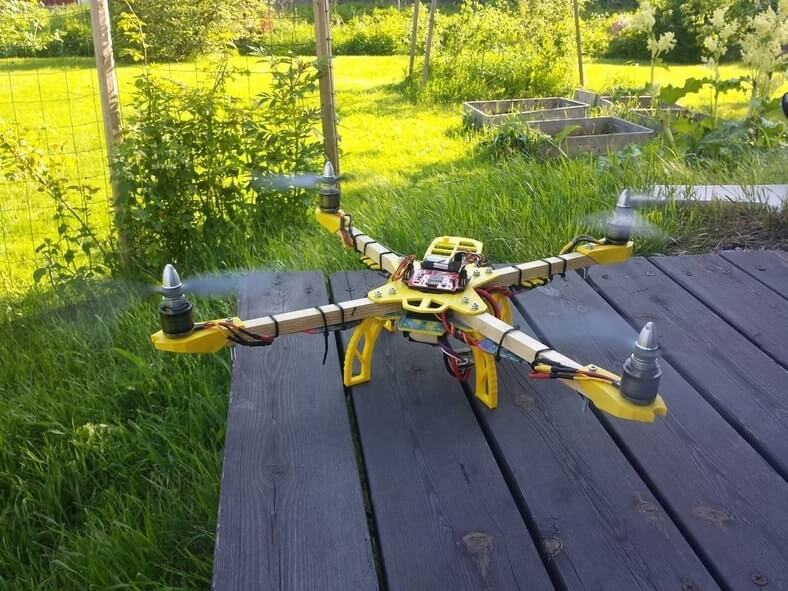
Willing to build your quadcopter? You can use the Farlig 550 Modular Quadcopter model as your project. It requires a Raspberry Pi, motors, 3D printed parts, and a Pi camera for live aerial telemetry.
All the files needed for 3D printing and building the quadcopter are available online for free.
Uses:
- It is ideal for aerial video recording, mapping and surveying, and geographic/ real estate photography.
- It is great for recording motions and filmmaking by students and hobbyists.
- Portable
- All files are available for free
- Customizable
- Best for short film making
- Frequent updation
- Hard to build
Laptop
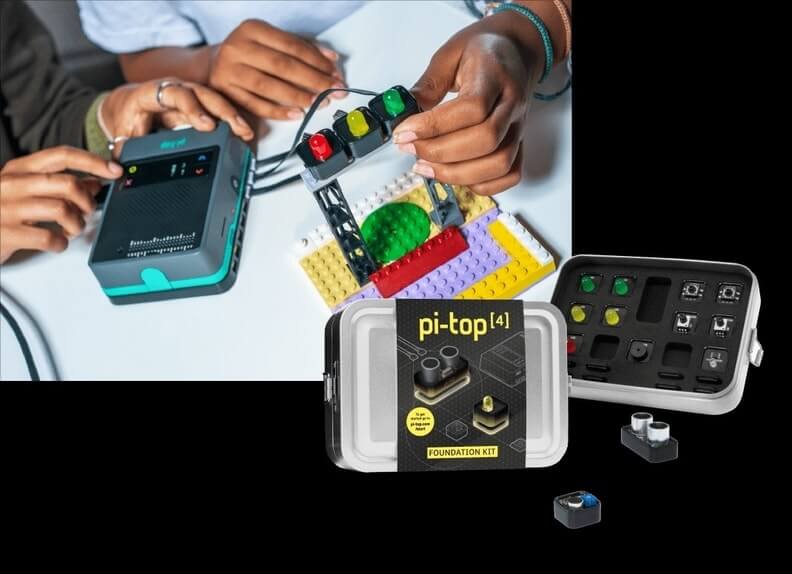
Do you wish to build your laptop or computer at your home? If yes, then Pi-Top came up with great DIY kits that contain a range of components, which include Raspberry Pi, LED screen, buzzers, speakers, wires, and other 3D printed parts. You can assemble your laptop or desktop by simply following the steps carefully.
Pi-Top comes with a Pi OS that gives access to a lot of applications. These include Microsoft Office, Scratch, Minecraft, 3D printing software, and many more.
Uses:
- It supports STEM-based learning and is designed for all age groups. It enables you to learn computing, programming, and how computer hardware is built. Thus, it is ideal for schools and learning institutes.
- You can use your imagination to design, code, and create your own laptop or computing device.
- Easy to assemble
- Great for STEM learning
- Highly cost effective
- Need a little technical knowledge
Pip Boy
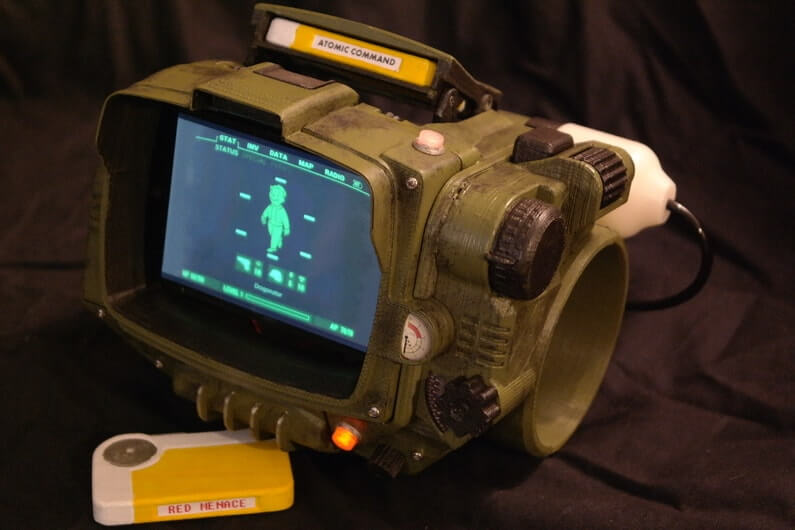
The Fallout 4 Pip Boy Edition is exceptional. It sold out just within a few hours of its announcement. Instead of spending $350 and waiting for delivery, you can now make it to your home. It can be highly customized.
The original Pip Boy was designed to operate with a smartphone only. However, the model made by Yvette De Haas is well adapted to Raspberry Pi. He made few changes to the original design.
It has more buttons on the right instead of the left, and a tape player on its top. It is designed to hold most smartphones. Thus, there are three versions available for you to download that differ in size only.
Uses:
- It is the ultimate gadget for Fallout fans.
- It can be used for various purposes by tweaking its functions a little.
- Customizable
- Fun to use
- Wearable
- Detailed user guide available
- Hard and needs experience to be built.
Google Glass
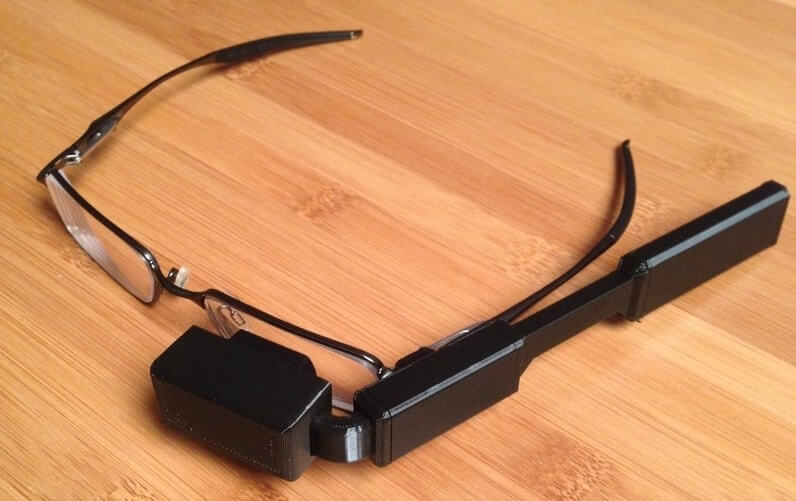
Adafruit came up with a project that converted your glasses into a ‘Google Glass’. It is a mini-computer that can be mounted to the frame of any prescribed glasses or sunglasses. It is made with a Raspberry Pi Zero, NTSC/PAL video glasses, a mini wireless USB keyboard with a touchpad, and a few printed parts.
The original Google Glass was released in 2013. It was a smart small computer attached to the frame of a pair of glasses. It was operated either through a touchpad or voice commands.
It was also equipped with a front view camera that was used to take pictures and make videos. The Adafruit Google Glass version works in a similar fashion but does not include a camera.
All the files that need to be 3D printed and tutorials to build it are available on Adafruit’s website.
Uses: You can use it to watch impressive videos from anywhere. It could be while lying in your bed or sitting comfortably on your sofa/desk chair.
- Mini computer
- Portable
- Low maintenance
- Customizable
- Banned in many places
Security Camera
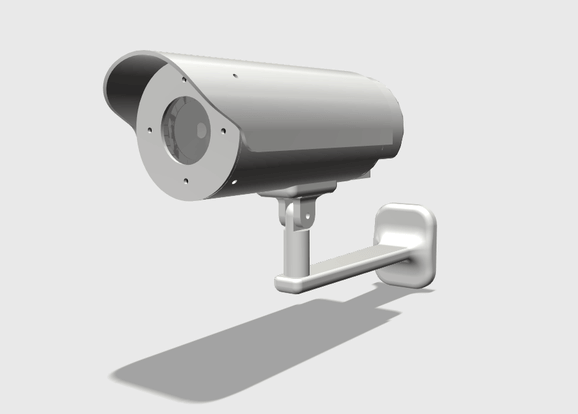
Purchasing and installing a security system with cameras at your home or office is always expensive. It costs you around $1500 for the devices and installation only. Moreover, you have to pay monthly fees on top of it. Therefore, it is better to build your own smart security system by using Raspberry Pi Model B.
Besides Raspberry 4, you will need RPI Image software, a power supply, a Wi-Fi adapter, screws, lens, and a few printed parts. RPI image software is easy to download and use.
Uses:
- It is ideal for industries and large firms to build their own security cameras as it will be cost-effective.
- You can also add facial recognition, motion tracking, and other features to enhance your security system.
- Cost-efficient
- Customizable
- Easy to build
- Require time to build and install.
Robot
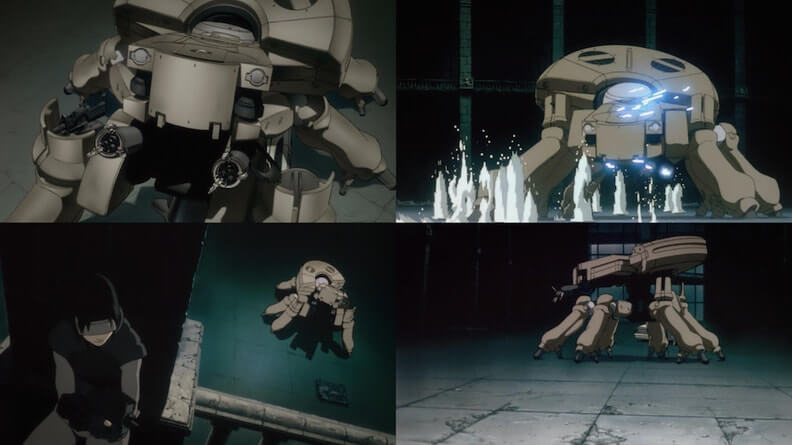
Inspired by the tank from the last battle in the ‘Ghost in the Shell’ movie, which is quite interesting, you are now able to create a robot that resembles a spider.
The Ghost in the Shell is a Japanese animated film series that revolves mostly around the character of Major Motoko Kusanagi and the crimes that she had to resolve.
Paulius Liekis, who belongs from Lithuania, had produced the replica of the T08A2 / R3000 spider tank. It uses Raspberry Pi and is controlled through a PlayStation controller. You can follow his instructions to build your own robot.
Uses:
- Captures the interest of children and adults
- Best for face tracking
- Great for students to learn about robotics and computer programming
- Ideal for Stem learning
- Inspired by the ‘Ghost in the Shell’ movie
- Encourage Stem learning
- Track faces
- Can be customized
- Hard to build
Desktop PC
Adafruit came up with another inspiring project that enables you to build your own portable 10 inches Raspberry Pi Desktop PC. It will cost you the same as a dedicated Linux box with a decent-sized screen. However, building a Desktop PC yourself is better than buying a cheap deal.
The list of all things required for building it along with detailed instructions and files for 3D printing are available on Adafruit’s website.
Uses:
- You can mount it anywhere and design custom brackets to easily tailor it to any configuration.
- Ideal for traveling since it is portable.
- Portable
- Can work like both a PC or a tablet
- Great for traveling
- Serves as a mini-computer
- Cost similar to that of DIY deals available online.
Retro Gaming Station
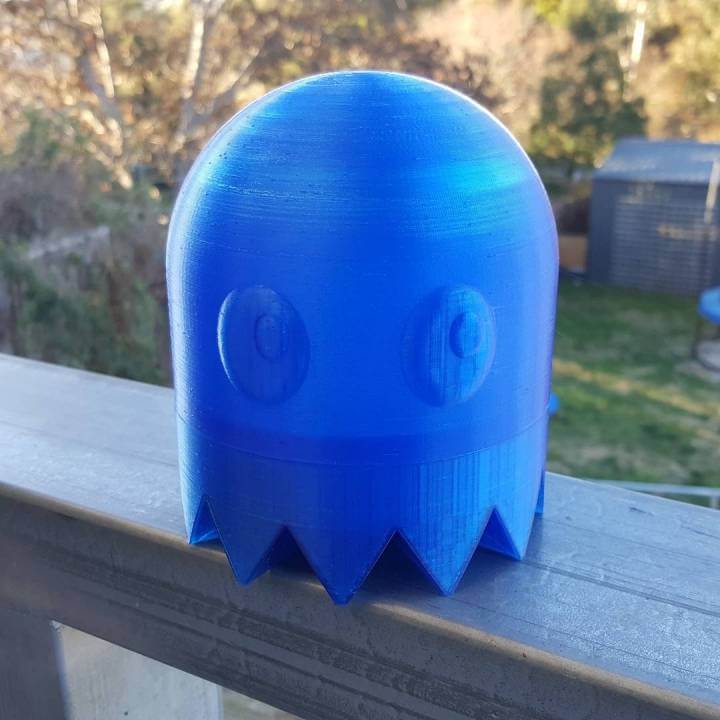
Another gaming project that we included in our list for you and your kids is the making of ‘Retro Gaming Station’ inspired by PAC MAN. It is easy and fun to do. As you just need to 3D print the files available online, install the RetroPie, put the Raspberry Pi 3 inside the case, and start playing.
The case can be printed in different colors and has only two parts. It is designed to mount the Pi upside down for easy SD card access. There are large air vents at the bottom for air circulation.
Uses: It is ideal for those who love to play games with friends and are interested in 3D printing. You can add some color to the eyes of PAC MAN to give it a professional look.
- Customizable
- Game project
- Light
- Support free
- Easy to 3D print two parts
- Not suitable for high-resolution games
Skycam
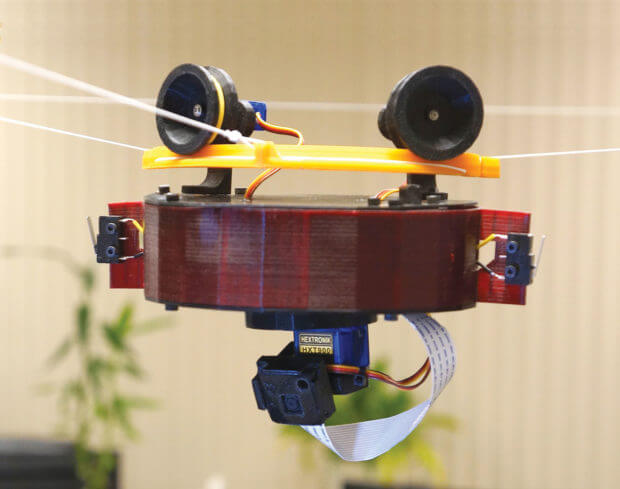
For those who cannot afford a drone, they can now build their own skycap by using Raspberry Pi and a 3D printer. It travels on a monorail of string or rope and can turn corners. It has a camera that can slightly tilt to stream live videos and is controlled by a smartphone or any browser.
It is surely one of the best DIY Raspberry Pi projects that you can complete at home. This project is selected from Make. The detailed instructions on how to build it along with 3D printable files are provided on its webpage.
Uses: It is ideal for those who are interested in robot building. It is great for Stem learning.
- Live streaming
- Controlled by smartphone
- Cannot mount upwards itself like a drone.
- Needs a rail of string to travel
3D Scanner
This is a super complicated and different project. It is not necessarily to be built with 3D printed parts but you can use them for your ease. This project will help you to learn to build a 3D scanner by using Pis, cameras, SD cards, power supplies, and Led lights. The tripods and mounts could be 3D printed.
It is the most challenging project on our list. You have to assemble a lot of components in order to make it work properly.
Uses:
- It is ideal for those who love challenges.
- The 3D scanner enables you to scan any object. You can even scan an adult person.
- These scans can be used for 3D printing or rapid prototyping.
- Step by step guide available
- Scanned files can be used for 3D printing.
- Difficult to set up hardware
Telescope
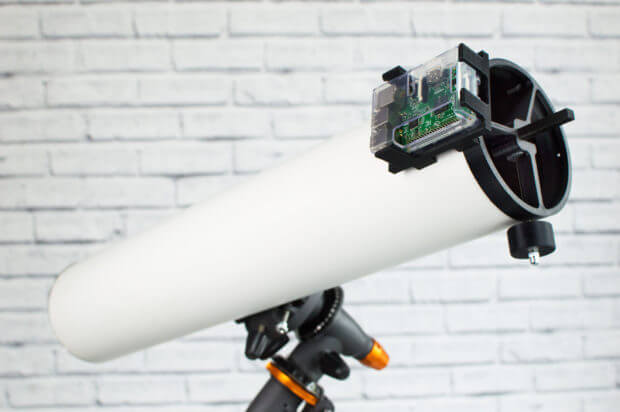
The University of Sheffield and Alternative Photonics came up with a project PiKon for the Festival of Minds in September 2014. It captured the interest of a lot of people.
Using two low-cost technologies, 3D printing and Raspberry Pi, you can also build your maestro camera telescope at home by carefully following the instructions. They also provide makers with 3D files and complete kits that include 3D printed components and lenses that you can use to build the telescope.
All the parts of the telescope are 3D printed except for the primary and secondary mirrors. Use a Raspberry Pi camera as it has light sensors.
Uses:
- This project is ideal for those who are interested in astrophotography and new technologies.
- You can get a closer look at the moon due to the 120X magnification factor.
- Best for Astrophotography
- Cost-efficient
- DIY kit available
- Difficult to assemble and mount
Game Boy
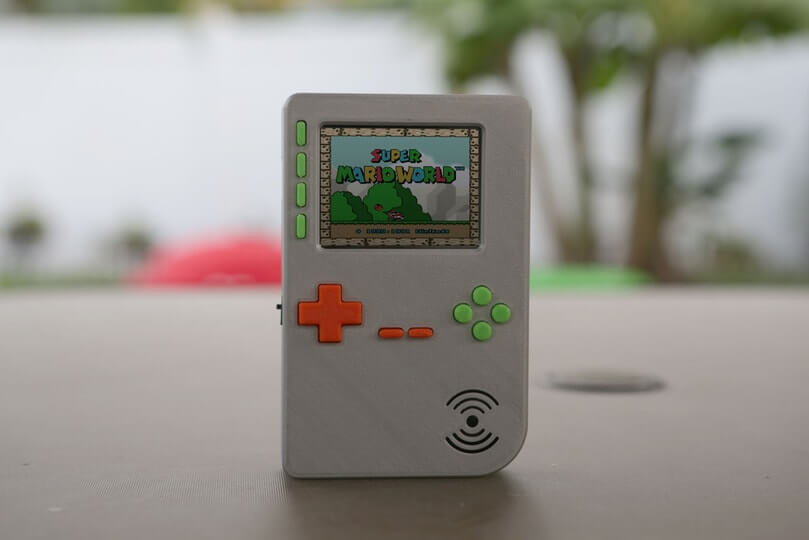
Another project for game lovers, it uses Raspberry Pi and is a successor of PiGRRL. It has a bigger screen, more buttons (i.e. D-Pad, A,B, L, R, X, Y pause, start and 4 extra buttons on the PiTFT), small audio speaker and amplifier. It is easy to build with no tedious button wiring tasks.
The project is aimed at beginners though it requires a lot of soldering, wire tinning that can take up to a weekend to construct. All the necessary steps to follow when building the game boy are present on Adafruit webpage.
Uses: This project enlightens those who love programming, new technology, and playing games. It is great for hobbyists and beginners.
- Supports Stem learning
- Easy to assemble
- More features
- Consume a lot of time
Microscope
Students in the OpenLab of the University of Cambridge developed a microscope that runs on Raspberry Pi. They aim to develop low cost and open access scientific tools for education and research purposes.
The traditional microscope costs between $15000 and 80000. It is now simple to replicate and build microscopes as all the instructions are easily available online.
The supporting frame of the equipment is built by the OpenBeam technology. All other parts have to be 3D printed. You can easily reproduce the whole system without any workshop by viewing the designs available online.
Uses: It is cost-effective for scientists, institutions, and laboratories to produce their own microscopes rather than purchasing those traditional ones.
- Cost effective
- Detailed instructions available online
- Precise
- Use open source hardware and software
- Difficult to build
Dashboard Navigation
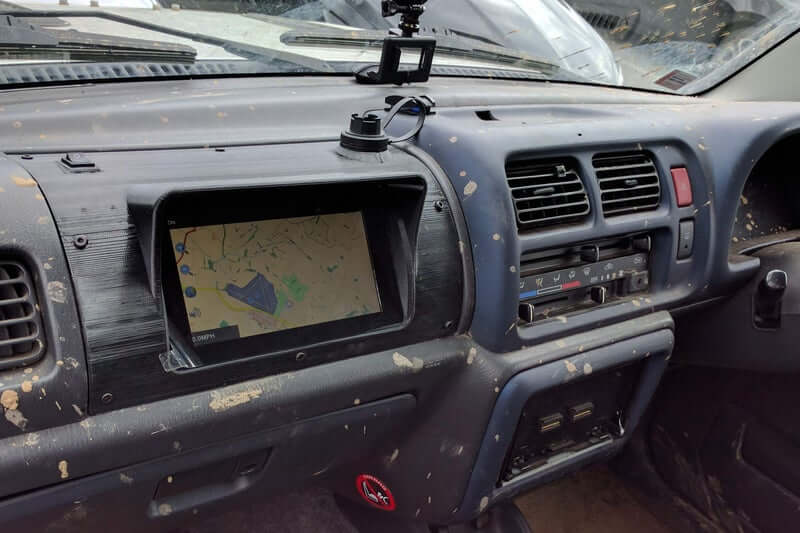
Gregory Holloway built an in-car navigation system for his old Suzuki by using the latest low cost technologies. These include 3D printing and Raspberry Pi 3. Before that, he used to use his laptop as his navigation guide. He already had mastered a lot of Raspberry Pi projects before undergoing this project.
All the dashboard components are 3D printed and installed in the passenger airbag compartment. He used a mini wireless keyboard to type in his final destination for navigation. He has provided all the detailed building instructions and 3D files for maker’s assistance.
Uses: Best for the cars that have no installed navigation LCD system. Gives a more professional look.
- Cost effective
- Best for old cars that lack a navigation system.
- Difficult to make.
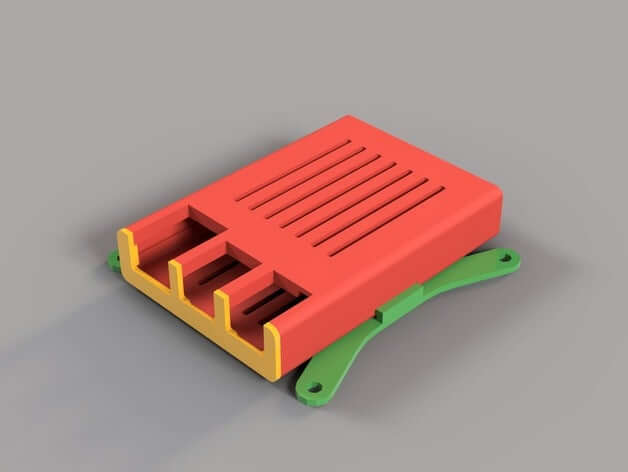
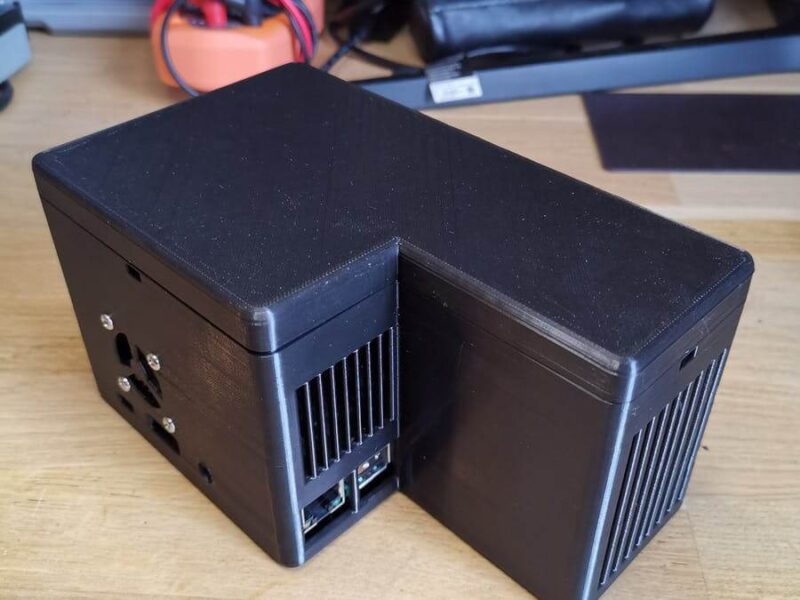
Developer’s Case
If you are an electronics developer, then it is important to ensure that all the components are fixed in their place. This ensures that they are not sliding against each other to avoid short circuits or any damage.
In cases where there is a single electronic board, it is easy to fix it but where there are multiple boards you need modular support to fix them. The ‘Custoblocks’ are ideal for Raspberry Pi and Arduino. It is extendable and keeps the devices safe. It can also house breadboards. You can 3D print the Custoblocks for your projects.
Uses:
- It keeps the electronic devices tidy and enables easy wiring.
- Best to keep electric boards safe.
- Customizable
- 3D print files available
- Extendable
- Modular
- Not suitable for a single board.
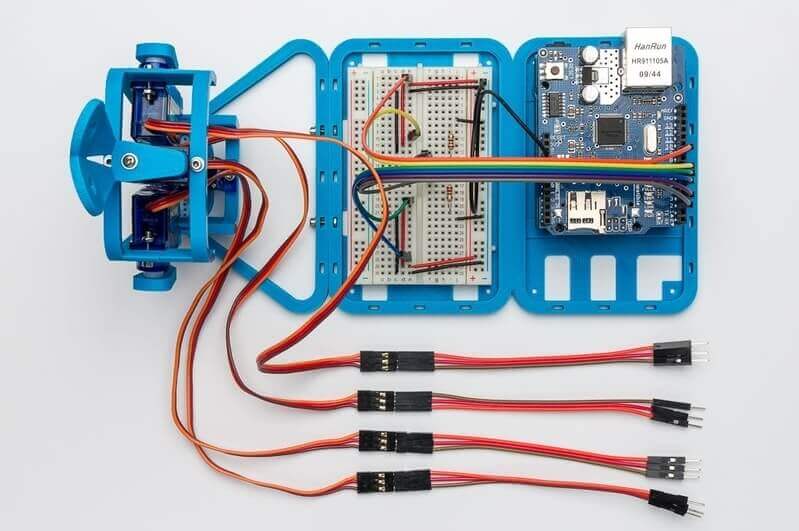
Robot Tank
The MR 4 robotic tank was built by Tim Clark, who is a Thingiverse user. It uses Raspberry Pi and most of its components are 3D printed. It is also designed to be used with external Arduino and several other servos.
All the files to 3D print and instructions to build are available online.
Uses:
- It is ideal for those interested in robot building and engineering.
- Great for students to learn about robotics and computer programming.
- Ideal for Stem learning.
- Develop interest of students and adults
- Can overpower using other servos.
- Difficult to build
Server Farm
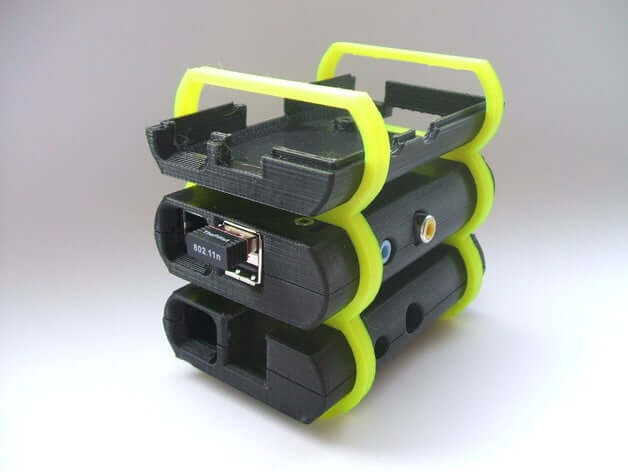
The stackable cases were designed and built by a thingiverse user, Nakto. It is like a real pie for Raspberry Pi. All the cases and frames can be easily 3D printed and stackable.
Uses: These enable you to stack all your little computers in one place. You can stack as many boards as much you want by 3D printing more cases.
- Extendable
- Easy to 3D print
- Can make a cluster of little computers
- No vent holes for air circulation.
Smart Clock
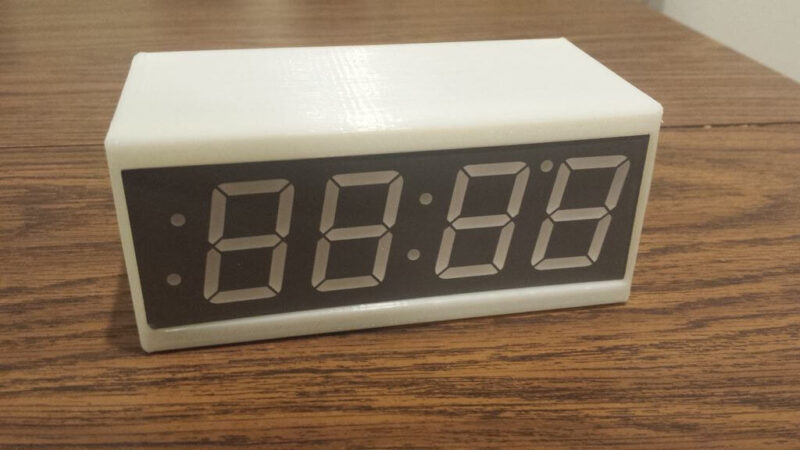
Robert Sheldon designed and built a smart clock that features more functionality than a normal clock. It runs on a Raspberry Pi Zero and uses the internet to operate. It is easy to build with little soldering.
The clock has a 1.2 inches 7 segments display in any color from Adafruit and most 3D printed parts.
Uses:
- The clock automatically adjusts to time zones according to its IP address.
- It can also track your latest Amazon orders.
- In addition, it informs you about the time when the next subway train will arrive.
- More advanced clock
- Automatic time adjustments
- Easy to build
- Color customization
- Requires internet connectivity.
An Internet of Things Printer
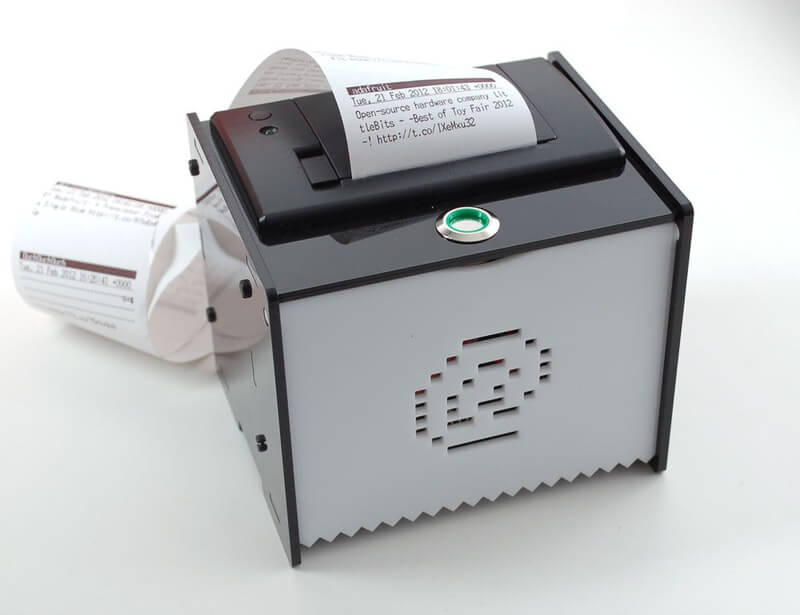
This is one of the interesting projects. The “Internet of Things” refers to the effective connection between the physical object and the internet world. We will build an Internet of things mini printer. It is connected to the internet and shares all the information by printing out.
The device does not wait for your commands. It acts as an active agent by anticipating your needs and pulls out the information from the internet. It uses Raspberry Pi and runs on the Linux operating system. It looks tidy with wireless networking and can easily handle graphics.
Uses:
- Update you with a daily forecast before you head out.
- Provides you with a puzzle to solve while riding on a subway.
- Offers you with tweets according to your interests.
- Portable
- Neat and tidy with no wires lying around
- Compact
- Requires internet connectivity.
Apple IIe
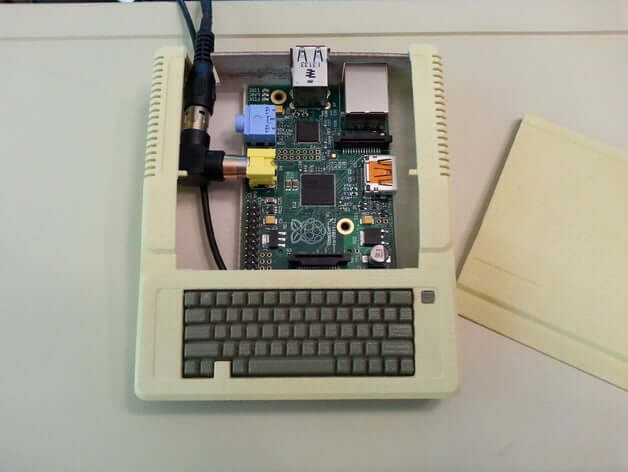
Apple IIe was the third model of the Apple II series. It was the most successful personal computer that Apple produced. It was launched in January 1983 with a selling price of $1395.
Raspberry Pi can easily imitate any computer from the 80s. Therefore, we decided to rebuild the Apple IIe by 3D printing its case. This project was initiated by Charles Mangin. He painted the components to exactly resemble the original Apple IIe design.
Uses: Best for those who are fond of historic things and vintage computers. It is ideal to learn how computers were designed and built initially.
- Easy to build
- Huge build size
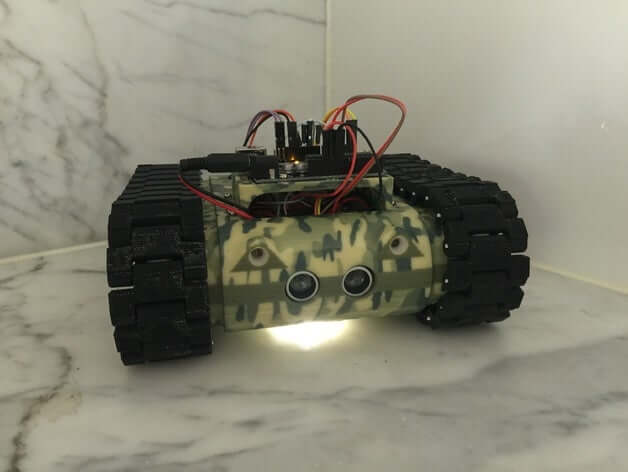
Cam Tank
Do you love tanks and want to build one? Cam tank is a super exciting project to go for. Though it challenges a lot of your skills, it is worth building it. It uses Raspberry Pi and most of its components are 3D printed.
The tank is remotely controlled. It can drive on its suspended wheels, rotate its tower and shoot 6mm bullets from a tilting gun. It also streams a live video to the controller so you can control it while sitting on your sofa or lying down on a bed.
Uses: It is an ideal project for you and your kids. You can add more features to it that include extra guns, self-patrolling sensors, a better driving system, etc.
- Remote controlled
- Ideal for children shooting games
- Challenge a lot of maker’s skills
- Difficult to build
Pokemon Finder
Crazy about Pokemon Go. Well now, you can use Raspberry Pi to find your Pokemon without the need of keeping your phone open and checking it after every ten minutes especially when you are in a class or attending a meeting.
This great idea was introduced by the Ruiz brothers when there was great hype about Pokemon Go. It uses Niantic Pokemon API software. The case can be 3D printed in any color that you want.
Uses: It notifies you when Pokemon is nearby. The first LED turns on when a common Pokemon appears, the second lights up when a rare Pokemon is near and the third lights up when a legendary Pokemon comes.
- Helps to catch common, rare, and legendary Pokémon
- Portable
- Customizable
- Illegal
- You could possibly get banned.
Computer Controlled Plotter
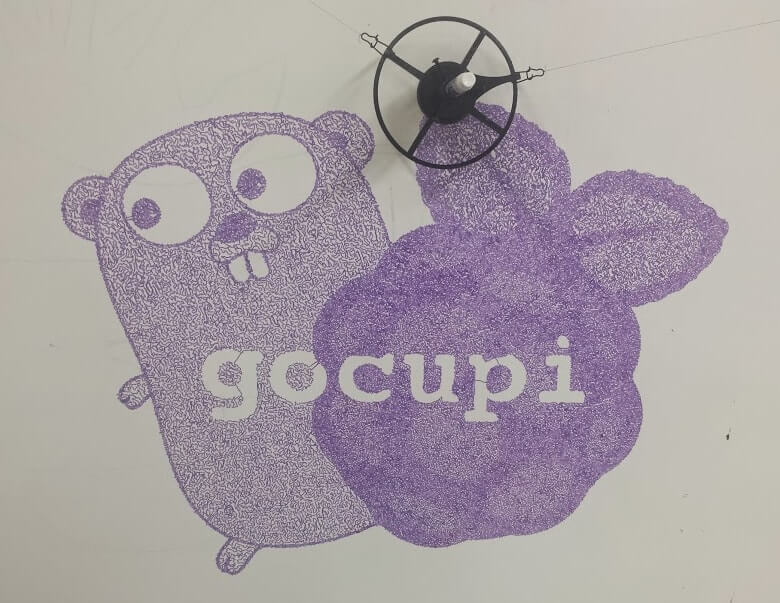
You can turn Raspberry Pi 3 into a plotter through this project. It was inspired by the drawbot and polar graph projects and is designed through the assistance of Dollas Makerspace.
Gocupi is different from other plotters as Raspberry Pi does all the processing and controls two stepper motors that are attached to a surface through suction cups. The steppers move the pen that is attached through two strings, to draw the image on any vertical surface that you want. You can 3D print the files available online to rebuild this plotter.
Uses:
- Enables you to plot complex patterns and images that were not previously able with a microcontroller.
- Best for illustrations and presentations.
- Ideal for schools and other educational institutes.
- Supports complex images
- Smooth drawing
- Difficult to build
Camera Monster
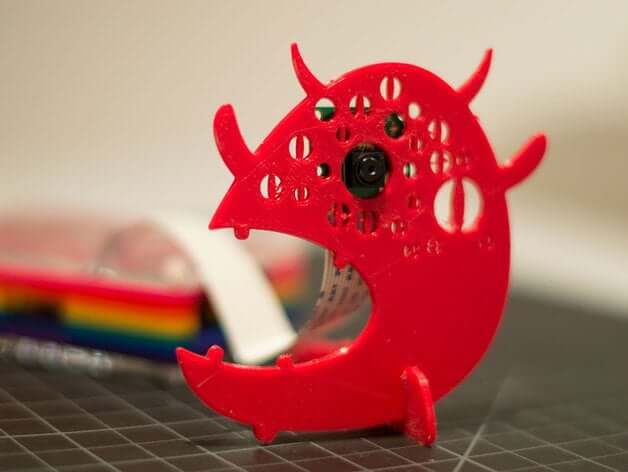
Guess what! You can now easily 3D print a monster to mount your Raspberry Pi camera. Jerome, a Thingiverse user, came up with this interesting project. After looking at the complex designs available online, he decided to create his own.
The camera monster is a simple two-piece design. The camera is screwed in an opening using two holes on the sides of the lens. In addition, there is room for the focus light.
Uses: It is great for kids to learn about new technologies in an exciting way.
- Simple 3D design
- Easy to print
- Fun to build
- Practical
- It is still a work in progress. Therefore, issues might occur.
TV Mount
Now let us build a TV mount for your Raspberry Pi. There are numerous fascinating Vesa Mounts designs for Raspberry Pi available online. However, this one by Bolding Maker enables you to attach the Pi with your TV.
The TV mount is a simple four-piece design that you can easily 3D print.
Uses:
- You can use it as a media server on your TV set that can be run on free Kodi software.
- You can make it in many different colors.
- Easy to print
- Simple 3D design
- Practical
- Only for Pi 3, 2 and B+
OctoPrint
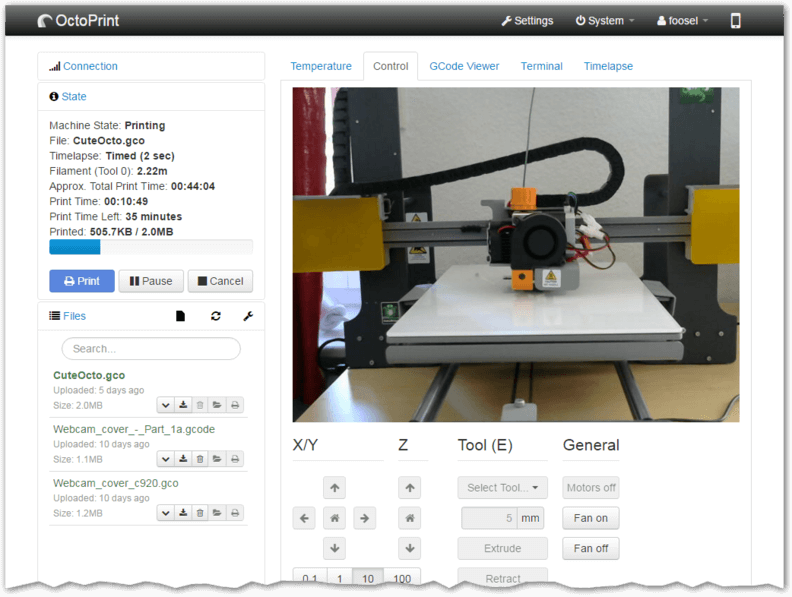
Octoprint is a great software for enhancing the performance of your 3D printer. It is an open-source program that, if installed on Raspberry Pi, will enable you to remotely monitor your printer, consult an integrated GCODE, embed a webcam feed, move the print head across all the axes, and control your current 3D print at all times.
Octoprint is easy to download and install on Raspberry Pi.
Uses:
- It offers a snappy web interface.
- Enables you to fully control and monitor every aspect of your 3D printing through a web browser.
- It is compatible with most of the 3D printers available in the market.
- Open-source
- Extendable
- Time-lapse recording
- Difficult to control multiple 3D printers at a time
- Does not indicates when the filament runs out
- Slicer plug-in works well with small objects only.
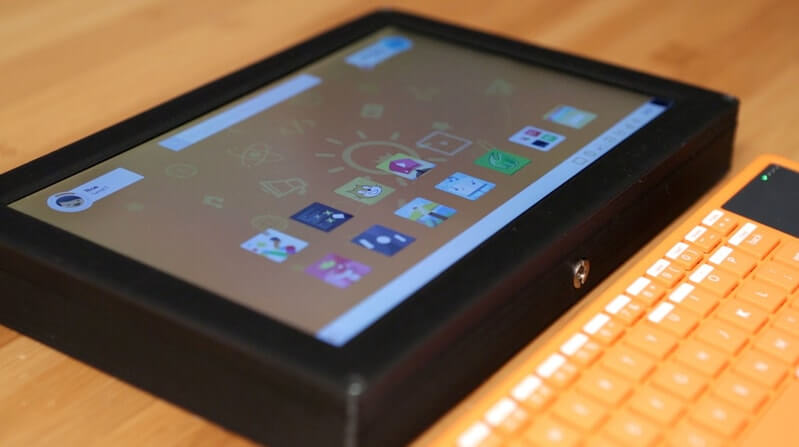
Cigar Box Pi
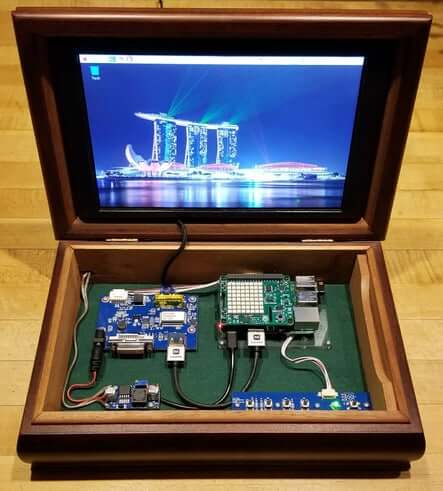
Do you have an idle cigar box lying around in any corner of your house? Grab it. It is time to build a mini cigar case laptop by using a Raspberry Pi. If you do not have a cigar box, do not worry. You can easily purchase it online or get it from a yard sale at a very cheap price.
You will need a 10.1 inches LCD screen as all the cigar boxes have almost a standard size. In addition, you will require an OSD, HDMI cable, LVDS Cable, a wireless keyboard, and a video controller to build it. All the detailed instructions are available online.
Uses: Great for those who want to build their own mini laptop that they can carry and use wherever they go.
- Portable
- Recyclable
- Environment friendly
- Compact
- Easy to build
- Not suitable for kids
Automated Cooling Control

What is cooler than automatically controlling the temperature of your home? This project enables you to remotely monitor the cooling system of your house regardless of your location. So when you arrive at your place, you are welcomed by a pleasant temperature inside.
This project was first accomplished by Teodora Bulea. She has provided detailed instructions on how to commence the project.
Uses:
- Enables you to control the fan of your air conditioner via Gmail.
- All you have to do is just send an email via Google and the fan will automatically start to cool down the room’s temperature.
- Once a certain temperature is reached, the fan will stop by itself and you will receive an email.
- You can request the temperature of your room at any time.
- Remotely controlling the indoors temperature
- Easy to commence the project
- Remain informed about the indoor temperature all time.
- Requires internet connectivity.
Matrix Touchscreen Keypad
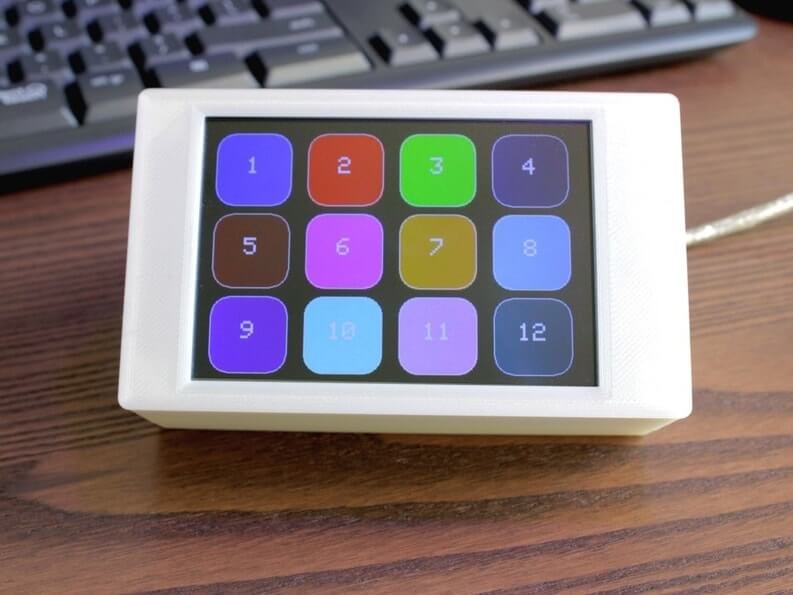
Matrix keyboards are easily available but it is great to build your own by using a Raspberry Pi Pico and a touchscreen. It is simple and cheap to make the matrix touchscreen keypad at home. It runs on Arduino IDE. You can either 3D print or purchase the case required for it.
Uses:
- Matrix keyboards are best for controlling your PC, cell phones or tablets.
- It speeds up your workflow and enables you to meet deadlines.
- Portable
- Simple design
- Customizable
- Speeds up the work
- Scalable
- No wireless connectivity.
Solar Powered Bitcoin Miner
Are you interested in the cryptocurrency thing but are worried about the amount of energy it consumes. It is said that Bitcoin mining utilizes around 110 Terawatt Hours per year of energy that is 0.55% of global electricity production. However, don’t worry now.
By using a Raspberry Pi with a Notecard Learn and a Pi Juice you can now build your own Solar Powered Bitcoin Miner with cloud-based reporting.
Uses: It is great for energy sustainability and cost-efficiency.
- Cost-effective
- Sustainable solution
- Fun to build
- Not as powerful as the traditional crypto mining machines.
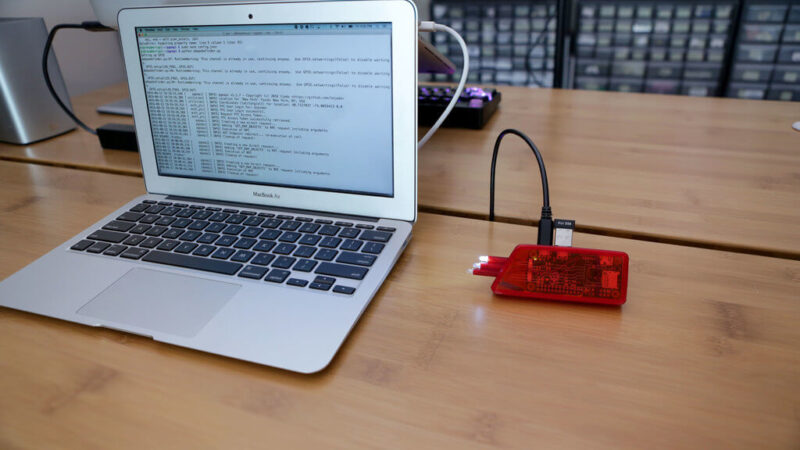
Laptop Connection
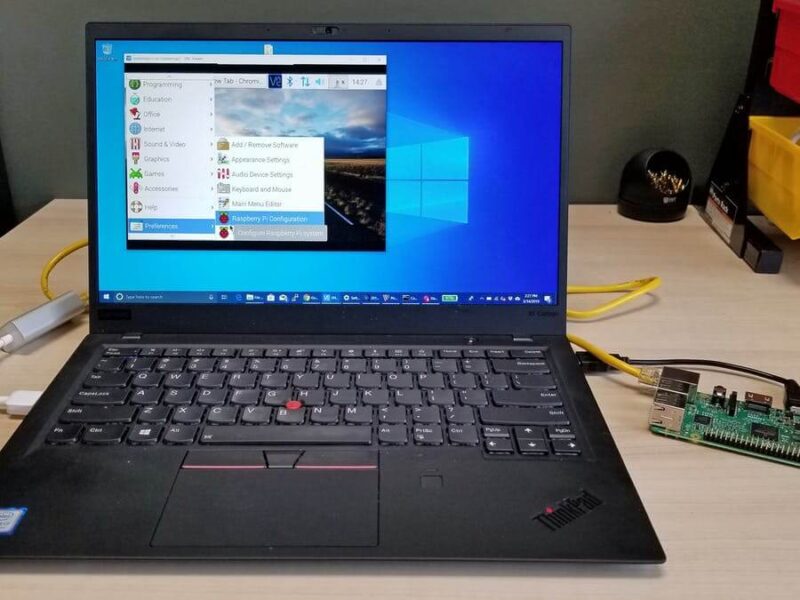
Raspberry Pi is considered to be a mini-computer but for project purposes, it requires an HDMI display screen. Most of us do not have access to it. Therefore, to solve this issue, this project enables us to easily connect our Raspberry Pi to our laptops or PC via Ethernet. We can now use the laptop’s screen and keyboard to control our mini computers.
Uses: Enables you to use the laptop’s keyboard, touchpad, and screen for operating Raspberry Pi by using a VPN server.
- Fewer accessories required
- Easily connects with the Laptop
- Requires Ethernet
Shutdown/ Restart Button
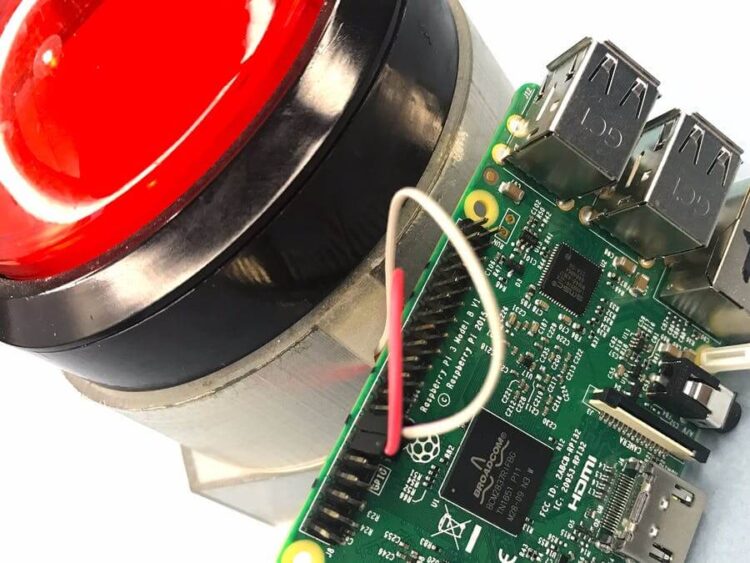
Are you building an installation project and do you want to shutdown or reboot the Raspberry Pi safely without using a keyboard? This is possible now by simply attaching a switch button to your Raspberry Pi by using jumper wires.
If you want the shutdown and reboots buttons separately, you can add another button too.
Uses: Shutdown or Restart your Pi without interrupting the software script running in the background.
- No need for a keyboard or mouse
- Shutdown or reboot the Raspberry Pi safely
- Do not disturb the installation script
- Prevents data corruption
- Short circuit if loosely wired.
Use any Display Types
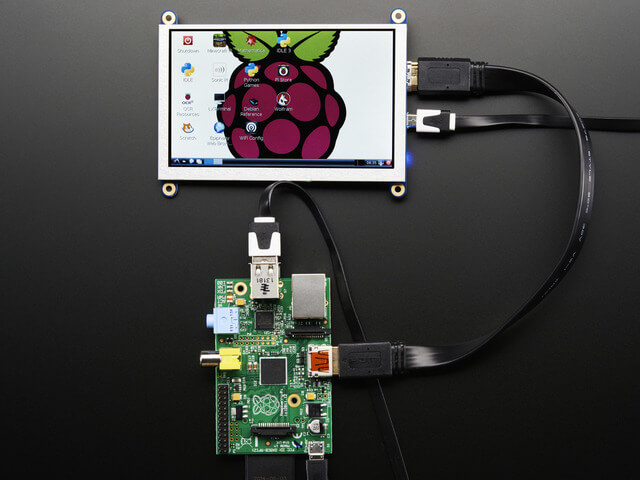
Rectangle display screens are too ordinary. This project enables you to use your Raspberry Pi with monitors that have weird display screens.
These include round displays, highly weird video projectors, head-mounted displays, or ultra wide-bars. It is necessary that they all have an HDMI input that easily connects to the Raspberry Pi.
Uses: It enables you to use any type of display screen for your projections or professional use.
- Easy to commence
- Exciting to use weird screens
- Does not apply to SPI, PiTFT, or DPI displays.
YouTube Boombox
In this project, we will build a lo-fi video player for YouTube. It will be powered by Raspberry Pi and uses Adafruit’s BrainCraft HAT. You need to 3D print the case order to house the Pi and fit in the speakers and a display screen.
The boom box is set to kiosk mode and randomly plays any YouTube music. It uses digital I2S to offer great quality stereo output. There are vent holes on the side of the case to enable air circulation.
Uses:
- Enables you to play YouTube videos and music.
- The built-in joystick allows you to change the channels and adjust the volume.
- The button next to the joystick allows you to stop and play videos.
- You can also use your headphones.
- Portable
- No keyboard or excess accessories required
- High-quality output.
- Very small display screen
A.I. Air Guitar
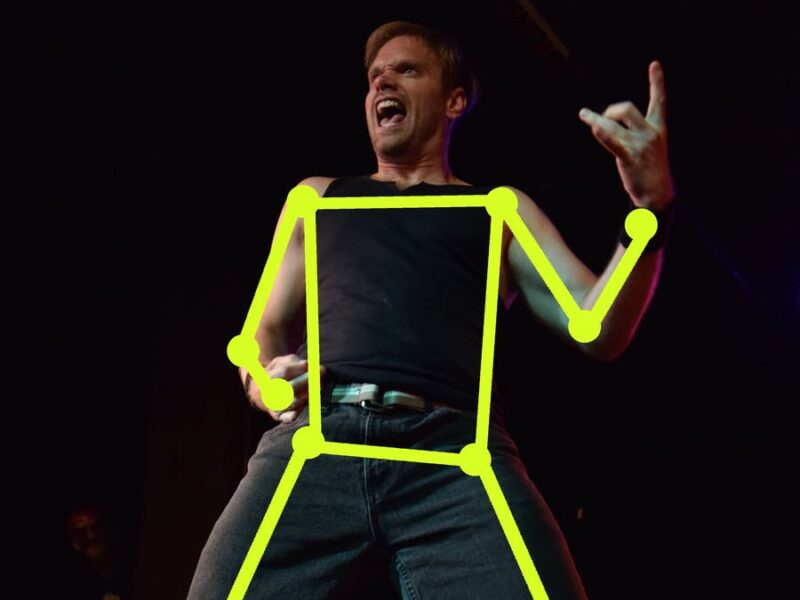
You can fulfill your lifelong dream of playing guitar through Artificial Intelligence. This project enables anyone, even inexperienced, to play air guitar by using pose estimation technology. The camera tracks your gesture and Raspberry Pi calculates your moves. It then compares it to the database and gives you a score accordingly.
Uses: It is ideal for those who want to become a guitarist but don’t know how to play it or their fingers hurt when striking the strings.
- No need to buy a real guitar
- Best for beginners
- Fun to commence
- Lacks experience of playing a real guitar
File Server
If you wish to have a cheap backup server, then you can use a Raspberry Pi to make a Nextcloud server. You’ll need a SATA hard drive for it. It is easy to build. You can also 3D print a case for your new server. The project is quite flexible and scalable.
Uses: You can copy and synchronize your data on the Nextcloud server.
- Compact
- Simple design
- Easy to use
- Takes time to store data.
Video Doorbell
Want to know who is at the door while sitting on your couch or lying down on your bed? This project enables you to build a smart two-way audio and video doorbell using a Raspberry Pi.
Uses:
- When someone rings the doorbell, a push notification appears on your phone screen.
- You can talk to the person sending outside through your cell phone.
- You can also view their gestures.
- Compact and sleek
- Smart doorbell operation
- Customization
- Notification can only be sent by Mac.
Photo Frame
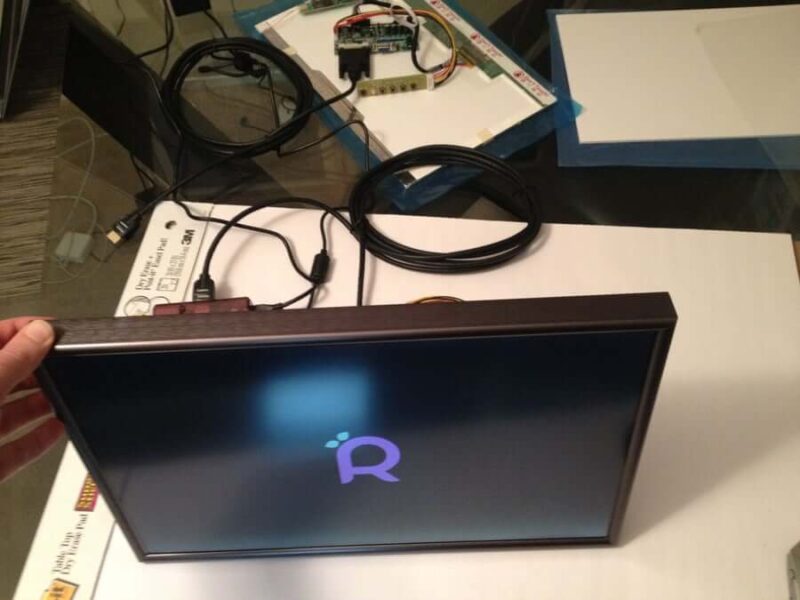
This project is ideal for beginners. It is a digital photo frame that is easy to assemble and sleeker. You only need to mount an LCD display screen and Raspberry Pi to a picture frame, connect it to Wi-Fi and enjoy viewing your beautiful memories.
Uses: Enables you to view your pictures digitally on a photo frame.
- Sleek design
- Easy to build
- Need Wi-Fi connectivity
Zoom Meeting Station
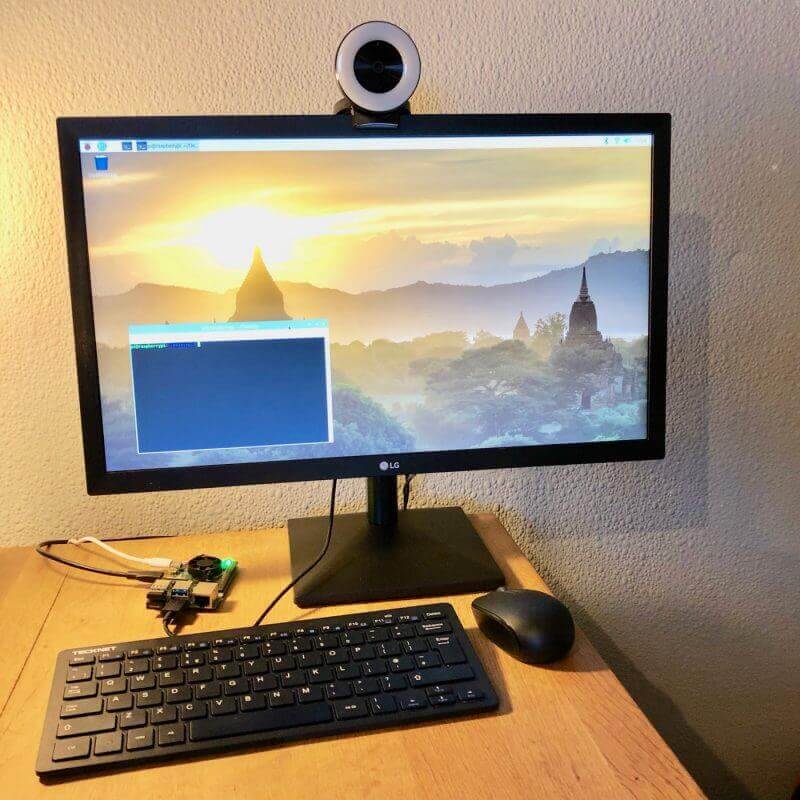
Are you working from home these days and unable to attend a virtual meeting due to a faulty computer or laptop? Then don’t you worry. You can now build your zoom meeting station by using Raspberry Pi. All you’ll need is a keyboard, webcam, and a display screen.
Uses: It serves as a replacement or secondary desktop computer when working from home or at the office.
- Works fine as a desktop computer
- Best for work from home
- No need for a complete computer set
- Requires update
Air Quality Monitor
Living in a densely populated and polluted area where air quality is a major concern. This project helps to develop a device while using Raspberry Pi 4 to measure the air quality both outdoor and indoor.
Uses: You can obtain easy-to-read graphs on air quality based on the read data.
- Graph available for comparison
- Accurate data
- Internet connectivity required
Very Slow Movie Player
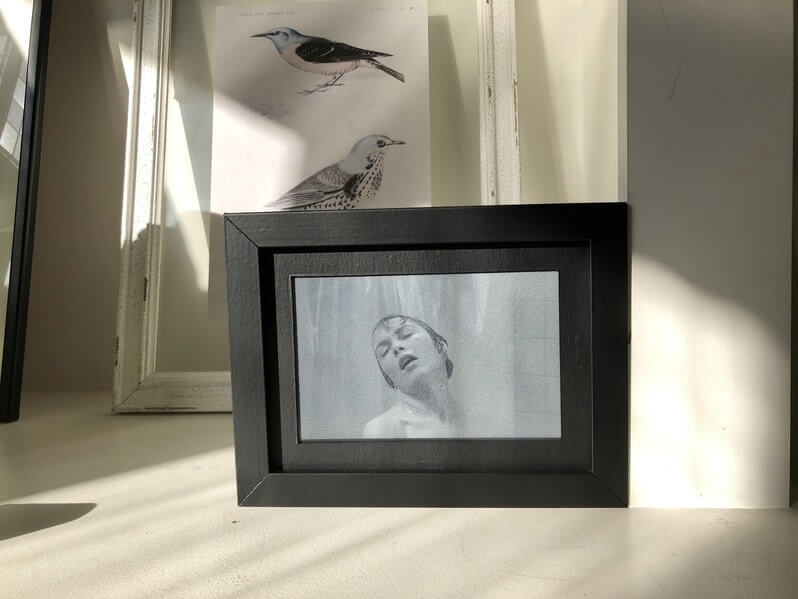
Ever wish to watch your favorite movie scene for hours? This project enables you to build a device that plays each movie in very slow motion on an e-paper display. It is powered by Raspberry Pi and serves as a piece of art on the corner of your desk.
Uses: Enables you to watch your favorite scenes in very slow motion.
- Resembles a photo frame
- Best for beginners
- Great lockdown project
- A scene could last for about two complete days.
Streaming Device
Don’t have a Chromecast or Apple TV to stream videos on your TV? You can now stream media on your TV using your android smartphone. All you need is a Raspberry Pi 3 Model B, HDMI cable, and free software.
Uses: Enables stream YouTube videos as well as local audios and videos using an android application.
- Alternative to chrome cast
- Easy to commence
- Does not support the cast button.
Office Software
Now you don’t have to pay a penny for accessing office software. Simply download LibreOffice on Raspberry Pi 4 and start working. It is easy to use, open-source, free, and compatible with Microsoft office.
Uses: Have access to not only a spreadsheet, word processor, and presentation software, but also freely use formula editor, database, and diagram software.
- Free
- Easy to download
- No technical support
Minecraft
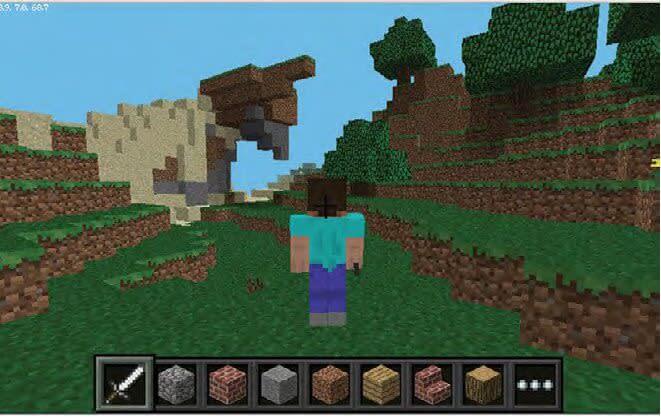
Gamers, children, and teachers love playing Minecraft. It is an alternative to Lego bricks that enhances your creativity and 3D skills. Its free version runs smoothly on Raspberry Pi 4.
Uses:
- It is great for you and your children for Stem learning.
- Experienced coders use it to hack data and systems.
- Fun to play
- Easy to download
- Can be used for illegal hacking
Learn JavaScript
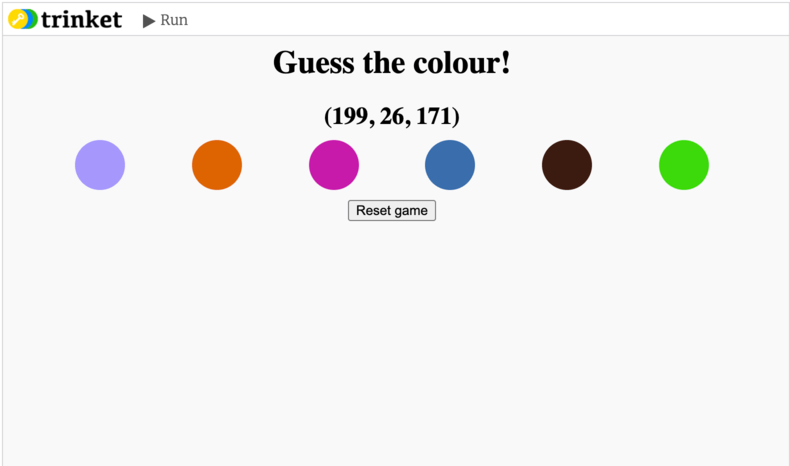
Want to learn the world’s best programming language, JavaScript? If yes then head to the Raspberry Pi site and enroll in the short course. It is nicely constructed with easy-to-follow instructions.
Uses: Enables learning the basics of the programming language.
- Easy to commence
- Fun to learn
- Need internet connectivity
Wi-Fi Extender
Tired of low or poor Wi-Fi connectivity in some parts of your home? This project enables you to build a Wi-Fi adaptor using Raspberry Pi 4 to extend its total range. Now you can enjoy full signals in every part of your house.
Uses: Enhances your Wi-Fi network range.
- Easy to build
- Cheap
- Efficient
- For the older Pi version, you need two adapters.
Wall Mounted Google Calendar
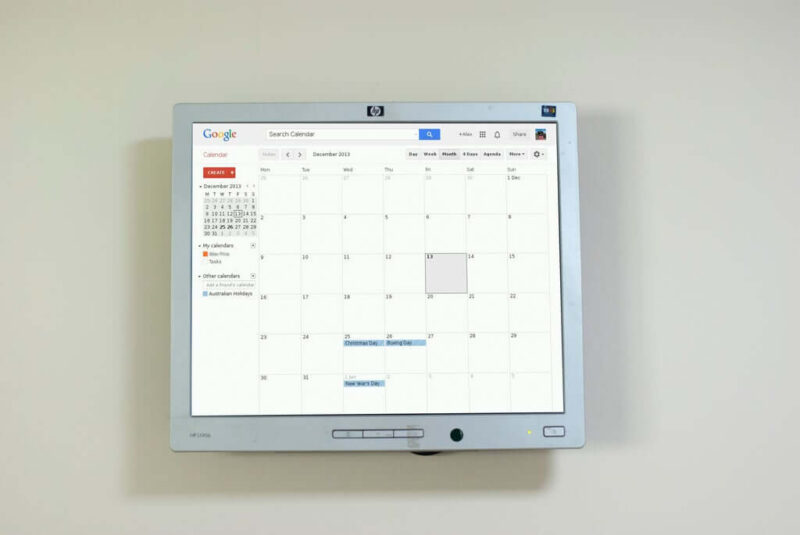
Let’s recycle your old computer monitor to build a wall-mounted Google calendar. With little effort, you can commence this upcycling project. Obviously, it will be powered by Raspberry Pi.
Uses: Displays Google calendar via the internet.
- Replaces traditional wall mounted paper calendars
- Digital
- Most updated
- Requires internet connectivity.
Blood Pressure Monitor
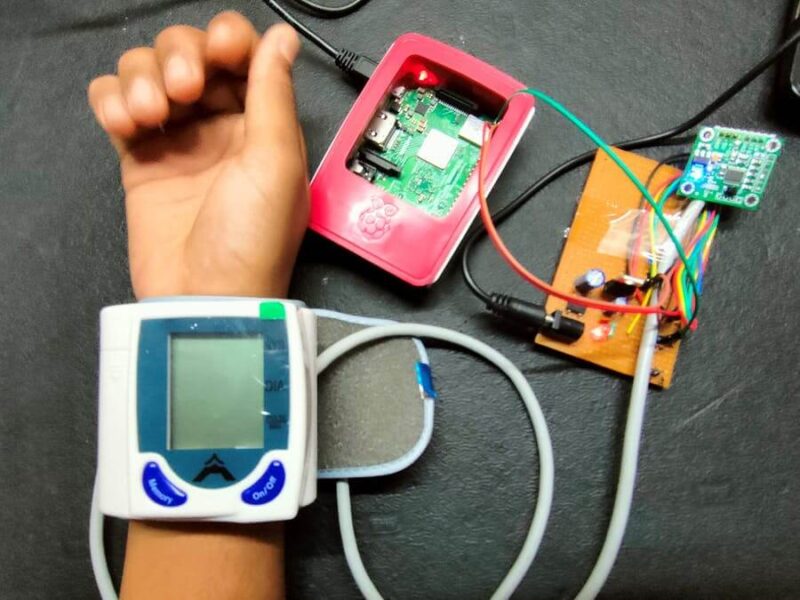
Let’s combine the Blood Pressure sensor with Raspberry Pi. This device will measure your blood pressure and heart rate and then store and forward the results to you via email. It will contain the blood pressure, systolic, diastolic, and heart rate details in a text file.
Uses:
- Helps to measure your blood pressure daily.
- Best for patients with high/low BP issues.
- Details in a text file form
- Measures BP daily
- Accurate
- Difficult to build
Project Alias
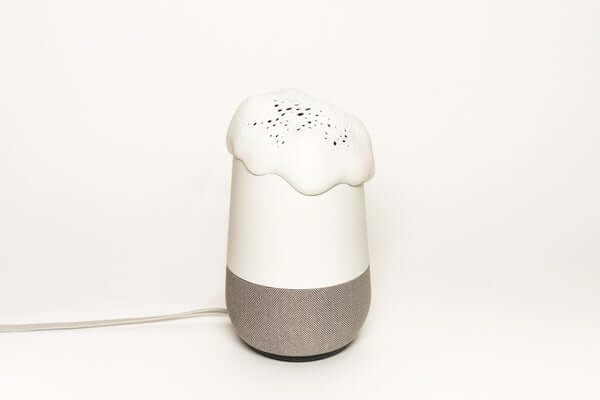
Let’s replace ‘Alexa’ with a more customizable and private home assistant. You can build it using Raspberry Pi to have more control over your smart assistant.
Uses: You can change its name and train to react to a custom wake-up word or sound.
- Customizable
- Private
- Greater control
- Requires training.
Office Clock
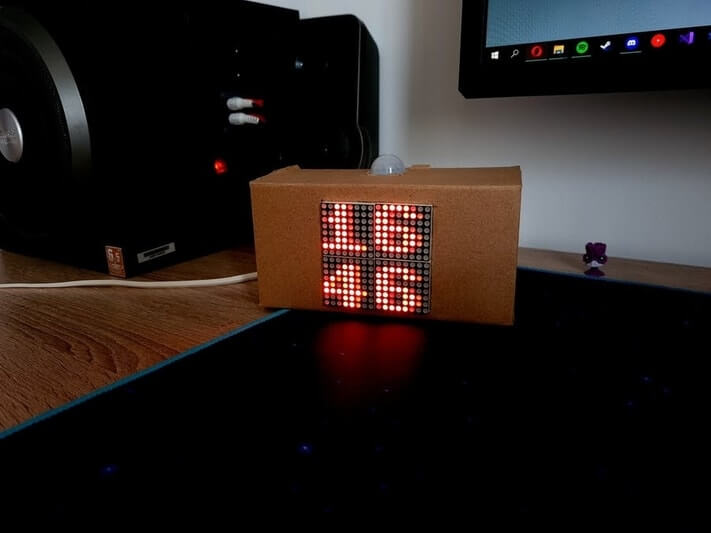
Are you tired of your colleagues’ questions about time, temperature and humidity? Then here’s a solution. Build an office clock for them using Raspberry Pi Zero that clearly displays time, humidity and temperature on a LED matrix at one glance.
Uses: You could use it both at home and in the office to tell you about the time, temperature and humidity.
- Portable
- Compact
- Accurate
- Clear display
- Difficult to build.
Hydroponic Farm

Do you love farming fresh vegetables and herbs? The Robotic Urban Farm System is easy to build from PVC pipes. The vertical hydroponic garden enables high-density output and shortens the growth cycles.
Uses:
- An Arduino and Raspberry Pi enable us to monitor temperature, plant nutrition, and the water cycle.
- You can even monitor it through a smartphone application.
- It is ideal for farmers
- Better monitoring
- Great productivity
- Requires constant monitoring
A.I Cereal Dispenser
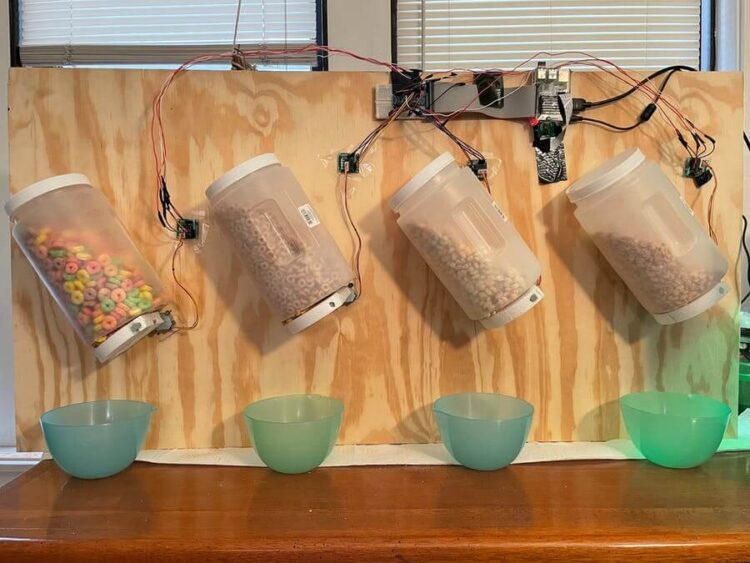
The Raspberry Pi-powered cereal dispenser is an artificial intelligence-driven food dispenser. It detects your face and pours the preferred amount of cereal into your bowl by opening and closing a flap.
Uses: Great for daily cereal eaters during breakfast.
- Automatic
- Accurate
- Fast
- Not ideal for hotels or restaurants
AI Thermometer
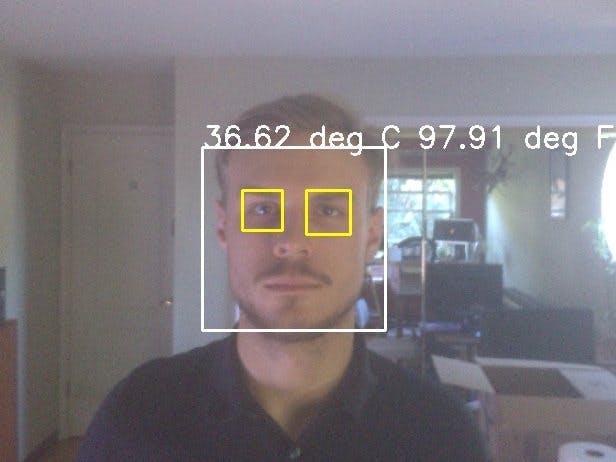
Another interesting medical project. This Raspberry Pi project enables you to build a tool that automatically measures your skin temperature by reading your face only.
Uses: It is ideal for use in clinics and hospitals.
- Contactless
- Screens multiple people simultaneously
- Can be wall mounted
- Complex to build
Smart Mirror
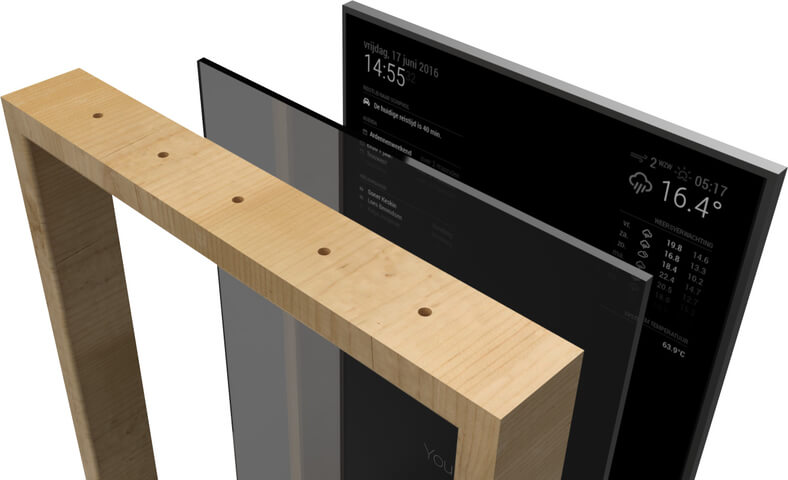
Always grew up hearing that magic mirrors exist only in stories or movies. Now, it is possible. We can build our own personalized smart mirror that can respond to our questions quickly and acts as our personal assistant.
The software, MagicMirror2, is easy to configure. You can select from multiple modules available for free. These include voice control, weather forecasts, news, transport, communication and sports.
Now let’s say together ‘Mirror mirror on the wall…’.
Uses: Replaces traditional mirrors with smart mirrors that tell you almost everything you ask for.
- Open source
- Modular
- Community Driven
- Low picture quality
Autonomous Cleaning Robot
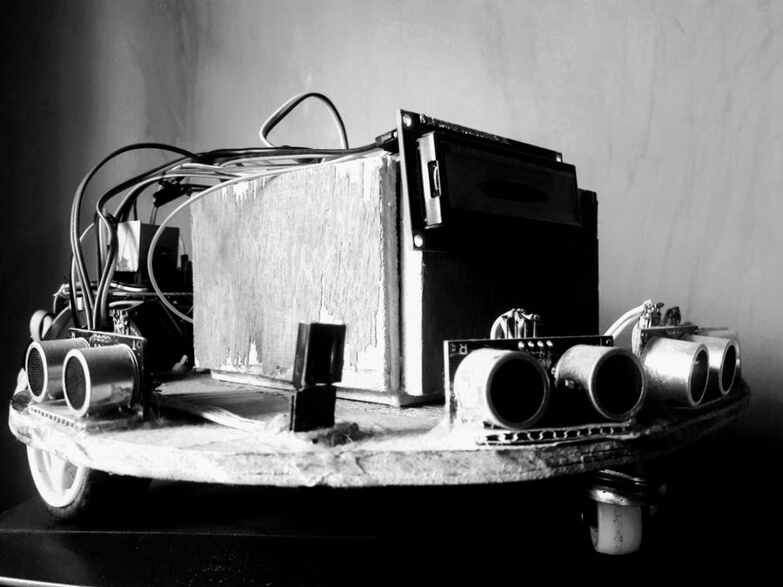
Daily routine household chores can be boring and tedious. With the help of an Autonomous Cleaning Robot, life will be fun-filled with less effort. All the tasks can be done within a few minutes.
Uses:
- Vacuums the floor.
- Wakes you up in the morning.
- Reminds you to take medicines on time.
- Kids use it like a remote-controlled toy.
- Monitor indoor activities when you go outside.
- Helps to maintain a routine
- Helpful for habits building
- Great for kids
- Performs average on a soft floor.
Conclusion
There are multiple projects based on Raspberry Pi that you can choose from. Each one has its pros and cons. You should select one based on your interest, capabilities, and resources availability.


