Whosoever says that the 3D printers are the easiest to handle, must haven’t worked with one.
Before you start exploring the nuances of opportunities that come by along with additive manufacturing, you must not ignore the steep learning curve that the technology entails.
3D printer setup may get you all nuts. But trust this, every expert has to go through this trouble to find the right 3D printing settings.
You cannot expect to master the skills of 3D printing in day one. If you have the knack for learning new things, you would love to try out the way this technology challenges its users. But the results are worth taking pain for.
Amidst all this, you must take care of a few of the major factors or critical settings which if not considered would always lead to failed prints.
Unexpected errors cannot be avoided. However, there are many things that we can assure beforehand for achieving a successful 3D print.
Things that you can control through slicer settings could help you stay on the safer side. You just have to know how to find what is the right 3D printer settings and you can make your way to the highs of the learning graph.
A few ups and downs, but with a little help, you can find out what exactly you need to do. The settings would differ for different models, the filament of choice, and a lot of other factors.
You just have to make sure to follow the lead and balance the numbers to ensure the best results. These may seem like a lot in the beginning but with every success, you would start realizing how these settings work.
The 3D Printing Settings You Must Verify for Every Model
As mentioned, there are few settings that are highly critical and must be set right for every 3D model. Any error in doing so could lead to unexpected results. And, if set correctly, could help you achieve great finish and accuracy.
Start with Extrusion Multiplier
Most of the beginners and even a few experts face issues with 3D printing when extruding filament. You must have control over how much filament comes out of the nozzle at a given time.
There are other problems related to extruder settings that we will discuss later, let’s focus on this part as of now.
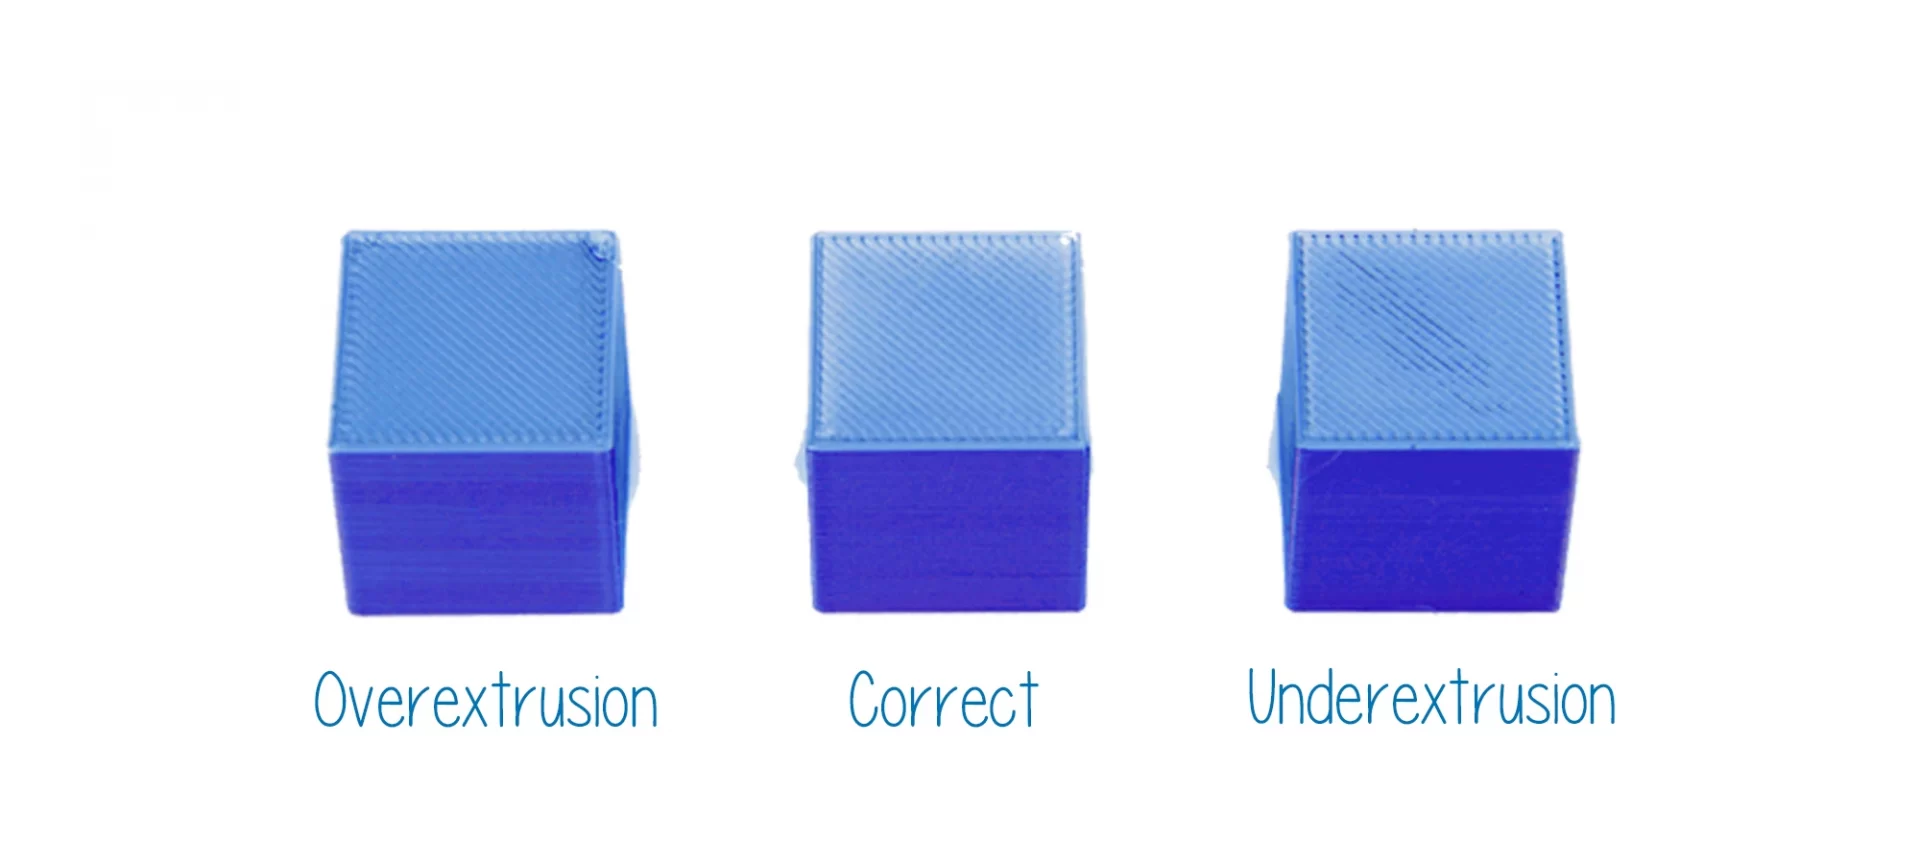
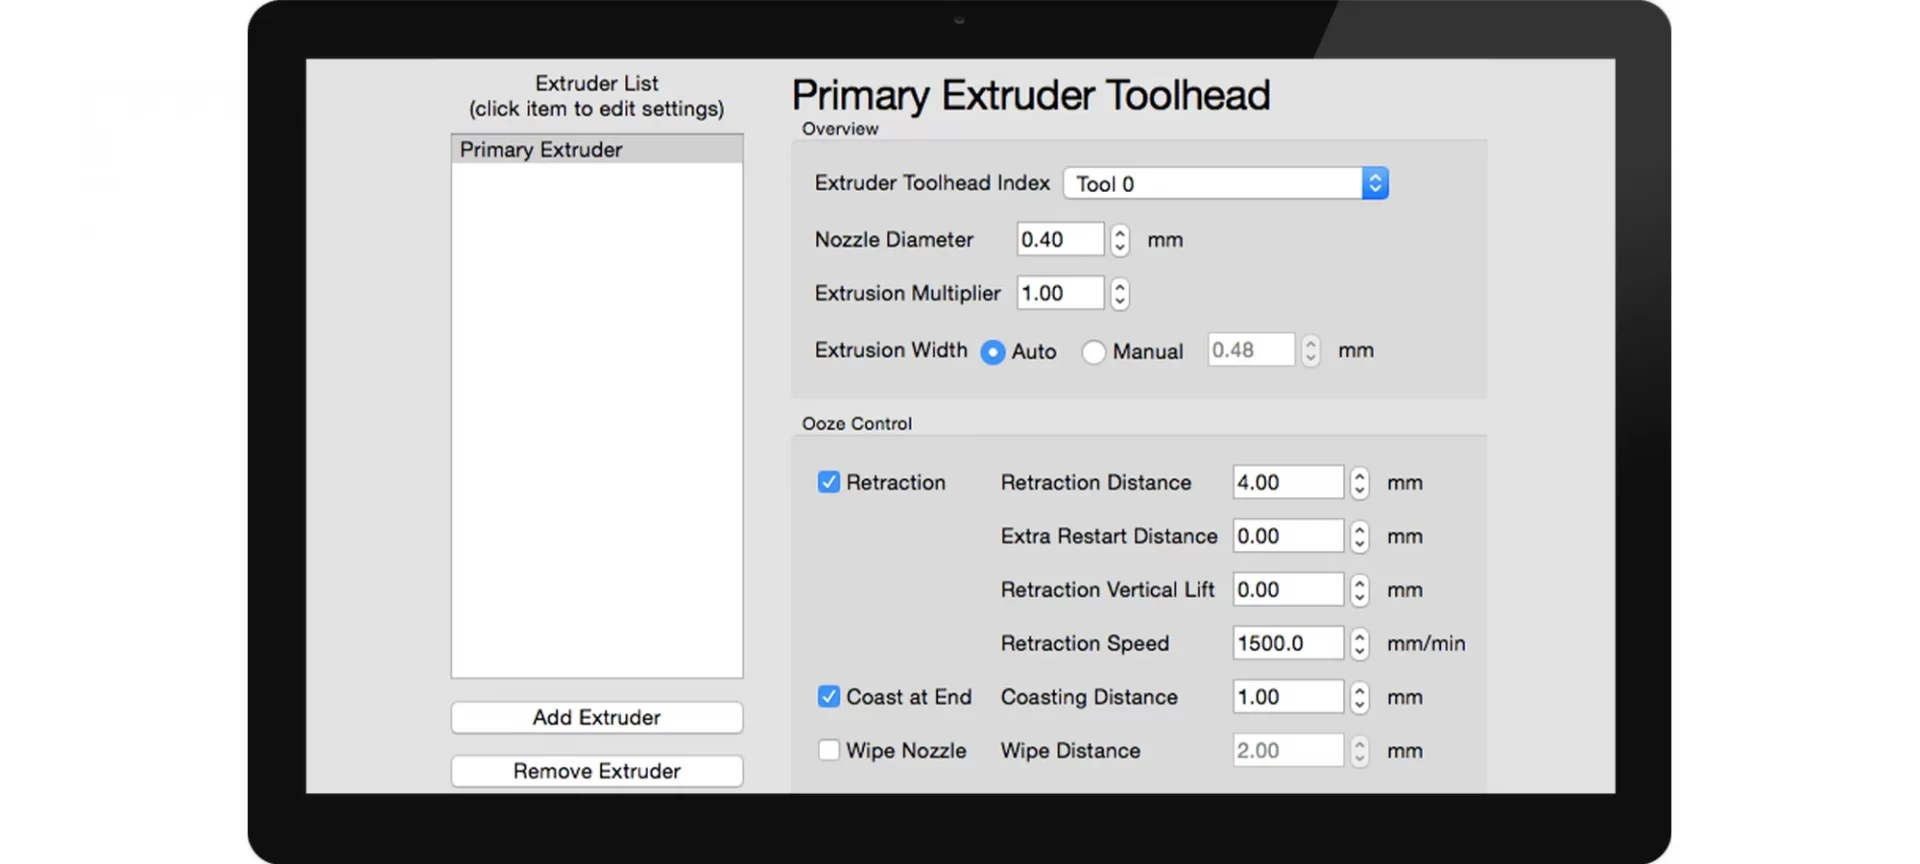
When looking at the extrusion multiplier, you are actually trying to specify the amount of filament that leaves the nozzle.
To do so, you must carry some adjustments and make changes to the extrusion flow rate. And, you must also remember that the 3D printer settings change with the selection of different filaments. The same goes for this one too.
To print ABS, you must print with a multiplier of 1 (100%). On the contrary, when printing with PLA, you must use a multiplier of 0.9.
If you feel that the settings aren’t appropriate, you must adjust the flow rate with little difference at once.
You can start incrementing or decrementing the setting by .05. And, test the setting for each change that you make. Do not forget, in 3D printing, the slightest change that affects a lot.
For instance, even by surging the multiplier from 1.0 to 1.03, your 3D printer will start extruding 3% more material. Also note, the change in temperature setting would go hand in hand with this one.
In case you increase the multiplier, you must check with the temperature. This might also need an increase in the setting to be able to melt the filament before extrusion.
Retraction Distance 3D Printer Settings
Whatever you do, never ignore this setting at all. Without knowing how to work with a retraction distance setting, you won’t be able to move to the next level.
If not handles properly, you can get into an oozing problem. What is oozing? It refers to the spiderwebs that form between the parts of the 3D model.
The reason it happens is when the hot filament is dragged a little more during extrusion. This leaves extra strings forming spiderwebs.
Retraction settings could help get rid of the problem for good. Although there are other reasons too it mostly happens because of wrong retraction settings.
Hence, it is important to go through the steps to ensure you know what to look for when encountered with oozing.
Retraction is the process of pulling back the filament a little bit back when the nozzle is not extruding any material.
Hence, during “non-print moves”, retraction setting decides the amount of filament which must be pulled out of the nozzle.
Depending on the extruder you use, the setting will vary. For Bowden extruders, retraction distance is higher than the direct-drive extruders.
During oozing, you can try increasing the retraction distance by .5 or 1mm at any given time. Test the print and if the problem persists, make the adjustment to the settings likewise.
Set the Retraction Speed
Now that you have mastered the settings with retraction distance, it is time to look for retraction speed. This setting controls the rate of the filament with which it is pulled back from the nozzle.
You can find the recommended speed for your particular filament in use. However, the standard and most efficient settings range between 1800mm per min and 6000mm per min.
When adjusting the retraction speed, remember not to set it is too low or too high. In case, it is too low, the filament would come out slowly before the printer head is done moving.
In the opposite scenario, when the speed is too high, the drive gear would grind away at your filament.
Also, it is not necessary to adjust the retraction speed equal to your print speed. The best setting is to keep it as fast as possible without leading to the grinding of the filament with your drive gear.
Check the Extruder Temperature
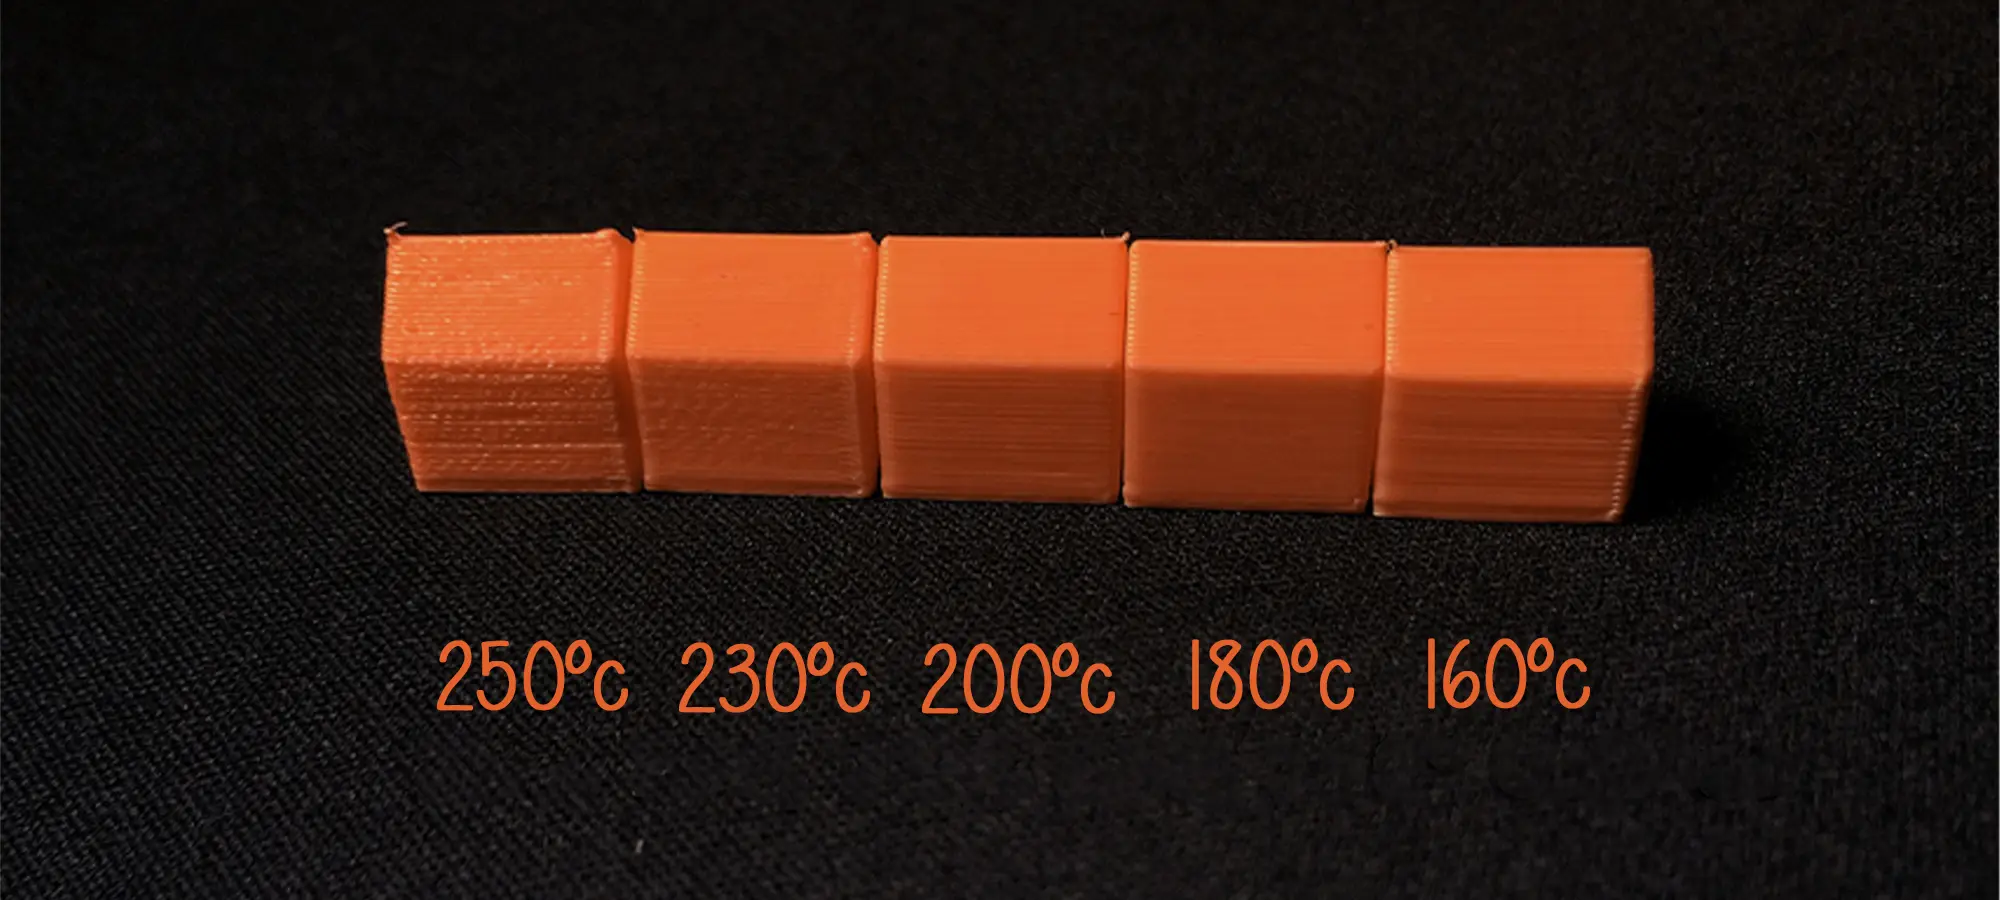
When 3D printing, most of the game depends on temperature settings. Every degree matters. When extruding the filament, the extruder must be set to the right temperature. Or else, it won’t extruder properly or not at all.
Extrusion temperatures mostly depend on the filament you choose for printing your model. 3D printing PLA settings are different from that of ABS.
And, other materials also expect varying temperature for clear extrusion. When printing PLA, the temperature must lie between 215 degrees Celsius to 235 degrees Celsius.
You do not even need a heated print bed as well. However, this is not the same as ABS. It has a higher melting point. So, the extrusion temperature must
The range of 230 to 240 degrees Celsius. Plus, you would also require a heated print bed. One thing to note.
When you are creating a really small mode, you must specify the extruder temperature to as low as possible, while staying within the specified range for the chosen material.
You can even adjust the different temperatures for different layers. Much slier offers you to make those 3D printing settings, you just have to pick the right one.
Temperature 3D Printer Settings for Heated Build Plate
There is a reason why certain materials can’t 3D print without a heated bed. Because the correct temperature of the print bed is very crucial for achieving accurate and precise results.
When heated at a higher temperature during extrusion and deposited over the cool surface would give way to warping.
However, when using a heated build plate, one can keep the lower layers warm when the hot layers are deposited over it, enforcing for an even cooling process. Hence, avoiding warping of the layers.
The overall cooling will be smoother and would produce better print results.
ABS 3D printer settings are a bit complicated for the reason it needs high temperature for extrusion. And, that is why it requires a heated build plate.
To avoid it from shrinking, you can manage the build plate temperature between 100 to 110 degrees Celsius. Although PLA can work without a heated bed, if you decide otherwise, maintain a temperature between 50 to 60 degrees Celsius when 3D printing.
3D Model First Layer Height
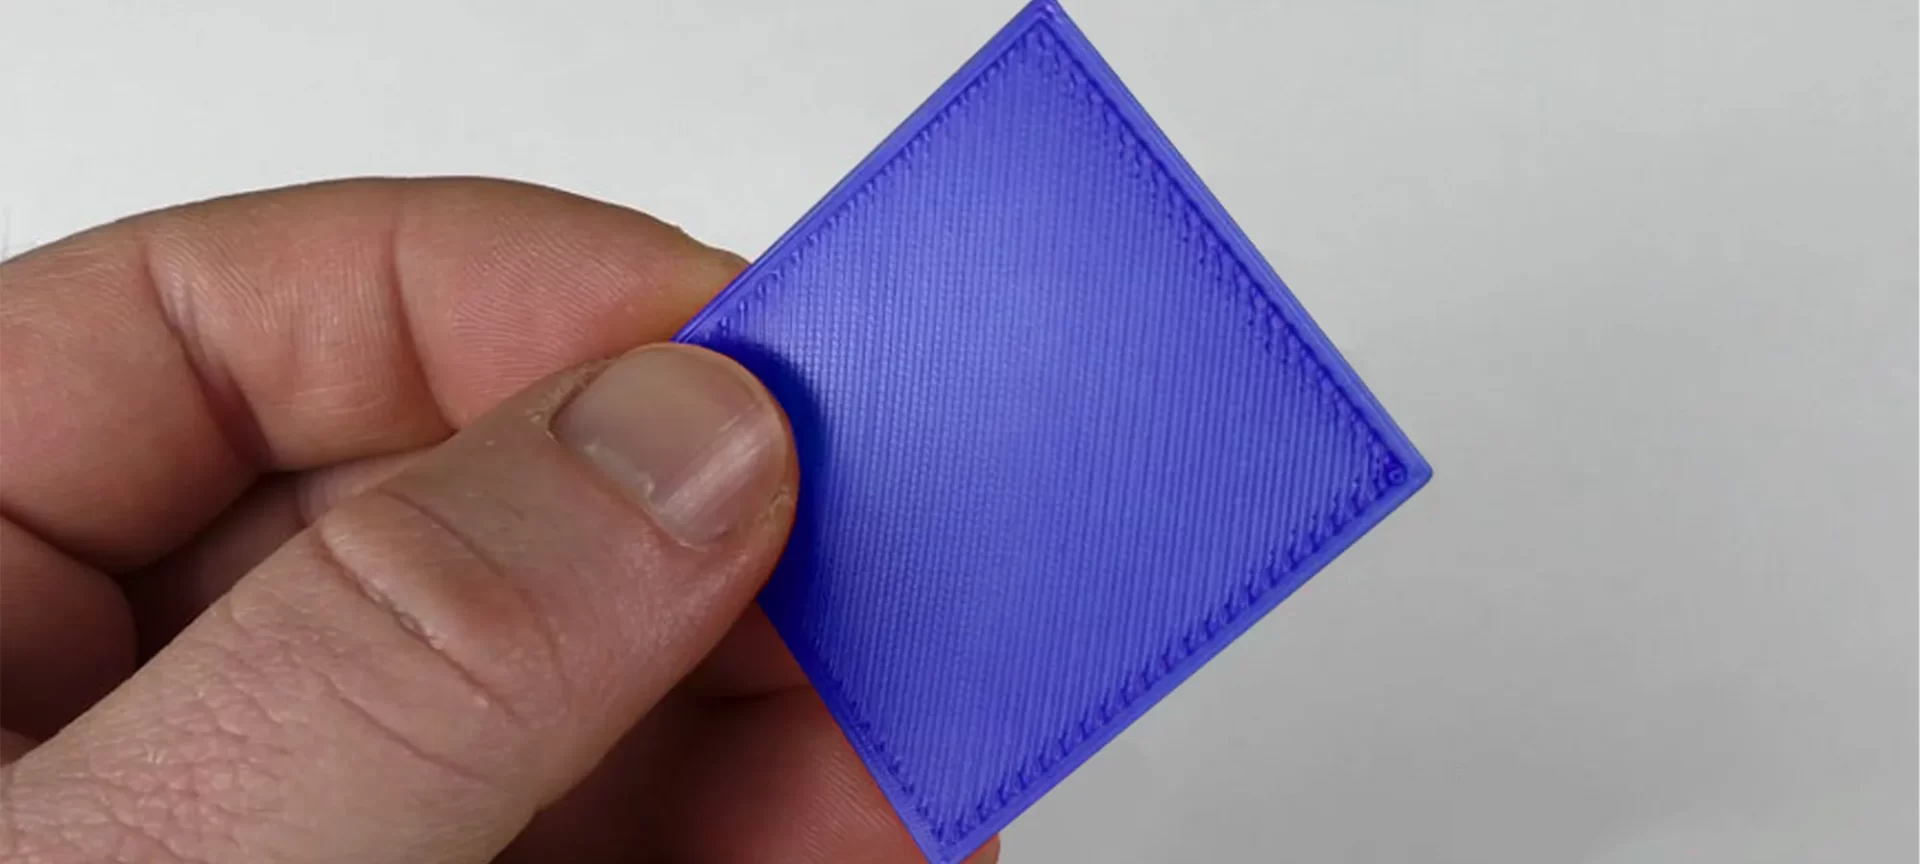
The first layer is the base for your 3D models. Each layer deposits over the first layer. Hence, it must be strong enough to take that load. It does determine how the entire print would come out to be.
You can make sure that the first layer stays unharmed until the end by adjusting its height. Your first layer must have a sufficient surface area to manage the other layers deposited over it.
You can keep your layer height to below 100%. Always remember, adjusting this setting will have no effect on the amount of filament that comes out for the first layer. Hence, the filament with the same volume will adjust into a space resulting in less height.
Hence, you can achieve the excess pressure along with the heat and surface area to help your first layer stick better to the print surface. Similarly, you can surge the layer width as well. This will allow for better adhesion as well.
First Layer Print Speed
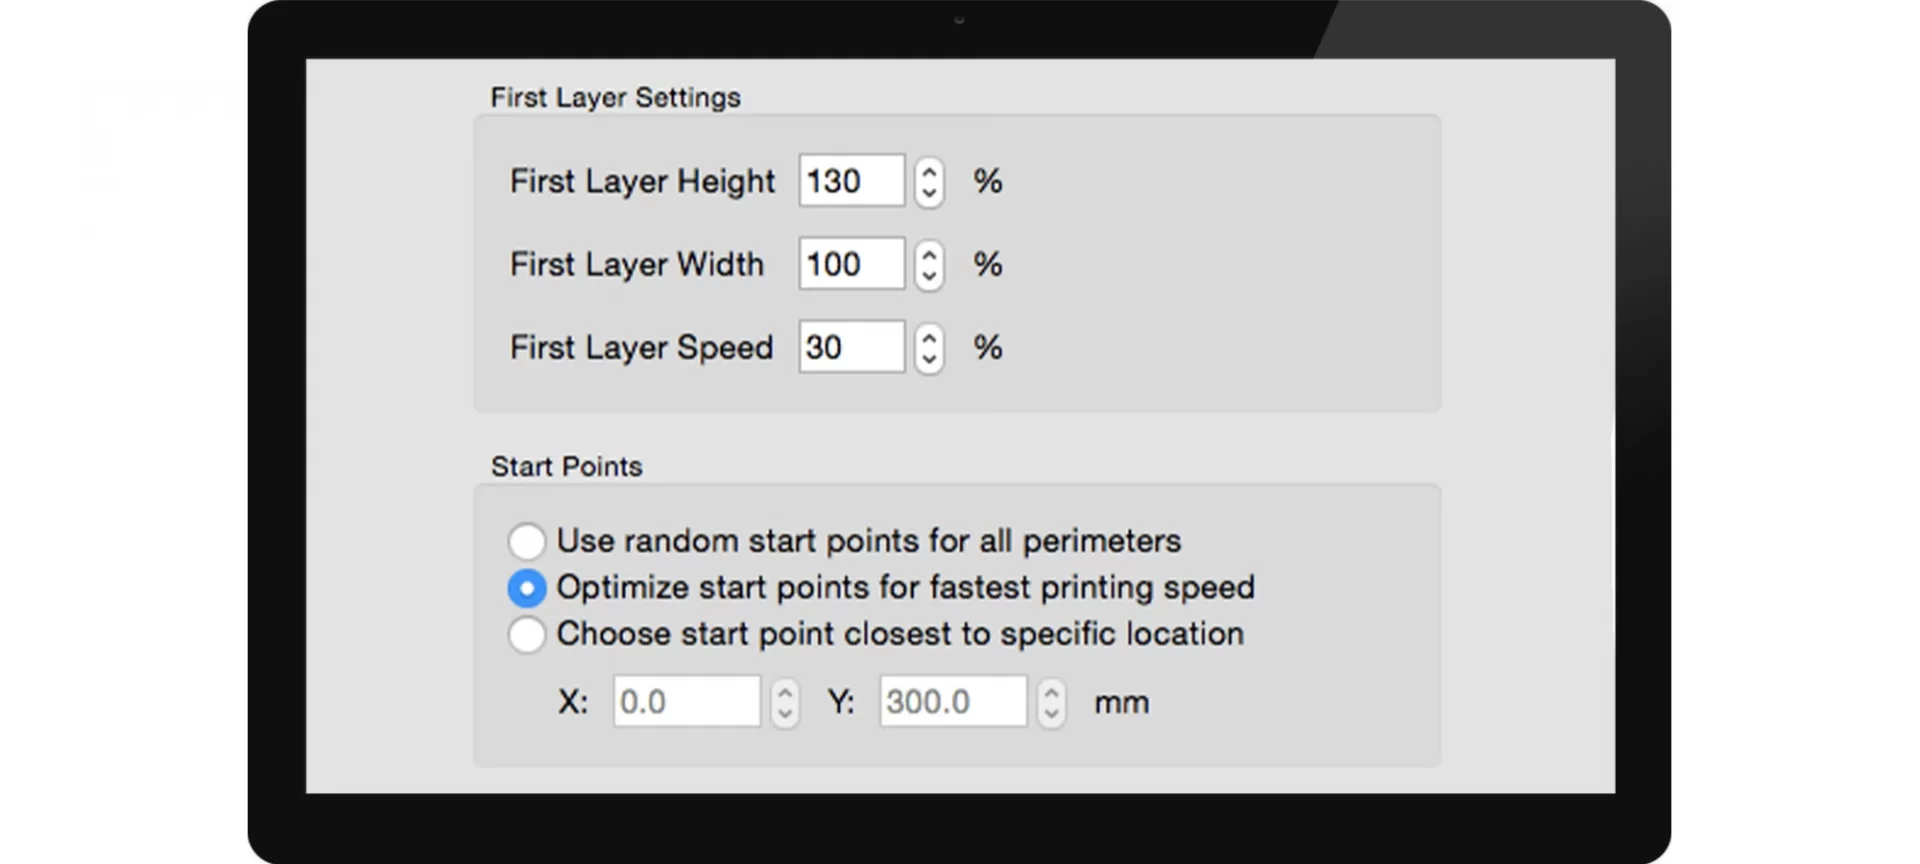
One more factor to consider is the first layer of print speed. When printing at a slower speed, you provide more time for your first layer to stick better to the build surface.
You must manage the speed between 30-50% of the usual speed. This helps in increasing the first layer adhesion. Ultimately, ends up with a better print that stays tucked in till the end.
Fan 3D Printing Settings
A lot of times makes find trouble with getting the perfect fine details or unsettled spots on the model after the 3D print completes.
If your model also seems deformed or stuffed with melted spots all over, you must work with your fan controls to get this problem out of scope forever.
Try enabling the fan. This can prevent the models from overheating as well as maintain the right shape of the prints without deforming it.
However, when working with this control, you must take care of the first few layers from overcooling. As a solution, you can turn the fan for the first few layers from the slicer settings and turn it in the later stages of 3D printing.
Infill Percentage Settings
Do you know that you can create completely hollow 3D models with the help of additive manufacturing? The settings of your infill percentage will decide how strong you wish to create your models.
The internal infill determines the strength of your 3D models. It depends on the percentage as well as the pattern you choose to fill the inside of the prints.
You can choose infills such as Solid, Grid, Honeycomb, and Triangular. The decorative items that aren’t supposed to hold heavyweights are usually 3D printed with weaker infills like Fast Honeycomb.
On the other hand, the external infill decides the aesthetics of your 3D model.
Coasting Settings
Because we have talked a lot about retraction settings, we cannot miss this one too. When working with the retraction, your filament may stay stuck in the hot end.
And, at the beginning of the retraction, these can ooze out for creating problems at the ends of perimeters.
This is where Coasting comes in. It stops the extruder from printing just before a specified distance from a non-print move.
Hence, the leftover filament clears out during this extra time. Usually, a costing distance ranging between 0.2 mm to 0.5 mm is all you would ever need to get rid of the defects.
In case, it is set too high, your prints can end up under extrusion or even gaps. So, decide precisely and check the settings before you proceed.
The Conclusion
3D printing has brought with itself a lot of wonderful possibilities. However, nothing is achievable unless you find the right 3D printing settings for achieving the best results.
So, find out what best you can create by rolling your eyes through a few trials and errors and finding the correct fixes for every setting.


