When technologies are in their initial stages of development, and there are not many experts who know how to use the technology in an adept manner, tools are needed to ensure the production of high-quality.
3D printing technology has since its inception changed the way in which the manufacturing sector was looked upon years ago.
From a purely subtractive approach for manufacturing parts and functional prototypes to a purely additive approach, we have clearly traveled to the opposite pole from where we were in manufacturing.
And this is not only for those who are new in learning this technology but also while developing complex parts and functional prototypes that, 3D printing skirts, brims, and rafts are required.
But when are they required? And how to differentiate between a skirt and a brim. Or a brim from a raft?
And while 3D printing skirt or a brim, what are points that you should keep in mind, what are printer settings that you should do, what are the slicer settings that you should imply?
Are some of the key questions that you should get an answer to make sure that the part or functional prototype that you are 3D printing is of high quality and closer to the imaginary part or functional prototype.
Reading this article you will be able to answer a tiny part of these questions that concern 3D printing skirt.
And when to use it, the pros and cons of using a skirt in your 3D printing process, the slicer settings that are needed for 3D printing a skirt, and the difference between skirt, raft, and a brim.
We will start with the reverse sequence that is mentioned in the above sentence.
What is the Difference Between 3D Printing Skirt, Brim, and Raft?
Although all three of them are used to support the part or functional prototype you are 3D printing, there is a line of difference that separates the use of each of them.
And what better way to understand the difference then by understanding their definitions.
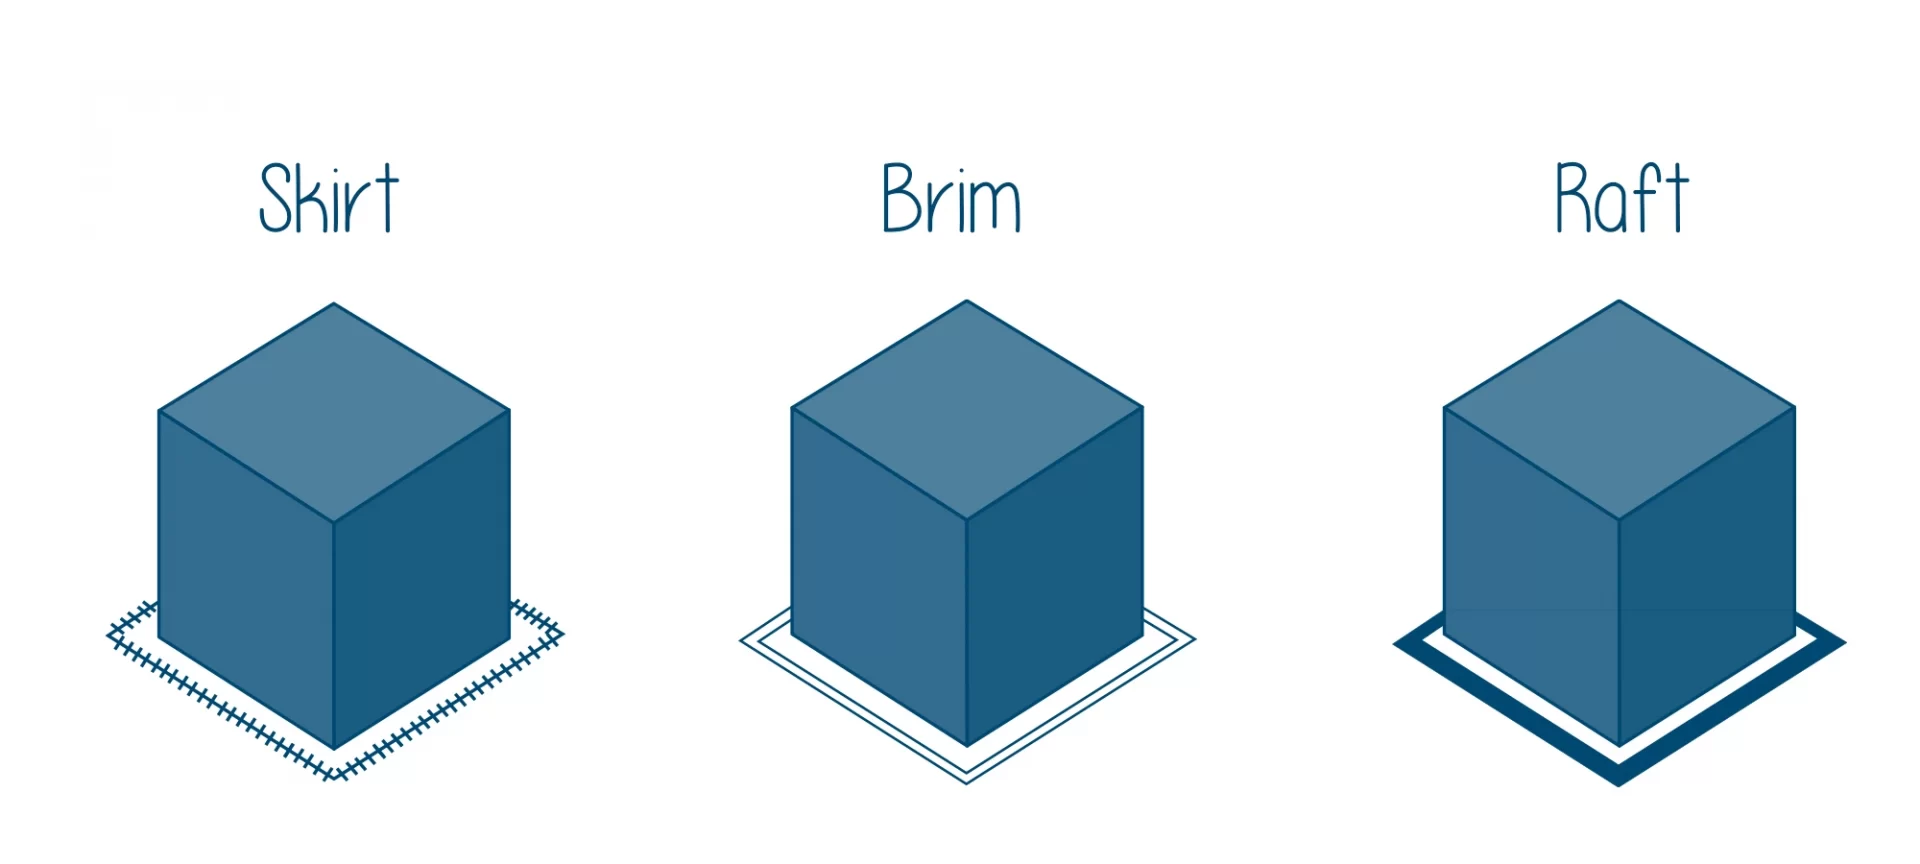
Skirt
For all the painters reading this definition, you can relate to a skirt as the outline that you draw to your painting using a highlighter.
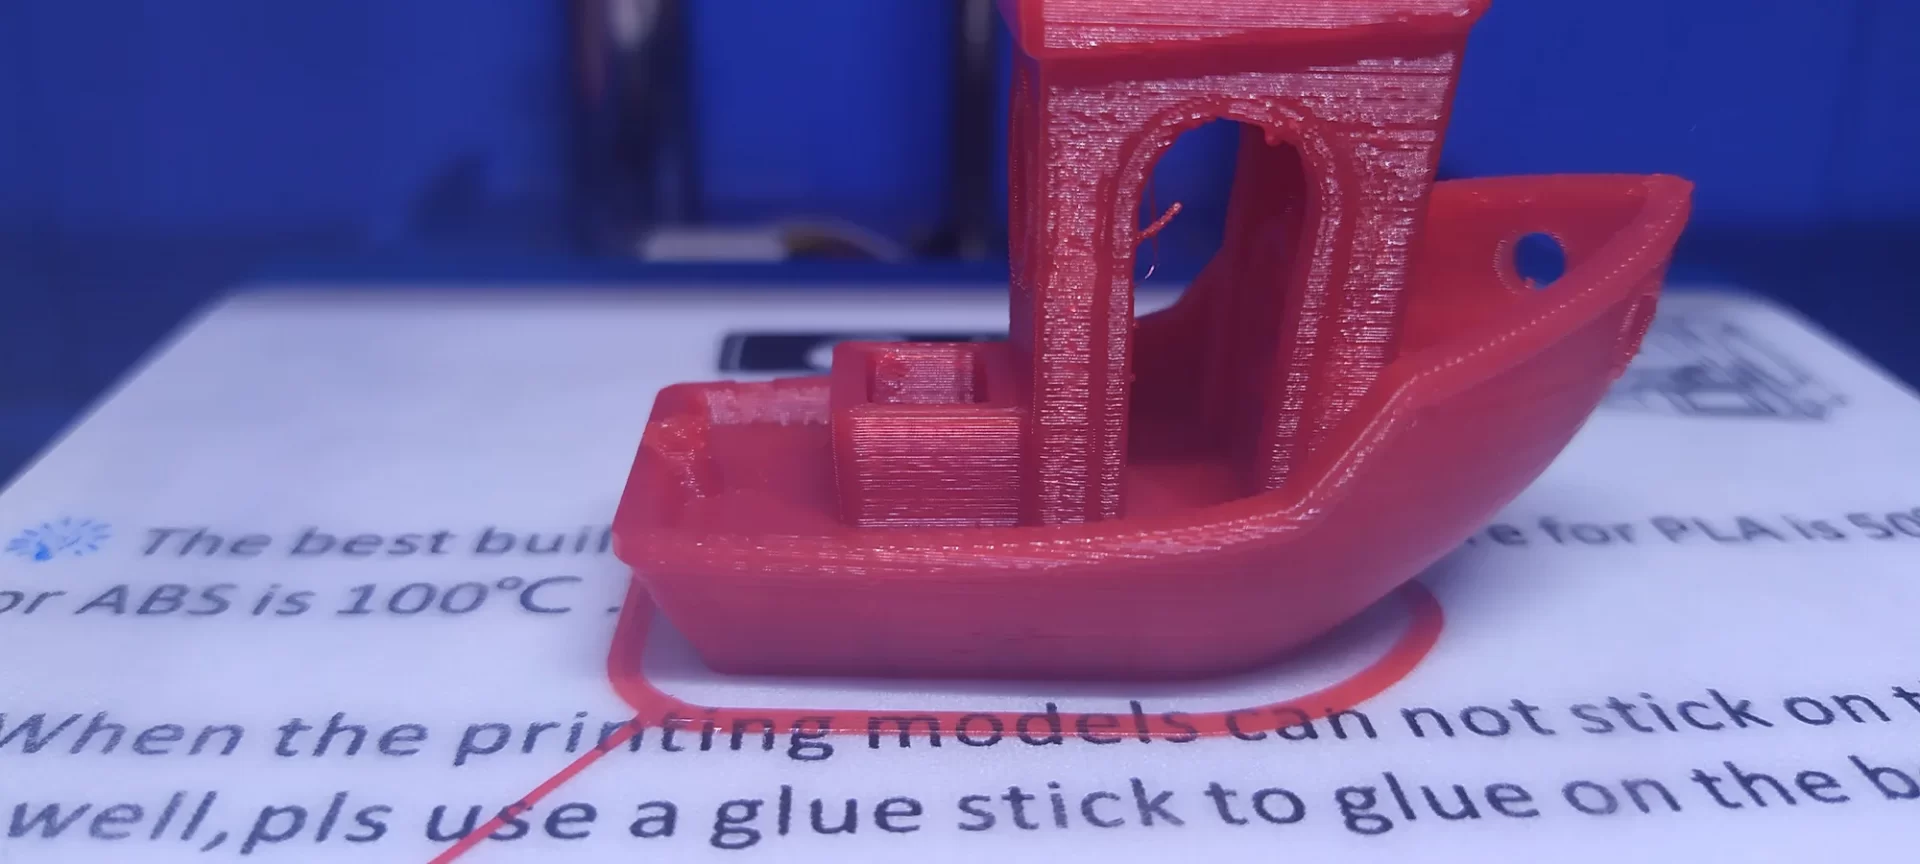
Yes! A skirt is an outline that, unlike your painting, surrounds your part, but it does not touch the part or functional prototype that you are 3D printing.
And unlike your painting’s highlight that you do at the end of your painting, the skirt is extruded on the print bed before starting your print.
By helping you prime your extruder and establish a smooth flow of filament, skirts serve a useful purpose.
The leveling or adhesion issues can also be solved or adjusted by observing the skirt.
Raft
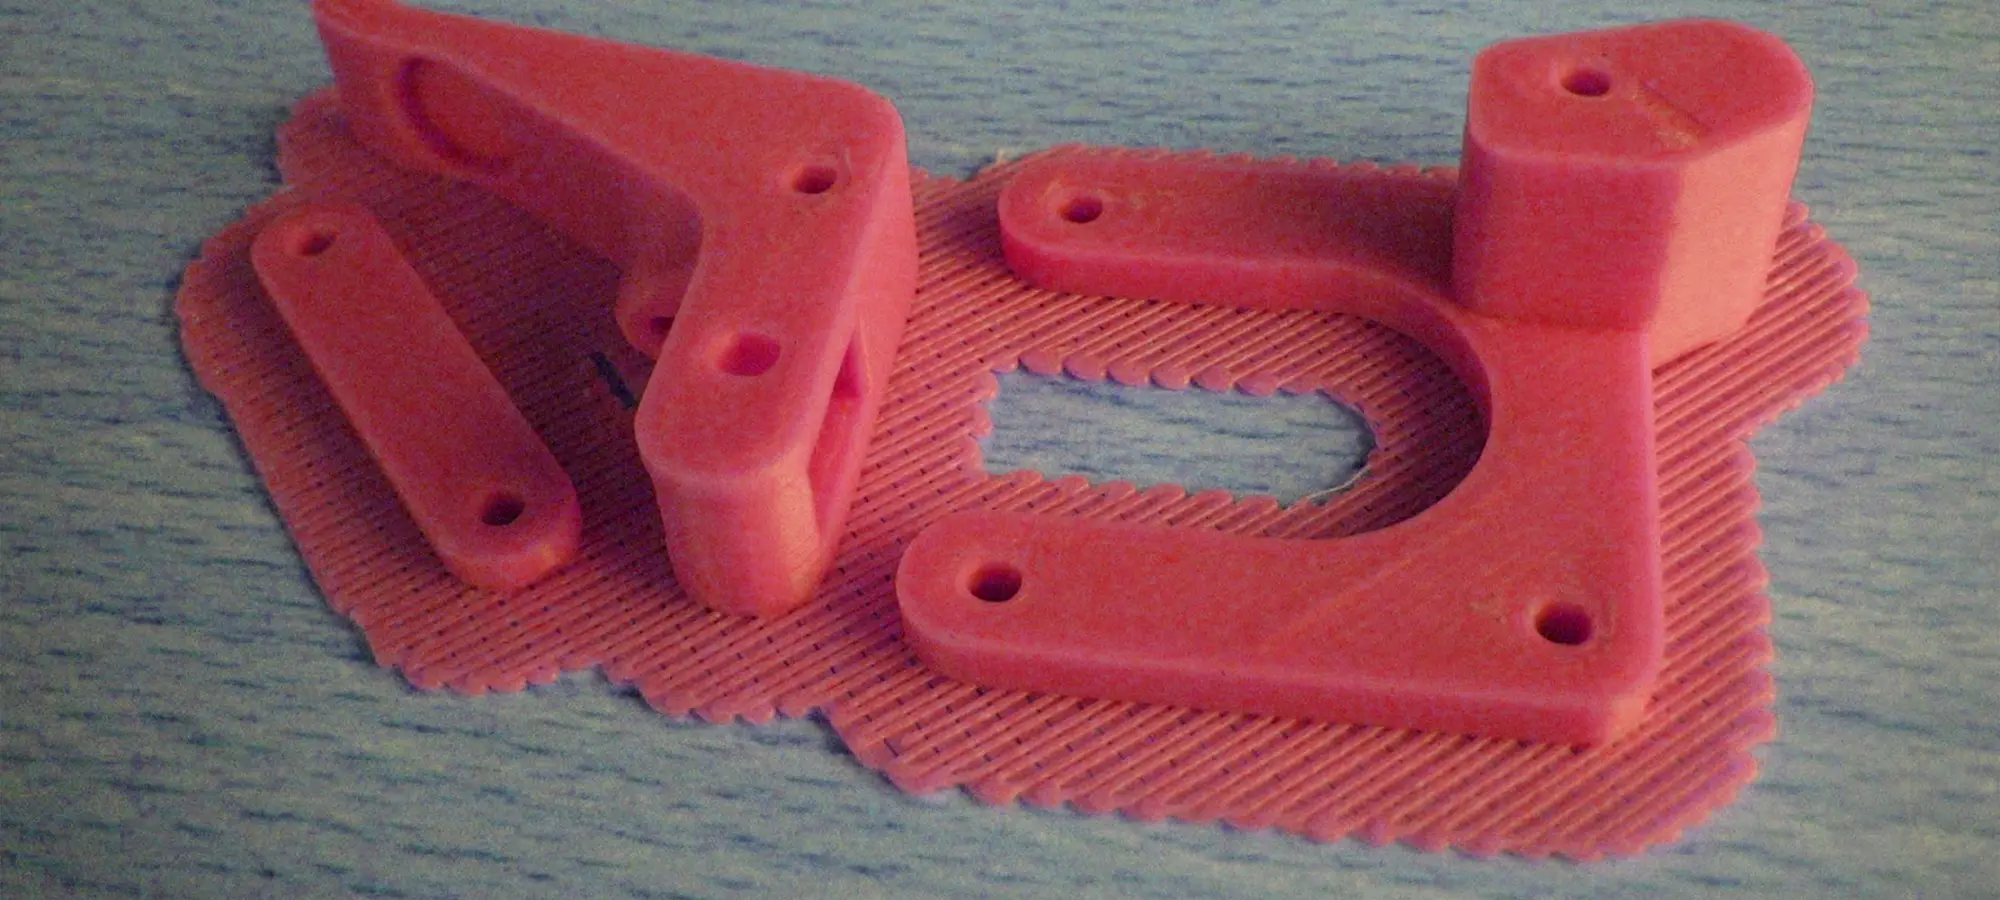
A Raft is defined as a horizontal latticework of the 3D printing filament that you are using for printing a part or functional prototype, this arrangement is located underneath your part.
So, as you can imagine, your 3D printed part will be printed on top of this raft, instead of directly on the build platform surface of your printer, there will be lesser bed adhesion issues while 3D printing a part or functional prototype.
Rafts are primarily used with famous 3D printing material named ABS to help users overcoming not only the warping and bed adhesion but also help to stabilize models with small footprints.
In addition to all that, rafts can be used for creating a strong foundation on which to build the upper layers of your part or functional prototype are built.
Once the print is complete, the raft effortlessly peels away from the print and can be discarded so there would be no attachment issues which can lead to damaging of the printed part or functional prototype.
Brim
A Brim is a special type of skirt that, unlike a skirt, is attached to the edges of your model.
Typically, the brim is printed with an increased number of outlines for creating a large ring around your part.
Brims are often used for holding down the edges of your part or functional prototype, which can prevent warping and help with bed adhesion.
The Brim may be a preferred option to the raft, as it can typically be printed much faster and use far less amount of filament.
Also, you should remember that once the printing of part or functional prototype is complete, the thin brim can be separated from the solid model and discarded.
Now that you have learned the difference between all the three, we can come to the point i.e. Application of a Skirt.
When is it Recommended to Use a Skirt?
Typically, there are three main points when one is recommended to use a Skirt.
- While starting to print a part or functional prototype, the melted filament inside the extruder may sometimes flow out of the nozzle when you do not want it to. This can happen because the filament has not melted completely, or there is an excess amount of melted filament already before the starting of the printing procedure. In any of these conditions is you start 3D printing a part or functional prototype, the quality or that part or functional prototype will be affected. In such conditions, experts recommend printing a skirt would prevent the overflowing or under flowing of the melted filament and will ensure that the normal flow of that material takes place.
- Once you are done with the 3D printing skirt, a benefit that you can enjoy is, you can detect whether your bed leveling is fine or not. And if there are any problems with bed leveling you can detect them immediately.
- After having seen these two issues where 3D printing a skirt can help, here is the third one, which is also the most common one. Layer adhesion is a problem for solving, which you will have to pay attention to the first layer of the complete part or functional prototype. After you have 3D printed a skirt, you will get to know whether the material which you are 3D printing with, is sticking to the print bed of the printer or not. After you have the full knowledge, you can change the settings like the bed temperature of the printer, its flow rate as well as the distance between the nozzle and bed of your printer.
You do not need to care about the design, the material with which you are 3D printing or even the conditions, it is advisable to use a skirt on every single print. And this is because it serves some useful functions of 3D printing the extruder and detecting any printing issues before the actual print starts and saves time, effort, and money.
After having seen when to use a skirt we will now have a look at the pros and cons of using a 3D printed skirt in your printed part or a functional prototype.
Pros and Cons of 3D Printing Skirt
- The first and foremost advantage of using a 3D printed skirt is already mentioned above i.e. it helps with priming of the extruder.
- Apart from priming the extruder, a skirt can help you detect common issues that can be easily found while 3D printing a part or functional prototypes such as layer adhesion, proper flow of 3D printing material from the nozzle, and the bed leveling of a 3D printer.
- After the end of printing a part or functional prototype using Skirt, and without, you can know the difference between time, effort, and money used in printing a part with and without a skirt. There are more chances of printing a part using lesser time, effort, and money while printing a part or functional prototype with a skirt than without.
- 3D printing a part or functional prototype with Skirt uses lesser material compared to a brim or a raft.
- As the skirt does not touch the 3D printed part or functional prototype there are lesser chances to the scale of negligibility that the removal of the skirt affects the part.
- Printing a skirt does require you to produce some waste material.
- It increases your overall print time as you have to print more things than you have to otherwise.
- If you have a dual extrusion system on your printer, printing a skirt would consume some space on the build plate of the printer which would sometimes not let you print simultaneously.
After having stated in front of you the pros and cons of using a skirt while 3D printing a part or functional prototype, we now wish to share with you the slicer settings that you need to accommodate for 3D printing a skirt.
Slicer Settings
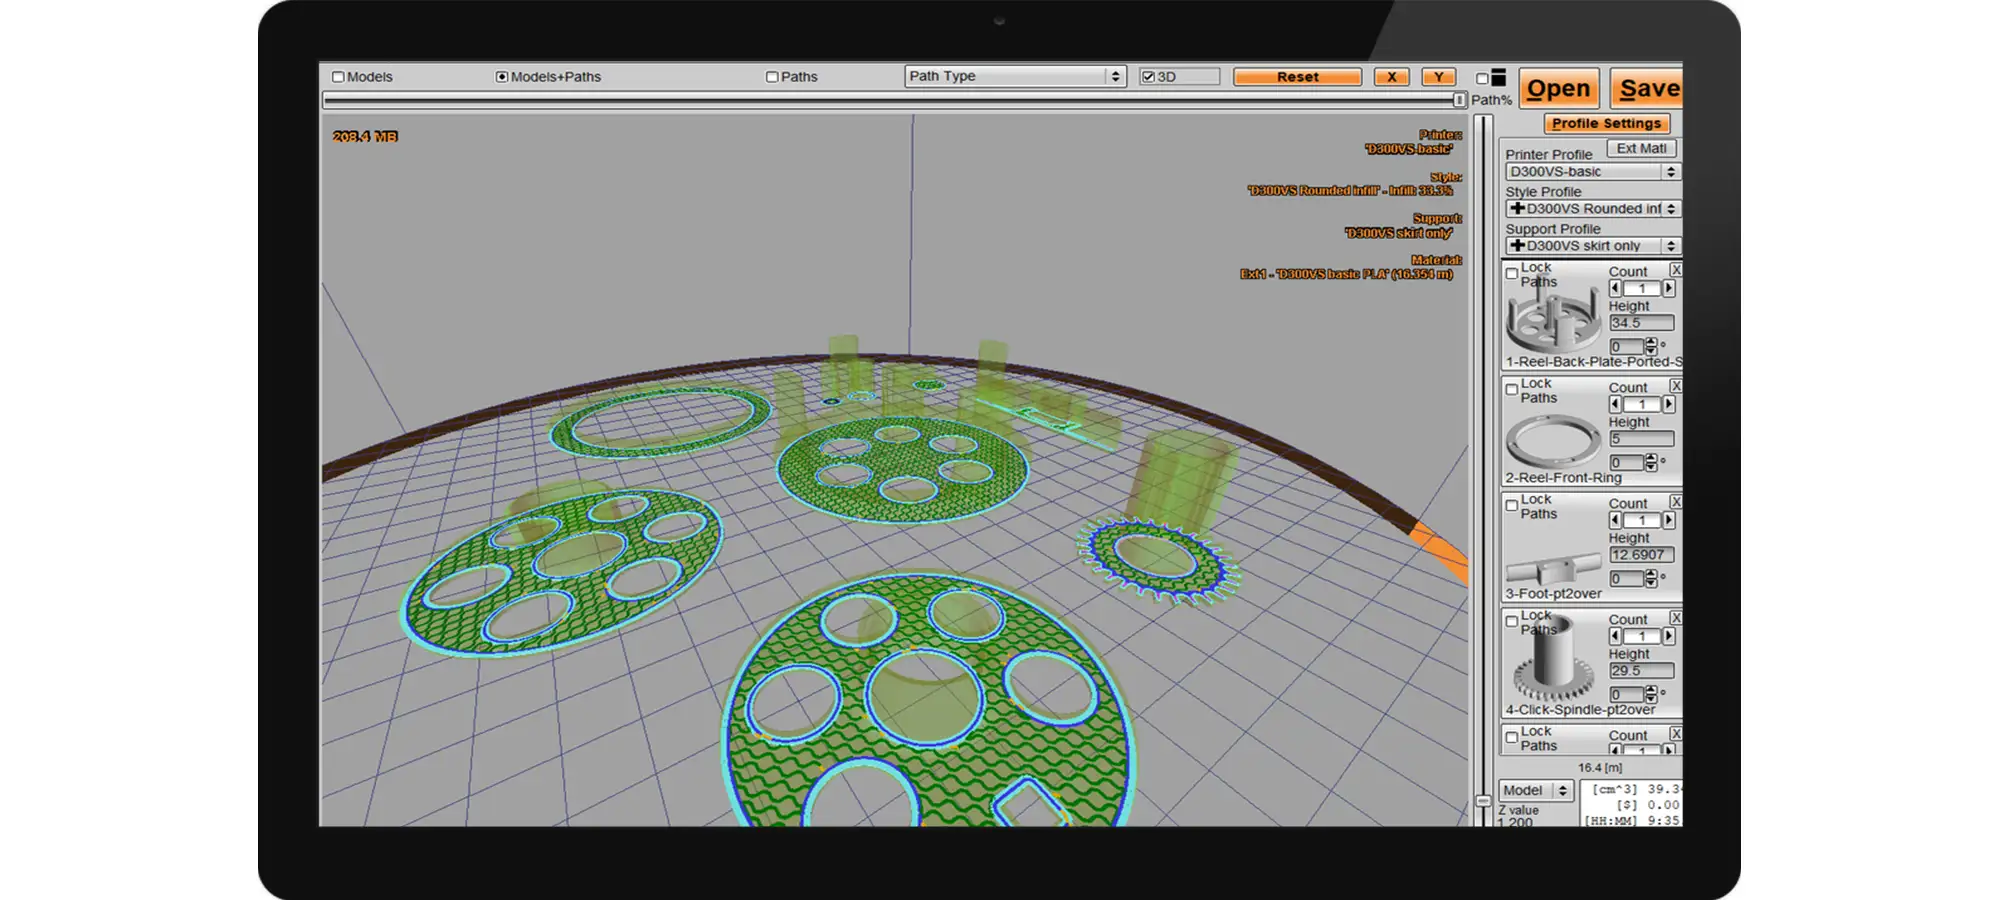
Depending on the slicer that you are using for 3D printing a part or functional prototype the detail settings might vary, however, the general settings do remain the same.
You will encounter these settings under the Print Setup option. This option lets you use two types of settings:
- Recommended Settings.
- Customize the Settings.
Recommended Settings come set from the company manufacturer depending on the printer that you are using, whereas if you wish to change, you need to opt for the second option.
When you click on Customize the settings, there are two important settings that will be displayed to you and let you control the skirt printing on your 3D printer.
The first one of those is Skirt line control and the second one is skirt distance.
Both of them are very easy settings that you will understand by reading their definitions, which are as follows.
The skirt line count is defined as the number of lines that outline the complete print of the part or functional prototype.
While the skirt distance is defined as the distance between the print of the part or functional prototype and the skirt.
After adjusting these two settings, you can freely print the skirt.
These settings should be adjusted by seeing the general dimensions of the part or functional prototype that you are 3D printing because Skirt as you know is just the boundary.
Generally, it is seen that even a single skirt line is sufficient for 3D printing most parts and functional prototypes, however, it may vary if your part or functional prototype is complex.
If, however, the print area of your part or functional prototype is small, appropriate priming of the extruder may not occur with a single line. In such case 3 lines are ideal.
The Conclusion
Remember, you can customize your skirt by adjusting the settings that are present on the Additions tab.
Doing this would allow you to adjust many parameters such as a) the skirt position, b) the amount of plastic that is primed, and even c)the extruder that is used for the skirt.
For playing with these settings you should know the following terms.
Skirt Extruder, using which you can choose the extruder that will be used for printing the skirt.
Doing this will allow you to prime different extruders at the start of your print and in case you want to prime all of your extruders, select the “All Extruders” option in the settings tab.
Skirt Layers will let you choose how many layers you want to include in a skirt. As mentioned above, typically, a layer is enough to prime the extruder, but adding a 2nd or 3rd layer may help.
Then comes Skirt Offset from Part which will let you decide how far away the skirt should be from the edges of your part?
And lastly, Skirt Outlines would be an answer to the question, how many loops you want to print around the outline of your model?
Once you learn the art of 3D printing skirt, you can easily ensure the high-quality of your part or a functional prototype.
So, learn, upgrade, and renew the value of prints that you do use your 3D printer. We wish you very good luck with your next print using a skirt.


