Tired of looking at people being able to 3D print unique designs? Do you also want to find out what it’s like to create something from your imaginations?
First, you must learn to design parts for 3D printing. Trust this, the journey is not going to be easy, especially if you are a beginner with no experience of 3D modeling. But the good news is that it is possible.
While you can stay put with the already existing 3D designs available with online repositories. But the real kick is when you see your creation taking shape. Hence, if you are someone with that goal, there cannot be any best time than now to start learning.
3D printing is advancing at a great pace. The time you start taking the first few steps, it may reform to become even more useful. So, it is better not to wait too much.
Starting early would help you catch up with the latest trends. And, you can learn at your own pace without rushing at things.
All these benefits can help you find a head start. You will face challenges and you may wish to go back. But with patience, you can 3D design for 3D printing.
You can find a lot of online courses helping you to gain momentum while trying to learn 3D designing. Taking assistance from the best ones would be very helpful too.
Many of these courses also offer time to time workshops to hone your skills further. If you have a knack for technology, you must start from basics. And, it does start with designing parts for 3D printing.
What is 3D Modeling – Design Parts for 3D Printing?
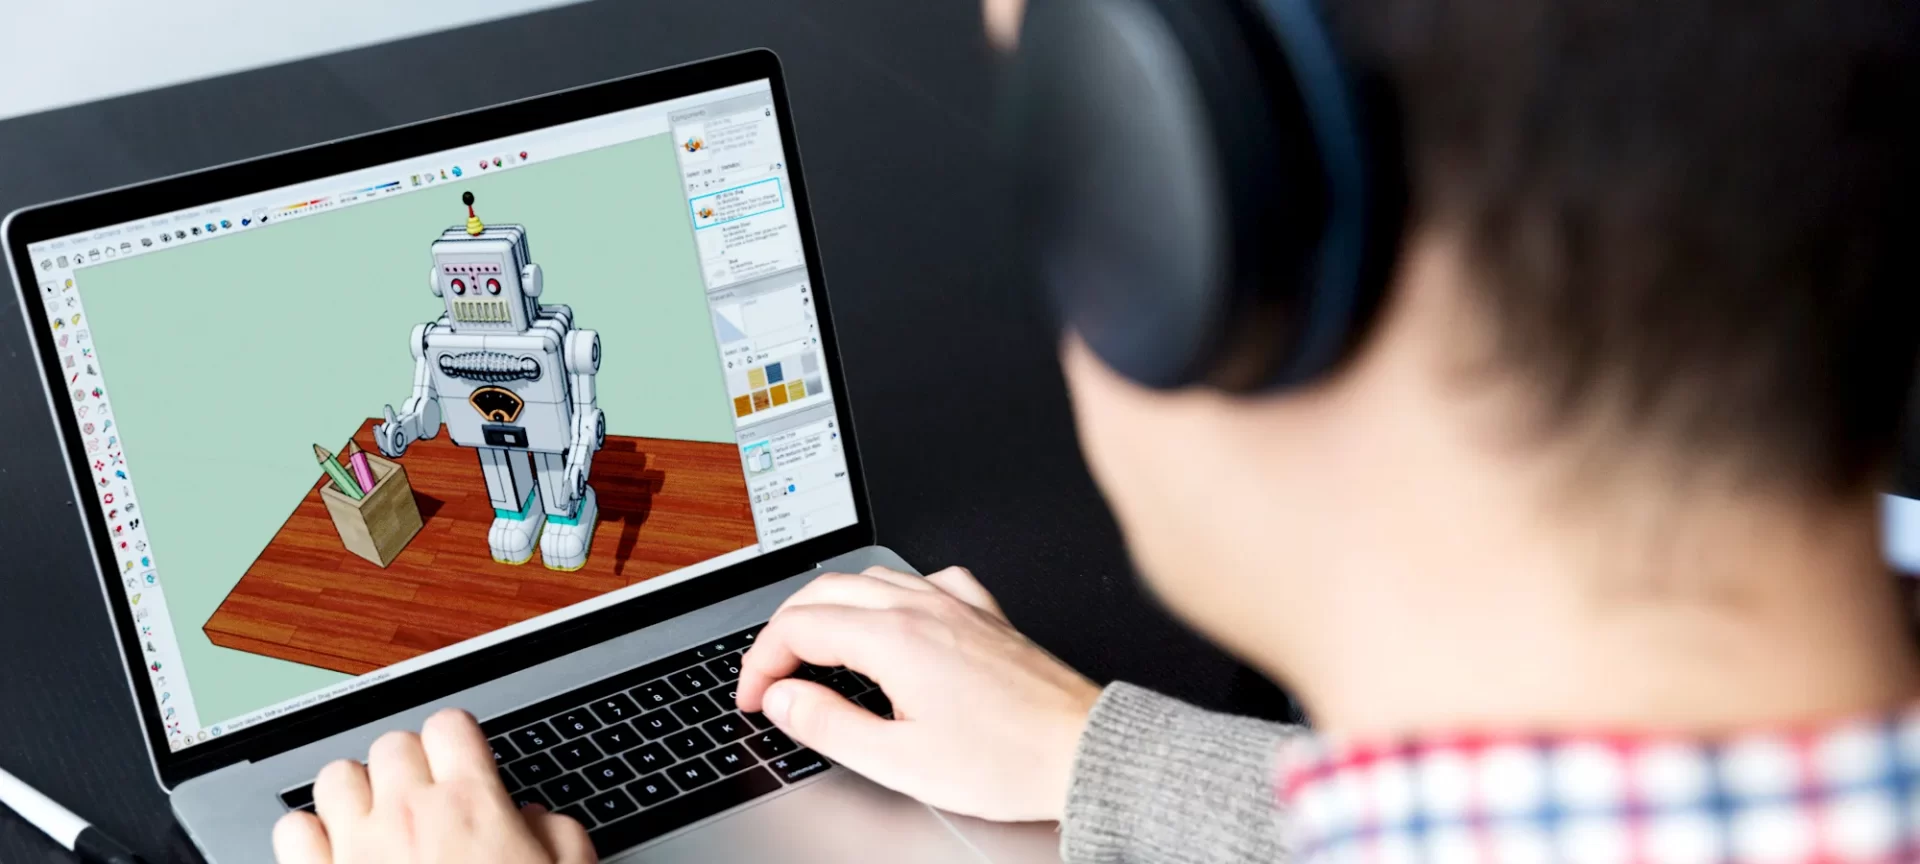
3D modeling or 3D designing is about producing a 3D digital representation of the part using software that you wish to create.
You can start creating parts with simple shapes. And, you can even use complex polygons to further achieve difficult 3D Prints. 3D designing is the first step towards 3D printing.
This is when you create a digital file that goes into the 3D Printer for manufacturing. This is an impression of how the parts would be printed.
You set the exact size and shape of the part when 3D designing. Every detail matters. From inch to inch, you must take care of everything.
Otherwise, the 3D print could fail miserably. Do not be alarmed. It may happen a few times when you start learning how to 3D design parts for 3D Printing. But as you experiment with different settings, you will find your sweet spot of success.
What Are The Steps to 3D Design Parts for 3D Printing?
It is important to know the basic steps when starting to 3D design. Because your entire 3D model depends on the design you create, you must perfect your skills.
Choose the Software
Do you know this is the most difficult part to start with? If you search for 3D modeling software, you will find plenty of options. Some are for beginners and others for intermediate and experts.
Even the list of those applications created for beginners is huge. And, there are subscriptions for these modeling applications. This means that you may not like what you pay for. But you need to try.
So, what can you do? How to design 3D models without knowing which software to go with? Pretty harsh, but no problem. The best part is that there are a few great tools that are available for free.
You can also enjoy free trial periods for some applications. The point is, you can find out which software is easy for you to work with by choosing the free ones. Start your selection by trying free modeling software.
Once you master the basic version, you can go with the advanced ones. It would be easier to shift to a complex alternative later if you have your base clear and precise.
Take Time. Do not Rush
It is important to take time when you start learning how to 3D design parts for 3D printing. You should not be rushing as if the world is going to end soon. When getting to know a new software, you must find out all the basic features and tools available with the same.
As mentioned above, try finding a course that could help you learn faster and with proper understanding.
You can also try to edit the already existing 3D models available online. And, you can choose to start with simple shapes such as squares and triangles.
You can also stack shapes over each other and 3D print to find out how it goes. Playing around a little bit would allow you to get acquainted with the software.
Never Give Up
If you really wish to get into 3D printing, you must keep it up. You will face challenges and failed prints. You may find it too daunting to go through the same settings and still cannot find the right numbers.
But that would all be worth it if you learn 3D modeling. Looking at the brighter side, you can utilize the failed prints to understand the capabilities of the particular material.
What to Consider When 3D Designing Parts for 3D Printing?
We did discuss the way you can start to learn about 3D modeling. However, there are certain tricks and tips you must always keep up your sleeves to avoid problems later.
The Right Orientation
You may have created a wonderful 3D design and want to print it further. However, even the best design could collapse when the orientation isn’t right.
The natural orientation is often the best way to go forward. This means that in most of the cases, the default orientation needs minimal overhangs. But sometimes, it is not the case. And, this is when you must intervene.
When talking about the orientation, the first thing you must look for is the wider base. For example, if you are working with a T shaped 3D model, could you expect the design to hold the top with such a narrow base.
The natural orientation, in this case, won’t allow you to 3D Print the object successfully. The worst part is that the model will fall after 3D printing more than 50 percent. Hence, you would be losing on time, material, and efforts.
Or else, if you still wish to print it with natural orientation, you must create overhangs. The 3D Print will be successful but eat up a lot of extra filament and the post-processing would be a challenge too.
That is why it is very important to find out the right orientation. The best design is where you can minimize the use of overhangs as much as possible.
The strength of the layers also depends on the strength of the base. So, orientation could save your model from failing right after the prints as well.
Deciding the Correct Layer Height
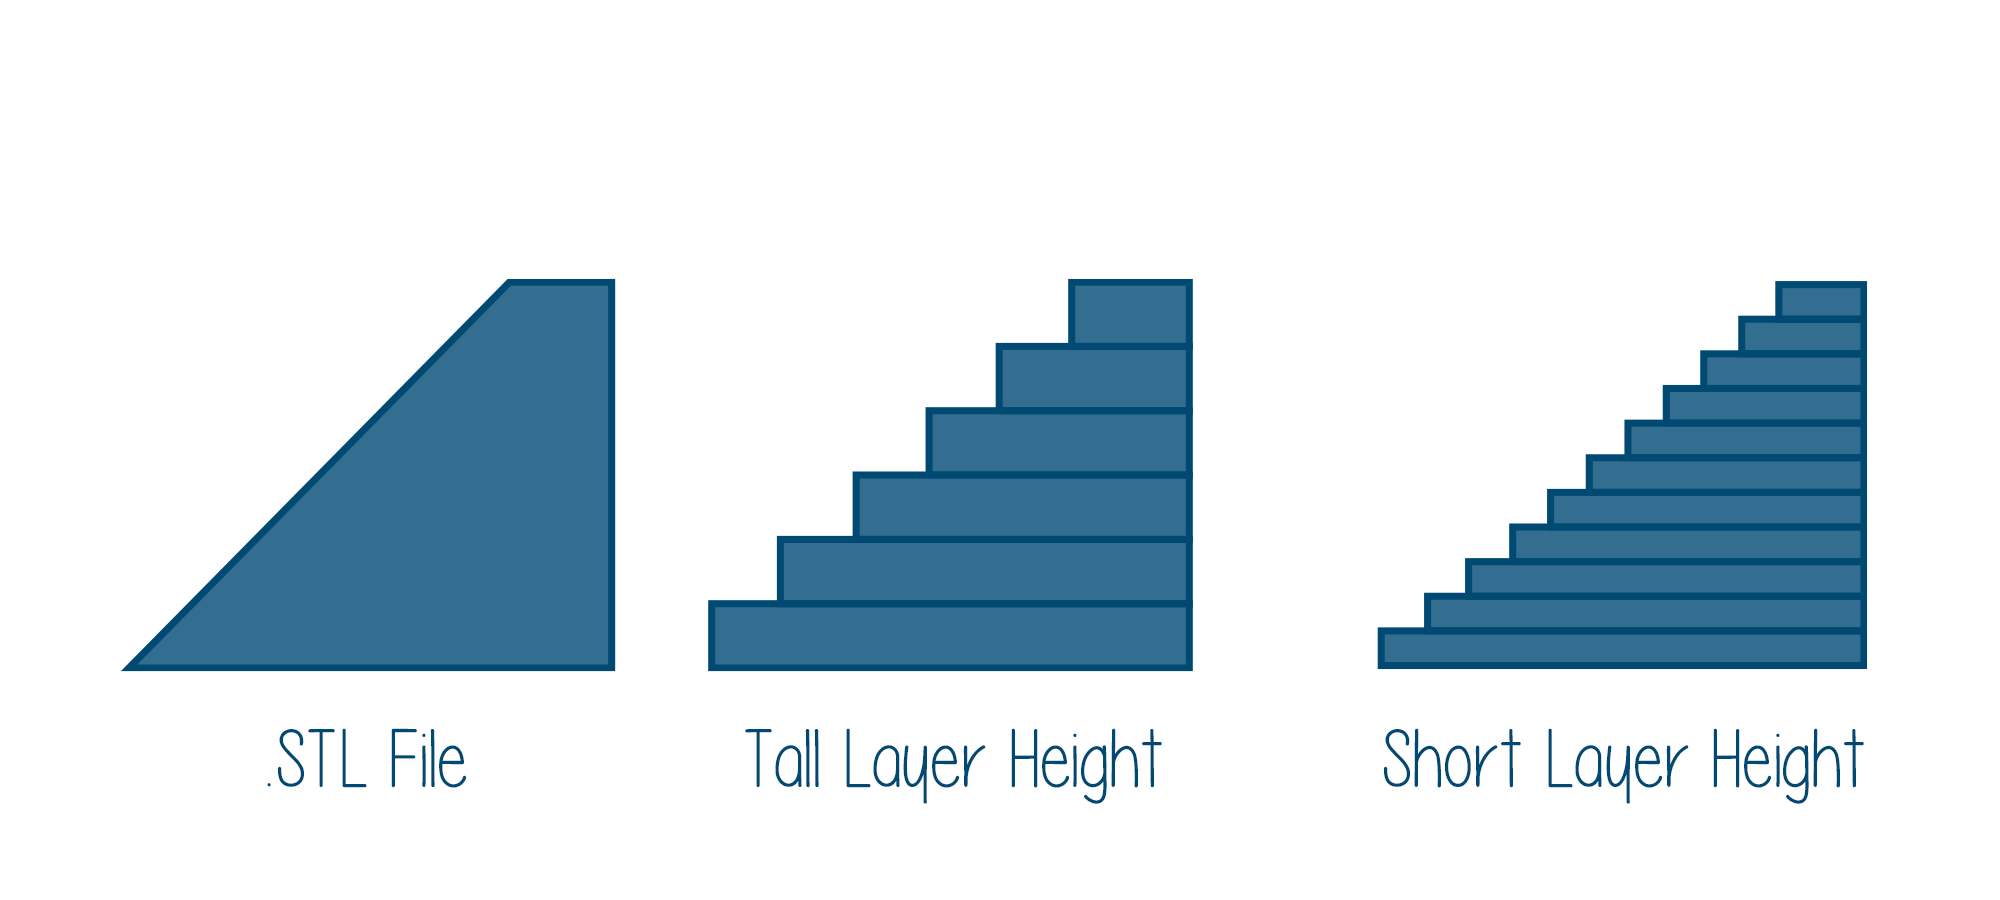
The layer height contributes to the surface finish of your 3D printed parts. The lesser the layer height, the finer is the surface and the layer difference is also minimum.
In short, the layer height would decide how great your 3D part would look after printing. However, the minimum layer height means that the part will take more time for printing.
In some cases, it becomes infeasible to keep the layer height to the bare minimum when printing large objects.
The problem is, when 3D printing a functional part, we do need the layers to be strongly connected as well as do not want to wait for too long.
In such cases, you can adjust the layer height to 50 percent of the nozzle size. This would help achieve a strong as well as quicker prints.
However, in the case where appearance matters the most, you can choose to keep the layer height lower. Hence, it is up to you, how you wish to progress with 3D designing.
Infill Levels
What does an infill level mean? If you are 3D designing, you do need to ensure that the model is well constructed as well as must not require a lot of material without a reason.
The infill level determines the percentage of space filled with material from inside of the 3D parts. When printing a square, you would need to ensure that the part is strong.
However, not completely filled with material (100 percent infill) to avoid investing excess time and material on the print. Usually, 25 percent infill is all you need to keep the strength of your parts intact.
In such a condition, the interior of the parts is filled with honeycombs, zigzag lines, or regular patterns. Hence, not acquiring 100 percent of the space. With 0.5mm of perimeter and 25% infill level, you can create a strong functional 3D part.
If you are 3D printing a part for decoration, you do not even have to use 25 percent of the infill level. Your job would be done with 5 percent of the infill level as well.
It is you to choose how strong you wish to keep your designer parts. Some even 3D print these parts with 0 percent infill level. A lot would depend on the design of the model as well.
There are times when you need to 3D print parts for high-torque gears or motor mounts. This requires at least 50 percent of the infill level.
You can go up to 60 percent infill or even more to get the desired strength. However, still, you would not need to 3D print with 100 percent infill levels.
You must also consider the need for printing a small object. When working with tiny models, where the surface area isn’t too much between the layers, your infill levels must be higher. You can use a 75 percent infill level for smaller objects.
Material Based Decisions
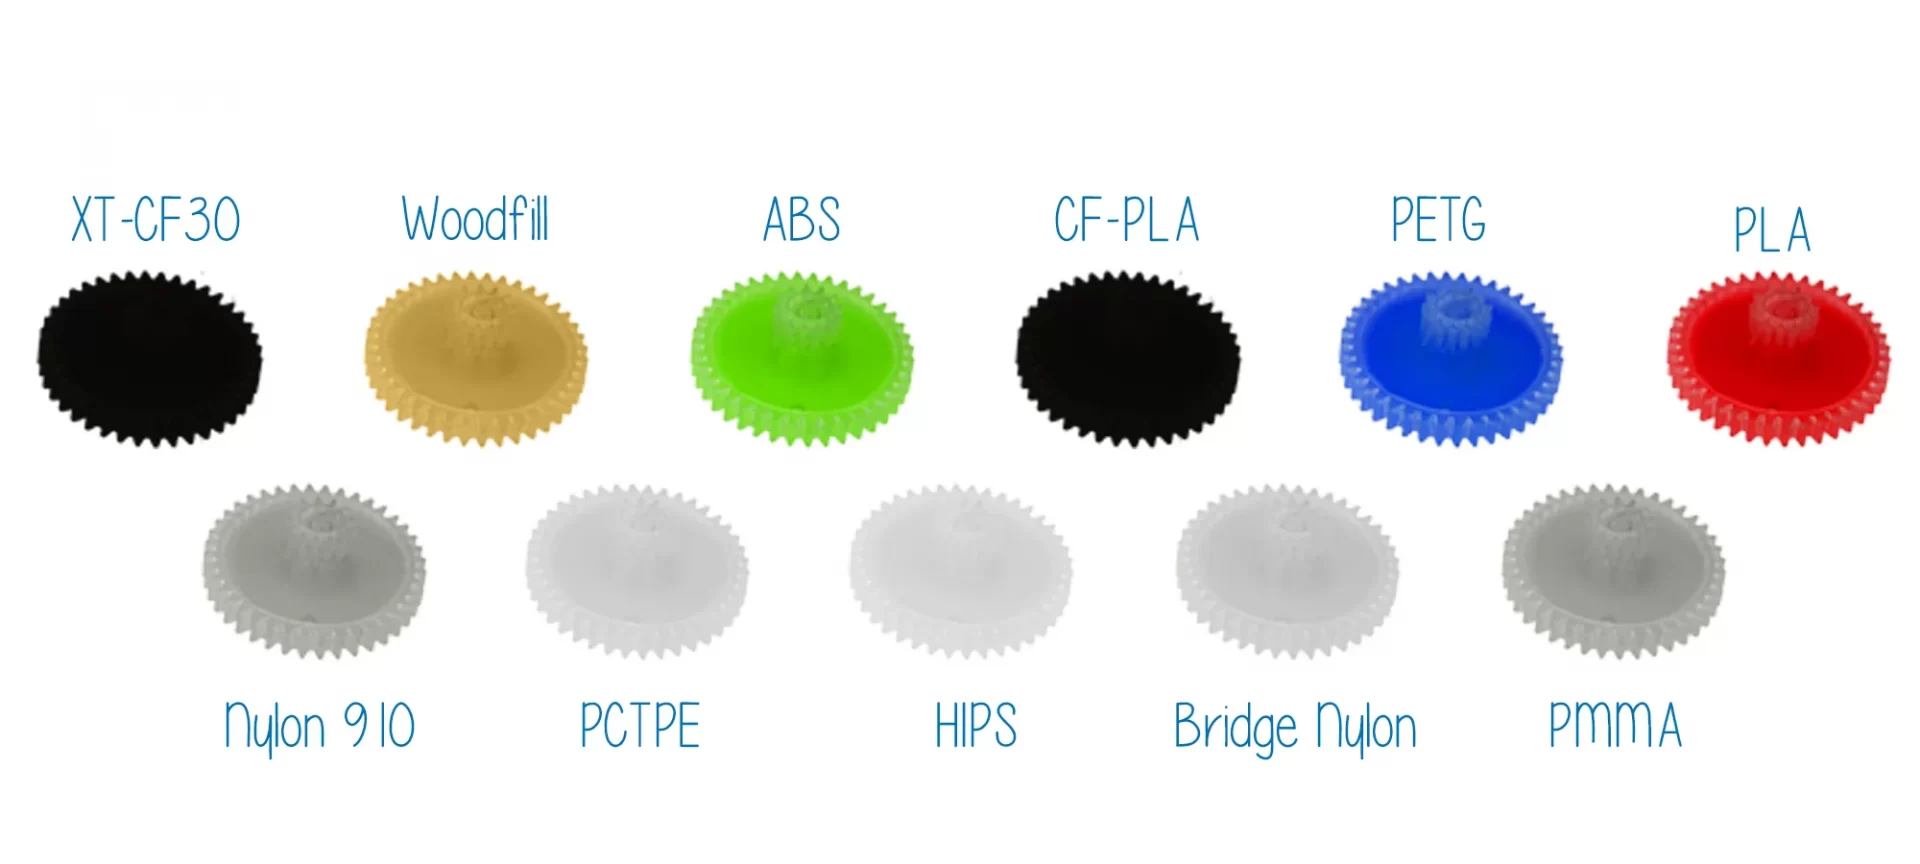
You must also consider the design specifics with respect to the material you would be using to build the model.
For example, PLA has got better layer bonding and could be best for 3D Printing parts larger than 100mm. Hence, if you are going to use PLA, you can stop worrying about the size of the 3D Print.
On the other hand, if you have chosen ABS, you must be highly precautious with your 3D design. This is so because the material needs a higher melting point and is susceptible to warping as well.
It is a tricky choice and your 3D design must be equipped with all the gears to handle the challenges faced during printing with ABS.
The Conclusion
Guessing work does not work with 3D designing or 3D printing. You must know the settings precisely to get to the best results.
Few times, you may have to experiment with what best suits your specific requirement. However, the settings would often be around the standard ones. Even then, a lot of people find it difficult to 3D print or 3D design.
This is major because 3D designing is not taught in schools or colleges within the standard syllabus. Also, the awareness of the possibilities hidden behind this powerful skill is still far-fetched to realize.
The good news is: time is changing and individuals are coming forward to bring this technology to the forefront.
Most necessarily, if one wishes to learn 3D printing, it becomes very crucial to crossroads with 3D modeling as well. Hence, you can do that too. The road that leads to 3D printing goes through 3D modeling.
Plus, you will be happy to see how you can start 3D Printing with your own creativity. Instead of selecting an online 3D design, you can think of something raw and unique.
Once you start to design parts for 3D printing, you would realize the fun of it. It is satisfactory as well as could keep you targeted at all times.
You can find out the various perks that the skill will bring with itself. So, even if you fail with few attempts, keep going. You will learn what you need to.


