OctoPrint

Before we begin with the setup instructions of OctoPrint for a Raspberry Pi 4, let us first determine what it is. OctoPrint is controller application software for your 3D printer.
Gina Häußge built it in 2012 who had initially taken the step to create it for her first 3D printer. This software application is compatible with Python 3. Its most essential use is for monitoring the print status remotely. It allows you to
- Manage the printers remotely
- Change print settings remotely
- Customize the operations by using plug-ins or self-written code, wirelessly
- Slice the 3D models using CuraEngine
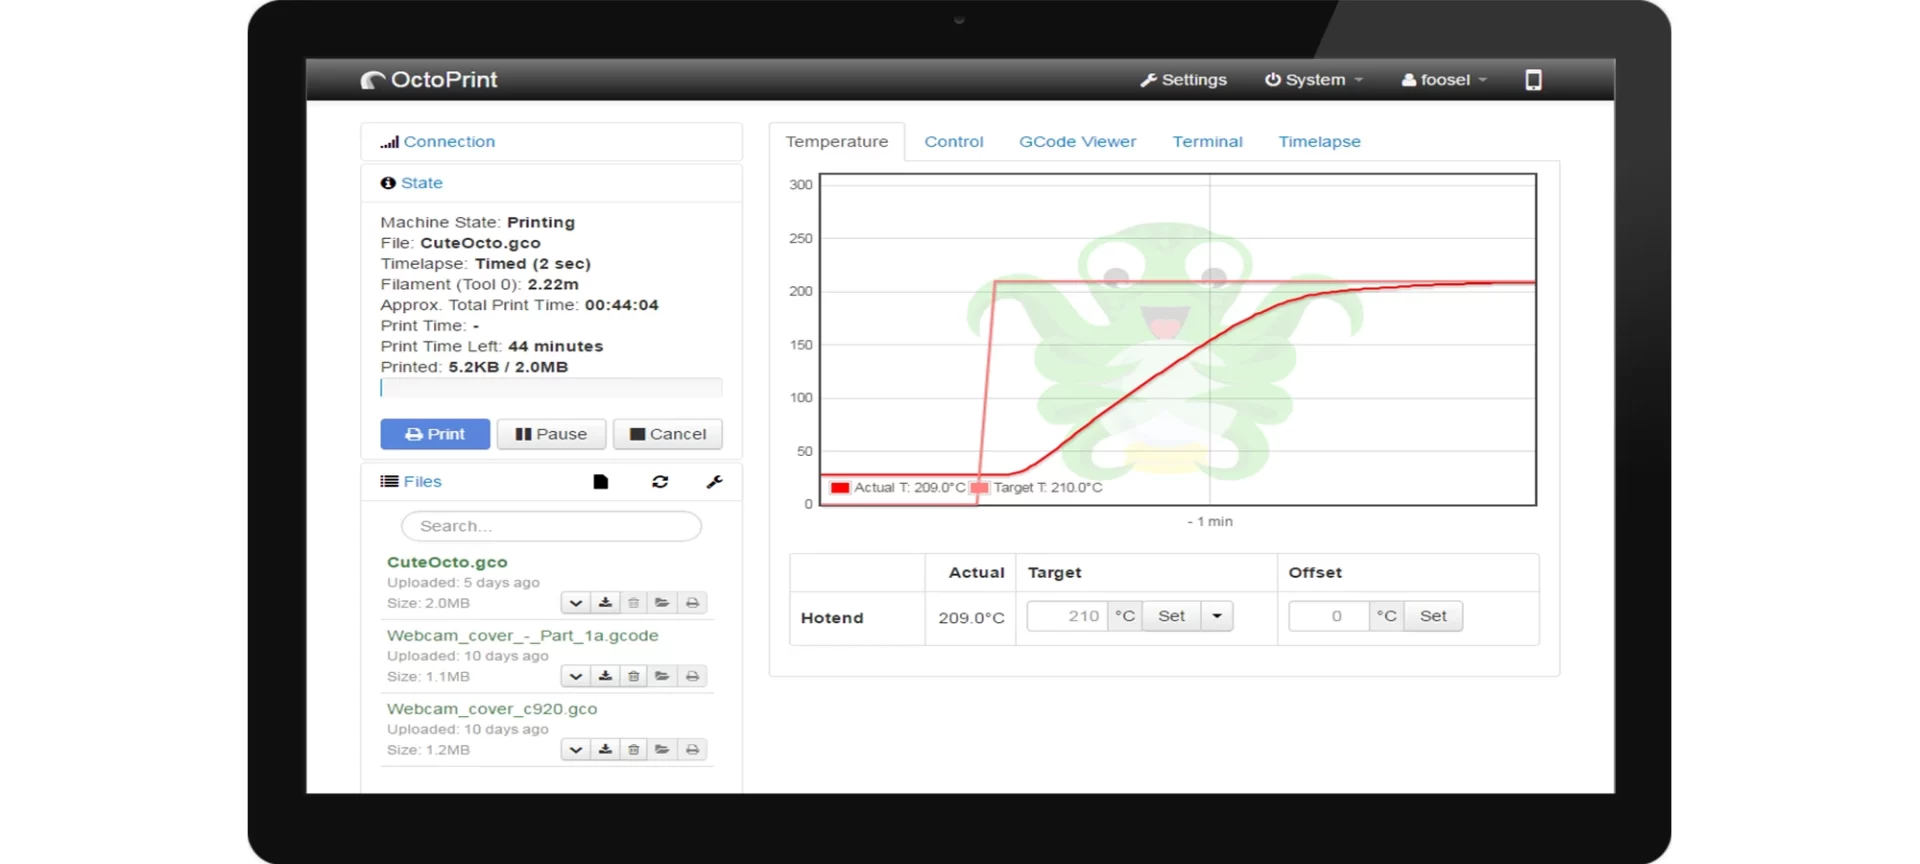
- Monitor the print temperature
- Upload G-code files from your computer to a 3D Printer
- Set up a webcam to monitor the progress online
- Regulate the temperatures of the warm end and the extruder
A Few Reasons To Set Up OctoPrint
CONVENIENCE
When it comes to wireless 3D printing, most 3D printers require the 3D files to be uploaded via a USB port or an SD card. This means that every time you decide to print, you will have to insert the SD card into your computer, load the G-code, and then plug the card into your 3D Printer.
And of course, a printer without an SD slot needs to be tethered along with the computer all the time. But, by the use of OctoPrint, all of this tedious activity becomes eliminated. Instead, the entire process becomes wireless.
PLUGIN BUNDLES
To add icing to the cake, the variety of plug-ins provided by OctoPrint’s Plugin Manager Interface makes life much easier.
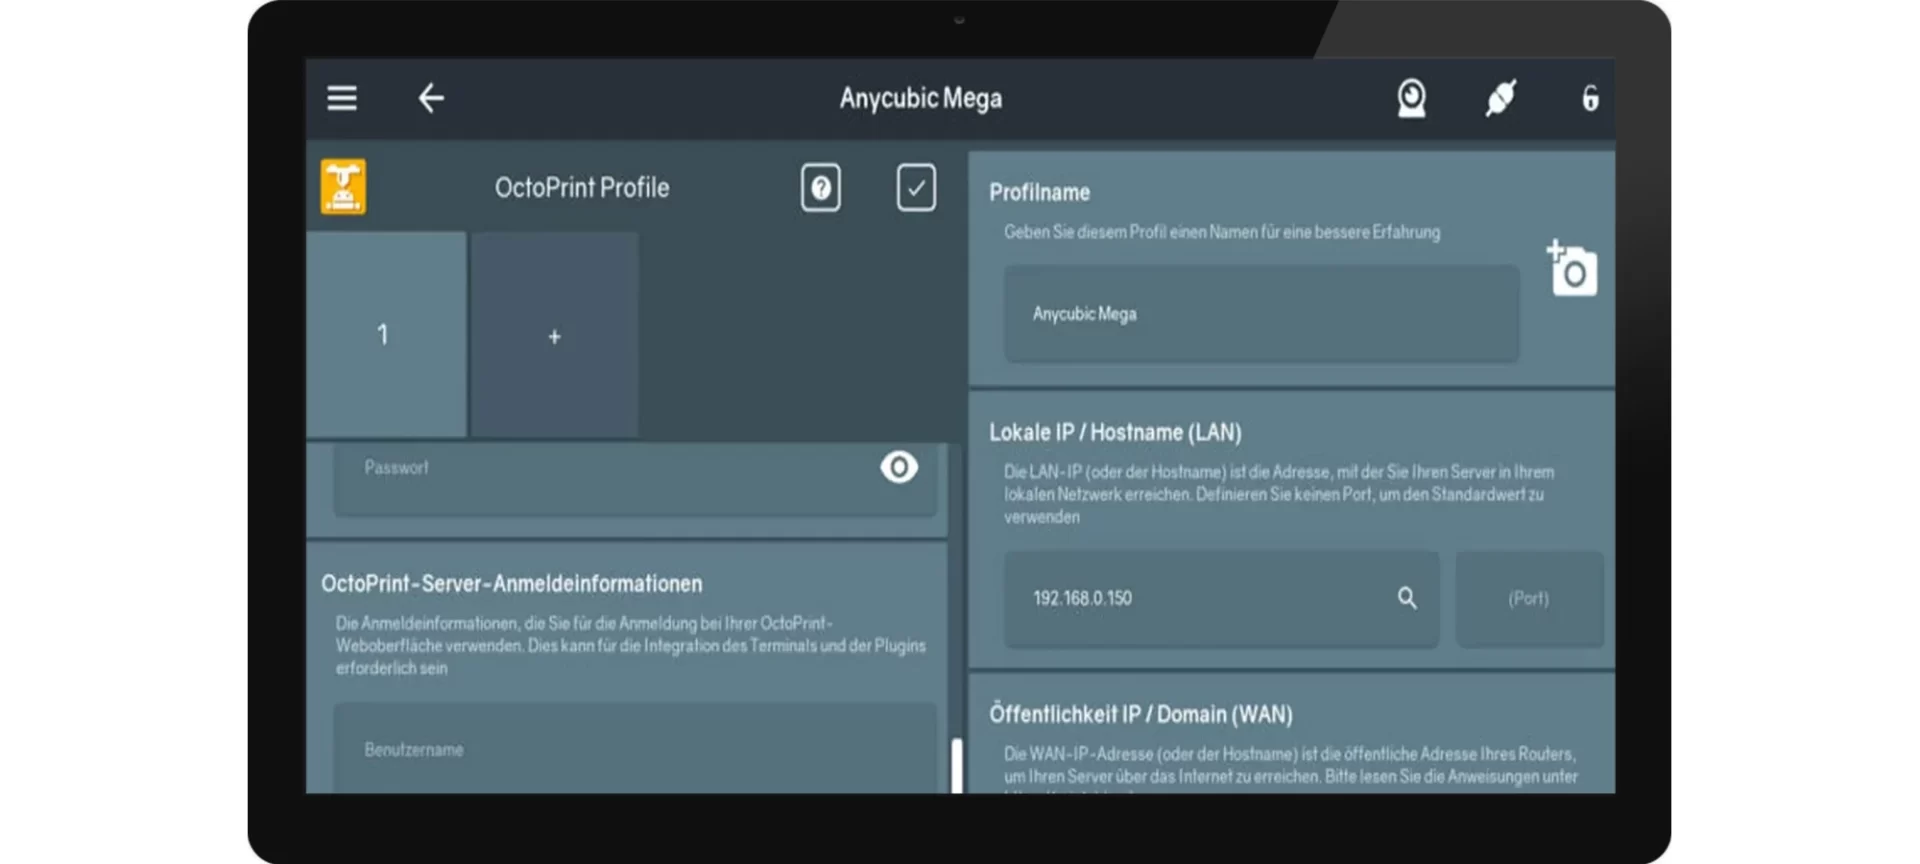
These may include external monitoring/controlling via smartphones, custom time-lapse creation and, telegram integration for remote controlling, emergency stops, bed Level visualizing, spaghetti detective, and Pushover. Currently, there are over 300 plugins listed in the official OctoPrint plug-in repository.
CALIBRATION
OctoPrint can run on a variety of systems but its most common use is on Raspberry Pi. Another cool functionality is that OctoPrint enables you to calibrate your 3D printer, which allows the view of the existing system presets on the command terminal directly.
Some of these commands may even allow you to input and store new calibrated values. If you are someone who likes to tinker with their machine, this feature will surely come in handy.
TOUCH SCREEN UI
Apart from this, cloud slicing is another mind-blowing feature of OctoPrint. You can also use the touchscreen UI of OctoPrint using their famous TouchUI Plugin.
This installation setup for touchscreens might seem a bit tedious at first, but we are sure that the guides and tutorials available out there would make your journey way easier. All of the source code is available on OctoPrint’s GitHub page for anyone who wants to modify it.
DIVERSITY
Another great aspect about OctoPrint is that you can connect and work with more than one 3D printer at a time. Hope so that these amazing advantages of using OctoPrint have broadened your exuberance and excitement to continue with the setup journey.
Requirements

Only 2GB of RAM would be enough for the OctoPrint setup. Apart from this, to start with the journey of setting up OctoPrint, the things you will require include:
- Raspberry Pi: It is highly recommended to use the Raspberry Pi models, which are compatible with OctoPrint to eliminate any chance of risk. The Raspberry Pi versions 1 and 2 are compatible but not officially supported by OctoPrint, so it is better to avail the latest options such as the Raspberry Pi 3B, 3B+, or 4B. It is necessary to note that the Raspberry Pi zero is explicitly unrecommended due to its performance failure and low standard.
- Full-Sized or micro SD Cards: According to your pi model requirement, you will need an SD Card (MicroSD or Full-sized) along with an SD adapter. An 8-GB Card should be enough if you do not plan to queue a large number of prints through OctoPrint. But, if you plan to make time-lapses on a daily basis, it is better to use 16 GB or a 32 GB card instead.
- Power adapter: Since voltage deprivation during the printing process can cause many performance issues, power adapters are extremely necessary to ensure the optimum delivery of electric power to the board. According to the website of OctoPrint, all its models require a 5.1-V supply, but the power supply connection may vary according to the model. Such as Micro-USB for Raspberry Pi 3B/3B+ and USB Type-C for 4B. The electric current transmission may also depend upon the board models, such as 2.5 A for 3B/3B+ and for 4B, 3.0 A.
- USB Cable: this is for you to connect the Raspberry Pi to the 3D Printer. The Pi end is a USB Type-A. The USB cable selection would depend upon the 3D printer end type.
- 3D printer + your passion: Lastly, you will require a 3D printer that is compatible with the OctoPrint software and the Pi model. And of course, the most important thing required now is your passion to print.
The Beginning Of The Setup
Setting up OctoPi Image

To begin with the setup, you will have to boot your Raspberry Pi with the OctoPi Image. To make that possible, you will need to install a tool to flash your SD Card. The best option required for that would be the Raspberry Pi imager, which is available for macOS, Windows, and even Linux.
For this,
- Firstly, download and install the Raspberry Pi Imager from the Raspberry Pi foundation.
- Secondly, insert the SD card into your computer.
- Open the imager and under the “Operating Systems”, click on “Choose OS”.
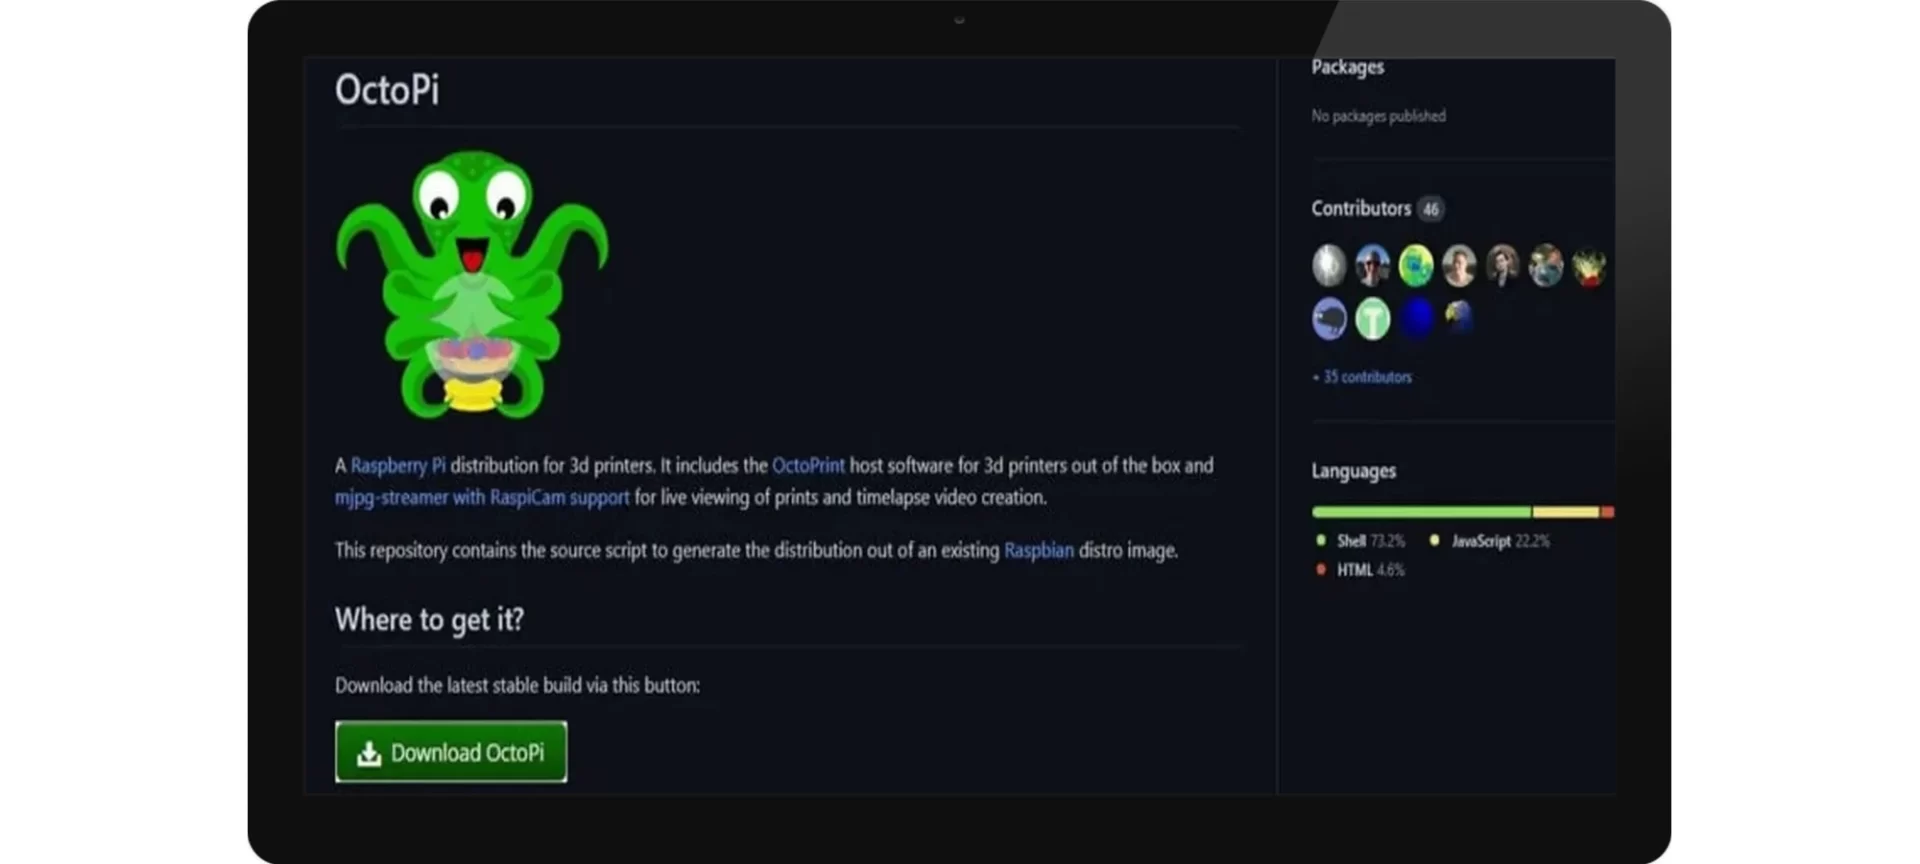
- To find the latest version, go to “Other specific purpose OS >OctoPi”
- Navigate back to the main window, click on “Choose Storage” and then select the SD Card
- Here, click “write” and the Raspberry Pi Imager will begin downloading and installing the OctoPrint Image
After this installation, the software will run a quick verification, and then you will be completely set to continue.
Alternate tool: Etcher
As an alternate preference, you can also use Etcher, which is another free tool for macOS and Windows.
- From the GitHub Repository, download the latest version of OctoPi.
- Unzip the downloaded image having the extension “.img”.
- Thirdly, insert the SD card into your computer.
- Open Etcher.
- Select your SD Card.
- Select the OctoPi image
- Click “Flash”.
POINT TO NOTE: If the pi imager or Etcher ejected the SD card after the flashing, remember to re-insert it into your computer.
WIFI SETUP

Now that the Octopi image is installed, the next step is to input your Wi-Fi network’s name and Password to get the Raspberry Pi connected to the internet.
For this step,
- Open the SD card’s directory, which may be located wherever the external drives show up.
- Look for “octopi-WPA-supplicant.txt” in the whole mish-mash of files.
- If you are a Windows user, open the file in NotePad, while the macOS users should open it on TextEdit. You can also open it in other text editors such as VSCode or Atom.
- To begin the editing, remove the first ‘#’ from the four lines in the first network block.
- In the “SSID” line, type the Wi-Fi network’s name.
- In the “PSK” line, type the password; In the case of using OctoPrint for multiple networks and 3D printers, you could simply copy-paste the network blocks and fill in the varying details of each network.
- Enter your country code in the code present near the bottom of the screen. If you are in the UK, ignore this step as it is already done for you. Otherwise, you will have to enter‘#’ in front of the UK and remove the ‘#’ in front of the country where you are. The code would seem like this:
Country=GB # United Kingdom
#country=CA # Canada
#country=DE # Germany
#country=FR # France
#country=US # United States
- After saving this file, eject the SD Card.
COMMUNICATION SECURITY
For the SSH (Secure Shell) access, every Raspberry Pi board comes with a default password and username. Due to this, it is highly recommended to change the password and secure your 3D printer from unauthorized access. To begin with this:
- Insert the SD card into the Raspberry Pi’s slot and, in case of a Wi-Fi adapter requirement, connect the adapter to a USB port on the Pi.
- Plugin the power cable to power up the Pi
- Open CMD on Windows or Terminal on macOS and run “sshpi@octopi.local”, you can even replace the “octopi.local” with the IP address that is assigned to your Raspberry Pi by the router. An example of the code can be:
## WPA/WPA2 secured
Network= {
ssid=”Octopus”
psk=”OctoPrint”
}
- If it confirms your request for connecting, type yes and hit enter.
- Type the default password “raspberry” and hit enter.
After logging into the Pi, you can be able to change the default password by performing the following steps:
- Run “sudoraspi-config” for which it would ask for the default Pi password once again.
- Hit enter as soon as the first option, “Change User Password” appears.
- Enter your new password twice.
Voila! Now your OctoPrint setup is completely protected and secured. Remember to use this password every time you decide to access Pi through the SSH.
SETTING UP THE PI CONNECTION WITH YOUR PRINTER
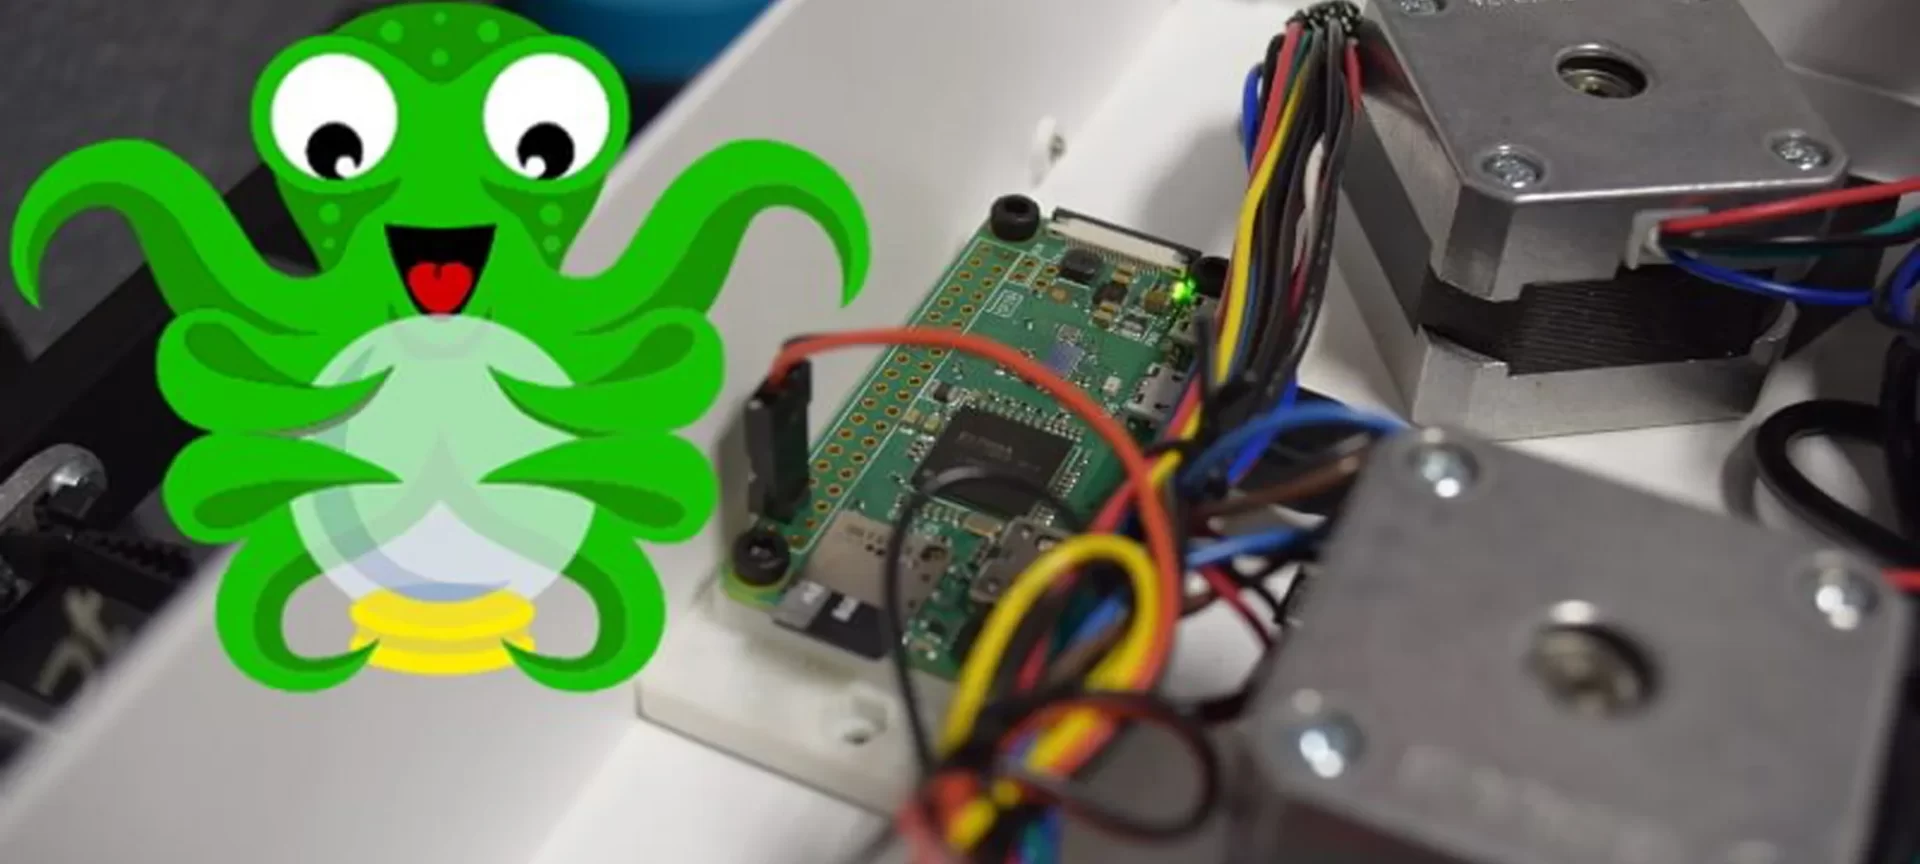
Bring all the pieces together by connecting the Raspberry Pi to the 3D printer. For this, only three simple steps would be required:
- Disconnect the Pi from the power by removing the power cable.
- Connect the Pi to your 3D printer with a USB Cable.
- Power up your 3D printer and the Raspberry Pi
INTERFACE SETUP
After booting up the Raspberry Pi, you will be able to access OctoPrint through your local network.
- Type “http://octopi.local” on the browser engine of any web browser. Your computer should be connected to the same network as the Raspberry Pi is connected.
- The setup wizard and the OctoPrint interface and will pop up. Keep following the upcoming steps to set up the password for OctoPrint. Remember that this password will not be the same as the one you had set for the Raspberry Pi SSH. Therefore, you can use a new password to access it later on.
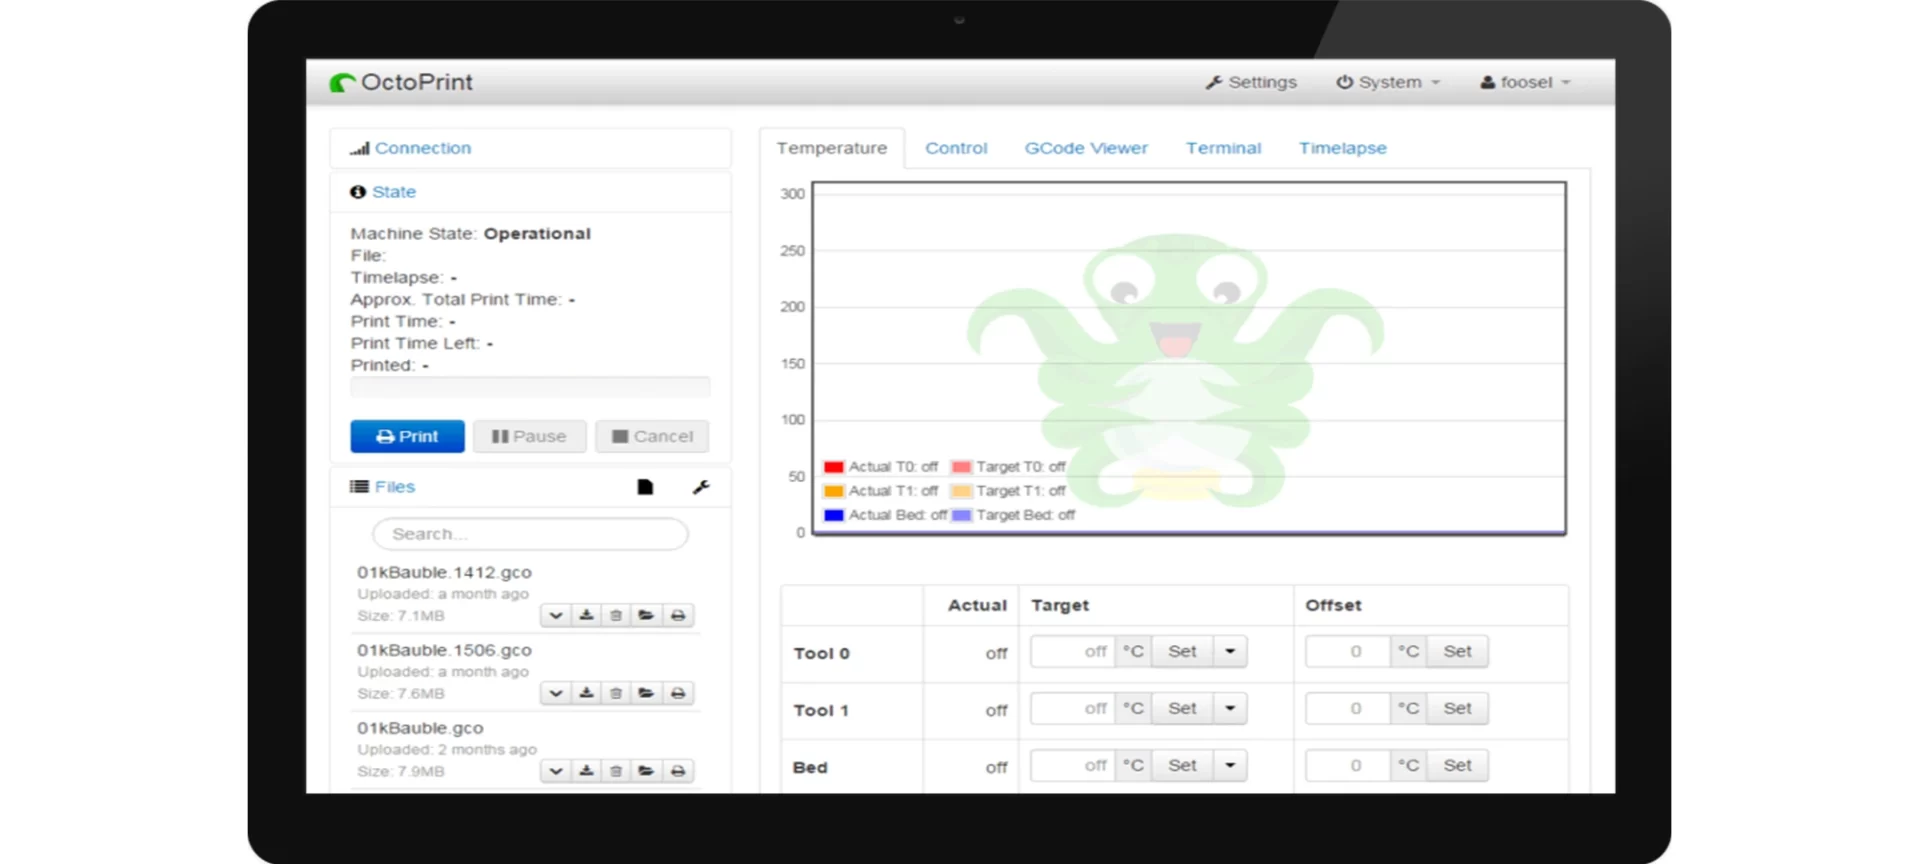
- To connect to your printer, open up the connection panel on the left with the options set to “AUTO”, click on “Connect”. If this step does not work out, try manually setting the serial port and baud rate until it begins working.
Yippy Yay! You have successfully set up OctoPrint on your computer and 3D printer. Now, to make your Very first print through OctoPrint, click on the “Upload” button that is present on the lower-left area and select a readily sliced G-code file.
Once it is imported, all the files will be presented as a list in the “Files” panel. To begin with, the printing, click on the small printer icon.
It was not that difficult, right? Now you are absolutely prepared to explore all of the OctoPrint’s functionalities and plug-ins! Good Luck with your journey!
Further Resources
For further referencing and troubleshooting, you could try using The MagiPi issue # 36, which contains a guide for getting started with this software on pages 50-51.
Image customization link: If you want the scripts to build and customize the image yourself, you can find it in OctoPi’s Github repository.
Linux setup link: For further details regarding the OctoPrint setup on Linux, you could look them up here.
Windows setup link: For installing the OctoPrint server on the Windows OS, you could click here for more detailed instructions on the forum
Mac setup link: For installing OctoPrint on Mac, you could get further details here on the official OctoPrint forum.
Troubleshooting link: For troubleshooting tips regarding the full Wi-Fi setup, you could check out the Full Wi-Fi setup guide from the forum.


