Regardless of whether you have a 3D printer at home or use one at your school or nearby maker space, it is possible that you have had a failed print or two in your time.
Running out or knotting of filament, your print stripping away from the print bed — these are normal 3d printing issues, and they can be expensive in case they’re found past the point of no return.
A 3D printer’s control board (otherwise called a motherboard) is known as the “brain” of the printer. It controls the equipment, like fans, stepper engines, drivers, radiators, and thermistors, using guidelines deciphered from G-code by firmware.
A 3D printer control board is explicitly intended for that reason and, while there are choices like PandaPi to run a 3D printer with an alternate board, most clients decide to stay with a devoted board.
What is Raspberry Pi?
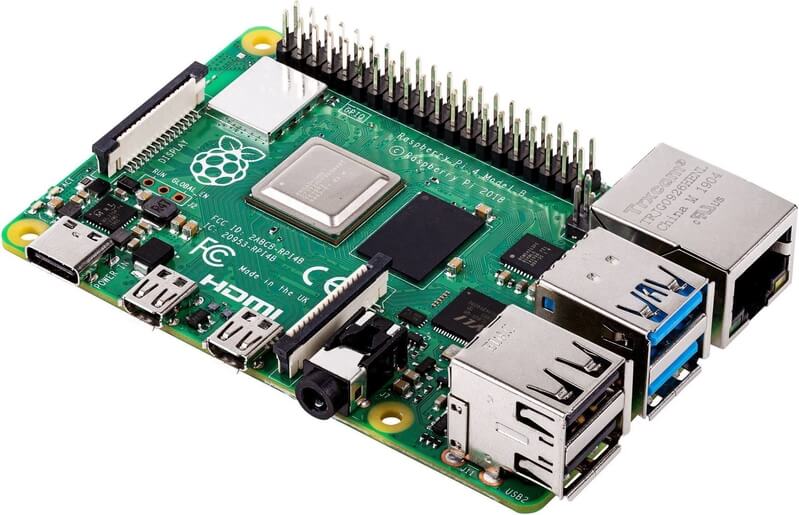
Raspberry Pis are small and less costly single-board computers (SBC) that can be utilized for some things, not at all like a 3D printer control board.
Some Pi uses web servers, sound players, game console center emulators, and even desktop computers (although it may only be beneficial for less taxing tasks like web browsing).
What is OctoPrint? (Definitions and Uses)

OctoPrint is free open-source programming, made and developed by Gina Häußge, which plays out a large number of valuable 3D printing-related errands, including controller of your printer, live video, and collection of data. In the event that you do not have it yet, the download and a setup guide can be found on the OctoPrint site.
Monitoring and Control
To control the print job, use OctoPrint on a Raspberry Pi is connected to your 3D printer. To begin with, guarantee a safe, uninterrupted run by using the product to limit who can get to the printer. Then, prior to beginning your print, use the web application to chip away at your STL document.
The application additionally permits you to reposition the print head whenever along with pausing or quit printing if necessary.
Live Video Streaming
Since OctoPrint can transfer video of your print as it occurs, you can look out for any issues that might expect you to cut short and restart. You can record the whole cycle from beginning to end and transfer the time-lapse by video to your preferred social media platform.
Data Capture
OctoPrint records real-time information, like the temperature, giving you one more approach to screening your print to guarantee a smooth, continuous process. In addition, the records will assist with investigating in case there is an issue.
In this article, we will go over the product and equipment prerequisites to run OctoPrint on a Raspberry Pi and give an overall outline of the setup cycle. Above all, let us take a look at the upsides of joining the utility of OctoPrint with the force of a Pi.
Why Use OctoPrint?

Maybe the best motivation to use OctoPrint is the capacity to screen your print progressively; you can associate a webcam and allow live video streaming of the print as it occurs.
Of course, streaming and control are just accessible on the local network, however, a basic module enables you to see the stream and control your printer from anywhere in the world!
You can also calculate the approximate print head location as the component is made. (Obviously, this is the part where we need to say that it is not wise to leave your printer running unattended).
One more valid justification to utilize OctoPrint is the ease with which records can be shipped off your printer (or printers) from the computer by running your slicing software.
For instance, Cura has a choice to simply connect and print with a single click. Nonetheless, if you do not have OctoPrint integration, the G-code can be stacked into OctoPrint by an internet browser.
OctoPrint Modules
OctoPrint can add significantly more benefits through extra modules. One of these modules is The Spaghetti Detective, named for a 3D printer’s ability to make what resembles a major heap of spaghetti in case a print fails.
This module uses a camera to look after your print and uses AI to check if the print begins to give up. It very well may be arranged to stop the print or essentially tell the client if issues emerge.
There are loads of module alternatives that will update your printing experience, so it is worth going through the module manager in the OctoPrint settings (or go to the OctoPrint module storehouse site) to see what else is achievable.
There are various generations of Raspberry Pi, with the equipment having been updated with each resulting release, coming full circle in the incredible Raspberry Pi 4.
There are other SBCs that have comparable capacities, for example, the Orange Pi Pc Plus, Banana Pi M3, Rock Pi 4, Odroid XU4, Asus Tinker Board, and Jetson Nano, to name a few.
There is also a scope of options in contrast to OctoPrint, which are worth looking into. A portion of these product alternatives can be run on a Raspberry Pi, however, some cannot, and hence a double check will be required when buying equipment.
There are many alternatives (OS) accessible for a Raspberry Pi, with the default choice being Raspberry Pi OS (in the past known as Raspbian). Please note that the downloaded system is alluded to as an image.
OctoPrint can be run any place where Python 2.7 or 3.7+ (programming dialects) are upheld. It formally upholds Linux, macOS, and Windows, despite the fact that its planned use is on low power and small device so you may run into issues using an all-out computer or Mac.
Controlling Your 3D Printer with a Raspberry PI
Below are all the requirements you need for setting up Raspberry PI for controlling your 3D printer.
Equipment
As indicated by OctoPrint, you are in an ideal situation using a Raspberry Pi 3B, 3B+, or 4B. In case you are utilizing a more seasoned model, there is an uplifted danger of print artifacts and you will encounter prolonged loading times, particularly in case you are intending to run extra modules or a webcam.
Regardless of your Pi choice, you will need a USB link to connect the board to the printer, a Micro-SD card (no less than 4 GB), and a 5 V force supply or buck controller to control the Pi. The controller is optional and may require soldering, nevertheless, it will empower the Pi to run from the printer’s power supply.
Programming
Usually, you will require the OctoPi software, alongside an etcher for making the boot drive. Putty, a device for designing the Pi by means of SSH, is an extra. (You can simply command prompt on Windows or Terminal on Mac.)
Set-Up
The essential strides to set up OctoPrint on a Raspberry Pi are mentioned below.
- Download the software and firmware tools from their individual sites.
- Compose the firmware onto the SD card.
- (This process can be skipped in case you will utilize a network cable.) Complete the Wi-Fi arrangement. Enter the network SSID and password in the “octopi-wpa-supplicant.txt” document on the SD card. Note that Visual Studio or Notepad++ must be utilized rather than Notepad.
- Insert the Micro-SD into the Pi.
- Boot (apply power to) the Pi.
- Sign in to the Pi by means of SSH.
- Set up a username and password.
- Connect with the printer.
- Sign in from an internet browser.
- Transfer your model, and print!
Conclusion
In addition to a Raspberry Pi, it turns out to be a lot simpler to monitor your printer’s progress as well as transfer and even make a timelapse of a print.
There are also many modules that can add extra usefulness, depending upon your necessities. In general, this is an incredibly beneficial development to your 3D printing arrangement.
In spite of the fact that there are other equipments and programming choices accessible, the mix of OctoPrint and a Raspberry Pi is usually best.
This is a benefit since, in case that you have any issues, there is somebody who might be there to help who has effectively experienced and settled a similar issue.
More definite advisers for getting OctoPrint designed and set up can undoubtedly be found on the web, and the OctoPrint online community is an extremely accommodating asset.
Moreover, some helpful sources are mentioned below:
- Chris’ Basement: A simple-to-follow video tutorial for setting up OctoPrint on a Raspberry Pi with the help of Putty programming.
- Raspberry Pi Blog: A thoroughly reviewed guide on the best way to set OctoPrint on a Raspberry Pi, including a screenshot.
- Teaching Tech: Another accommodating video guide that shows how to set up Octolapse, an approach to catch time-lapses where the print seems to rise up out of the bed.


