“Painting 3D models” is a very less explored subject. Rarely will you find proper information on how to effectively paint your 3D printed parts. While many users think that the process is simple, one must put great effort to beautifully cover the parts with desired colors. Have you tried to spray paint 3D prints before?
Spray paint isn’t often considered for coloring the entire part. On the contrary, users often utilize it for quick coverage. Or else, one can find individuals spraying paint for creating graffiti, and completing patch jobs on rusted vehicles.
Very few understand that these paints too can help accomplish detailed, artistic effects. All you need is the right technique and spray paint can help finish your printed parts with smoother surfaces and multiple color gradients.
As 3D printing has evolved over time, spray painting 3D prints too has managed to transform. So, if you spray paint your 3D printed parts randomly and thinking why isn’t it giving you satisfactory outcomes? Well, it’s because you are not following the correct method. So, here are a few tips to use spray paints and convert your dull parts into something amazing.
How do You Spray Paint 3D Prints?
As mentioned, Spray painting has a very different reputation among people. However, when it comes to 3D printing, these colors can play a very important role in giving your parts the look you desire.
With trial and error, experts have realized that acrylic spray paint works well as it sticks, provides an even finish as well a great final result! Priming is one such step that almost all beginners skip, and experts do not, because not only it makes painting effortless but also creates a flawless final surface.
Tip 1: Choosing a Suitable Location
Spray painting should only be carried out in a controlled environment without any draft or wind. Also, items near the part you wish to spray paint must be covered. In case you are filming, keep your camera at a distance that is out of the painter’s reach.
Remember that even the slightest movement of air makes the paint particles spread in various directions and stick to anything they come in contact with. Ideally, if you have a shed or a garage at your place, spray paint can be safely carried out there. Experts recommend not carry out spray painting in just any place in the home.
In case you do not have a dedicated place for spray painting, create one in a specific corner at your home or workplace. Plan in advance of the space where you’d store your freshly spray-painted prints because they might have to stay there overnight for drying.
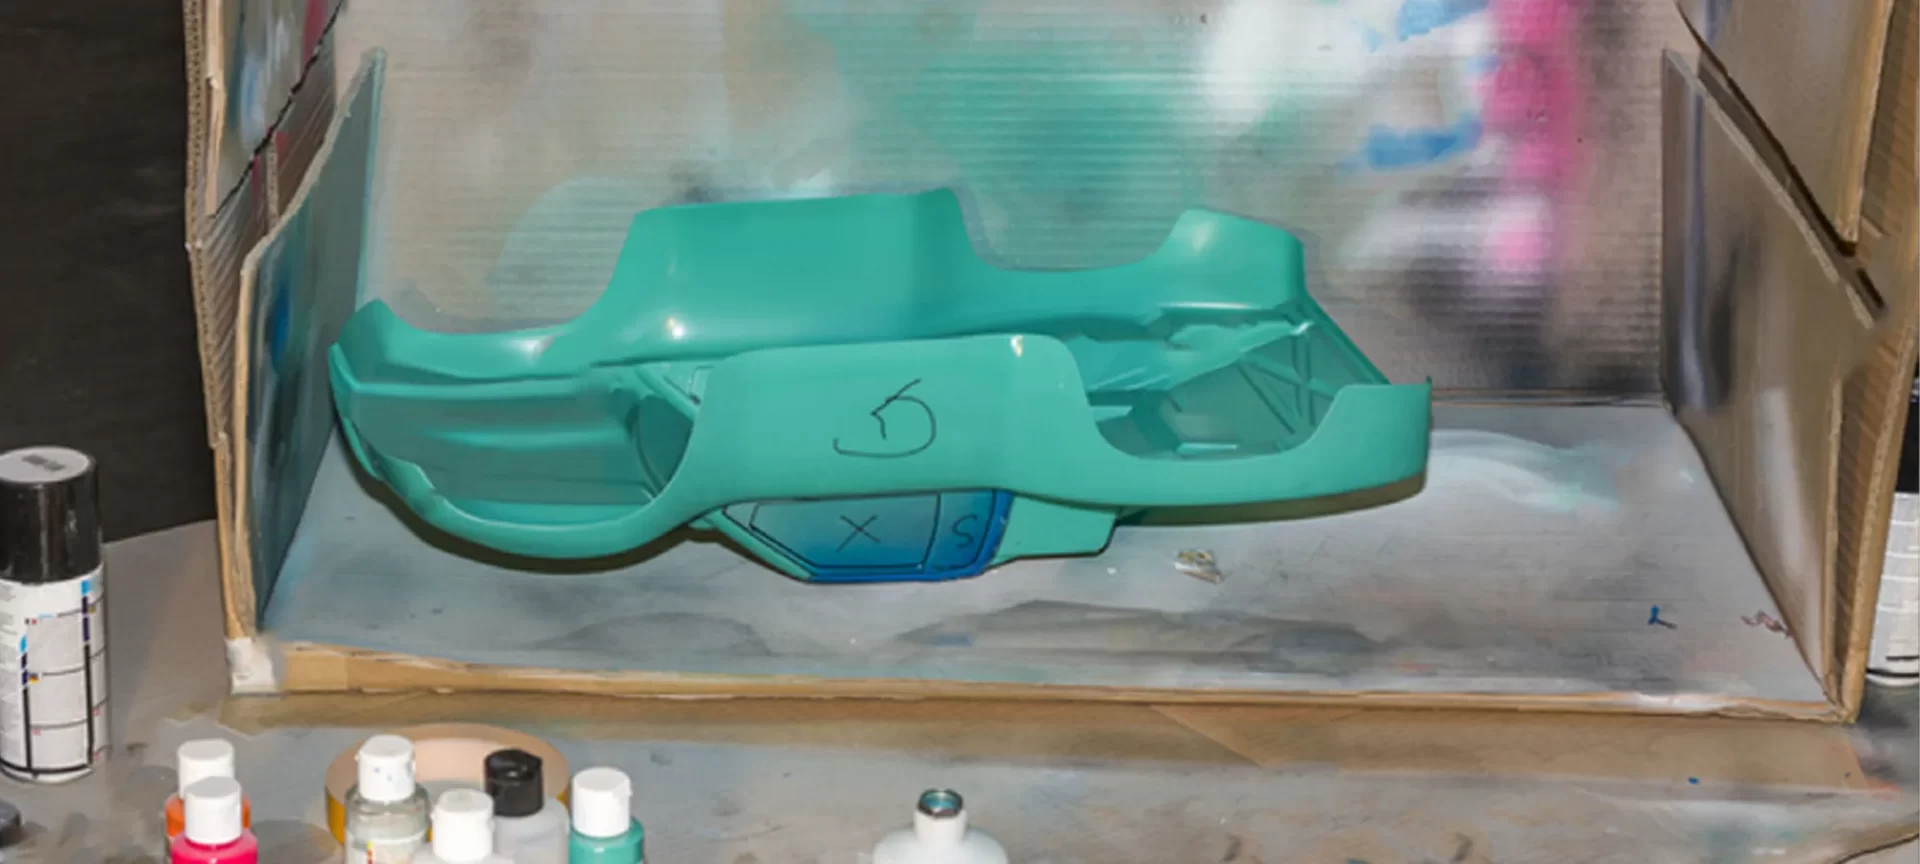
Spray painting 3D prints using a cardboard box is known to work well. It protects the surroundings from the paint as well as shelters the finished item from dust when kept for drying.
Tip 2: Inspect the Finished Part Nicely
Before applying any sort of paint or primer onto a plastic surface, ensure that it’s free from any sort of dust or dirt. Experts recommend using fine sandpaper for making the object’s surface a little less shiny and more adsorbent.
And after the sanding process is over, the part should either be brushed or wiped clean. It can be primed before applying the paint. Primer is fundamentally a paint that’s specifically designed to adhere to almost every surface.
There are many sorts of primers with various characteristics but the most suitable one among all is a multi-purpose spray primer that not only plays a significant part but also comes out to be cheaper compared to others.
Priming can be done stepwise starting from sanding, followed by priming and letting it dry in open. Thereafter you should check the finish if it’s desired, the process completes, if not, it is to be repeated.
Priming a finished object treats the surface and helps the paint to stick better than usual. It is the most important part of post-processing prints to make them look professional, after painting.
Tip 3: Choosing the Type of Spray Paint Wisely
There are many categories of spray paints available in the market. The simple two categories are:
- The simplest ones that actually apply the color.
- The transparent ones with just the glitter.
In case you choose the latter, eventually, with time the paint will fade out and your print’s original color would take over.
Also, a lot depends on the brand that you choose. So, if you are unlucky you might hit upon the wrong name and will need a lot of spraying, and also it will take too long to dry out.
Many brands have a pre-requisite of priming the part to painting. Not doing so, absorbs the paint. So, do check out the requirements of the spray paint brand that you use. Some experts recommend silver metallic spray paint because it dries much quicker and is easy to apply.
Tip 4: Setting up the Part
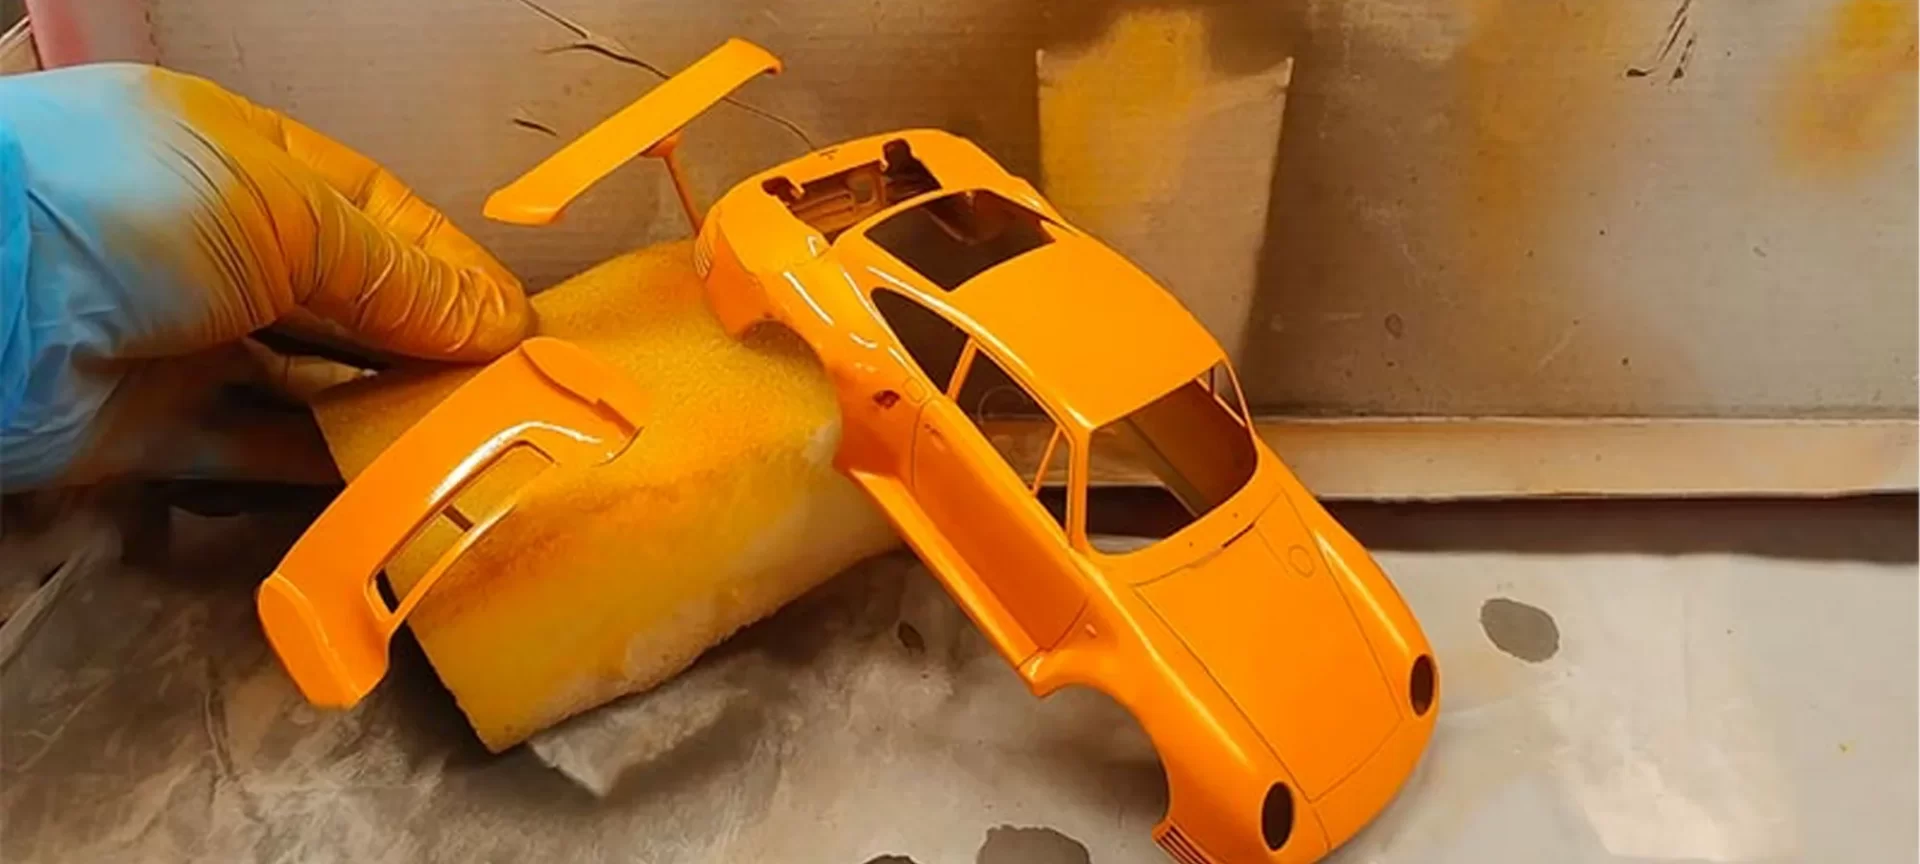
In case your part is a little bit complex and has intricate geometries, you are requested to hang it from some sort of a wire or place it on a stand. This will enable you to reach all or most of the parts without turning them over.
However, in scenarios wherein your painting is to be carried out in limited space instead of painting only on the outside, place your part on some sort of newspaper so that you do not end up damaging the surrounding. And if you are only spray-painting specific parts, use the painter’s tape to conceal the parts that you don’t want to paint.
Tip 5: Carry out the Spray Painting in Three Steps
The spray painting process is quite similar to priming.
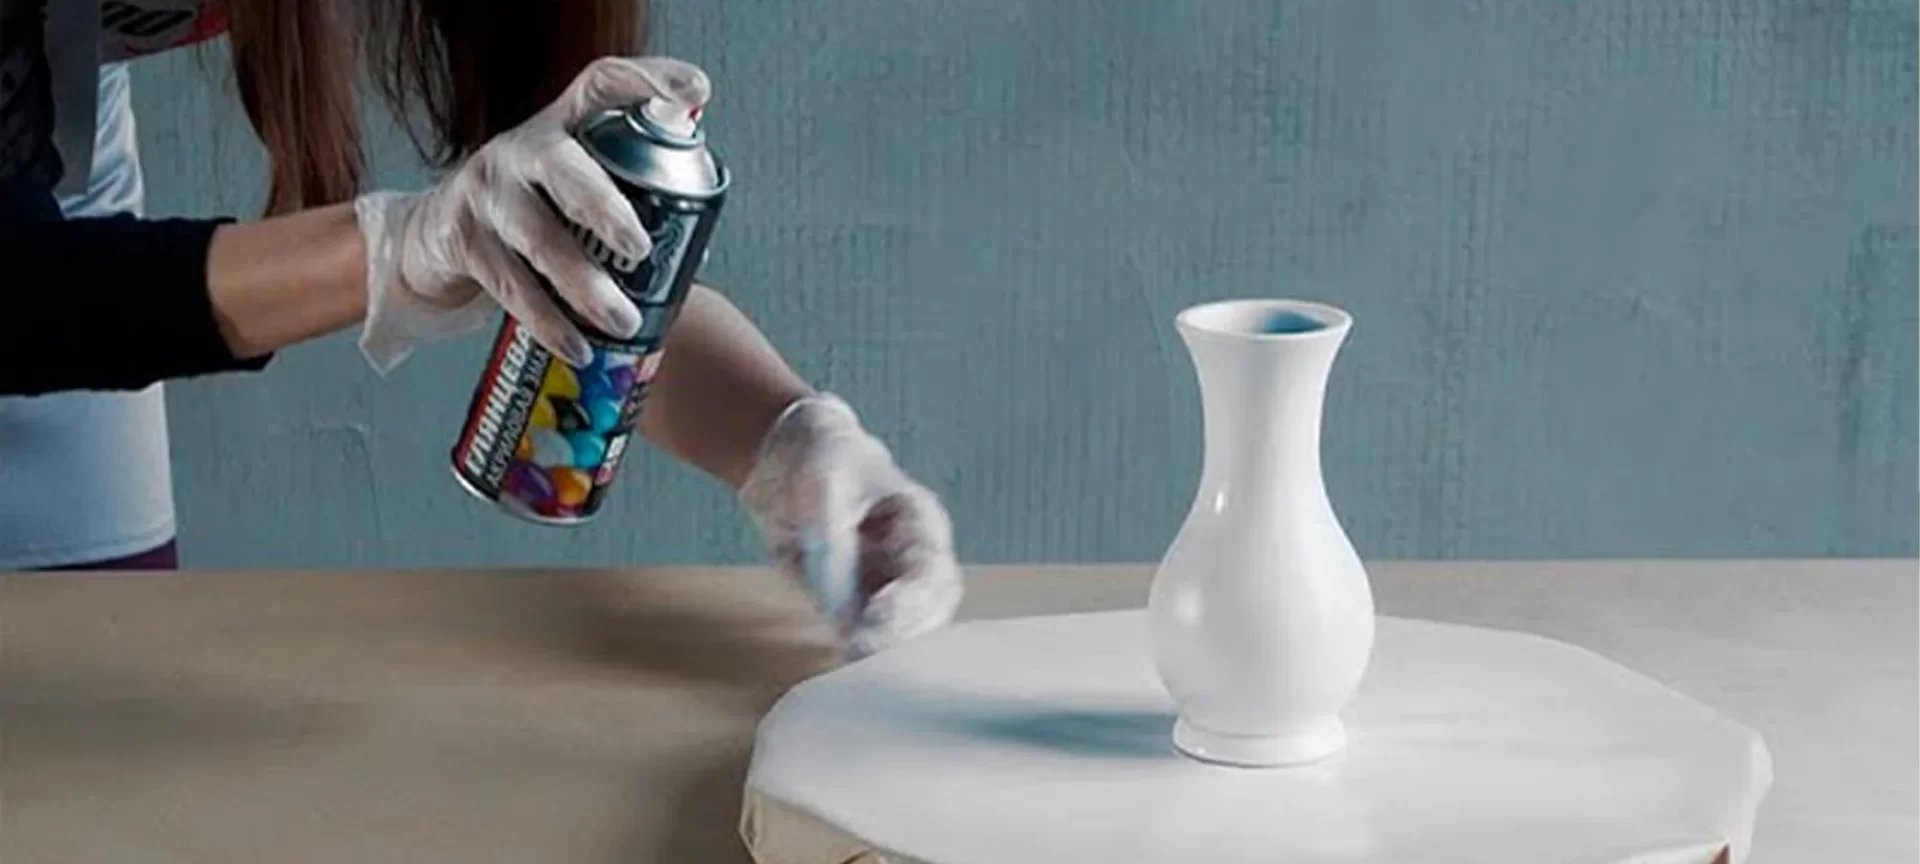
- Apply the first coats: Holding the nozzle near the rotating model start moving the spray paint around quickly. It is advisable to start with two light coats and then finish with three or four wet passes. While spraying you can wait for five to ten minutes for avoiding sagging. In case you wish to continue refining the surface, buffing and polishing the paint surface for maintaining a smooth surface is recommended. This will look glossy under the clear coat. However, it’s not necessary to do so.
- Adding topcoats: Masking the particular areas for preserving their details you are recommended to add topcoats. They are layers over the previous coats and will not generally show if thinner. Generally, the first and the second coats will be easily seen. However, if you put it in between the applications and let the paint sit for a couple of minutes observing the color whether it’s saturated enough or not, it will work.
- Finishing with a clear coat: This step is generally meant to seal the painted model, mainly for protecting the painted surface and achieving the desired shine. Users can apply the clear coat in one or two thin and even layers and then wait for 10 minutes between their applications. It is at this point that your paint is almost over but you can still polish it using wax or a fine polishing compound in case you wish to have a super glossy finishing.
Points to keep in Mind While Spray Painting
- To spray paint 3D prints, masking is a very important step to keep in mind. It involves removing the tape right after it’s done. So, to ensure that the paint stays make sure you have clean and sharp edges between colors. Do not need to worry about coating the mask as the tape will prevent almost any paint from seeping through.
- The first coat will always block the neutral color of your primer and is advised only when you wish to have rich colors. Although, normally white is an ideal first coat to have for light colors and black is perfect for darker tones.
- The topcoats are optional and not every part needs them. Only when you are applying a contrast color you will be able to create gradients of rich color fusions. In case you wish to have the first and second coats, print the topcoat easily.
- Ensure complex parts are printed in layers and not in one go. Start with the first coat, because it acts as a foundation for the painted model, note that there are a couple of tweaks you can do in case you wish to highlight details create reflections or get a weathered appearance.
Expert Advice for Professional Spray Painting
To spray print 3D prints is to ensure that the part will end up looking professional. So, go through the below-mentioned advice by an expert and imply them to get great surface paint on your excellently printed part.
- The first and foremost advice is to keep the utmost safety precautions because spray painting is hazardous. Not only is it flammable and toxic, but can also cause harm when breathed in. So, while you are spray painting your 3D prints be safe and wear appropriate clothes, rubber gloves, and a respirator.
- If possible, spray paint 3D prints in a dedicated environment where there is negligible wind because even the slightest air resistance can change the way things are working to an extent that it can spoil your complete print. Also, carry out the complete spray painting in one session. Do not do it in parts, otherwise, there are complaints that the object has different shades of paint.
- Spraying too close to the print ends up with noticeable drips that do not look nice on the parts. It’s best to print in multiple coats keeping each one of the light. Darker coats end up appear to be a short time solution which then has chances of fading out. Instead, multiple lighter coats stay long-term.
- Try various preparations like mounting your model on a dowel using a hole in the part. But ensure that the dowel can withstand the part’s weight and it would not break. If everything works fine, the arrangement would make it easier to maneuver the object while spraying paint over it. Also, you would be able to access all the crests and troughs and most importantly do not end up with any fingerprints.
The Conclusion
Spray paint 3D prints with Tamaiya spray paints. They do not only come in a variety of colors and finishes but also, go well with plastics. Also, Montana Gold Acrylic professional spray print is known to provide the best results.
Note that, it is up to you to decide how many layers to spray paint. Although reading about spray painting helps, it eventually comes down to your judgment. So, it’s better to test your hand before doing it on the final finished part.
Also, a lot depends on the geometry of the part that you are spray painting. Sometimes you spray paint 3D prints using a single layer and it looks fabulous, the other time even three layers are not enough. This is where the logic of topcoats and layering comes into play. Overall, there is no one rule to master this art of spray-painting 3D prints. In fact, the more you experience the more you learn. The best is to start with light painting.
Moreover, to spray paint 3D prints a lot of observational skills come into play. In case the paint looks too thin, you need to take a call of painting one more layer over it. At the same time, beware of not adding too many layers as that would result in losing all the carefully finished 3D printed parts failure which is probably the last thing you’d want.
Spray paint 3D prints to make them look more professional and appealing. But more than that it’s about making them look more realistic. Colors make objects more noticeable so that when you need them the most, you do not have to go out looking for them because they are already striking out!


