You may already be familiar with 3D modeling, and maybe you just got your first 3D printer, and you want to get your hands dirty, but you don’t know where and how to get started.
In this article, we’re going to take you through some of the most important things you need to consider when DfAM based on experts’ recommendations.

Design for Additive Manufacturing, usually shortened as DfAM, involves all the skills and practices that allows hobbyists, engineers, prototype designers, as well as other 3D printing enthusiasts to create 3D printable models using 3D printers.
It’s important to note that not every designed 3D model is printable, as there are requirements that have to be met to successfully 3D print them.
It’s an exciting technology, however, most beginners are stuck when it comes to where they should start from in order to create 3D models that are printable.
Engineers, prototype designers, and other professionals who have just been designing general models for 3D printing are now challenged to push their boundaries to design models that have less weight and which use less material to print.
It has already changed the way they think and operates as it’s different from the traditional method of preparing designs for manufacturing.
Though there is no one-fit rule for designing models for 3D printing because there are different software, materials, 3D printers, as well as 3D printing technologies that you can use.
There are, however, some general rules and requirements one needs to put in mind to be successful. Let’s have a look at some of them.
Get the Correct Tools for 3D Printing
Having the right tool with you will really help you in achieving your goals, and you can choose from all the various 3D printing software available. To begin with, you have to choose a good 3D modeling software.
Before, most of the 3D modeling programs were not optimized for 3D printing – they were used just for designing models themselves that later had to be imported to external software to print them.
But as the technology continued to advance, more and more 3D modeling software became optimized for 3D printing. Examples of such programs are SelfCAD, Fusion 360, Autodesk AutoCAD, and many others.
We’re not going to discuss each of them as that would be the topic for another time, but we’ll briefly discuss the one that we are using.
SelfCAD is an online 3D modeling software for both beginners and professionals. It’s been optimized for 3D printing and equipped with tools, such as Magic Fix, that will fix the geometry of your designs in preparation for 3D printing.
SelfCAD also has an in-built slicer, compatible with the majority of 3D printers, and it’s easy to customize it based on your requirements.
There is also an option to preview how your design will be 3D printed. Once all is set and done, you can generate the G-Code that you can send to your 3D printer.
If SelfCAD isn’t your cup of tea, you should opt for Fusion 360 or AutoCAD. Once you’ve decided on the tool you will be using, and once you have your 3d printer, it’s time now to dive in and begin the 3D design process.
If you don’t have a printer yet, and you want to buy one, you can check out the list of the best 3D printers available to choose the appropriate one.
Choose the Appropriate 3D Printing Technology to Use
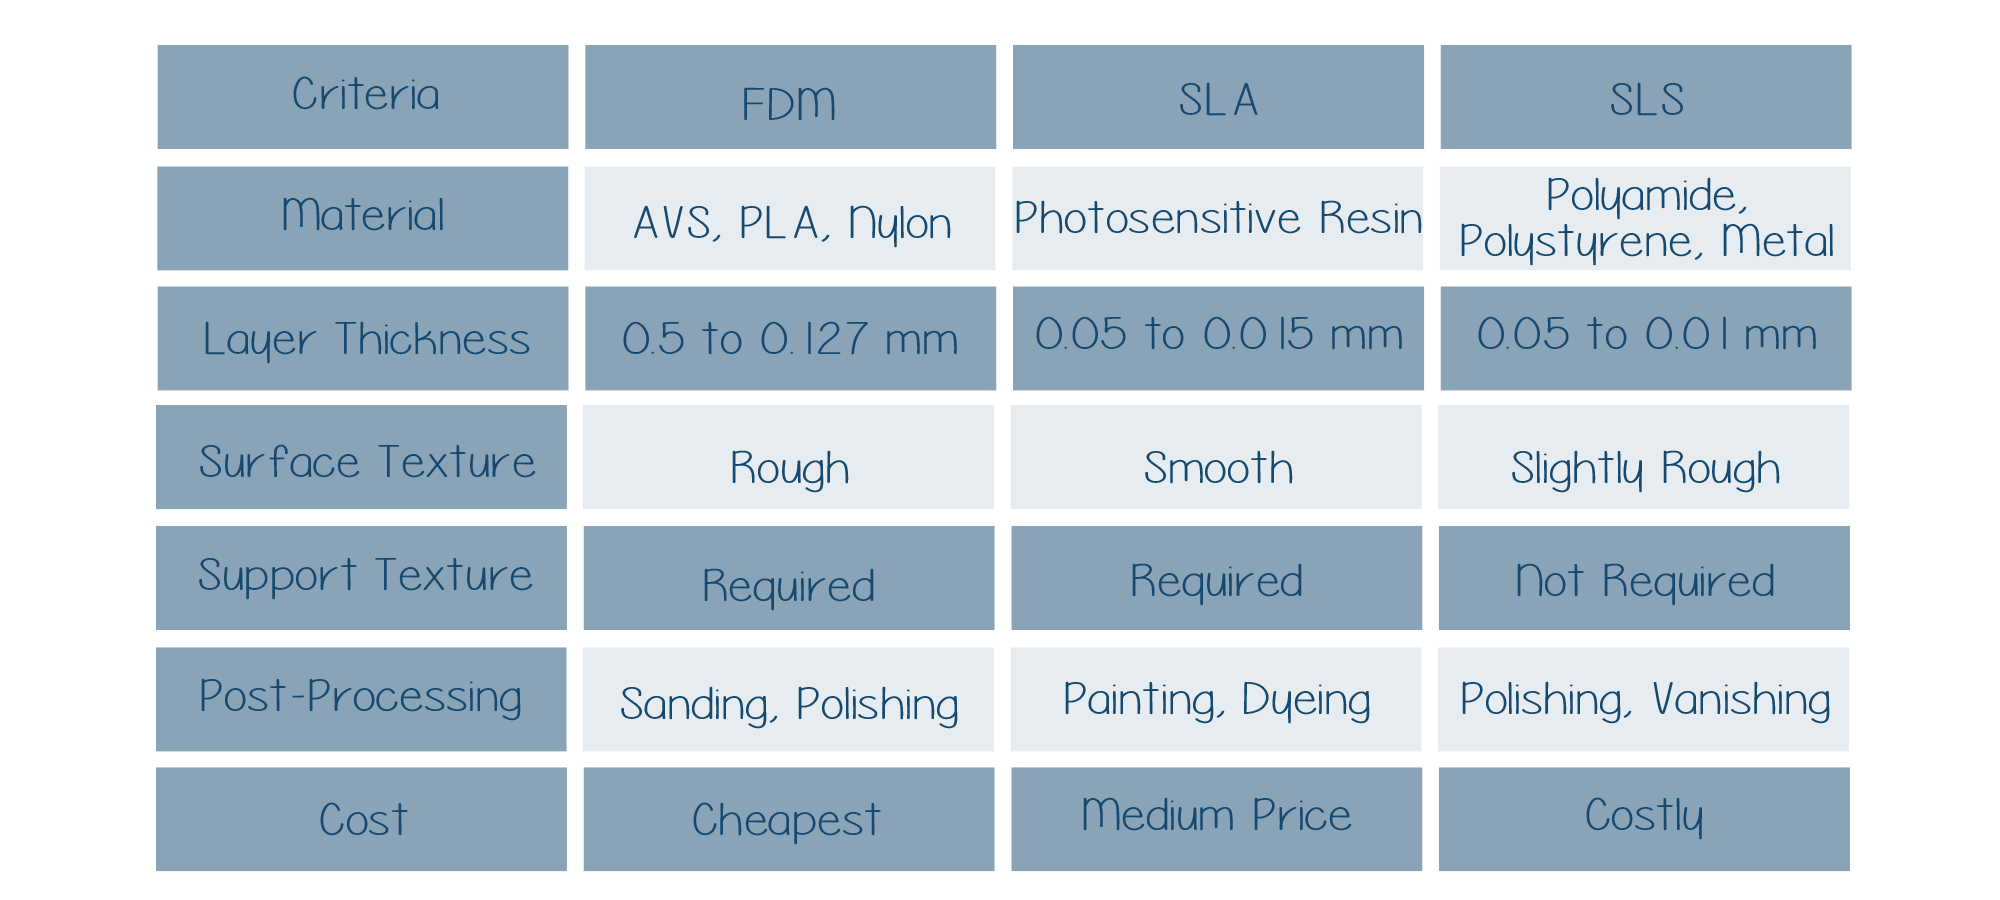
There are various 3D printing technologies available, and the one you will choose should depend on the type of model you would like to print and its purposes. It’s easier to make this choice once you know what materials you will use for printing.
For example, if you choose the ABS material, then the best technology for it would be Fused Deposition Modeling. It’s the most common technology right now, and it prints objects by heating and extrusion of the filament to form layers.
It’s the most appropriate technology if you want to produce strong and tough parts. Laser sintering technology, on the other hand, is best suited when you work with rubber-like materials, such as polyamide and alumide.
If you would like to 3D print in metal, then the Lost Wax Casting would be the most appropriate choice, and the liquid-polymer technique is used when 3D printing resins.
Always Check on the Wall Thickness
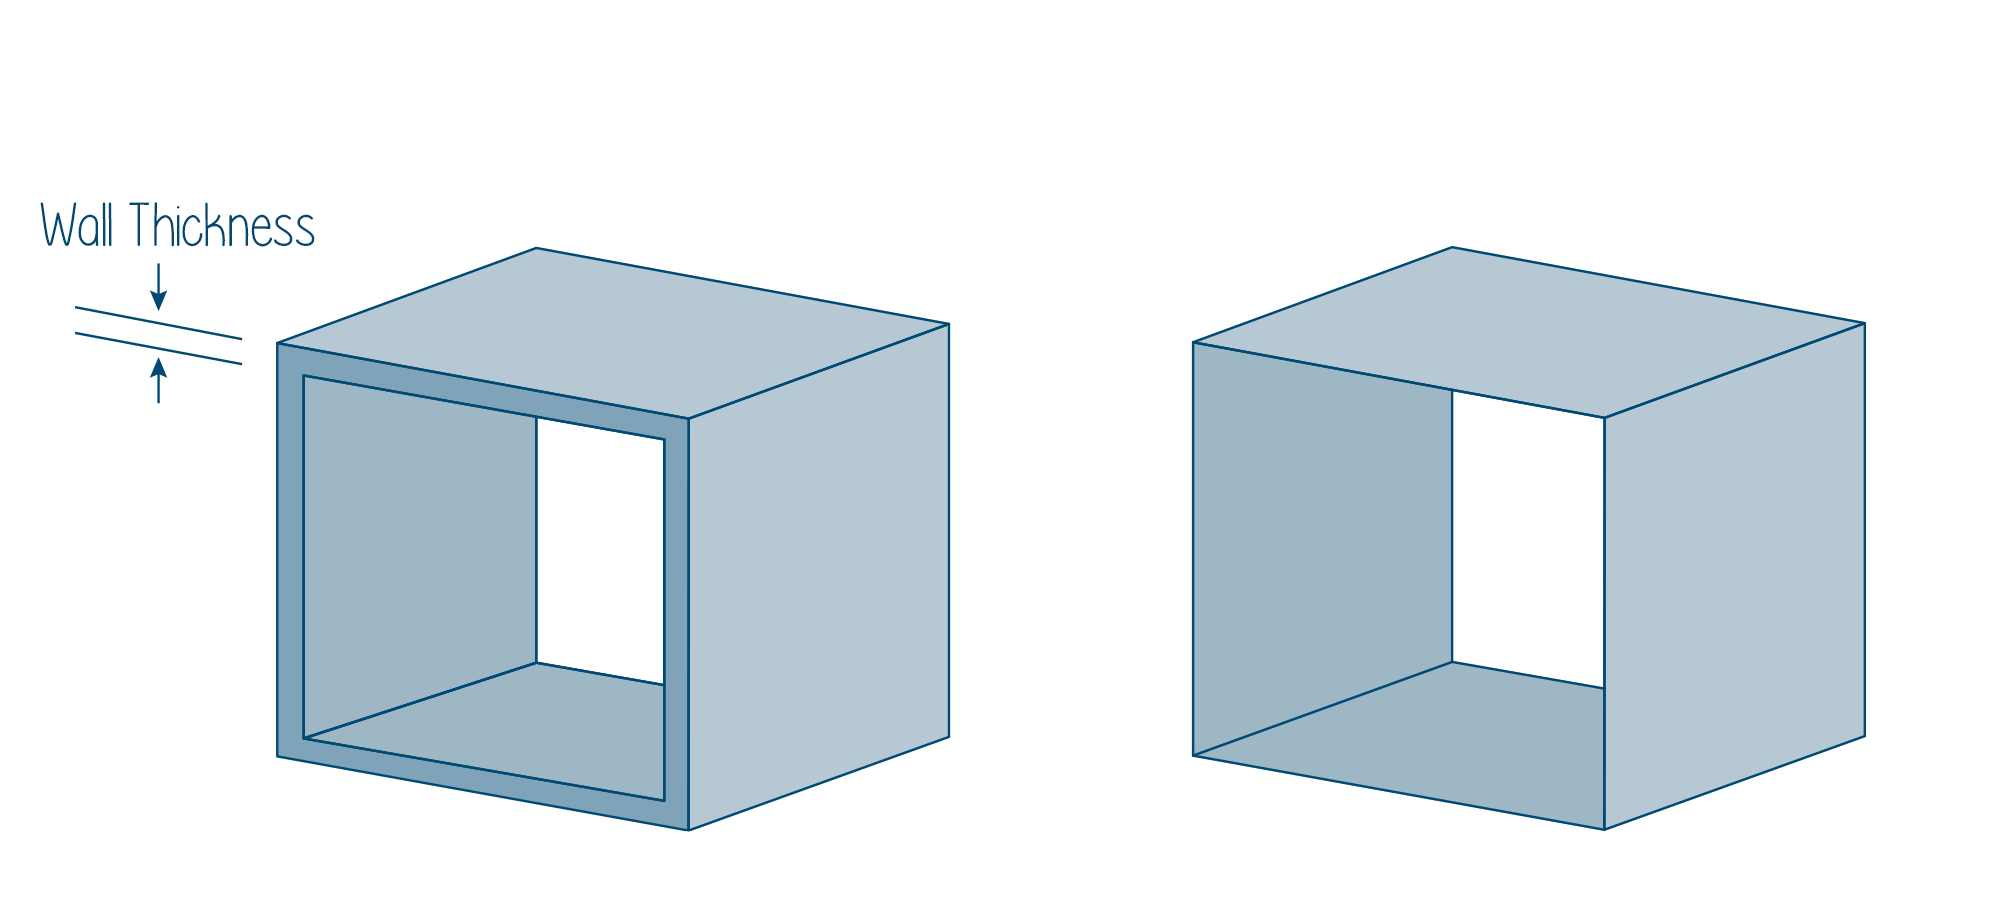
There is no specific size of thickness required, as every additive manufacturing technology requires a slightly different one based on the used 3D printing material.
But you need to always check the thickness and ensure that they have the right size. It should not be too thin as it can be difficult to print and can lose its properties too.
Check on the Strength of your Model
Always ensure that the parts are stronger to make sure that your 3D print is both successful and functional. For the most part, you will ensure that during the 3D modeling process, but it’s not the only way. You can always use the slicer to make sure that it’s stronger.
It’s easy to customize it in the SelfCAD Slicer. You can do it by selecting the Shell option in the Settings section and ensure that the Top and Bottom Thickness, as well as the Wall Thickness, are set to optimal.
Check on Warping and Shrinkage
Warping and shrinkage are a common challenge after a model has been printed and cooled. Usually, it occurs due to the changes in the material when heated, melted, and then sintered, which can result in cracking and deformation of the model.
Parts with long and flat surfaces are the ones mostly affected because heating and melting result in lengthwise contraction of the design. Deformations mostly occur in the sharp sections of the design because they are mostly the stress concentration points.
These issues can easily be handled while the model is still in the design phase. For example, you can always avoid sharp corners in your model as well as flat surfaces, and instead, add rounded brims in your designs.
If your design already has sharp corners and you’re using SelfCAD, you can easily fix it by selecting them and using the Round Object tool to make them smooth and remove sharpness.
Smoothing the corners and edges will evenly distribute the stress, which will decrease the risk of cracks and other imperfections.
Always Check on the Resolution
Before the 3D printing process, always consider choosing the appropriate resolution for your model. Resolution refers to the level of detail your model will require when it is being 3D printed.
When designing your model, always keep attention to the level of details. Avoid extreme levels as it will make it difficult to print, and consider the resolution settings of your 3D printer as they are different from the Resolution available while modeling.
Consider Overhangs Before 3D Printing

Some objects usually require withstanding or underlining materials to serve as support before 3D printing. Overhangs are areas of the 3D model that extend beyond its actual layer and which doesn’t have any direct support.
Not every 3D printer is designed with the capability to print overhangs, so it’s recommended that you first test your printer and see how well it prints them.
You can do this by trying to print a test overhang and see how your printer will perform.
Most 3D printers, especially FDM and SLA, have a limit of adjustment angle when 3D printing. That is, mostly no more than 45 degrees.
Therefore, if you don’t want to use overhangs, it’s recommended not to exceed the recommended angle limit, or else you will have to use the supports.
The disadvantage of using supports is that it increases printing time, material costs, as well as post-printing work.
If you find support to be a difficult task, you can decide to split your model into several parts if it’s complex, and then print them separately and join them later using solvent or adhesives.
Consider Bridges
Just like the traditional bridges, bridges in 3d printing connect two sections of a 3d printed object. Depending on the design of the object, it might have several raised areas.
Bridges help stabilize the raised areas in order to avoid bending or collapsing.
You should consider using bridges if your 3D model has several raised areas in order to join them together. Most 3D printers have settings for bridging.
These settings allow it to deposit material from its nozzle as well as cool and harden it. So you need to check your 3D printer for these settings and make sure that before 3D printing everything has been set up well.


