The history of sand 3D printing is intriguing. It began in the late 1990s with a German company named Generis in collaboration with MIT i.e. Massachusetts Institute of Technology in the United States.
The company focused on sand 3D printing for metal casting molds while the university developed and patented the 3DP metal binder jet technology.
Their efforts led towards the building of the first-ever commercially available printers which were offered in the mid-2000s.
With the passing of time, formality seeped in and licensing arrangements and the division of Generis lead to two firms VoxelJet and ExOne. Currently, these both rule the market of sand 3D printing.
For knowing how does the reviving of sand casting improves the quality of parts and a lot more, we will have to dwell into the core of sand casting as well the newer, more advanced way of doing it i.e. 3D printing sand casting.
And that’s exactly what we are going to do in this article. Starting with the traditional sand casting, we are going to take you through the revolution that 3D printing has brought to it and then finally land upon the heart of this article.
Not only that, but we will also give you some recommendations for the best sand 3D printers because there are a lot of them out there in the market that it’s difficult to decide upon which one’s to buy.
What is Sand Casting?
It is the oldest known casting process in history. Sand casting’s roots can be traced back to earlier than 1000 B.C. Other technologies to produce parts have also come a very long way, but the metal’s fundamentals are relatively unchanged.
The basics are creating a cavity in the shape of the part you want and then pouring molten metal into it. Having stated so, there is a lot that you need to go through before actual part creation. Here’s that lot.
What is the Sand Casting Process of Manufacturing a Part?
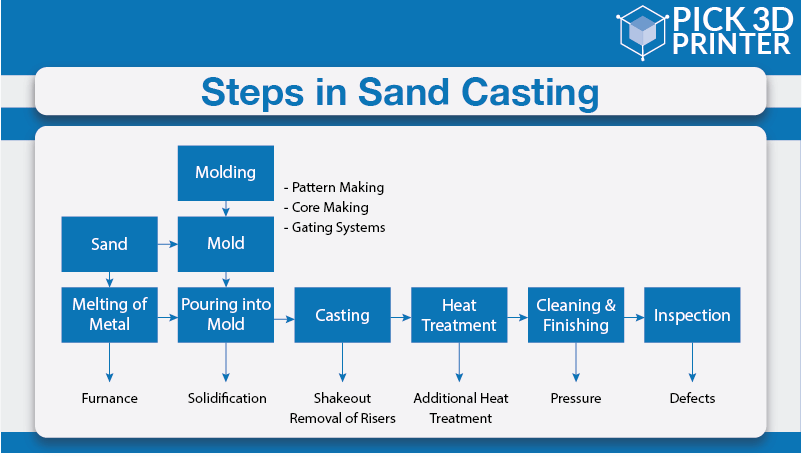
Below mentioned is a stepwise procedure for making a part by sand casting.
Step 1: Mold Making
In an expendable molding process, this step is must be performed for every casting. A sand mold is created by packing the sand into each half of the mold.
Then the sand is packed around the pattern i.e. a replica of the external shape of the casting. As soon as the pattern is removed, the cavity that is expected to form the casting remains.
Internal features of the casting that cannot be formed by the pattern are created by separate cores made of sand. But this is before the formation of the mold.
The calculation of mold-making time includes:
- Positioning the pattern.
- Packing the sand
- Removing the pattern.
Also, the mold-making time is affected by the size of the part for which you are forming the mold. In addition to it, by the number of cores, and lastly, by the type of sand mold.
In case the mold type requires heating or baking time, the mold-making will obviously increase. Also, at times lubrication is applied to the surfaces of the mold cavity. This is done to facilitate the removal of the casting.
Moreover, the use of a lubricant also improves the flow of the metal and the surface finish of the casting. The choice for lubricant is made based on the sand and molten metal temperature.
Step 2: Clamping
Step 1 is the most time-consuming as well as the fundamental step of sand casting. After having gone through that step, the remaining ones are easy-peasy lemon squeezy.
Once the mold has been made, you must ensure and prepare it for the molten metal to be poured. The surface of the prepared mold’s cavity is first lubricated for facilitating the removal of the casting.
After that, the cores are positioned, the mold halves are closed. Also, the mold halves are securely clamped together. The mold halves must remain securely closed to prevent the loss of any material.
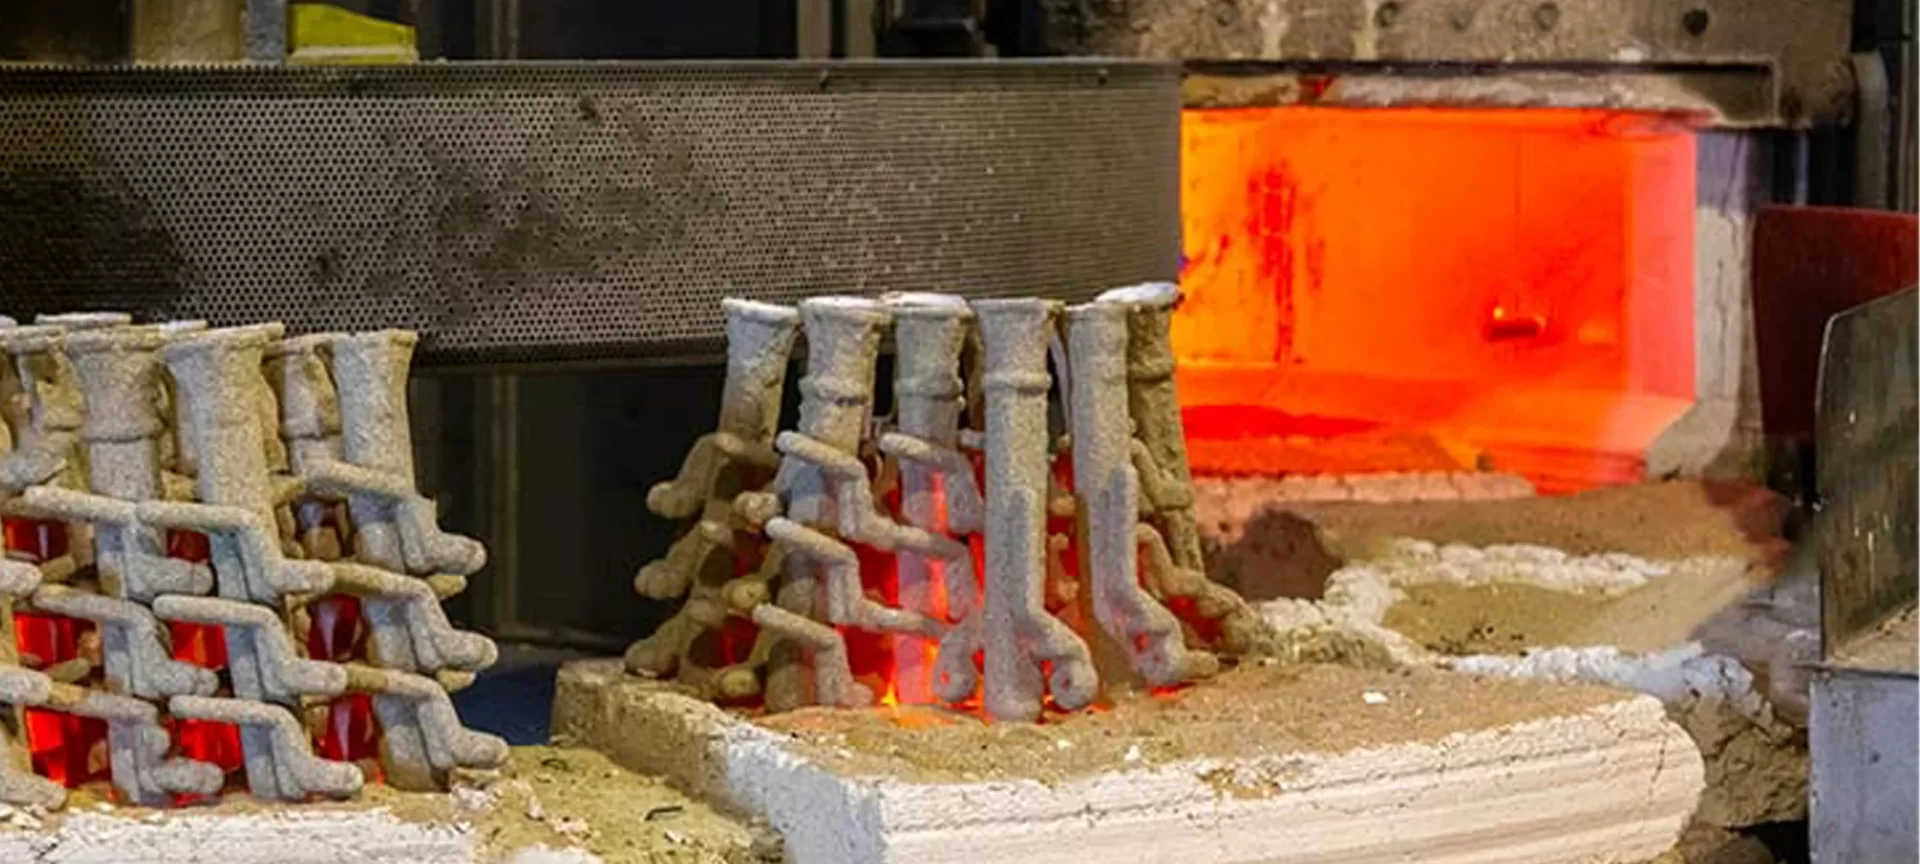
Step 3: Pouring
The next step includes the maintenance of the molten metal at a set temperature in a furnace. As mentioned above, after the clamping of mold has been done, the molten metal can be ladled from its holding container, placed in the furnace, and poured into the mold.
The pouring part can be either performed manually or by an automated machine, it’s up to you. All you need to ensure that enough molten metal must be poured that it fills the entire cavity and all channels in the mold.
This filling time should be intentionally kept very short to prevent early solidification of any one part of the metal.
Step 4: Cooling
Now the molten metal that was poured into the mold will automatically begin to cool and solidify. Only when the entire cavity is filled, the molten metal solidifies, will the final shape of the casting be formed.
This mold can not be opened until the cooling time has passed. For estimating a desired cooling time you need to take into account the wall thickness of the casting as well as the temperature of the metal.
Remember that this is the step wherein the most number of possible defects can occur.
In case the molten metal cools too quickly, the resulting part may exhibit shrinkage, cracks, or incomplete sections. However, preventative measures can be taken for designing both, the part and the mold.
Step 5: Removal
After the calculated solidification time has passed, you will be easily able to break the sand mold to remove the casting.
This step is often referred to as shakeout and is typically performed by a vibrating machine the function of which is to shake the sand and casting out of the flask.
After removing the casting will likely have some sand and oxide layers adhered to the surface. When the removal of sand is done especially from internal surfaces shot blasting is used. Doing so also reduces the surface roughness.
Step 6: Trimming
Trimming is removing the excess material from the casting. Either manually via cutting, sewing, or using a trimming press. The time required for doing this can be calculated from the casting’s envelope.
Obviously, a larger casting will require a longer trimming time. The scrap material resulting from this trimming is either discarded or reused.
However, the scrap material may need to be processed with proper chemical composition before it can be combined with non-recycled metal in case of reusing it.
After having gone through sand casting, let’s go through sand 3D printing and how has it revived traditional sand casting.
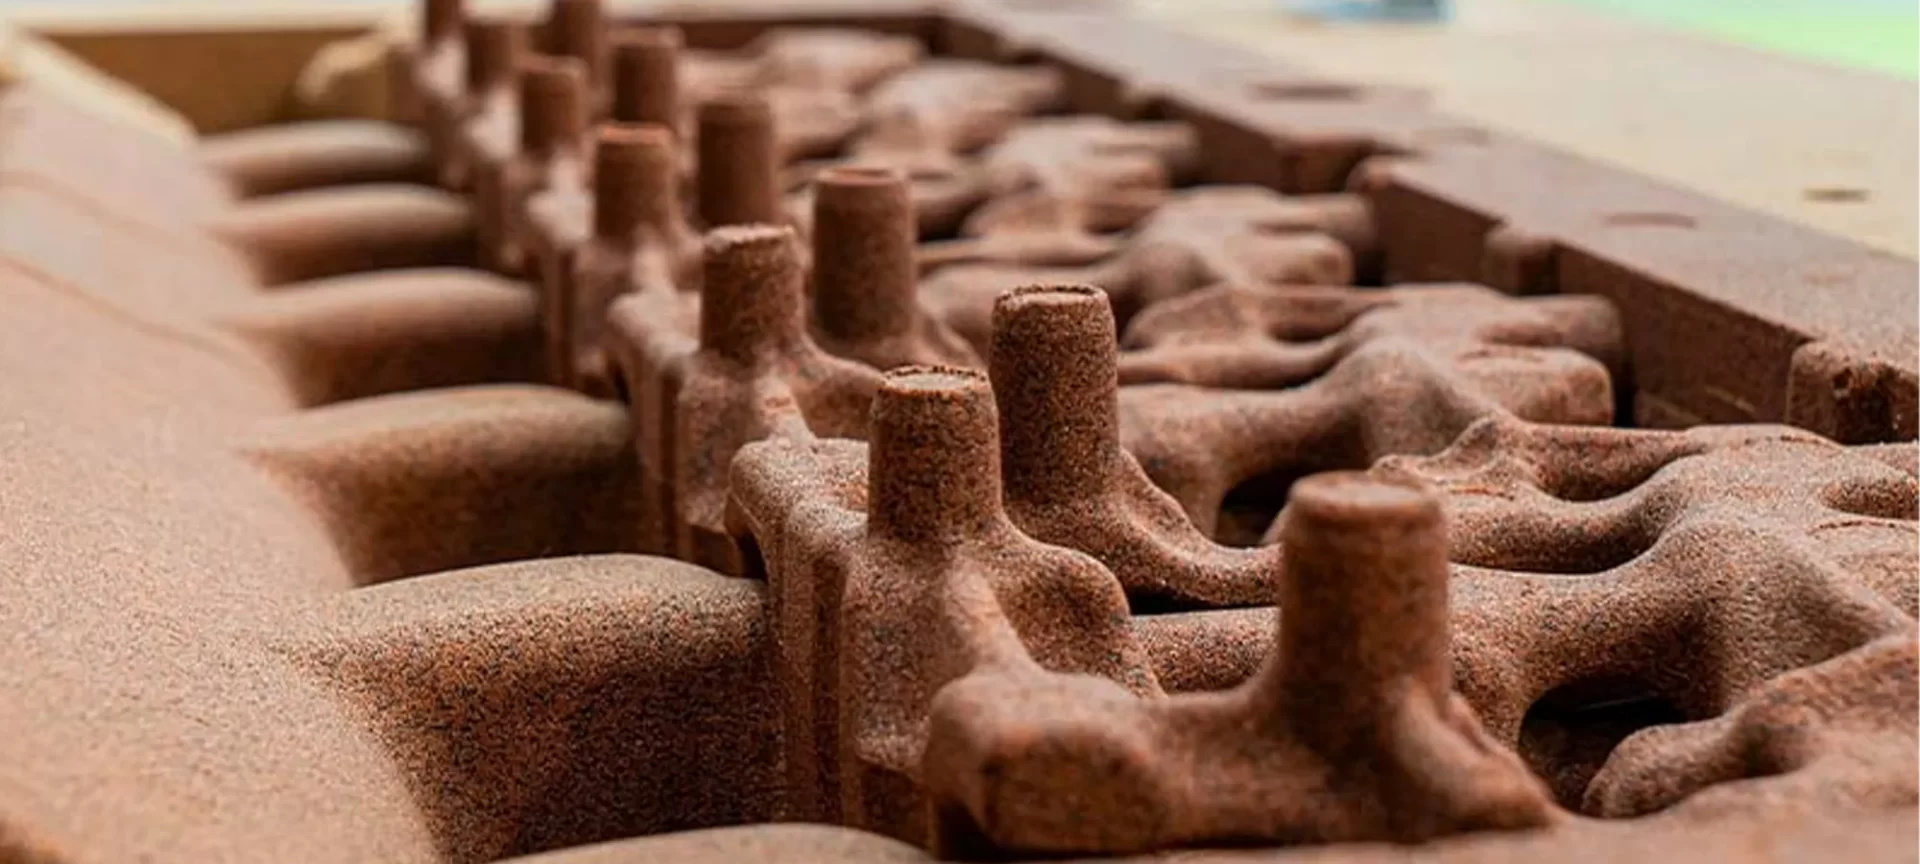
How Do You 3D Print Sand?
Sand 3D printing begins by leveling the first thin layer of sand onto your 3D printer’s build platform. Then your printer’s printer head traverses the sand layer simultaneously extruding the binder in the pattern needed for that layer.
Dispensing, leveling, and binder extruding continue in a fixed sequence until part 3D printing of the part is completed.
The additional sand on the build platform functions as the support material for coming layers that are to be 3D printed.
So, you need extra support structures. And finally, when the part is finished, any loose sand that remains is carefully removed.
Post-processing after this process may include: a) further cleaning, b) impregnating the part for increased strength, or even c) sintering and binder removal for metal powder parts.
What Are The Benefits of Sand 3D Printing?
- Fast and accurate: Printed cores and molds are created in a matter of days. As compared to traditional core boxes which can take many weeks to build. Feedback from the first part of the process is easily incorporated into the digital model. And this helps in the creation of dimensionally accurate parts. This is something that’s not always practical or even possible for traditional sand casting patterns due to the scope of the adjustments. Also, the high expense of altering existing wood or urethane tooling.
- Precise surface quality and contour consistency: Because 3D printed sand molds do not need a draft for pattern extraction, even a special accommodation for under-cuts, the molds are built to exact profiles which result in weight savings and less machining. Printed sand molds are known to produce surfaces many degrees higher than foam tooling.
- Complex structures can be easily made: Many times there is absolutely no need to watch out for undercuts. Sand molds permit the creation of interior features that are not possible to create with traditional cores. Additionally, the complexity can be added in various iterations which is something that was not at all previously possible.
- No need for support structures and very little material loss: Materials that remain on the build platform, not 3D printed with the binder act as supports for later layers. So, essentially you need no supports, hence no material is wasted. In fact, the leftover material in the print bed can be reused.
Recommendations for Sand 3D Printers
Below mentioned are the brands that you must check out before making a buying decision regarding sand 3D printers.
ExOne SPrint
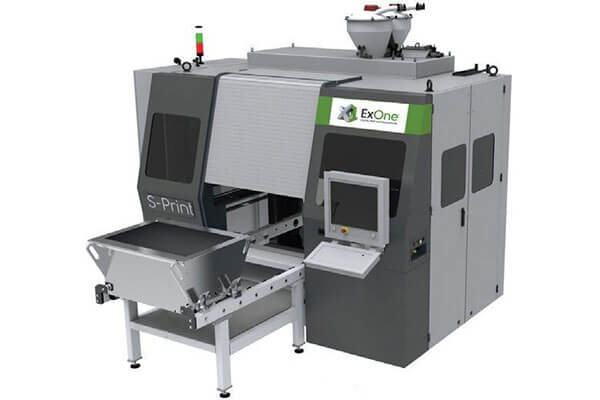
Extremely helpful in creating the complex sand cores and molds directly from 3D CAD data, the S-Print 3D core and sand mold system combines a compact structure and an extremely versatile range of applications.
The printing system comes with the flexibility that lets you select any binder system available at ExOne.
Molds printed from S-Print can be made to accommodate a variety of casting materials that are available for rapid product development and short-run production.
The build volume of this printer is 800 mm * 500 mm * 400 mm. It prints parts and functional prototypes at a build rate of 39 liters per hour.
The layer height offered by this printing system in each part and the functional prototype is 0.26 mm to 0.38 mm.
Voxeljet VX 2000
Being an extremely powerful and proven 3D printing system for industrial applications, VX 2000 has a 2,000-liter capacity which makes it one of the most productive 3D printing systems on the market today.
It doesn’t matter whether you are talking about large collection jobs or components with up to 2 m edge length, this 3D printing system lets you print all with equal efficiency.
It has an innovative combination of bi-directional printing technology and parallel powder application.
This printing system prints the entire construction panel at a breakneck speed. This is carried out in just two passes per shift with the highest amount of precision.
VX 2000 is extremely handy in the production of small to medium batch sizes and enables unit costs offering significant economic advantages over conventional production methods such as sand casting.
Offering a construction volume of 2000 x 1000 x 1000 mm, the VX2000 is specially designed for economically producing small and medium batch sizes in the shortest possible time.
With a building volume of up to 92 l/h, the VX2000 is one of the most economical and productive 3D printing systems in the world. It is impressively efficient with large molds in small runs or smaller molds in large numbers.
Best Metal 3D Printers
Best Binder Jetting 3D Printers
How Does A Sand 3D Printer Work
The Conclusion
Sand 3D printing has immense benefits over the traditional sand casting method. In fact, the former was an invention resulting because of working on the latter’s limitations.
3D printing technology which is currently associating with almost every existing method of manufacturing and bettering it like no other ignited the necessary fuel to spark the new revolution by making sand 3D printing happen.
Sand 3D printing is still a little less explore compared to other methods of 3D printing and is also a little less accessible.
You will easily find FDM 3D printers for beginners, even SLA 3D printers, but not sand 3D printers. It is still limited to industrial 3D printing. And that’s the only limitation.
For exploring this technology you need to invest a lot. But with time, as FDM and SLA 3D printing got better, sand 3D printing too will. It has a bright future and there are many positive predictions made by experts about this uniquely effective method of manufacturing.


