The company, Creality 3D Technology Co. Ltd was founded in 2014. It offers a wide range of 3D printers for all classes of individuals, whether you are a beginner, an intermediate, or an expert in the field of additive manufacturing. Creality Ender 3 V2 is one of them.
The Ender 3 V2 is the updated version of Ender 3. It is a great choice for beginners, start-ups, hobbyists, lecturers, students, home users, and small business owners.
It offers some exceptional features that are not even found in large expensive printers. This makes it most appealing. It provides great quality 3D prints at a very low price of $200.
The Creality’s 3D printers, including Ender 3 V2, run on the Marlin firmware. For those who are unaware of the word ‘firmware’: it is a simple program that links software with the hardware
In 3D printers, firmware understands the ‘G-code’ sent to the slicer software by the user and translates it to the stepper drivers that control the motor, heater, flow, speed, and display, etc.
For example, the given G command ‘G1 X 20 Y 10’ to the software is translated into a set of instructions understood by the stepper. Thus, the extruder reaches X=20 and Y=10.
In this article, we’ll discuss the Marlin Firmware and how to update it on the Creality’s Ender 3 V2.
Marlin Firmware

Marlin is one of the most widely used firmware. It was created in 2011 by Erik van der Zalm for RapRep and Ultimaker 3D printers.
Being reliable and precise, it now manages most of the 3D printers. It was derived from the previous codes of Sprinter and GRBL. It has tons of features that are useful for 3D printing.
Marlin is based on the C++ program language and offers a comprehensive G-code with 150 commands. It supports 5 multiple extruders. The firmware is licensed under GPLv3 and is free for all applications.
It is available in two different versions, one for 8 bits microcontroller and the other for 32 bits board. The 32 bits version offers more advanced and better features. It enables you to customize almost everything.
Creality Ender 3 V2 is one of the best 3D printers that provide the best class experience to its users with various advanced features.
These include a carborundum glass platform, a new self-developed silent motherboard, a rotary knob on the extruder, a heated print bed, a power outage recovery feature, a new TMC2208 stepper motor and enables using third party filament. All these features are greatly supported by the Marlin Firmware.
Ender 3 V2 with either Creality V4.2.2 or V4.2.7 mainboard. They come with a version of Marlin firmware installed that older 8 bits mainboards were not able to handle.
The Old and New Marlin’s Firmware for Creality’s 3D Printers

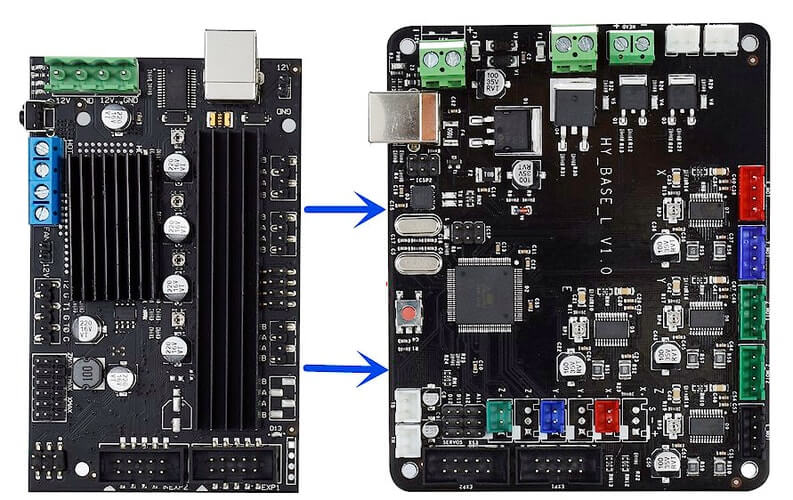
Initially, the Creality 3D printers came with 8-bit mainboards that were not too stable and tend to break down often. As they had less storage, these first-generation mainboards (V1.X and Melzi) were not able to support all the features of Marlin 2.0.
It was too complicated to install a new firmware on them and required a bootloader (for eg. an Arduino Uno), an ISP or Cura to the USB cable.
The new mainboards (V4.2.2 and V4.2.0) have more space i.e 32 bits for faster processing and a pre-installed bootloader for simple installation.
With these features, it enables you to install new firmware through the MIcro SD card slots. The Ender 3 V2 has these SD card slots on both the mainboard and LCD.
To update the new firmware on Ender 3 V2, you need to download a Bin file on a micro SD card and flash it on both the mainboard and LCD. Now, we’ll focus on the steps to follow for upgrading the Marlin firmware on your 3D printer, Ender V2.
Reasons to Upgrade the Firmware
The recent Marlin firmware for Creality Ender 3 V2 brought various new 3D printing features, tweaks, and bug fixes. Though the older ones are more stable, they have few Marlin 2.0 features deactivated.
The old firmware does not offer a linear advance feature that forecasts the build-up pressure in the hot end for great quality prints with over or under extrusion.
Also, you may need to upgrade the firmware to use the advanced features offered by Creality Ender V2 which are not supported by the stock firmware. These include a filament runout sensor, BLTouch screen, a geared extruder, and many others. The new firmware supports these modern features.
Things you need to Update the Firmware
Due to the new mainboards, you won’t need many things to update the firmware on Creality’s Ender 3 V2. You’ll need the following things, to begin with:
- Two Micro SD cards (Note: one is being provided with the printer).
- A device, computer, or laptop, with few programs that include a file archiver program. Such as 7-Zip or VS Code.
Though the whole process can also be done with one SD card, for simplicity and convenience it is better to use two cards. Also, if only you use a pre-configured firmware file that downloads as a RAR file then only you’ll require a file archiver program to unzip it.
7-Zip is an open-source file archiver program that is available online for free. If you want to manually edit the firmware’s code, then you’ll require VS code.
Steps to Update the Firmware
To update the firmware on Creality Ender 3 V2, the user should follow these steps:
Prepare your 3D printer for the update.
Switch off your printer’s power, unplug its power cable and remove the mainboard SD card.
Download the Firmware
Before downloading the firmware, create a new folder labeled as ‘Ender 3 V2 Firmware’ or any other easily recognizable name. Now you can either download the self-configured firmware or download Creality’s preconfigured firmware.
Creality preconfigured firmware
We recommend you download the firmware from Creality’s website if you don’t want to alter your firmware. For this, you should head over to Creality’s download webpage. On the left side of the page, navigate to ‘Ender Series Firmware’ and then head to ‘Ender 3 V2 3D Printer’.
There are two different firmware versions based on whether your 3D printer is running V4.2.2 or V4.2.7 mainboard.
Select the correct firmware version, download the zip file of the new firmware to your computer and save it in the new folder created before. If your printer has a BLTouch installed, then choose the link that clearly mentions ‘BLTouch’.
The file downloaded will be either in ‘ZIP’ or ‘RAR’ format. Unzip the ‘ZIP’ file. For unzipping the ‘RAR’ file, you need to use a third-party app. 7-Zip, to do it.
With pre-configured firmware, you don’t need to configure the source code files, so you can skip that step and move to copy the BIN firmware file to the micro SD card.
Self-configured firmware
If you need to tweak your firmware for bug fixing, updates, or other reasons then you should download the firmware from Marlin’s home page or Marlin GitHub. Download both ‘Marlin-2.0.x’ and ‘Configurations-release-2.0.x.x’ zip folders.
Unzip both the folders. Then extract and copy-paste the second-degree folders with similar names as their original folders into your newly created folder on your device one by one.
Configure the Firmware
To configure the Marlin firmware for Ender 3 V2, follow these steps:
- Open the unzipped configuration folder and then open the ‘config’ folder.
- Click on the ‘examples’ folder, scroll down, and open the ‘Creality’ folder.
- Open the “Ender 3 V2” folder and copy all the files present in it.
- Open the unzipped ‘Marlin-2.0.x’ folder and then find and open the ‘Marlin’ folder containing the ‘Configuration’ file.
- Paste all the copied files into that folder.
- When prompted, agree to replace the files that have similar names.
Compile and Edit in Microsoft VS code.
To compile open the PlatformIO plugin and click ‘Open project’ in the Microsoft VS code. Then, open the ‘Marlin-2.0.x’ folder that contains the PlatformIO INI file.
If you want to make any alterations to the firmware, you can edit it here. Once all the editing is completed, click the checkmark on the bottom terminal in VS Code to compile the firmware as a BIN file. If there is no checkmark, go to the Auto Build Marlin plug-in and compile it from there. Wait until the firmware is successfully built.
Upload the Bin Firmware file to your Micro SD card.
Plugin your mainboard’s Micro SD card into your computer, clear everything on it and copy and paste the BIN firmware file to the Micro SD card.
Format the other micro SD card to upload the new firmware for the LCD screen.
Plugin your Micro SD card into your computer and delete or move all the files present on the card. Then format the micro SD card to the “FAT32” file system and the “4096-byte” allocation size.
Upload the Bin Firmware file to your other Micro SD card for the LCD screen.
Also, copy and paste the BIN firmware file to the other Micro SD card as you did previously.
Update the LCD firmware.
To update the LCD firmware, first, disassemble the LCD and insert the LCD Micro SD card into your LCD circuit board. Reconnect the LCD cable and power on the 3D printer.
The LCD screen would be displaying an orange-colored blank screen. Wait for some time until the LCD screen displays your printer’s home menu. This indicates that the LCD firmware update is completed.
Now, shut down the printer again and remove the Micro SD card from the LCD circuit board. Reassemble the LCD screen and remount it onto the 3D printer.
Update the mainboard firmware.
Plugin the mainboard MicroSD card that contains the updated firmware file. Then, turn on your 3D printer. The screen will go blank for a few seconds.
The printer will then boot up with the new firmware installed in the SD card. Then, unplug your MicroSD card after the home screen appears on the LCD screen.
Conclusion
After following the above-mentioned steps, you are good to use your Ender 3 V2 for 3D printing with updated firmware.


