3D printer acceleration is often regarded as silly criteria that affect the print quality of a part, but it is not that silly. In fact, you might be completely unaware of the issues caused by the improper acceleration of your 3D printer.
Acceleration is one of those important firmware settings which can change the complete fate of the object that you are 3D printing. And it’s closely associated with the 3D print speed of your printer. Both of which are in turn intimately connected to the print quality.
So, let’s learn about 3D Printer acceleration. And, also find out what a perfect acceleration could do to your 3D models. So, how about starting with the details for attaining perfect acceleration. At the same time, looking at the various terms associated with it.
What are the Three Basic Terms Associated with Motion of a 3D Printer?
When it comes to the movement of any 3D printer, there are three basic terms related to it.
3D Printer Speed
Speed is the easiest parameter to understand because we have experienced it in many aspects of our lives. Like driving (km/h), downloading (kB/s), etc.
Basically, if you have a 3D printer moving at 100 mm/s, it means that your printer requires 1 second to move 100 mm away from its current location.
However, the speed does not change instantaneously in the context of a 3D printer. But, it slowly gets faster until it reaches its target speed.
And that transition from slower to faster 3D print speed is called acceleration. The basic print speed of any 3D printer is mentioned on the websites of 3D printers that you plan to purchase.
3D Printer Acceleration
Acceleration is a little bit harder to get than speed but not completely impossible. As mentioned above, it is the change of speed relative to time. For example, let’s think of a car that starts at 0 km/h and wants to reach 100 km/h.
For achieving the intended speed, it starts moving slowly and then reaches 100 km/h. For doing so, it takes 10 seconds. This can be perceived in a way that the speed of that car increased by 10 km/h in one second. So, the acceleration is 10 km/h/s.
Its measuring unit can be confusing, but it is basically a length / time^2. That is why you will find the acceleration values marked on 3D Printers by the manufacturers in terms of mm/s^2.
Since the components of 3D printers are light and small, their acceleration values can be very high compared to a moving car.
If your printer is based on Marlin firmware, its standard acceleration is 3000 mm/s^2, which is a good value for a rigid setup. This would mean that your 3D printer would only require 0.033 seconds for reaching 100 mm/s.
You would also often find some manufacturers reduce acceleration below 1000 mm/s^3. This is done in order to reduce corner ringing and other imperfections.
Jerk
Jerk is considered to be a misleading term in 3D printing. So, it makes sense to look at it in an industrial motion application.
Jerk is calculated as the variation of acceleration, meaning that the same logic can be applied between jerk and acceleration that we did apply between acceleration and speed.
Its unit can be mm/s^3. But note that, jerk is not used in the trapezoidal acceleration profile, which is actually the motion profile used in 3D printers. This also essentially means the acceleration changes abruptly.
The jerk that we get to see in 3D printing has units of mm/s, which is actually the unit used for measuring speed. Actually, in 3D printing, jerk is defined as a threshold for minimum speed requiring acceleration.
For example, if you have a standard jerk value of 20 mm/s that will make any move below 20 mm/s without acceleration.
This happens often when you are building a part with an infill line very short wherein the 3D printer will vibrate extremely quickly.
What is 3D Printer Acceleration Setting?
The 3D printer acceleration settings measure how fast your printer’s print head speeds up, even after getting limited by your designated 3D printer speed in the slicer you use.
The higher these slicer settings, the quicker the print head of your printer will get to its maximum speed. Vice versa, the lower the setting, the slower the print head will get to the maximum print speed it can reach.
A lot of times your printer’s top speeds won’t be reached while the 3D printing process is going on. And, this will especially happen while 3D printing smaller objects. Because while printing such objects there is not much distance traveled to make full use of the acceleration!
This can be particularly understood by taking the case of a car’s acceleration, where say the car is capable of going to a maximum of 100 kph, but there are a lot of turns in your journey, will it be able to? No, right?
The same logic applies to the print head of your 3D printer. Now the talk comes of how can you change your acceleration setting?
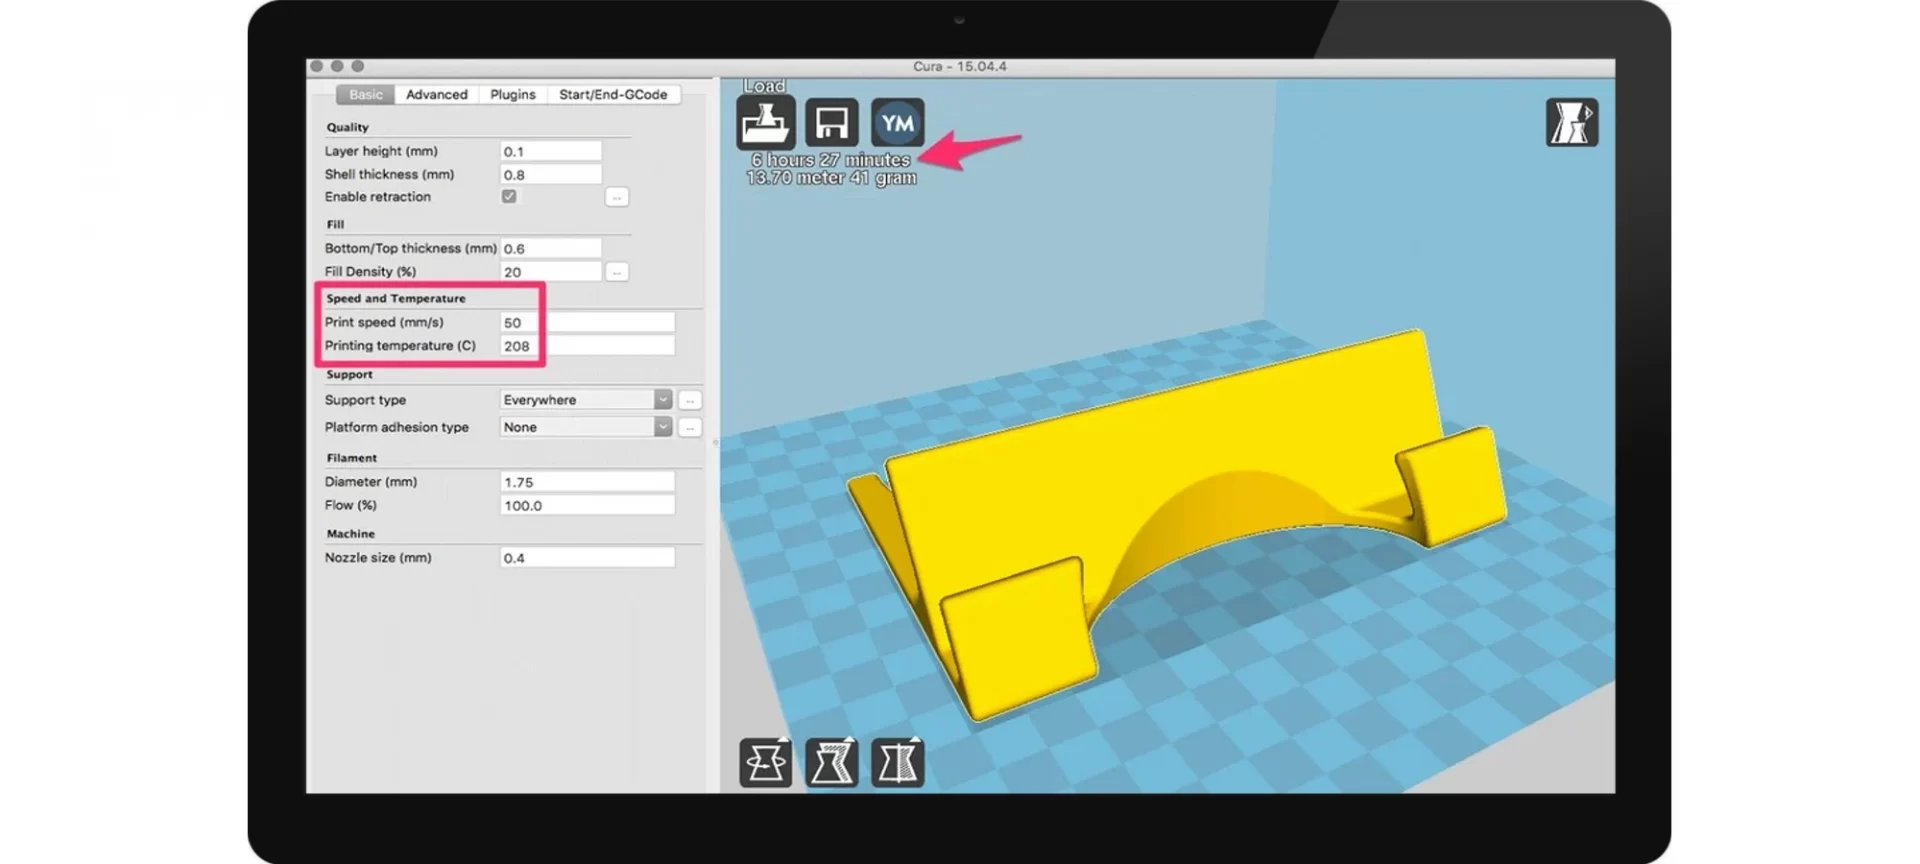
If you are using an open-source slicing software such as Cura, they clearly state how enabling ‘Acceleration Control’ can reduce printing time at the cost of print quality.
So, in such times, what we can hopefully do on the other side is improve the printer’s acceleration from your end and gain the benefit of increasing your part’s print quality.
No matter which slicer you are using, it doesn’t actually have much to do with acceleration, in so far as emitting G-code which will state where the print head should go and at what speed.
Actually, the player here is the firmware which sets limits to speed and decides how fast to accelerate to a given speed.
You may also note that it is possible for you to have a condition wherein each axis on your 3D printer can have different speeds, acceleration, and jerk settings. In most 3D printers, you will find that the X and Y axis settings are generally the same.
Otherwise, your 3D parts will have varying features depending on the part orientation. Also, there are limits on how high a value of acceleration you can set, especially in parts wherein the printing at angles larger than 45 degrees.
What Do You Solve by Using the Correct Acceleration Settings?
Adjusting your 3D printer acceleration has a whole host of issues that it solves. In addition, this includes things that were not known to you as an issue before. Yes! It’s that surprising! It can solve the following issues:
- It would lessen the amount of roughness in your 3D printed part’s print surface.
- Having the perfect 3D printer acceleration would removing ringing/curves from your 3D printed part.
- It will make your 3D printer a lot quieter than before.
- The printer’s Z-axis wobbling will be eliminated which will benefit the overall quality of your printed part or a functional prototype.
- Perfect 3D printer acceleration would fix the layer line skips in your 3D printed part.
- It will stop your 3D printer from running too violently or shaking too much which can affect the quality of the object that you are about to 3D print.
- It may solve many print-quality issues in general.
There are plenty of people who hold the experience of adjusting their acceleration settings in 3D printers and get some of the best print quality they’ve ever had.
It is one of those cases wherein sometimes you don’t even realize how good your print quality can be until you actually get the things fixed for the very first time.
And hence, 3D printer acceleration settings are definitely recommended to be fixed out and then see how it works for you. And the best thing about doing this is that you know how worse it can get.
If it doesn’t work. Just change your settings back to before. And, with little trial and error, you should definitely be able to reduce 3D printing issues and increase the overall print quality.
The Conclusion
There are many factors and parts that affect the overall 3D printer acceleration of your printer. To mention a few there are hotend, extruder, motors, and printer frame.
Also, the complete arrangement of your 3D printer whether it is a Cartesian or Delta 3D printer would make a difference. The generally seen trend is that Delta 3D printers offer more speed, acceleration, and hence jerk than Cartesian 3D printers.
But having a greater acceleration is not always beneficial either. As it will increase the chances of getting jerk during turns that your 3D printer head will take while creating the geometry of part!
It is all about experimenting and finding an optimal 3D printer acceleration for your printer which can only be done by the method of trial and error.
As your experience with your 3D printer will increase, so will you be able to find the right set of settings. So, what are you waiting for? Go on and experiment with the settings and find the 3D printer acceleration value that gets you the best results.


