3D printing is a technology that works based on many parts that have different names inside the 3D printer.
Whenever there is technology such as 3D printing, there are very many sets of problems that revolve around that technology.
3D print problems, as mentioned above, can be many because they have the involvement of various parts and mechanisms.
But all of them revolve around one single issue i.e. not achieving the quality of products that you meant to achieve.
In this article, we are going to talk about such issues and the reasons which can lead to them. And also how to avoid those problems from happening.
Issues regarding the first layer
As anyone who deals in 3D printing technology might tell you, the first layer’s quality is very important and the complete foundation of your whole print is built upon this layer.
This is because it provides adhesion on the build plate of the 3D printer. Many problems can happen to the overall part’s print quality if the printing of your first layer can go wrong.
So always take care of the first layer because it is the defining layer on which your complete print is dependent.
Reasons why you have issues with your first layer, sings that shows you have this issue and ways of fixing it
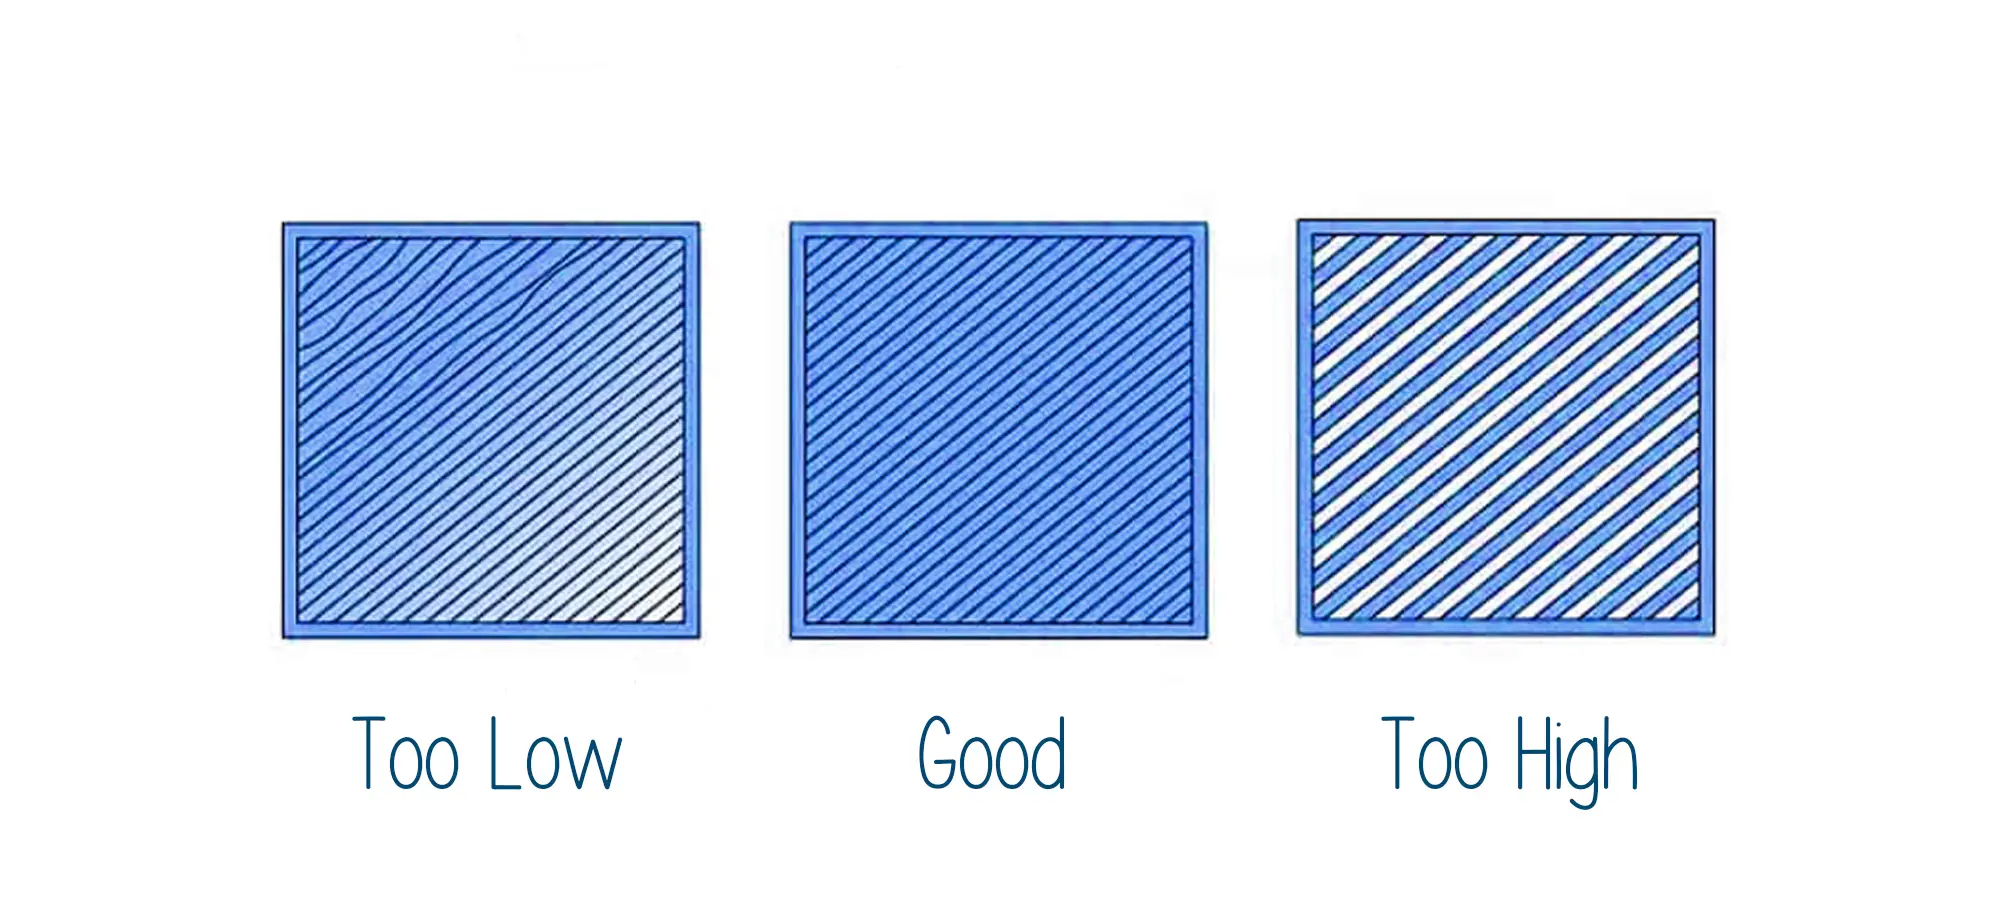
Nozzle Too Close to bed
There are four signs that you should get if the nozzle is too close to the bed.
The first one of those is, the line that you have just printed is way thinner than desired, so thin that it turns transparent.
The second sign is, the excess filament is squished upwards at the edges of the current printing line. This creates a rough surface and wavy patterns.
Thirdly, when the neighboring line is getting printed, the filament is getting torn off the bed. And lastly, the finished prints or functional prototypes are hard to remove from the print bed.
For fixing this you need to adjust the nozzle to bed distance. This you can do either by tightening the 3 or 4 leveling screws of your printer. Or by using thicker paper stock for manual bed leveling.
You can also fix the distance by adjusting the printer’s z-offset value when using a bed leveling sensor. While doing this you need to ensure that you’re not pressing down on your bed when leveling it.
Nozzle Too Far Away from the bed
If you are looking at the bottom of your printed part or functional prototype and you can see the individual lines that mean your nozzle was too far away from the bed.
While printing the first layer, if the individual lines were not touching each other also means that the distance between the nozzle and bed was farther than needed.
If the shape of the extruding line is very round and the extruding line is squished a little bit and pancake-shaped, then the nozzle was far from the bed.
For fixing this 3D print problem too you need to do what was recommended to adjust while your nozzle was too far away from the bed. Here is how to choose the best 3D Printer nozzle.
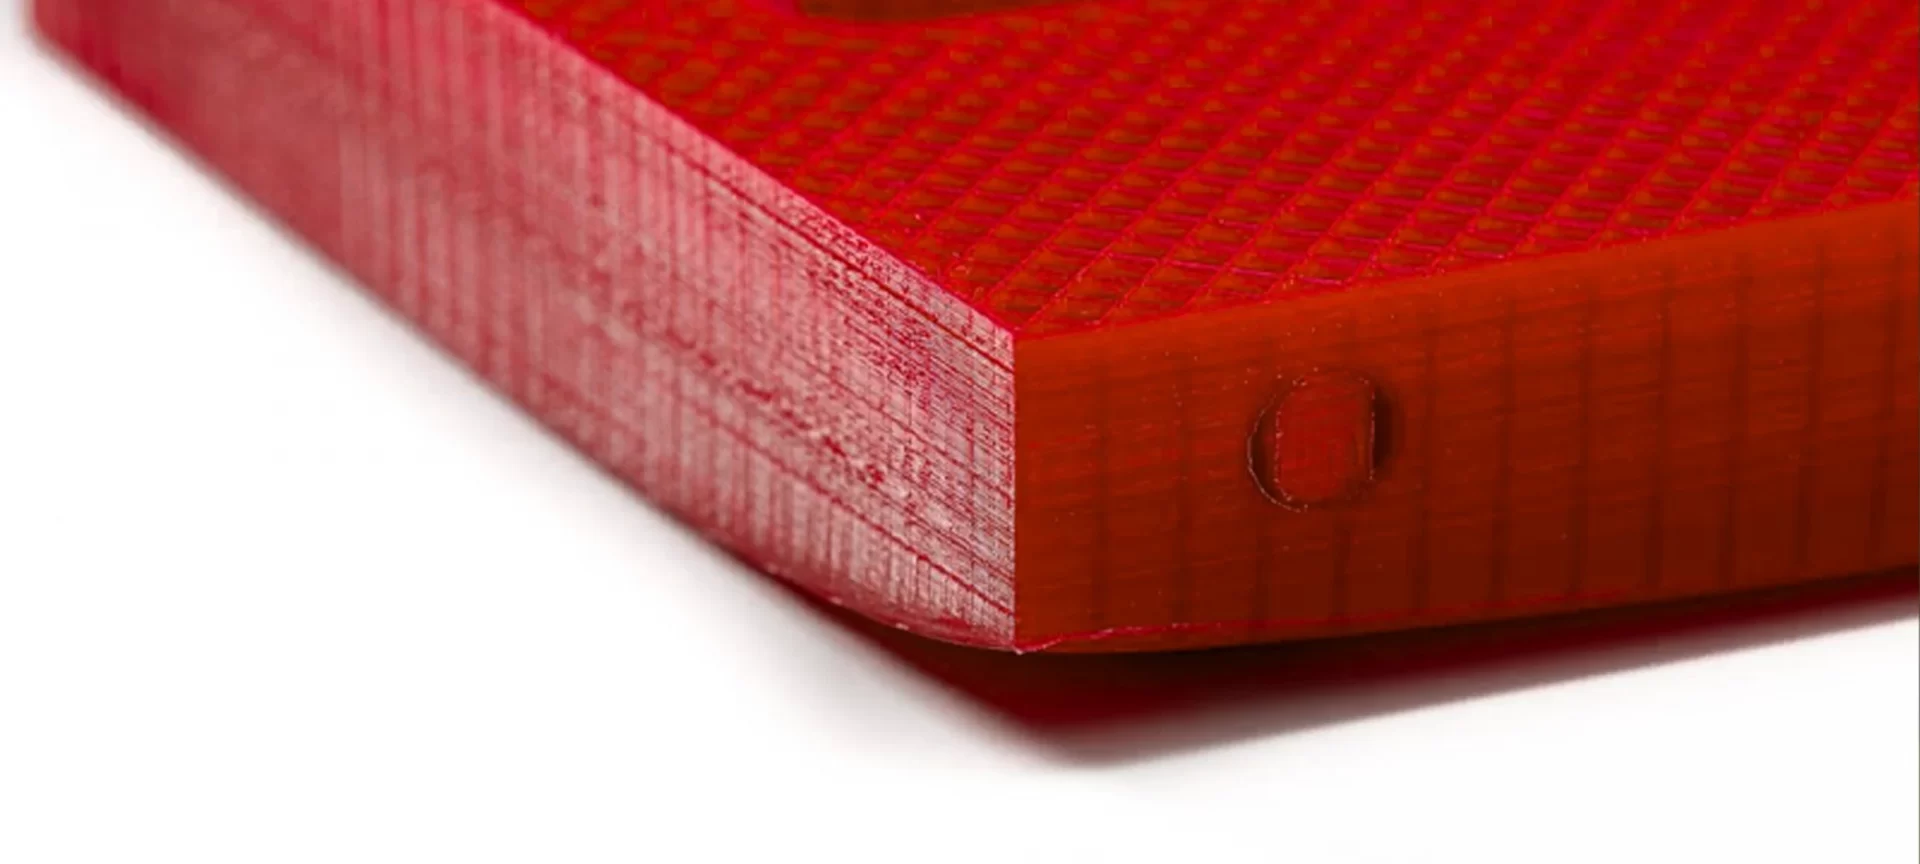
3D Print is not Sticking to the 3D Printer’s Print Bed

This is probably the second most common issue with many 3D printers. Possibly if adhesion in your printer is lacking, you might end up with warped print or, even possibly, no print at all.
Below mentioned are some of the reasons why this could happen and ways to fix them.
Reasons why you have issues with your print which isn’t sticking to your printer’s first layer
The platform is not leveled
If the leveling of the platform is not proper, you are bound to experience either the issue of the nozzle too far or close or both, along the X or Y-axis.
In other words, if the left side of your nozzle is too close and the right side is fine, your bed is most likely at an angle that isn’t leveled.
This is the sign that your platform isn’t leveled. For solving this 3D print problem, we need to make sure that the gap between the nozzle tip and the bed is the same all across the bed. And this can be done in many ways.
If you heat your bed and nozzle to temperature and make sure that the nozzle is clean, this 3D print problem would not take place.
Another way to ensure is by moving the heated nozzle to the first corner of the print bed.
You can also solve this problem by continuing to print the next corner and position your nozzle over it or adjust the screw to make sure you get the same drag.
The platform is warped
You can say your platform is warped, when you use a steel ruler or any straight edge, put that instrument on to your bed and then look from a distance.
You need to keep your eyes on the gap between the edge and the bed. You will get the same result by leveling all the beds at all the four corners and yet the midpoint or some other random points are not up to the mark, then your platform is warped.
For fixing this, you can do a simple thing, i.e. build a very thick first layer. The layer should have a maximum height that is 75 percent the nozzle size.
You can even try printing with a raft. If there is a warped build plate, you can level your print bed distance in a way that nozzle to bed distance fits in a small area, this will allow you to work completely with the warped build plate.
Cleaning your bed
It is obvious to mention that your bed isn’t clean if you can see lumps, the build-up of dust, gunk or debris, etc.
You can even say if the bed is not cleaned by seeing the bottom of the finished part.
If the bottom surface of the part or functional prototype isn’t smooth, the bed is surely untidy.
To ensure that this problem does not happen, you will have to degrease the bed surface of your printer regularly as per the manufacturer of your 3D printer’s instructions.
For cleaning your bed you are recommended to use either isopropyl alcohol or isopropanol in a high concentration or pure acetone.
Do not underestimate this 3D print problem and start cleaning your bed with liquids that are available to clean other parts like windows or any other furniture.
First Layer has been printed too fast
The most obvious sign that your print speed is too fast is when the extruder finds it difficult to keep up pushing the filament of your printer through at the speed at which you are printing.
Do not fail for suggestions that ask you to determine your proper first layer speed because it differs from parts to parts and what you may end up getting is a poor bed adhesion instead.
Understand that you need to look at your slicer settings to find a speed at which your adhesion doesn’t fail and the speed is maintained.
To fix this print problem, you need to understand this logic that every proper slicer out there in the market has the option to specify a different print speed for your first layer.
Like, for example, is a very popular slicer called Cura, it is called there is a term called Initial Layer speed, whilst in slicer called Simplify3D, there is a term called First Layer Speed.
So, whichever slicer you are using, you are recommended to find such a term that is relative to these terms.
It is said that a speed of 30mm per second or less is good for the first layer, and then you can increase the speed but here too as it is in all, experimenting is key. Click here for more information about 3D Print not Sticking.
Warping
As is the case in the above mentioned 3D print problems, warping can be caused by a few different variables.
But there is a benefit that it has above the ones mentioned above i.e. Easiness to recognize and resolve Warping.
Reasons why you have warping, their signs and ways to fix them
Signs of warping
Usually, the signs of warping are visible in the corners, which are the places from where it starts.
Warping is then known to progress if the print isn’t stopped at that very moment.
The print will start to lift from the print bed and appeared as if peeled away from the bed.
For those who do not possess knowledge about this term, Warping is a condition that occurs when the physical forces that influence the material’s cooling, exceeds the adhesion strength.
Ways to fix Warping
To fix the problem of warping, you are recommended to balance the printing and room temperature if the printer is open, and if it is closed, you need to manage the chamber temperature.
Printing at a little cooler temperature is recommended. All those who are following the rule of starting at the lowest temperature might want to increase it to the room temperature instead.
It is to be noted that the difference between printing and room temperature shouldn’t be too great or else you are bound to experience warping.
For printing at the cooler temperature, you can also start at your current nozzle temperature and work it down starting from 5°C and then incrementing, slowly.
Inconsistent Extrusion
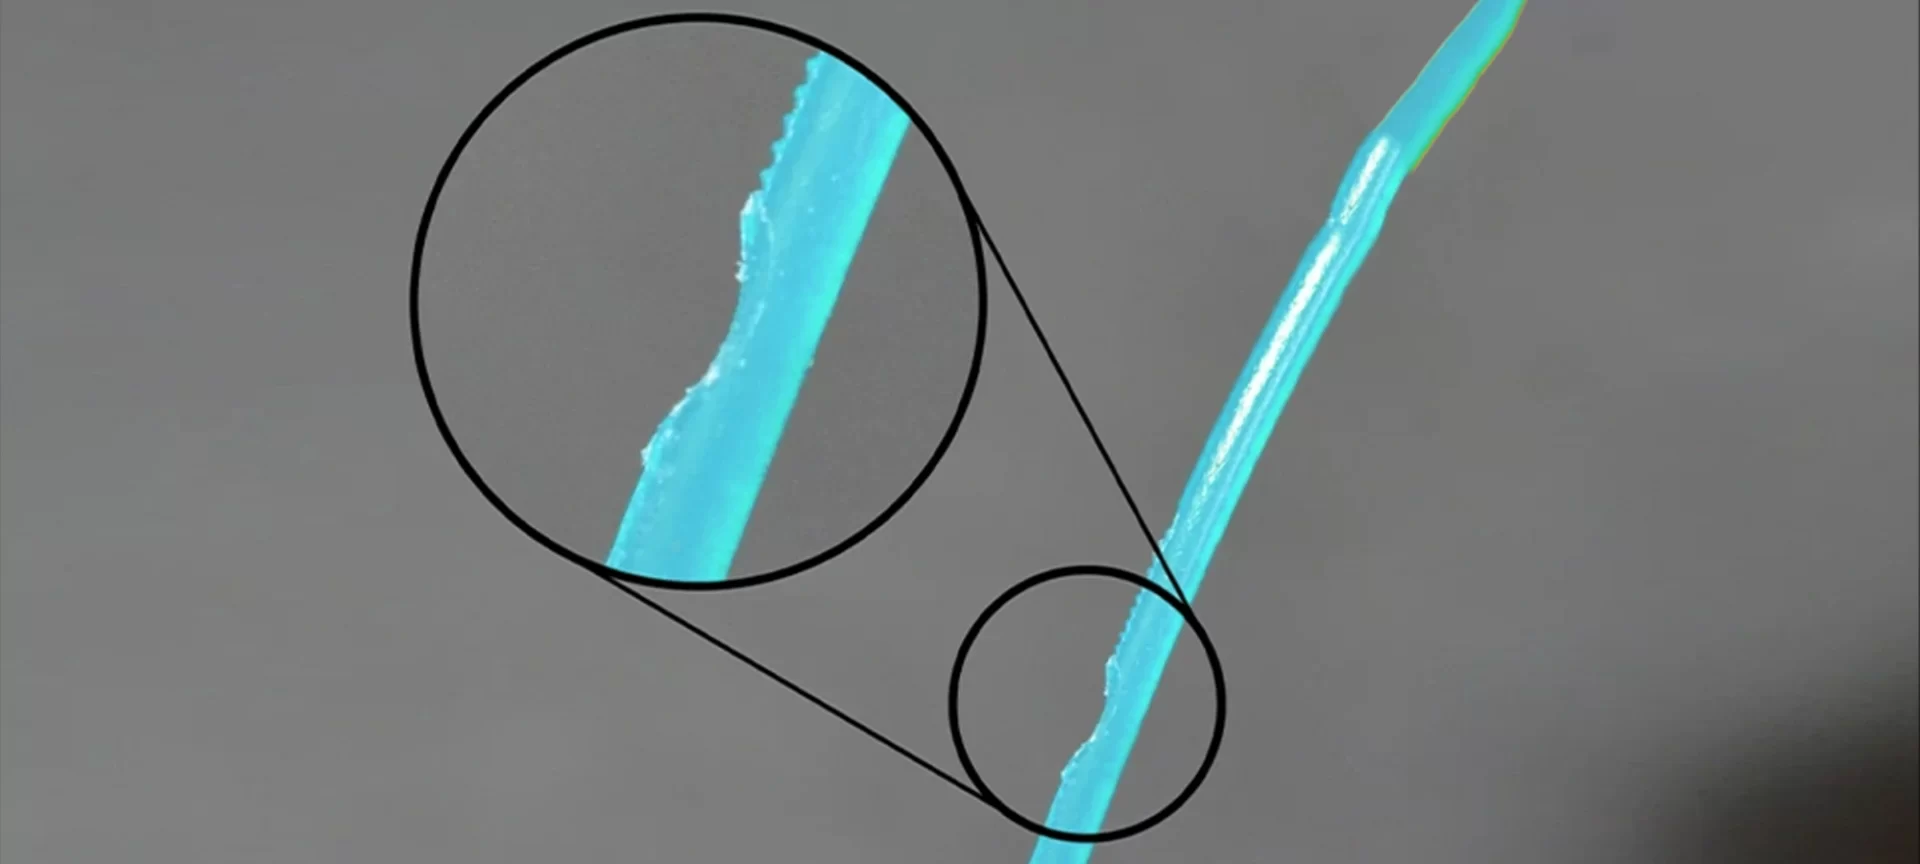
Inconsistency in extrusion can be of two types i.e. under or over.
But this 3D print problem can occur due to many reasons, below mentioned are some of the reasons why it occurs and how to fix it.
Reasons why you have inconsistent extrusion, their signs, and ways to fix them
Signs of inconsistent extrusion
The signs of inconsistent extrusion are easy to spot. In most of the 3D printed parts and functional prototypes, you end up with weak prints.
Cracking, crumbling, and tearing under even the slightest amount of stress in a way leads to visible gaps in your objects.
In the walls of 3D printed parts and functional prototypes, you see through because solid areas show spongy patches. These are all signs of inconsistent extrusion.
Ways to fix inconsistent extrusion
Lowering your retraction length can do a little good. You can also try giving a distance for priming the nozzle after retraction.
Slowing down of retraction speed is another way to go. And checking whether or not the feeder pinch wheel tension is up to the mark is the other.
In cases of over extrusion, you typically recalibrate the steps per mm, if they are done correctly, the next step is to properly calibrate and set your extrusion multiplier.
Temperature plays a very important role in determining all of these.
To make sure the influence of temperature is always on the lower end, you might want to ensure that you are printing at a cooler end than what’s needed.
The Conclusion
The level of amazement that is caused by the 3D printer by producing parts and functional prototypes that were otherwise unimaginable is the same as the level of problems it causes to anyone who does not know the basics.
In this article, we have covered the four most basic problems that anyone printing using 3D printer encounters.
It is almost impractical to try to sum up an article that enlists all the 3D print problems that you would face.
And even we make a list, it would take enough time as much as users of 3D printers need to come up with different problems.
What is interesting, however, is that these problems are something that every novice would wonder about.
Hope, when you encounter these issues you already know about them so it doesn’t seem new to you.
And you already know the solution to it, so you can implement the same.


