While trying to look at the definition of 3D printing infill on Wikipedia or TechTerms, you would not find one. Don’t worry the term is not too difficult to understand.
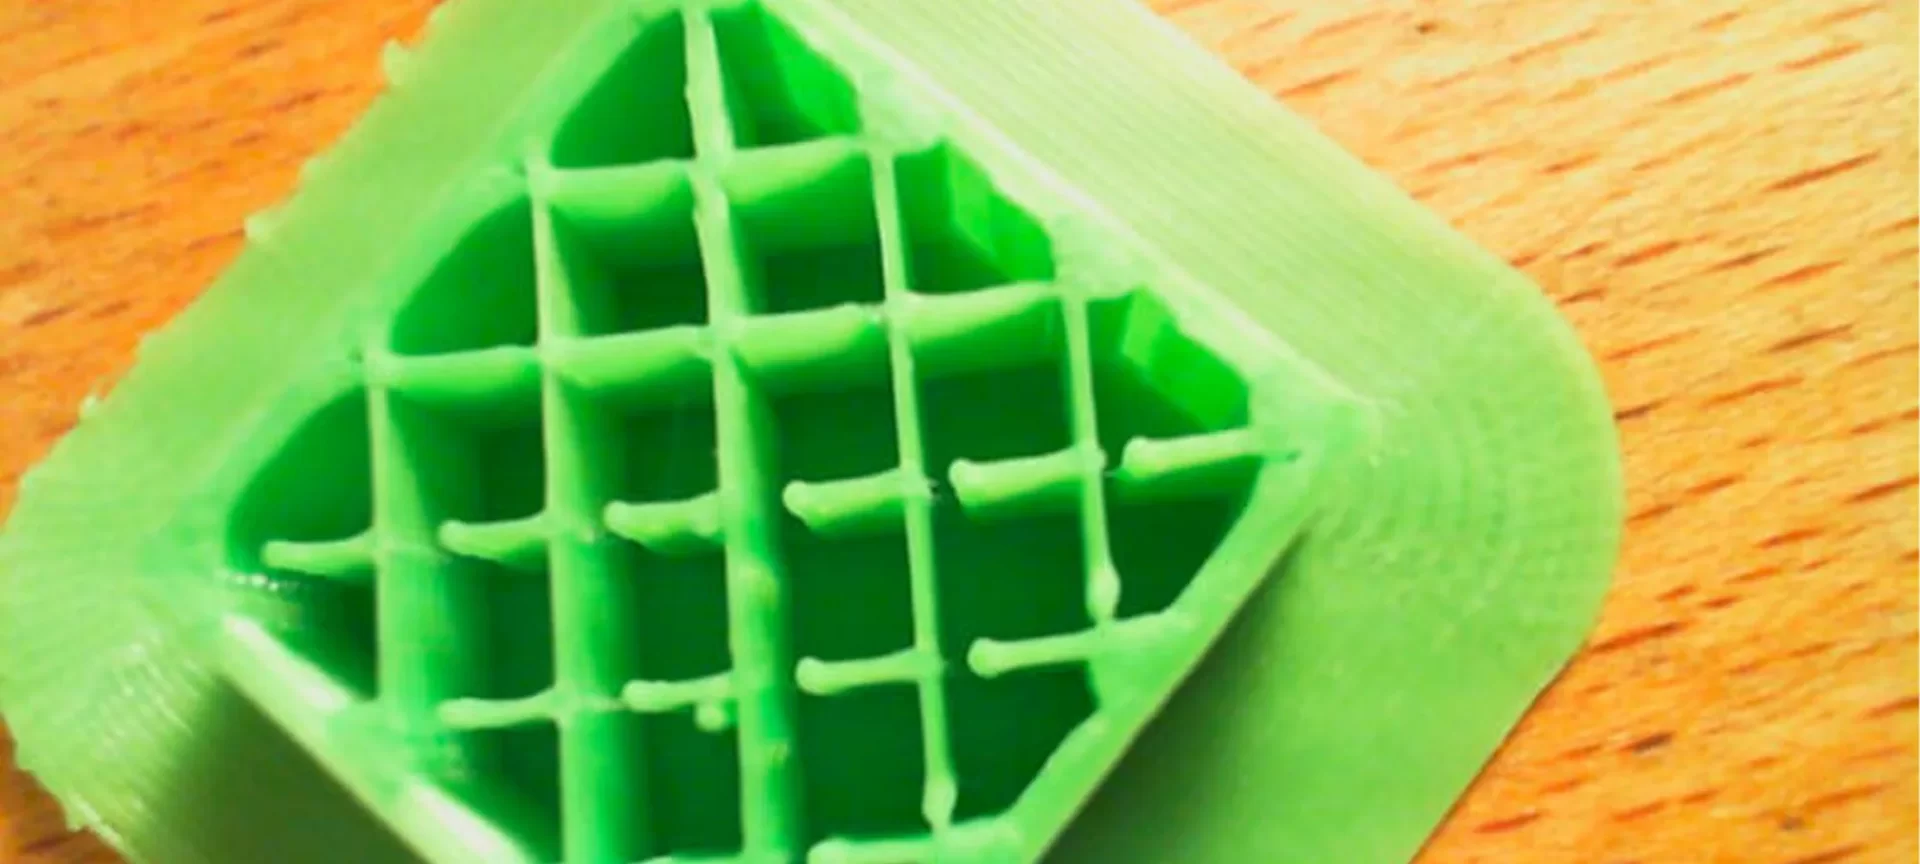
Infill as the name suggests is something that is filled inside. It is simply a repetitive structure that is used to take up space inside an empty 3D print.
If you observe 100 prints, the majority from those would have hidden infills i.e. you would not be able to notice it.
But occasionally, in minority prints, special infill patterns would be more than worthy of showing off.
Not only is infill used for filling the empty space in your print, but it is also used to change its weight depending on the material used.
Additionally, infill allows printers for printing flat horizontal edges over empty space reliably and efficiently.
It is not possible to have much structure or stability, making prints incredibly fragile without having a good 3D print infill.
Infill is one of the most important factors in the 3D print of parts and functional prototypes. But it is often overlooked because while having many things to look out for, like numerous patterns, densities, styles, and orientations, optimizing infill can be a daunting task. However, with the right knowledge, customizing infill can be fun and fruitful.
3D Printing Infill is such a parameter that impacts not only the strength, weight but also the structure of the print.
In an attempt to simply define infill, one may call it a repeating internal structure that is built up inside a 3D print. Although you must remember the main purpose of infill is to provide rigidity to the print.
But 3D printing infill can also serve for adjusting the weight of the print. By modifying the density of 3D printing infill you can do it. Let’s take a look at some basics that you need to know about infill.
How to Choose an Infill Percentage?
Now you already know that 3D infill printing is a necessary part for printing 3D parts and functional prototypes. And when objects require measurement of strength or sturdiness, the importance of 3D printer infill patterns increases. For many designers, infill is a pain in their asses. Most designers who want their print jobs to succeed are likely to have used a solid shell with at least a modicum of infill. But it is also observed, how the use of infill is directly proportional to the cost and the print time of the object. So, it isn’t completely useless if take a moment to decide your optimum 3D printing infill percentage.
In this article, we’re also going to take a close look at the process of infilling. We will also examine the pros and cons of 3D printing infill types and density. And also look at how to balance the amount of infill against the object’s intended use, to optimize strength while keeping costs and printing time to a minimum. After seeing all that we’ll look at how some of the cutting-edge slicer software that is presently hitting the market is changing the concept of infill. So keep reading to learn the best infill pattern for your prints.
Basic Object Sections and their Infill shapes
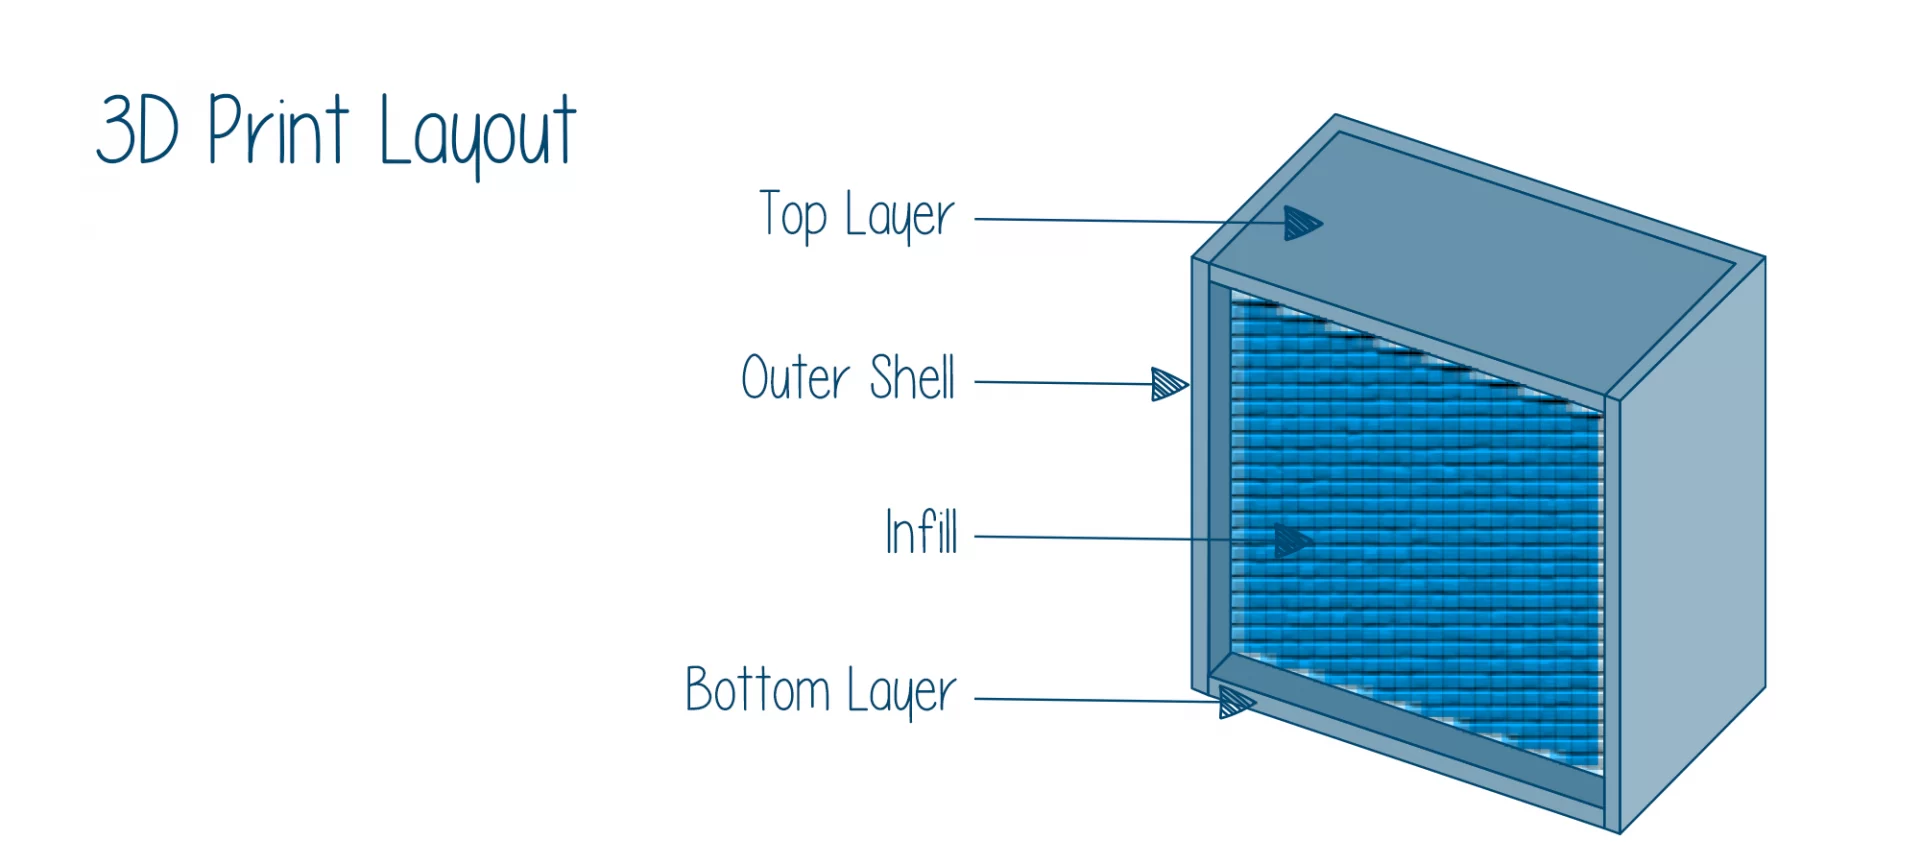
Generally, a routine part or functional prototype printed using FDM 3D printing technology consists of four sections.
For optimizing the complete design you need to divide the part into sections and then optimize them individually. The sections are:
- Shell is the outside walls of an object that is typically built up vertically along the z-axis.
- The bottom layers are that part of the shell that is comprised of an outside wall of an object, initially attached to the build plate.
- The Top layer is a part of the shell that is comprised of an outside wall of an object. It is facing upwards and usually the last part of an object to print.
- Infill, as mentioned above, is that material that comprises the interior of the object between the shell and walls.
Amongst the very many infill shapes that are typically available in most slicer programs.
If you want to know which one is right for you, it depends on what type of object you’re planning on creating and the 3D printing infill strength you require.
Rectangular is the standard infill pattern that provides a reasonable amount of rigidity in all directions.
This shape is also one of the easiest infill patterns to print and requires a minimum amount of bridging on the part of your print head.
Triangular is appropriate when strength is required in the direction of the shell. Although, it takes longer to print than rectangular or any other general part.
Wave or Wiggle is obvious from the name that it will have a waveform infill pattern.
The part is specifically useful when an object needs to be able to twist or compress. This infill pattern is great to use for flexible materials.
Lastly, 3D Honeycomb Infill is one of the most popular infill patterns. Because it provides greater overall strength in all directions, even more than a rectangular pattern, and can be printed within lesser time than a rectangular infill pattern This is one of the most commonly used, strongest infill patterns.
3D Printing Infill Styles and Uses
Each size, shape, and pattern of infill has its own style, strength, and weaknesses. Similarly, they have their own uses.
Although infill can take countless forms, there are several that fairly standard patterns are.
As infill takes up space inside a print, it makes all the sense in the world that infill designed for structure works better than infill designed for aesthetics.
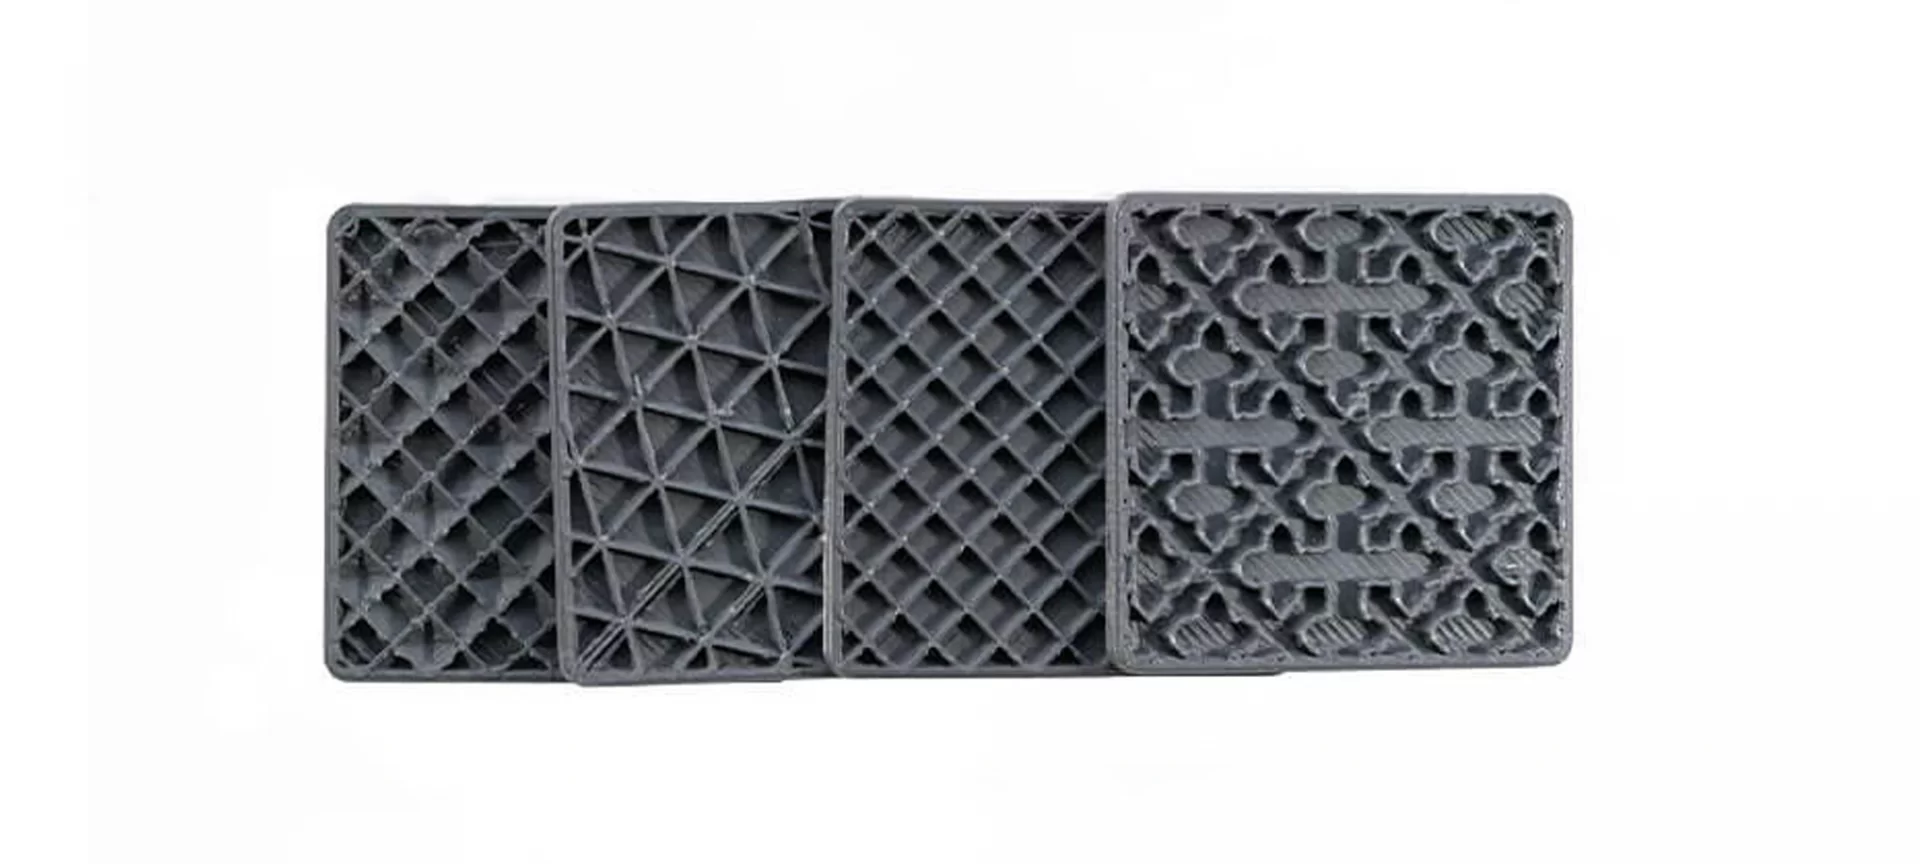
Scenarios like this have patterns incorporating grids, lines, honeycombs as well as rectilinear or concentric patterns which are known to work far better than any other patterns.
And now you have already seen it above, which one is best for what. These patterns give enough volume for printing between the gaps, as long as the density is set correctly.
What this permit is for printing over empty space more accurately, and with less error.
Whereas 3D printing infill like the Octi and Archi are designs in the image which are more suitable for circular or rounded designs of parts and functional prototypes.
Whereas Hilbert and 3D honey are the designs that are better for block-oriented prints.
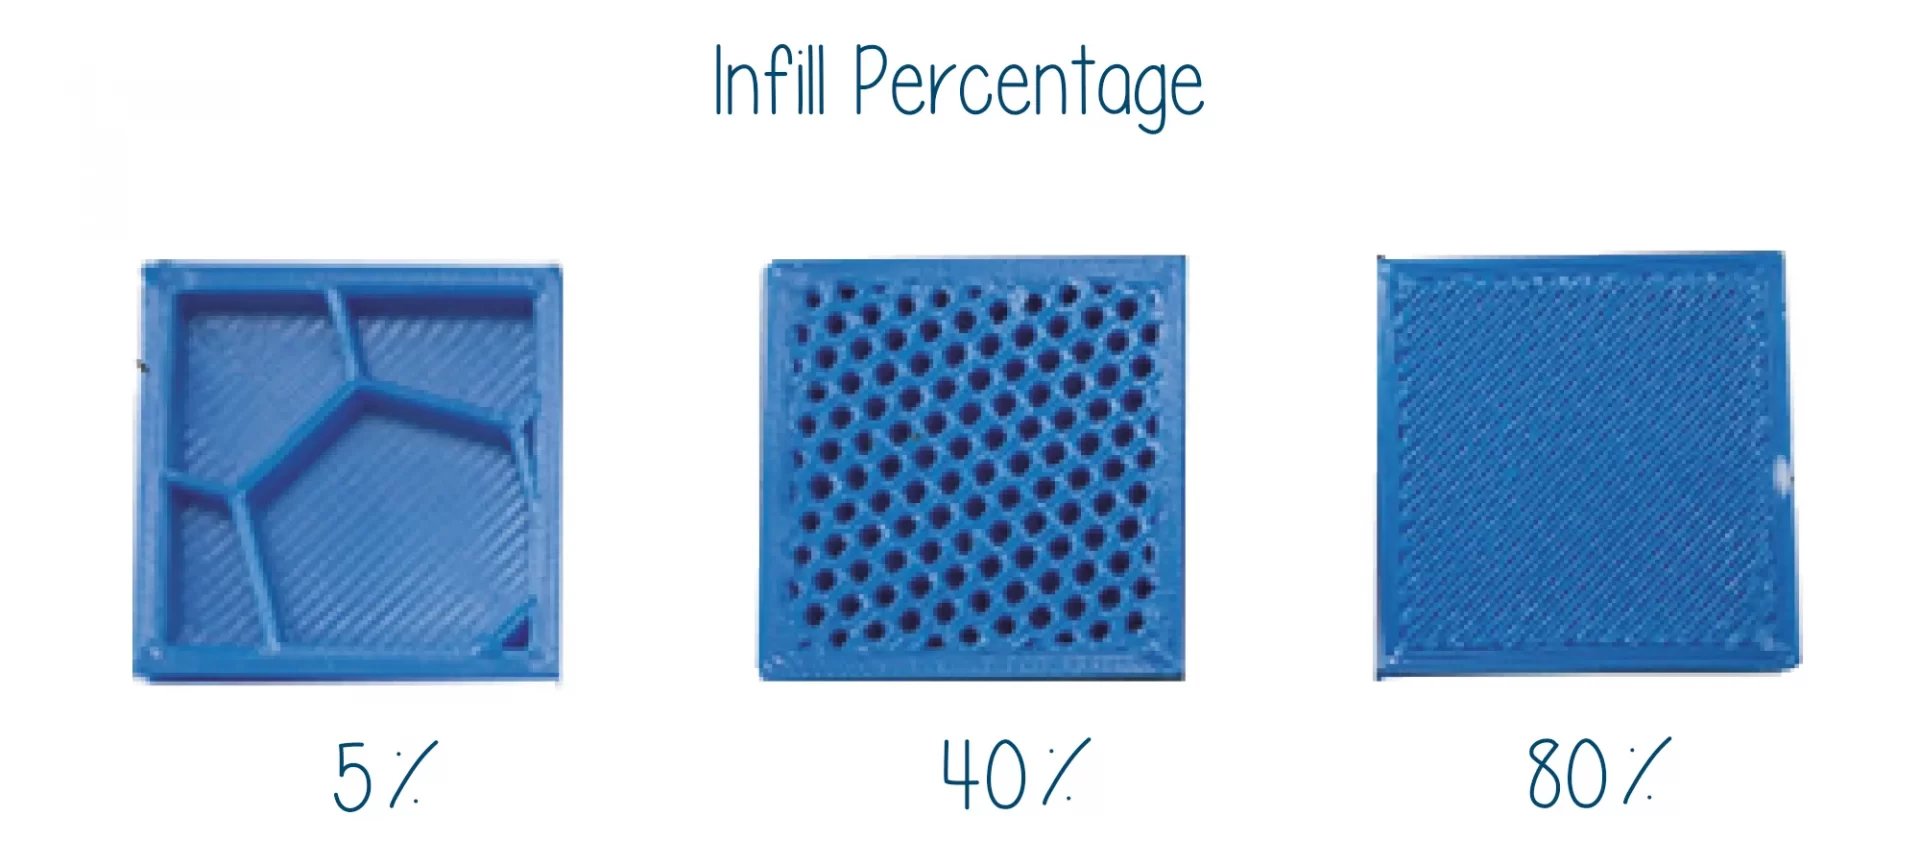
3D Printing Infill Percentage
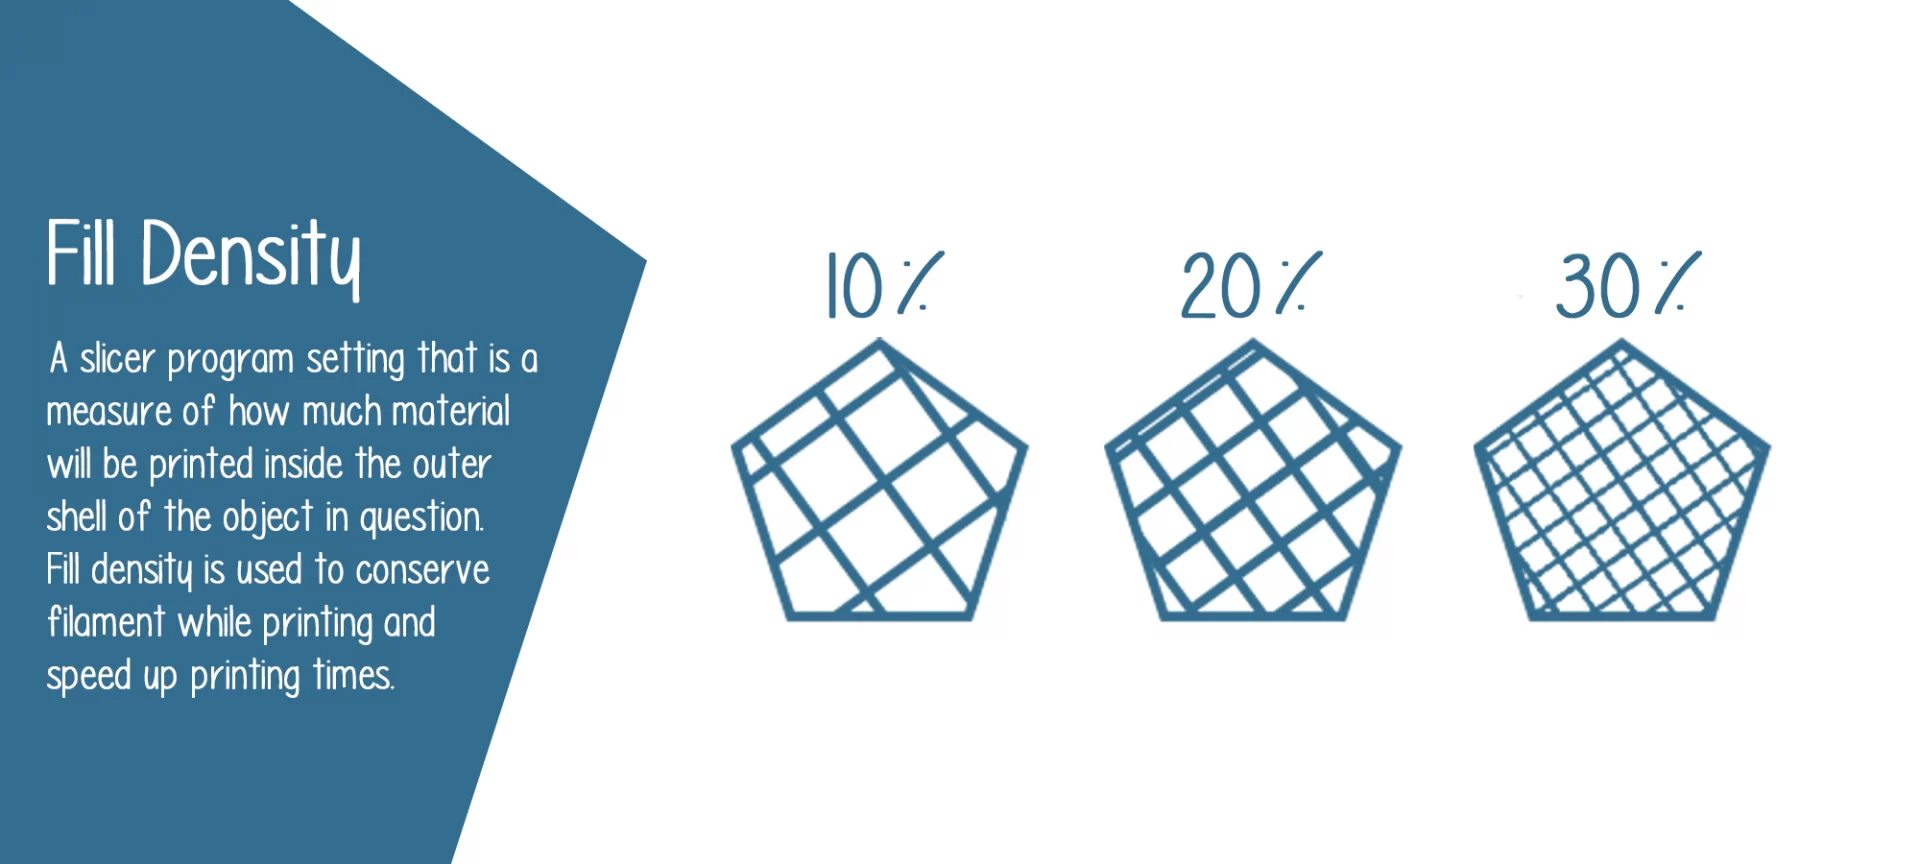
You can modify from zero percent to a hundred percent of infill in programs.
The ideal value of 3D printing infill is proportional to the final application that you wish to have in the part or functional prototype.
The most used percentage, which many lamination programs use as standard data, is 20%.
It is with this percentage that you can get 3D printed parts with medium or high strength, low weight, and very efficient printing time. This leads to transformation into parts with a good resistance or cost ratio.
In case you wish to print non-functional prototypes, models, and other objects of simple exposure the recommended infill is 10%.
You might think that this is such a low percentage, but the long printing times of complex figures or objects that do not need resistance to, for them any type of stress are reduced.
If you have done 3D printing before, you are clear in your head to have a 100 percent 3D printing infill for achieving maximum tensile strength. But this comes at higher costs, and both in terms of time and material and the pieces are heavier.
Apart from the values mentioned here, we recommend studying each case in detail for finding the resistance or printing time taking into account.
With that we recommend you decide anything in between 25% to 50% of infilling the resistance. And in some cases, you might want to increase it from 50% to 70%.
Feature Strength and Screwing, Tapping or Bolting

Another plate where 3D printing infill plays a critical role is in extending or protruding features that are connected to a model.
One good example which shows this is snap-fit connections. The base of this type of connection is often a weak point that has a low infill density of around 20%.
In such conditions the cantilever is much more likely to break as the short extruded clip is only connected to the body of print by a small cross-sectional area.
Here even if you increase the infill percentage means that more of the body of the print is connected to the cantilever increasing the strength of this connection.
Whenever a 3D printed part is going to be drilled or screwed, it is the 3D printing infill percentage that becomes a very important factor.
For understanding this better you can consider a print with low infill that is going to be drilled and then screwed to another surface.
Here, often the drill holes will go through the top and bottom layers of the print. This would miss the infill of the model and create a very weak connection.
In such applications, a 3D printing infill of 50 percent is desired as a bare minimum.
Connections that utilize clearance holes and bolts are better suited to 3D printed parts or functional prototypes with a low infill percentage.
It is the shells, walls, and infill that offer good compressive strength providing better anchoring of the part.
Rules That are to be Followed While 3D Printing Infill
- The application of part or functional prototype that you are printing should be understood before specifying shell thickness and infill percentage. This is because increasing the shell thickness and infill percentage increases the strength and time needed to print and print costs.
- The design shells should be a multiple of nozzle diameter.
- If you are screwing into a part, you should increase shell thickness or infill percentage for improving anchoring. In case this is not possible, consider using a clearance hole and bolting (with washers).
- While designing cheap rapid prints with rectangular infill if you choose the best selection it will print quickly. While the designs in which strength is critical to the function of a 3D printed part honeycomb or triangular infill offers an increase in strength when compared to rectangular infill.
Pros and Cons Having Lower Infill Percentage
- When you have a lower infill percentage, less amount of material is used than otherwise.
- The overall printing cost of the part or functional prototype decreases if you have a lower infill percentage. The print time of part decreases when you have a lower 3D printing infill.
- The overall weight of the part or functional prototype that you are printing is lighter than otherwise.
- The material that is printed is transparent and has a clear filament.
- Materials also tend to be fragile when they have a lower infill percentage.
- More material is used when you have a higher infill percentage.
- The overall cost of the print increases.
- Printing time of a part or functional prototype increases.
- The material is heavier in weight than otherwise.
- 3D parts or functional prototypes that are printed with higher 3D printing infill tend to have stronger snap-fit features than objects with lower infill percentage.
The Conclusion
Almost all the users of 3D printers know how 3D printed parts have two distinct zones called the shell and the infill.
And they understand the importance of correctly parameterizing these two values and how that can influence the mechanical resistance, the finish, the printing time, and the cost.
The shell is the outer walls of any part or functional prototype in which both the layers are in contact with the printing base and the top layers that attribute the final surface finish are included.
In this article, we have focused on 3D printing infill and how to correct choosing that leads to building a part or functional prototype of our need.
So enjoy experimenting with infill and see its different effects on the parts that you 3D print.
A little close observation of all that’s written in the article would let you enjoy the real flavor of 3D printing.


