Amongst the very many charming features of the Creality Ender 3 printer, there is bed leveling.
Auto bed leveling is absent as a feature in this 3D printer and for that you, as a user are required to learn bed leveling for ensuring accuracy in the printed part or functional prototype.
But before getting to Ender 3 bed leveling in particular, for all those who do not know what bed leveling of the printer is, below is the overview that will help you understand what is bed leveling and how is it supposed to be done?
What is Bed Leveling?
A leveled print bed is a crucial part of ensuring that you would get a successful 3D print of part or a functional prototype.
Not only does it lets the material extrude evenly across the entire build surface, but also ensures there is uniformity in the layers of the printed part or functional prototype.
The complete responsibility of ensuring that the part is printed correctly depends on the first layer of the part that is printed.
Bed leveling and adjusting the nozzle gap is all about getting that first layer tight and ensuring evenness in the filament with which you are printing using FDM 3D printing technology.
The material behaves predictably at certain temperatures if the print bed is completely leveled and makes it possible to control its form, by making your 3D printed object possible and easy.
After leveling the print bed of your 3D printer, you would need to adjust the Z height.
Manually doing this task will mean that you would not lose the balance of filament flow and bed adhesion for ensuring which, the value in software can be set so that the printer knows what the gap is between the nozzle and build plate.
For getting an even first layer, you would need the build surface as well as the nozzle gap correct, only after that, you would be able to have the perfect foundation for the rest of our 3D print job.
After having seen what is bed leveling, and understanding the responsibility of printing the first and fundamental layer with precision depends on it, let’s see the other importance of bed leveling.
Is Bed Leveling Important?

- Some experts consider the term bed leveling to be a misnomer because you are not actually leveling the bed with the surface, instead of placing it in such a matter that the tip will always hover at the same. This same is none other than a perfectly correct distance all over the surface of the enter build area; for the time required to print a part or functional prototype.
- This is very important for printing the foundational layer of the part or functional prototype i.e. the first layer in your 3D build. Not only does the first layer make it up for you to easily offer primary support for the whole of the print, but also if you really want to achieve a rock-solid base, the bed of your printer must be properly oriented. Thus doing bed leveling will provide both the right amount of adhesion as well as the delivery of the printing material while the printing process has started.
After having seen the importance of bed leveling, we will now move to Ender 3 bed leveling in particular.
There are certain pointers that you must take care of before starting your Ender 3 bed leveling process, they are mentioned below.
What to Check Before Starting the Ender 3 Bed Leveling Process?
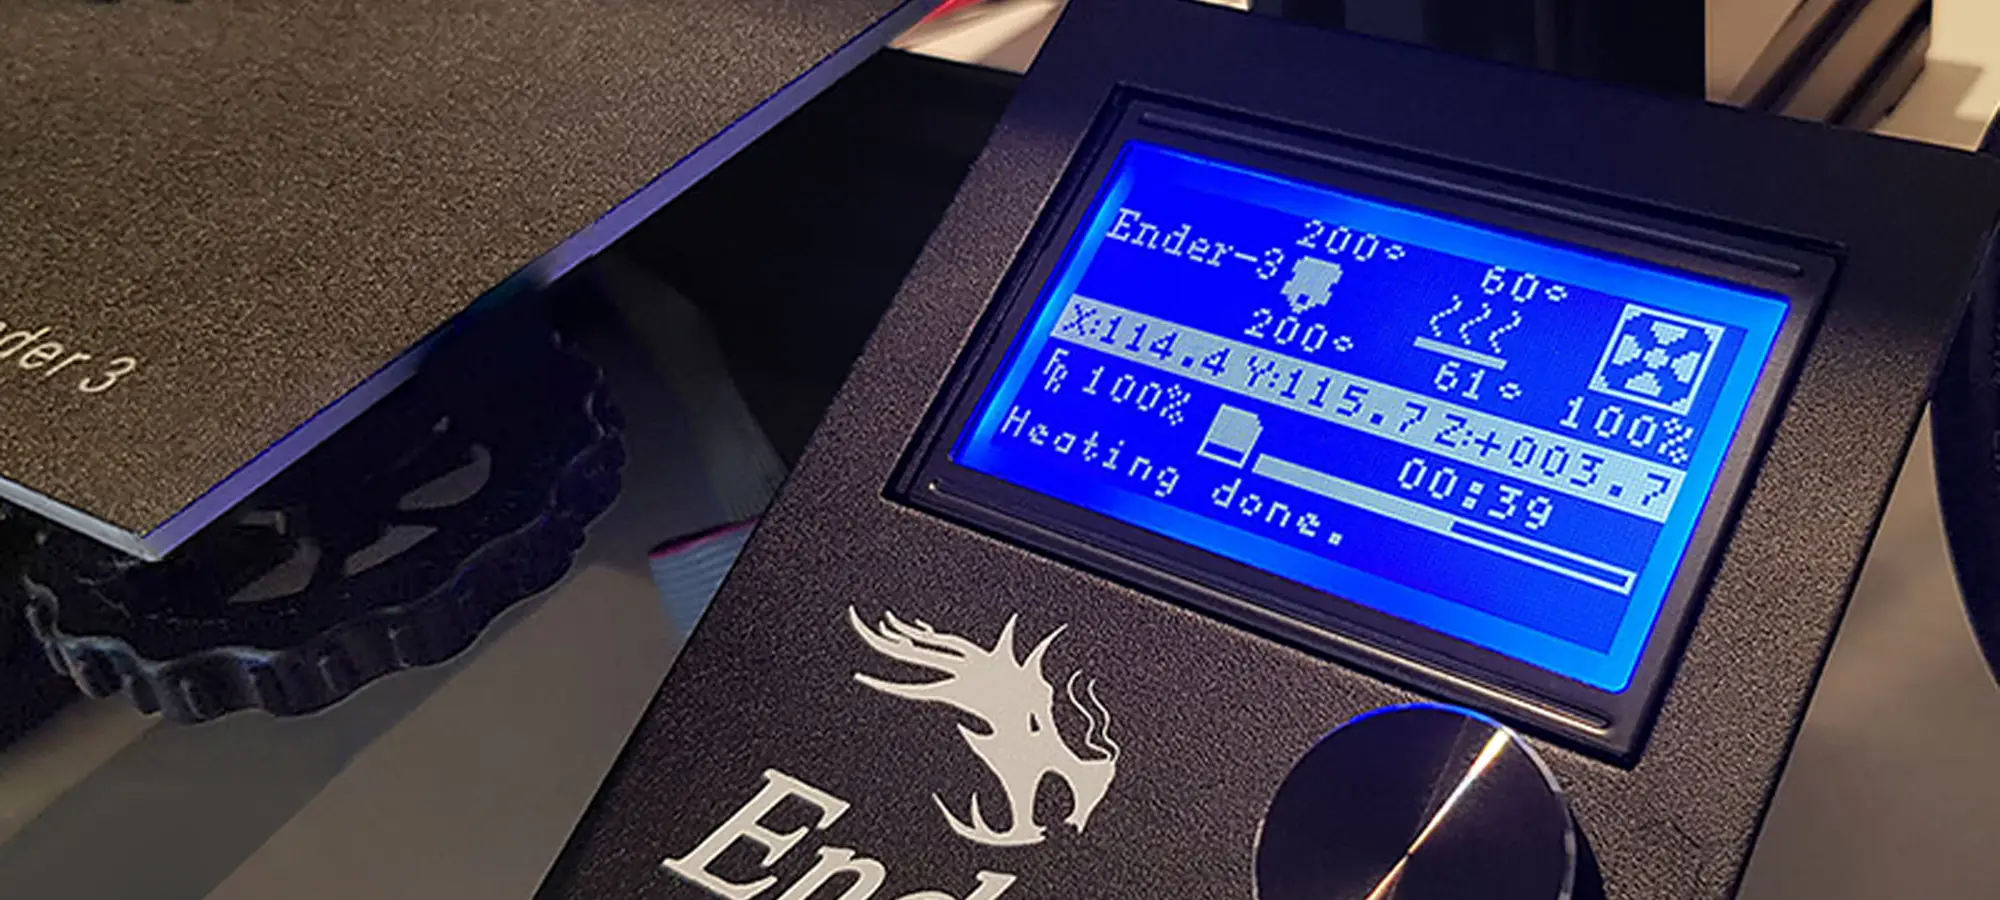
- You will have to turn on the Ender 3 3D printer and press the control button on its display screen, from which you can scroll down to the PREPARE options menu where all the functions would be then controlled.
- After having done so, you have to scroll further down till you see the AUTO HOME icon and press the button on your touch screen. This will cause the hot end of the printer to move of its own accord to the left front side of the unit’s bed and stop there. Make sure that this process does occur when you hit the button mentioned above.
- After this happens, you are again asked to go back to the PREPARE menu wherein this time you are requested to Scroll over to the DISABLE STEPPERS option and click the control. Once you do so, it will make things easier to move the machine’s bed back and forth until it reaches its desired position for the adjustment of the bed according to the part or functional prototype that you are willing to 3D print.
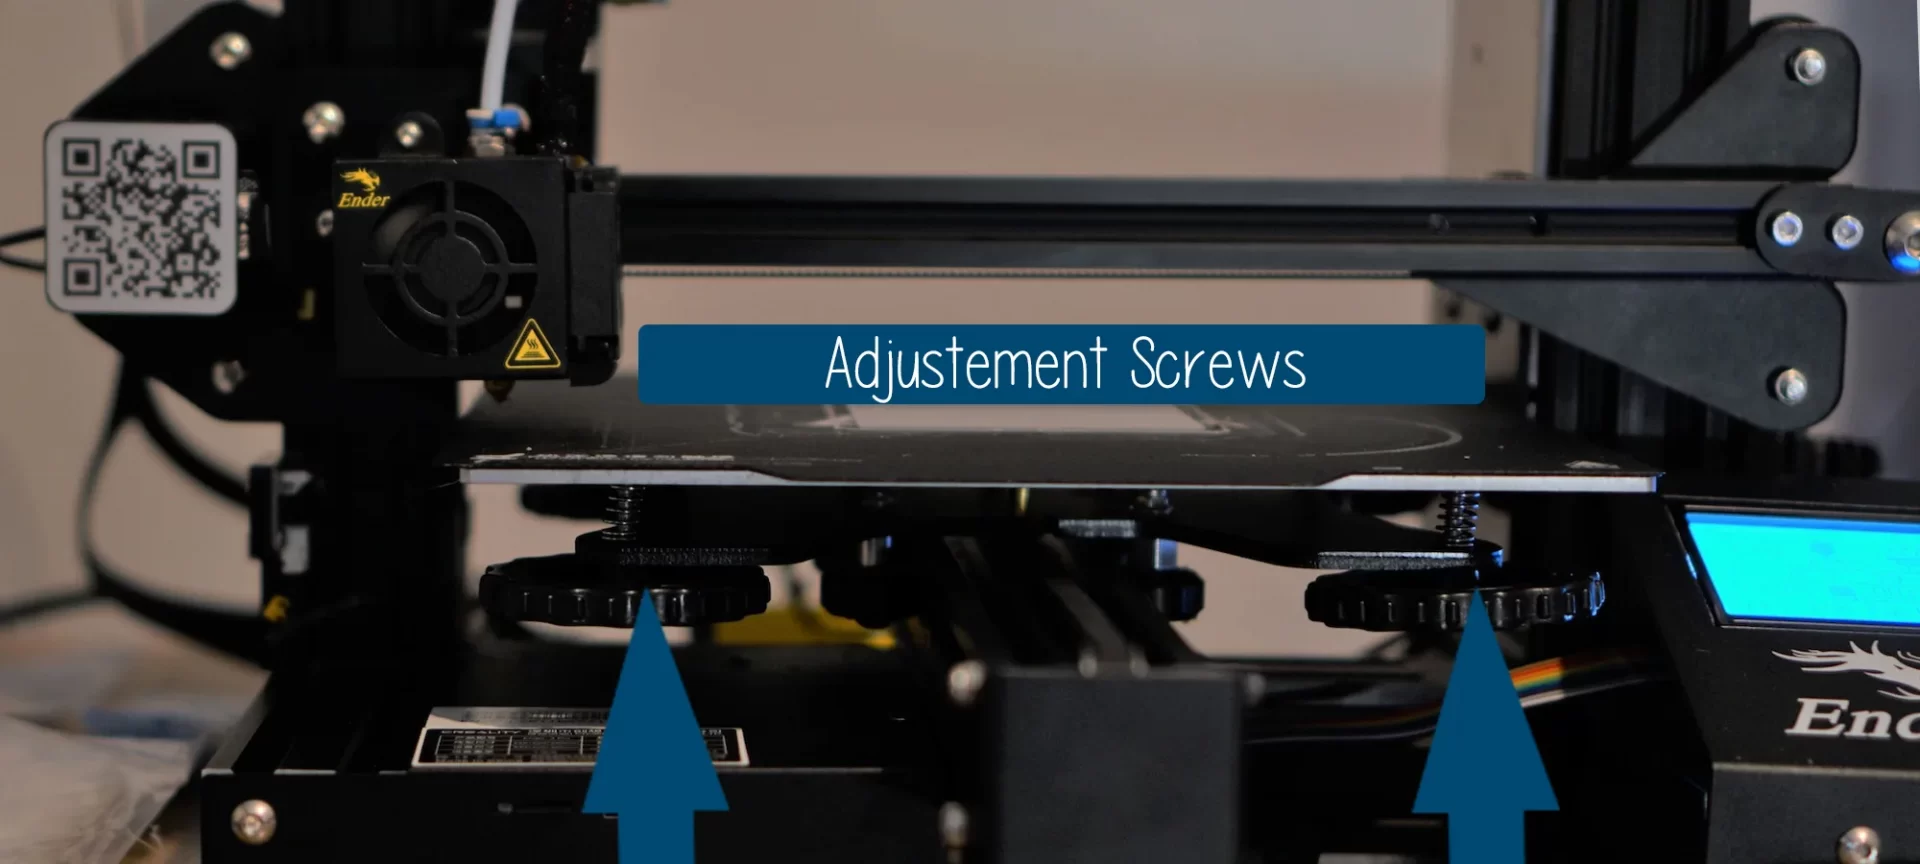
- Now when the controls are completely in your hands, you will have to individually rotate each and every one of the four leveling wheels that the Ender 3 3D printer has in a counter-clockwise direction in order to slowly lower the bed. As a general rule of Ender 3 bed leveling works, even one or two turns each, should be deemed sufficient for this task. The main purpose of this exercise is to basically make sure that the machine’s bed is kept lower than the tip of the nozzle before starting the 3D printing process.
Now we will go through the steps you need to ensure for preparing the nozzle.
Preparing the Ender 3 Nozzle and the Build Plate for Bed Leveling
Make sure that the build plate of the nozzle is clean, if not remove Ender 3’s build plate and clean it with a suitable cloth.
While cleaning the build plate, make sure you un-stick whatever has stuck on the surface of this build plate. You are allowed to use a spatula if need be for breaking off the loose material.
After having done this, you can wash the build plate with warm, soapy water and make sure it is dried and there are no particles on it before you start 3D printing.
You may reattach the build plate now with the heated bed using the clips that are provided to you, while doing this you should carefully check whether or not the build plate is flat and without ripples or does have high spots.
Also, one more thing to ensure about the nozzle is that is clean, if you have printed a part before, make sure particles of that 3D printing material are no more in it. There should not be any plastic protruding from the tip of it.
You can heat up the nozzle up to the temperature with which you have used the nozzle lastly.
After having ensured the nozzle and build plate are up to mark, and checking the machine for Ender 3 bed leveling, you can now start leveling the bed.
How To Level the Bed in Ender 3?
For bed leveling of this machine, you should consider moving the nozzle so that is well-positioned on the upper left corner of the printer’s bed.
As a general rule, it is advised to keep the distance, around half an inch or so, from both sides is usually.
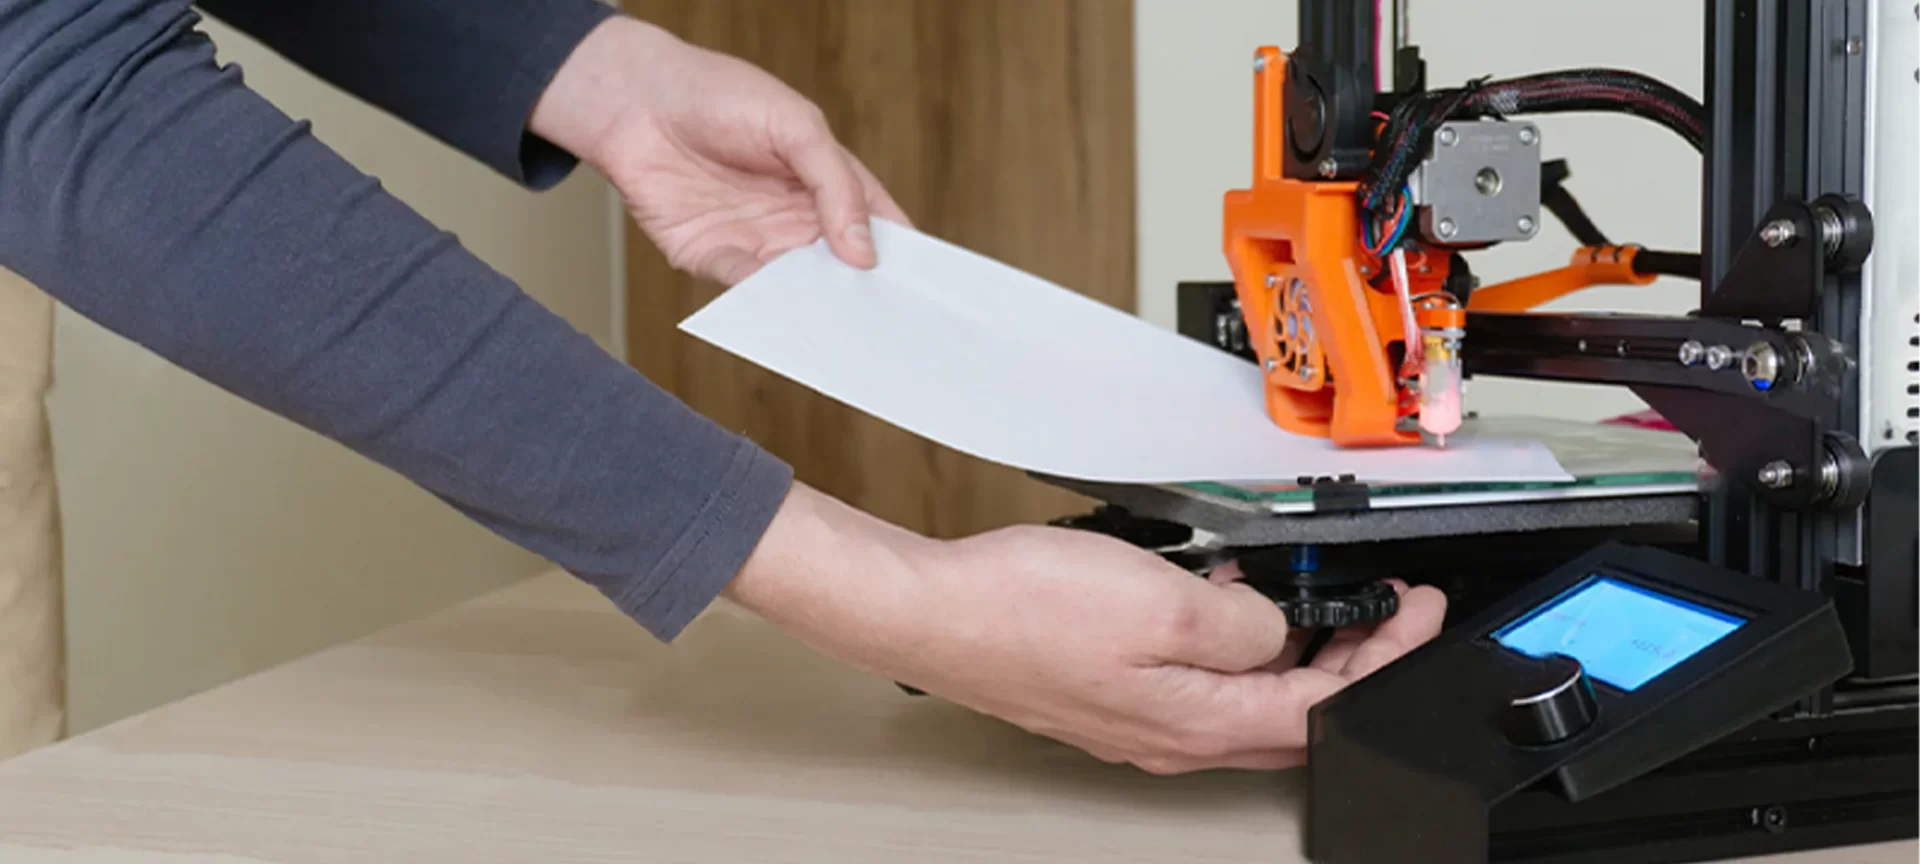
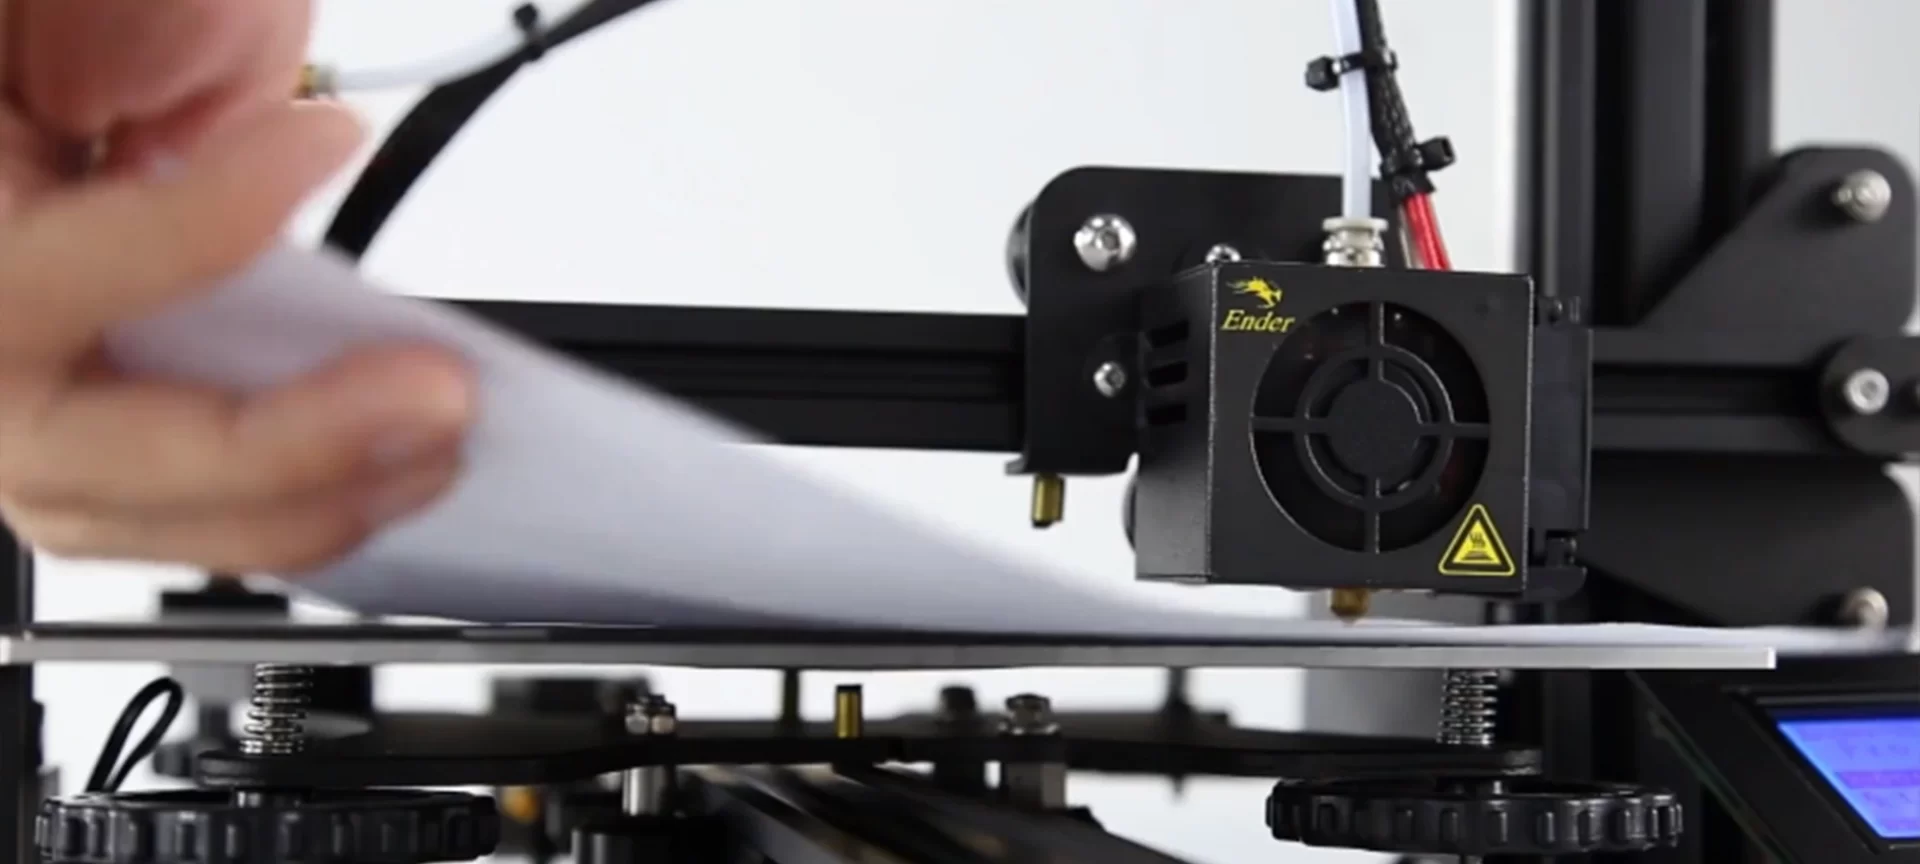
After having considered that you should start by sliding the paper in between the nozzle of the machine and the printing bed.
Although it is to be noted that the paper won’t fit initially, so you should drop the corner little by little until the complete fitting of the paper happens.
Once you notice the paper sliding without hindrance is when you are advised to raise the corner very slowly, with the help of the adjuster provided to you.
While doing this, it is important to remember that clockwise movements move the bed upwards and vice versa.
As you continue to change the movement of the bed, gently keep on sliding the piece of paper back and forth over the bed.
Ensure that you have stopped adjusting the turning the knob of the adjuster the same moment you feel the slightest resistance to the movement of the paper. This is an indication that the corner is now successfully leveled.
For ensuring Ender 3 bed leveling has been completed you would have to repeat the exercise for all the other corners of Ender 3’s build plate.
You are requested, to advance the hot end to the new corner very slowly as it is the best way to prevent any damage to the build plate of the machine, should the hot nozzle tip start to drag on the plate.
If you wish, you may use the available thumbwheels for this task but while doing so it is very important to remember that the paper must have very gentle contact with the tip of the nozzle.
So, it should slide but not very easily, for this it is necessary to be in tune with your feelings.
Once you have adjusted the corners of this printer on an individual basis, you should go back and thoroughly check all four corners as sometimes a few further adjustments are required for ensuring Ender 3’s bed leveling is completed.
And now before concluding the article we will go through some of the amazing features of this machine.
Amazing Facts About Ender 3
There are some differences in design between the Creality Ender 3 and Ender 2 which would be familiar to people who have used the latter.
The former one has the CR-10 vibe, as it features aluminum extrusions comprising the frame and a single leadscrew driving the Z-axis from the left-hand side of the frame.
However, unlike its forebear, which featured a cantilever style that left the X-axis rail projecting into thin air, the Creality Ender 3 completes the loop and closes the frame out.
The Creality Ender 3 features a modestly sized heated print bed that offers a build volume of 220 x 220 x 250mm for manufacturing any part or a functional prototype. This build volume is nearly double that of the Ender 2.
An impressive feature of the Creality Ender 3 is its ability to fully recover and resume a print even after losing power or getting disconnected.
This feature would let you never lose the progress made by you. On the right-hand side of the Creality Ender 3’s frame is an LCD with a control wheel that lets you operate and hence interact with the printer safely.
Unlike the CR-10, this control panel of the Ender 3 is attached to a 3D printer rather than included as a standalone component, making the full package more compact and portable.
Pros and Cons of Ender 3
- The price of this printer is affordable for almost anyone.
- Although it costs very low, the printer manages its users to offer decent print volume and high-quality parts and functional prototypes compared to printers in the same price range.
- The printer is open-sourced.
- It has a tight filament path that is responsible for improved compatibility with its flexible filaments.
- It is easy to assemble, has a compact design, and can be increased to a number of upgrades for 3D printing.
- The wobbling of the base is an issue that users face with this printer.
- The adhesive is needed for making the base stick to the print bed.
- You require to manually caliber the print.
- The flimsy bed of the printer needs to re-leveled time after time.
Conclusion
As a general rule of thumb, experts claim to ensure Ender 3 bed leveling after every eight to ten prints.
However, it depends on the type of part or functional prototype that you are printing on the printer, it may be possible that you require to ensure Ender 3 bed leveling lesser times than the rule of thumb.
If you change the temperature of the print bed you would not have to consider to level the bed.
The calibration is overall a very delicate operation so if you move the printer from one place to the other, or you accidentally bump into the print bed, you would have to level the print bed all over again even if you would have done Ender 3 bed leveling just a few minutes before.


