Among the very many free software that is provided by Autodesk, Netfabb is one.
It was in November 2015, that Autodesk acquired the German company Netfabb GmbH, which was originally the company that developed Netfabb software solutions. The software is meant for additive design and manufacturing.
The current situation is that Netfabb has already been considered by many to be one of the most important 3D print prep tools in the industry.
After acquiring this software solution provider, less than a year later, the software giant released its first Autodesk-branded versions of Netfabb.
And after that, the company has followed up with a new version of Netfabb every year. In this article, we are going to review Autodesk Netfabb software.
Overall, Netfabb is a comprehensive toolkit for additive manufacturing professionals. The software integrates design enhancement, manufacturing preparation, and build simulation tools in a single software environment that shares a common installer, common file formats, and process definitions.
Since the acquisition of Netfabb, Autodesk added powerful new capabilities to Netfabb such as:
- Process simulation for metal 3d printing.
- Latticing & Design Optimization.
- Advanced toolpath capabilities.
These are the features that provide engineers and designers with a broad collection of additive design and manufacturing tools.
Let’s start this Netfabb review article with the version of Netfabb that was released in February 2021.
Netfabb’s Current Version
Netfabb 2021.2 is available for download with big improvements in the areas of simulation and latticing, cloud storage, new machine workspaces, and new support actions.
For all of you who are not up to date with the latest versions of this software, Netfabb is Autodesk’s designated software for additive manufacturing professionals.
According to the Autodesk webpage, Netfabb is tailored for 3D printing, rapid prototyping, and additive manufacturing.
The software is used for preparing 3D files for printing and converting them to slice files which can then be transferred to 3D printers and used as input for producing a specific outcome.
For helping you prepare for a 3D print, Netfabb offers features that make editing, repairing, and analyzing 3D files easier.
As per the website, a yearly subscription to Fusion 360 with Netfabb Premium is $4,635 in the United States and you will have to contact an Autodesk representative if you are interested in Fusion 360 with Netfabb Ultimate or Netfabb Local Simulation.
For the software’s 2021.0 version, or 2021.1 and 2021.2 updates, Autodesk has made sure to keep up to speed with the fact that 3D printing is being used more regularly as a production technology.
To download the latest version of the Autodesk Netfabb Premium software, you can visit the Autodesk Netfabb webpage and click Download Free trial.
Now that we covered the latest version and how to get it, let’s take a closer look at Netfabb.
Overview of Netfabb
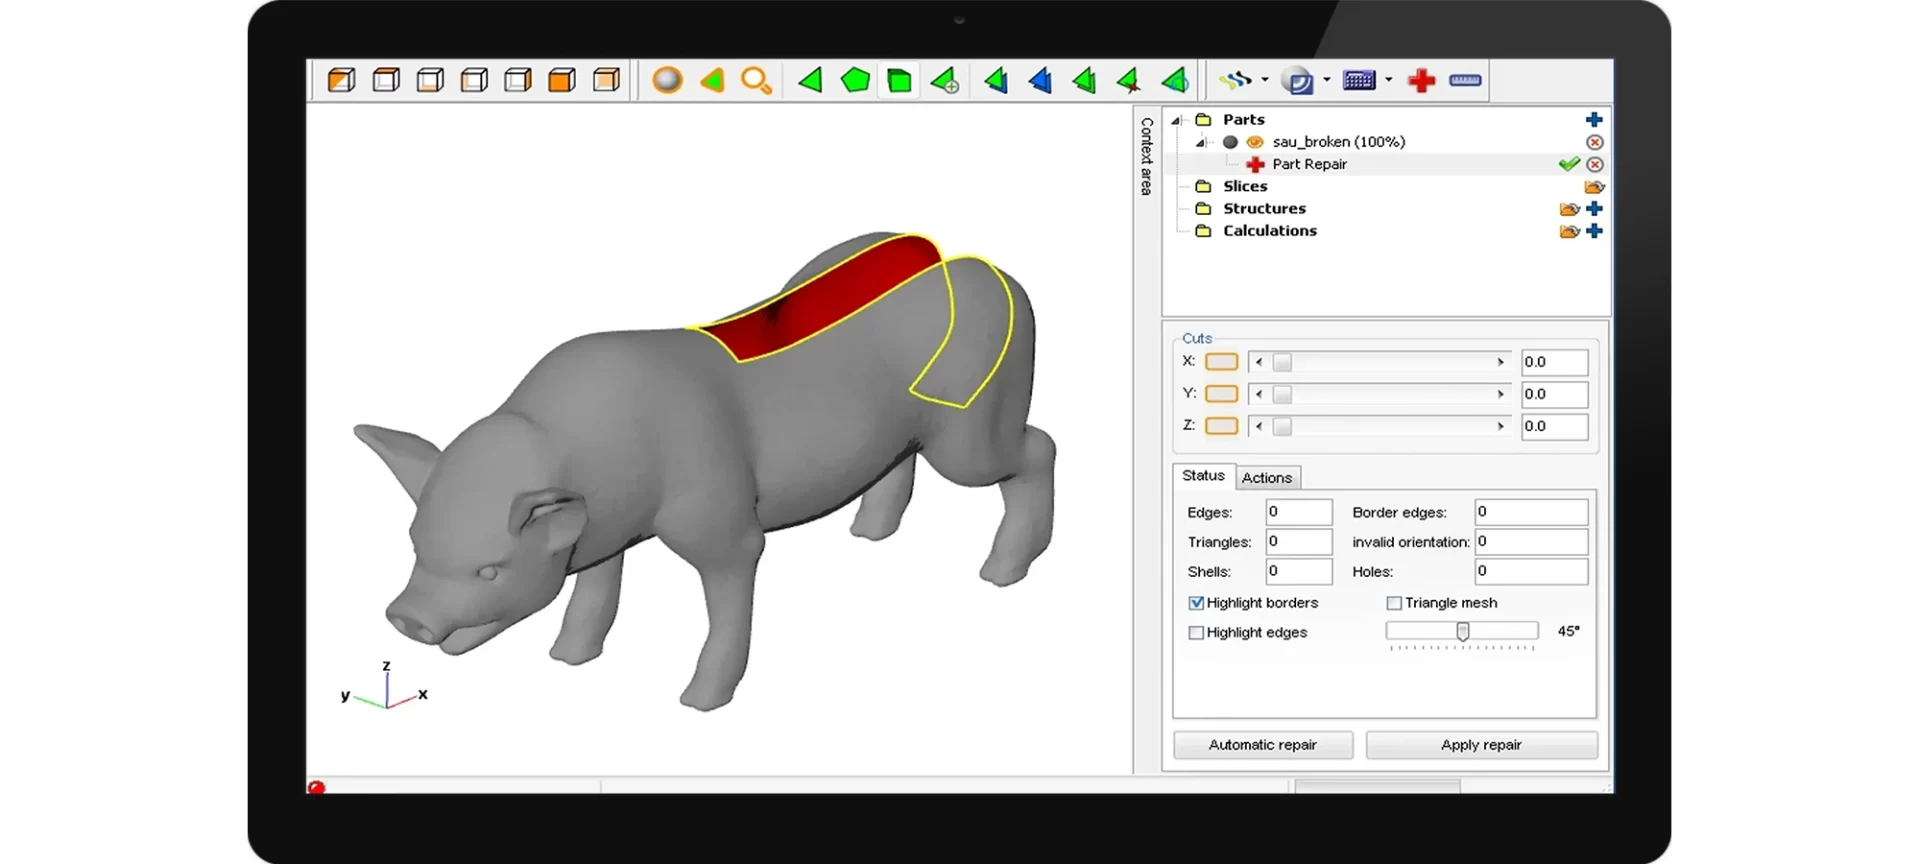
After preparing three-dimensional files for manufacturing, Netfabb can convert them into 2.5-dimensional slice files. All of these files consist of a list of two-dimensional slice layers.
The software also includes tools for creating, viewing, editing, repairing, and analyzing three-dimensional or slice-based files in various formats.
For performing the print preparation operations, this software uses a Stereolithography file format for creating a mesh of the part.
Three-dimensional corner point coordinates and flat triangles are something that the STL files of this software contain.
In this software, adjacent triangles in a model typically use common corner points and share edges. As a result of which, what you get is a continuous triangle mesh.
Since STL files do not contain any topological information concerning the mesh, errors can occur when certain CAD software is used to generate the STL file.
Netfabb can be used to detect and repair these errors and then be utilized for creating a faultless mesh without holes, deformations, or intersections. Netfabb can also open various CAD files so users do not have to rely on erroneous STL files in the first place.
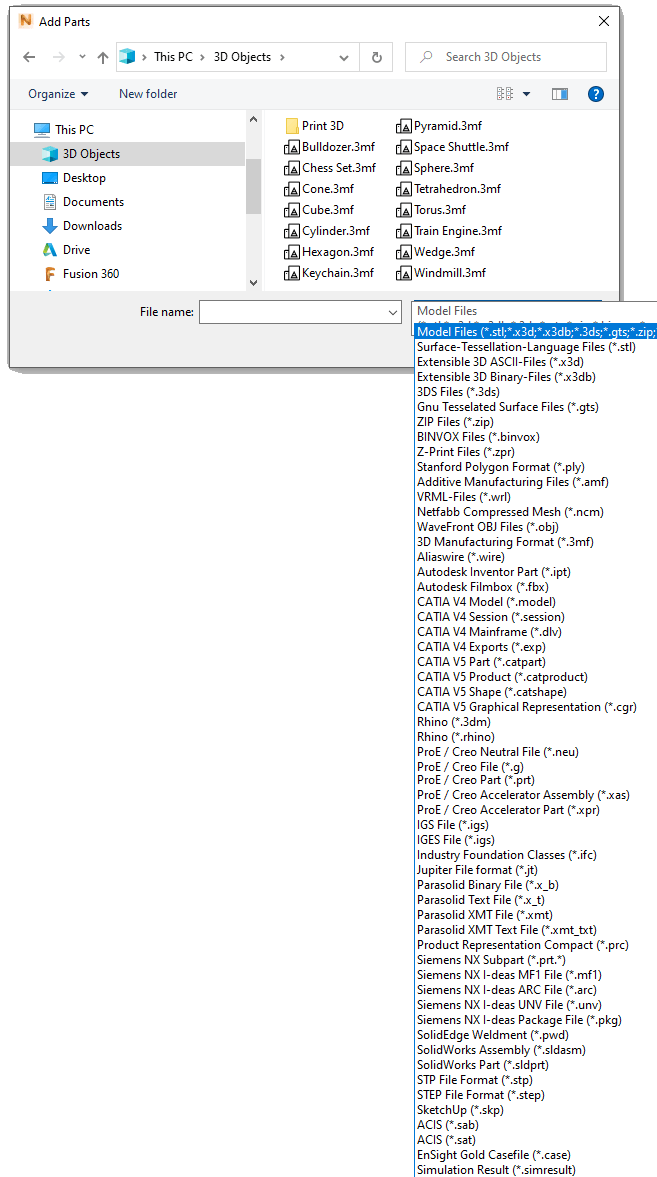
Slice files that are completely ready for additive manufacturing procedure can be converted from these meshes here onwards.
Now that we have covered the overview of Netfabb let’s take a quick look at some of the new features that the current version of Netfabb offers to its users.
Free Easiest Tools to Repair STL Files Online
3D Modeling for 3D Printing: A Guide for Beginners
Noteworthy Features of NetFabb
Although there are many features that the current version of Netfabb possesses, but below mentioned are the ones that we find really noteworthy.
My Machines
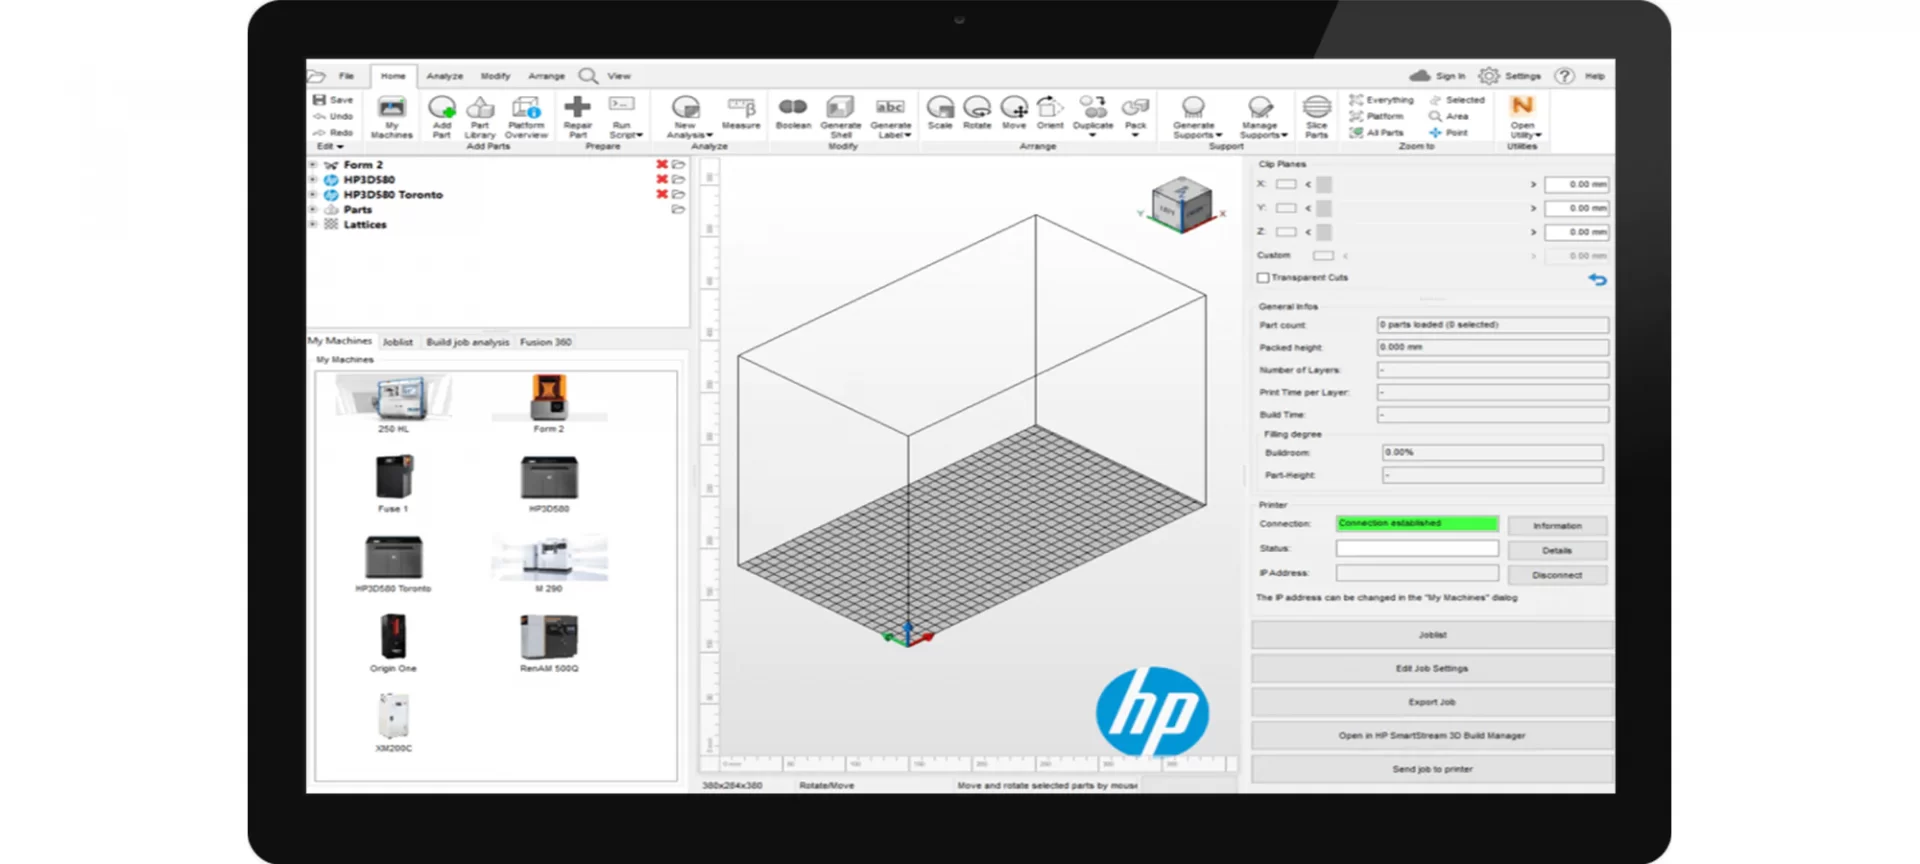
The feature focuses on the daily needs for managing and operating multiple 3D printers at the same time.
This feature received a lot of updates over the past several years and users can customize their machines and manage them effectively all within the My machines dialog with ease.
Autodesk website states “No more scrolling large lists of machines not in your arsenal, no more saving of empty projects to store machine settings!” This feature is clearly a big-time saver for users with access to more than one printer.
Lattice Commander

If you have operated the prior version of Netfabb you would know how extensive changes and improvements were made here.
While updating the software, Autodesk took some time out and explained that the user interface has been reordered into three tabs. There are:
- Statistics and ways for creating or importing components.
- An overview tab for managing the selected component.
- A tab for managing, and working on, the selected body.
In this newer version, you also have a grid overlay that is kept in to help users visualize the division of space and a new body property that sets the role it plays when a part is generated from the component.
Giving out an explanation for this, Autodesk says: “We added a new function to generate a part from component bodies at the click of a single button.
While we were working on the Lattice Commander’s user interface, we also collated the different latticing tools into a common section of the project tree to have them all in one place.”
3MF Support
The support has been improved for files with this extension. This step has come taking into account how large companies are working on replacing the STL format with 3MF files.
For making this transition happen, Netfabb is constantly striving to make 3MF files as easy as possible to use.
Technically this means that there is now an option in this software that can interpret components as groups. So, when you are exporting 3MF files using this software, the software will see groups and apply them as components.
All you have to do is check the settings for changing this. In addition to this, support for large counts of parts and triangles has been improved.
The Simulation Utility
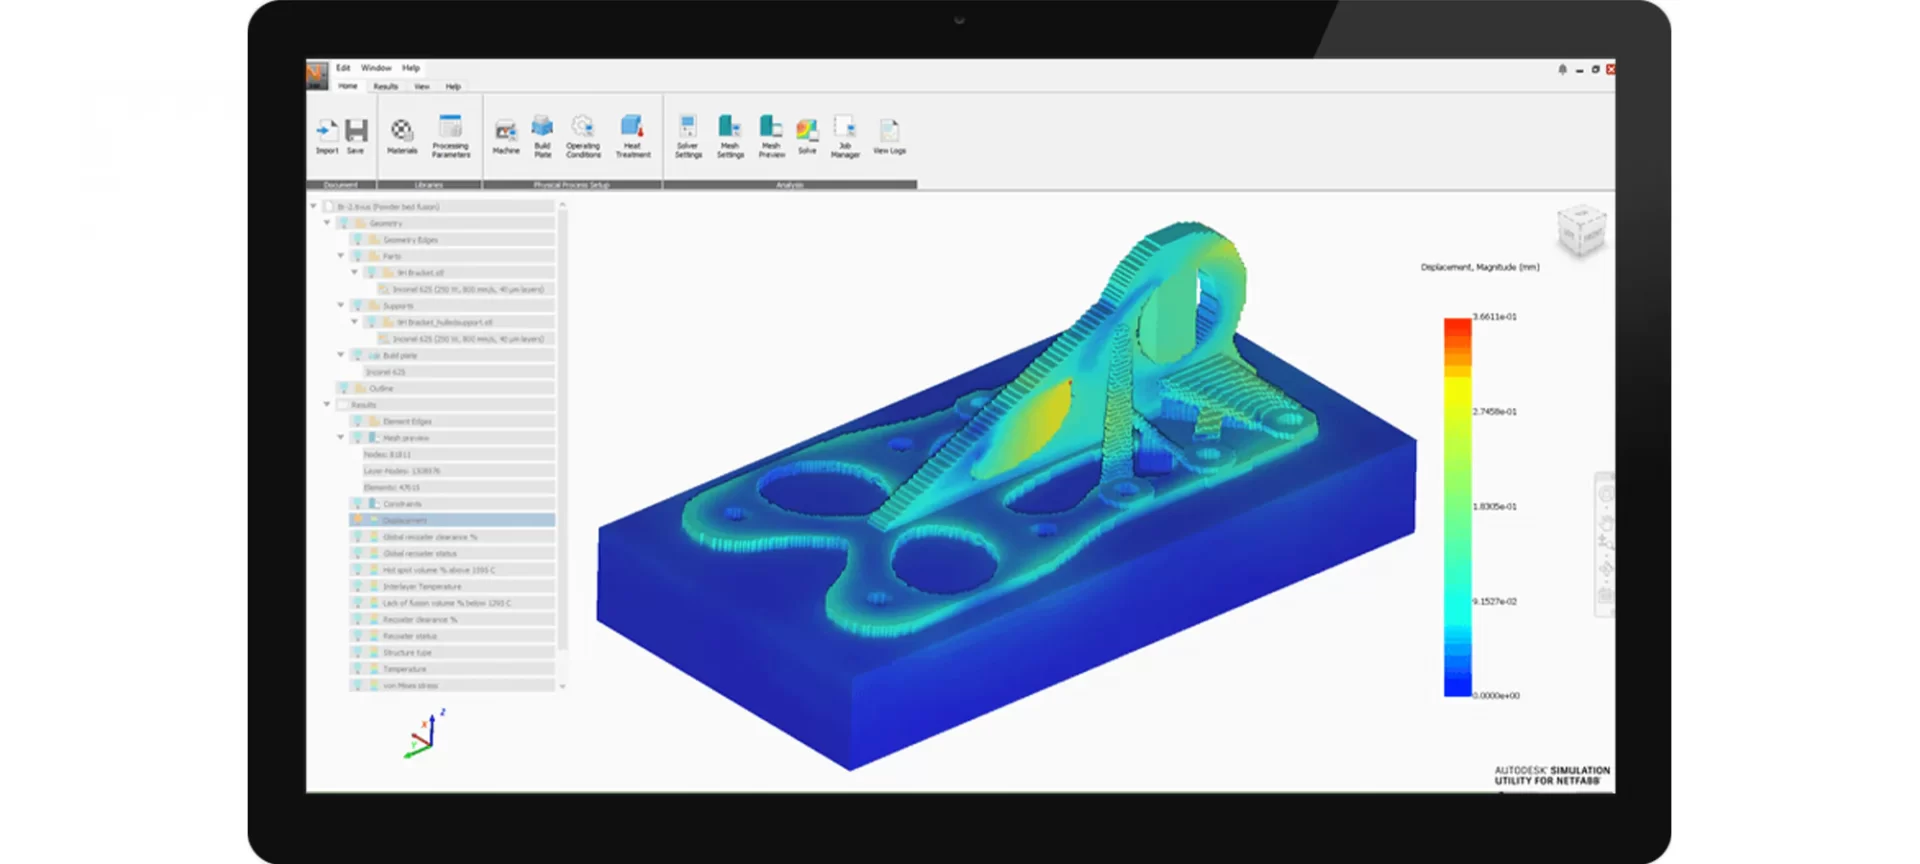
Process simulation capabilities, with certain limits, are available as a part of Netfabb Ultimate within the Simulation Utility LT for Netfabb.
Unlimited process simulation capabilities are available with a subscription to Netfabb Local Simulation, which gives users access to Simulation Utility for Netfabb. On its website, Autodesk lays out several changes that it has done to the Simulation Utility for Netfabb.
A few of these include, a new “Getting Started” window that provides direct access to the Processing Parameter (PRM) library.
In addition, users are warned if their graphics card is not suitable for running the Simulation Utility.
Additionally, processing parameter (PRM) files can be generated to include hot spot and lack of fusion information and browser information now include the PRM details for each object and support and the material for each build plate.
Lastly, new icons provide quicker access to operations such as editing, scaling, and opening the stored location of a PRM file.
After seeing the features which are upgraded in the Netfabb, let’s now look at the updated user interface and some of the specific tools in this Netfabb review.
Updated User Interface and Toolset
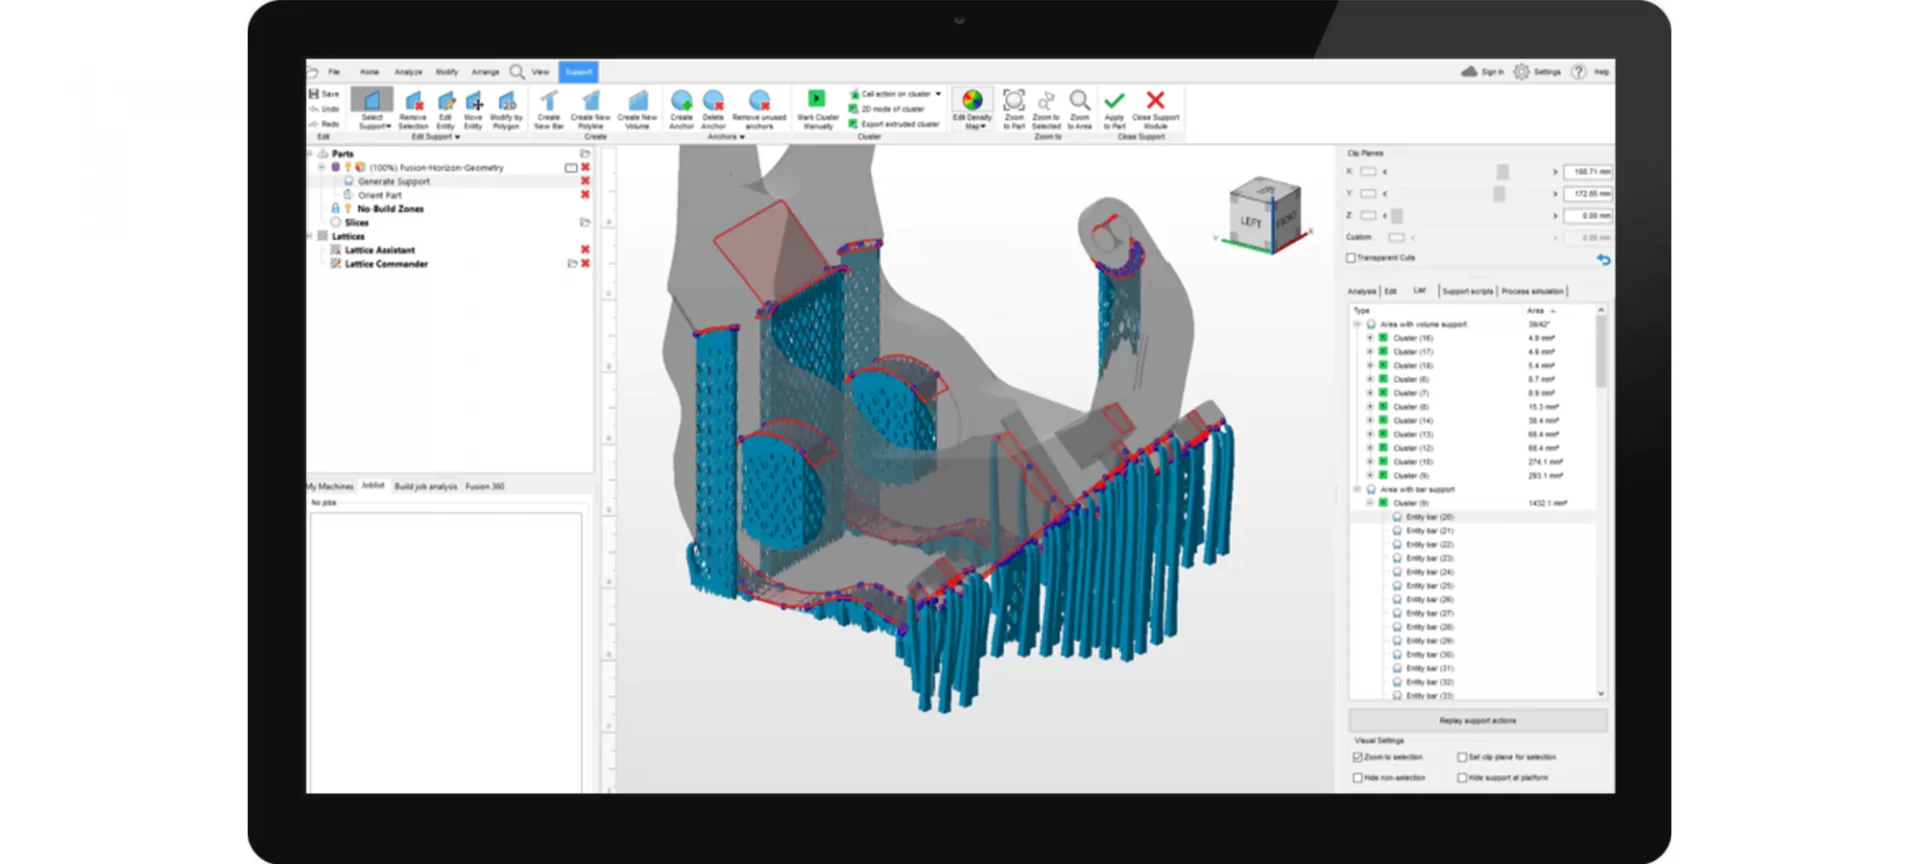
The interface of this software consists of a ribbon with multiple tabs that include several panels across the top of the screen. Users can also create a custom tab and populate them with their most-used functions.
The software also includes viewports that contain the Project tree, Clip planes, Job list, My Machines, and Build job analysis on the left and right as well as a large display area in the center.
The center part i.e. the display area allows you to view your model on the build platform while the left part i.e. project tree lists all parts, slices, and structures contained in the model.
Coming to the layout of the interface, it can be adjusted by resizing, repositioning, and even detaching frames and moving them around.
Although the user interface has changed after Netfabb was acquired by Autodesk, it is familiar to anyone who has used Netfabb in the past.
Tools that are a part of this interface enable you to reorient the display area and reorient parts that have been placed in the display area.
In addition to this, you can also easily adjust the size of the build platform and change it to match that of the hardware on which you will print the part.
Netfabb 2021.2 includes an extensive library of machines. You can also specify your custom build platforms that are built by yourself.
Netfabb also includes several modules with a specific set of functions to prepare your models for 3D printing. For example, there is a module for searching for the best orientations of your parts(s). There is another module for creating support structures.
Other modules include functions for Repairing models, Manipulating meshes, Analyzing parts, Cutting objects, Labeling models, Latticing parts, and more. So you can see if you have a part or functional prototype that is complicated to additively manufacture, you can prepare it for 3D printing using one or more modules within Netfabb.
When activated, each one of these modules loads its own components to the Netfabb user interface and changes the tools available in the menu and toolbar.
In addition, it also modifies the graphical representation of the part in the display area. Also, a new branch is created in the project tree for each loaded instance of a module.
How to Prepare the Parts to Manufacture?
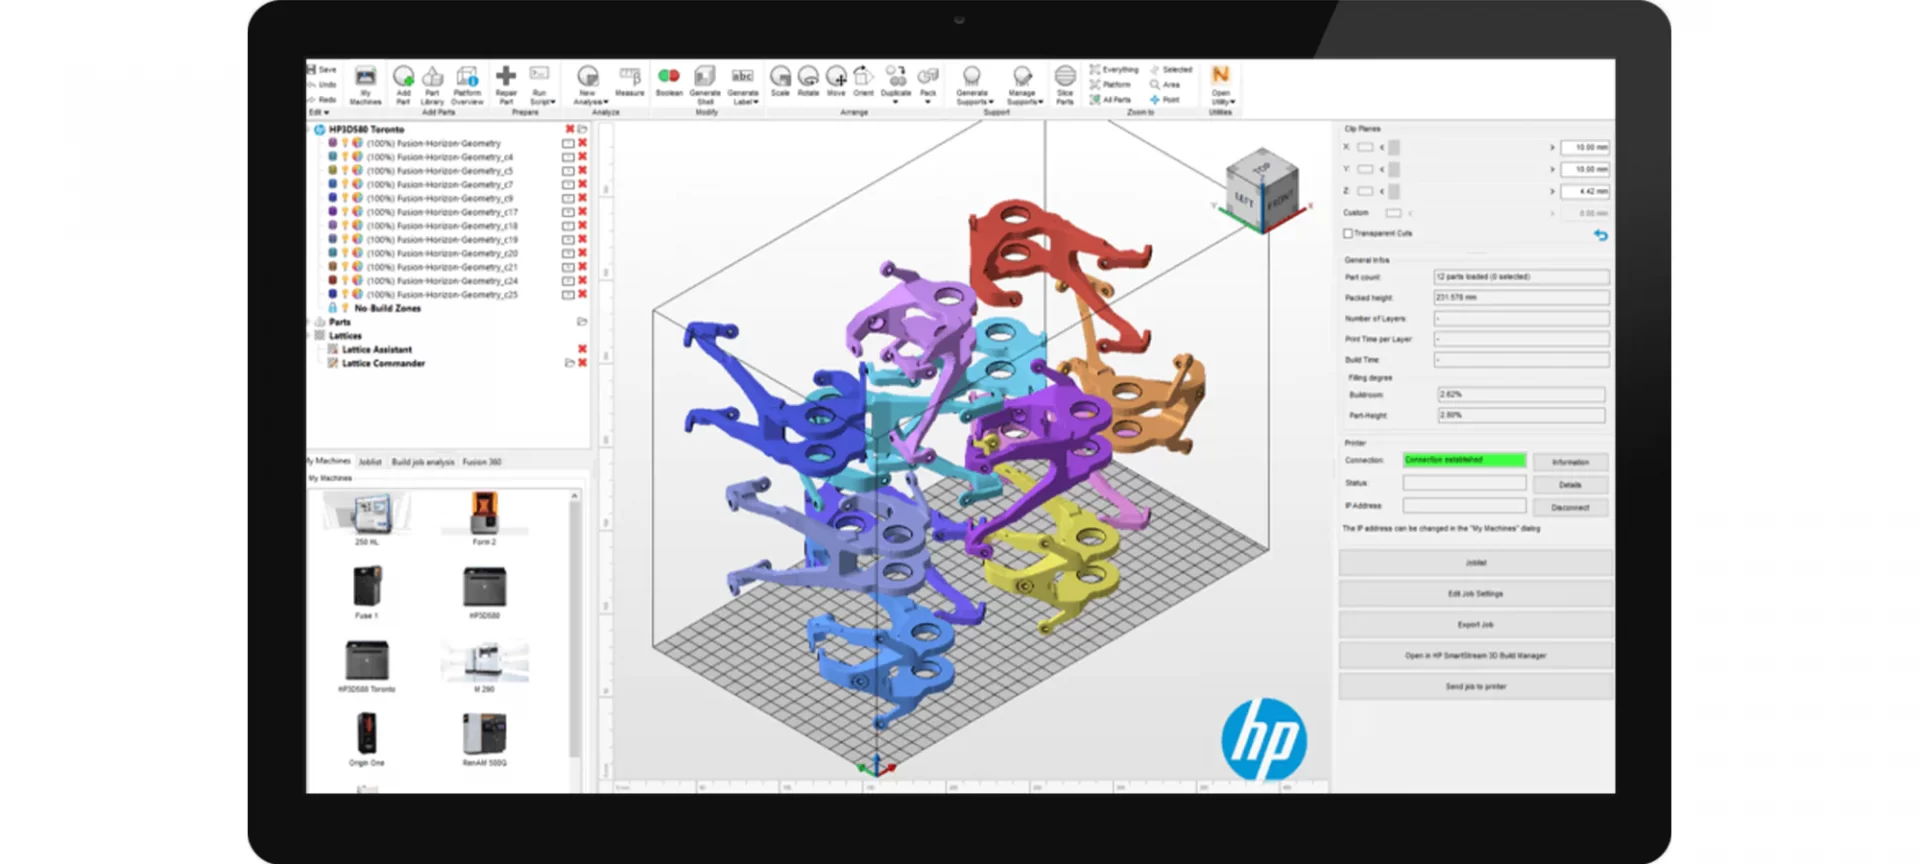
Once you are familiar with the updates that are mentioned in this Netfabb review, you can move onto the creation of real parts or functional prototypes via using those updated tools.
After the geometry has been read into Netfabb, the software permits you to fix errors in a triangular mesh that would otherwise make the part unsuitable for further printing preparation steps.
Netfabb is able to automatically repair parts for stitching triangles, close holes, fix flipped triangles, eliminate self-intersections, and so on.
The software also comes preloaded with some recipes of common repair sequences that are used for making parts and functional prototypes.
In customized cases, you can create your own recipes using a simple dialog.
If not that, you can also use manual repair tools to enhance the manufacturability of models, as well as manually cut out errors, and edit meshes.
Netfabb also allows you to compare repaired parts with the original model to determine deviations and verify build geometry.
Once the parts are repaired on Netfabb, you can save them in the STL format for 3D printing.
The other option is to use tools in Netfabb to analyze parts to make more informed estimates of the effort necessary to prepare parts.
To explain a bit more, parts can be compared, with differences displayed as heat maps.
The latter is also an effective way to compare an initial design with simulation data to see where and how much distortion will happen due to thermal effects during printing.
An option over here is also to analyze up- and down-skins to determine areas of the model that need to be supported, determine the center of gravity of parts, and so on.
For doing so, you can then use other tools to generate supports to hold parts in place and mitigate thermal effects during printing.
The software provides three main types of supports, namely:
- Bar,
- Polyline and.
- Volume supports.
The point to note here is that the program handles support parametrically. Support structures for parts or functional prototypes can be created with few or no manual steps and can be recreated whenever the arrangement of the parts changes.
If you are working with a 3D printing technology that does not require support structures, such as SLS or MJF, Netfabb also has tools for 3D packing your models so you can utilize your printer more effectively.
The Conclusion
Netfabb is a great software that is available to designers, students, and professionals in the field for the 3D designing of parts as well as functional prototypes.
This Netfabb review article is something that you can use to better your understanding of the software. This review covers some of the recent updates for Netfabb, so you can learn about them quickly and apply them in your 3D design and manufacturing workflows.
Apart from that, this review is useful for people who are currently looking to get a new 3D design/manufacturing software and are comparing options.


