The 3D scanner has proved now and then of its nuances of benefits. In the world of 3D printing, these machines have come out as saviors.
However, it is not so cheap to buy a 3D scanner. So, if you are thinking of saving some bucks, you can try a DIY 3D scanner. The best part is that you can build a great one.
You only need to pay for the parts and you can build a 3D scanner at home. The entire process is easy and very precise.
So, what are 3D scanners? These are used for processing the shape and appearance of the real-world objects and environment to convert them into 3D files.
The data can be further used for many applications including 3D printing. 3D scanners are based on different technologies and each one has its own set of pros and cons.
So, when you choose to make a 3D scanner at home, you must know what are the basic working of the machine.
How 3D Scanners Work?
Although there are different technologies to 3D scan an object, all of these are based on three basic steps.
- The first step is to take photos of the subject from different angles making the subject rotate 360 degrees.
- Using a sensor, for instance, a laser light, you must measure the distance of the several points on the surface of the subject from the camera of your 3D scanner.
- These points are then utilized to produce the 3D design of the subject which then can be used for several applications.
The points captured from the surface of the subject form a point cloud. If you will zoom in closer, you would find the separation of points falling in the same line.
How to Build a DIY 3D Scanner at Home?
You have to find out the different parts required to build the 3D scanner and then attach them to make it work. Does that sound too easy?
If you decide to explore the possibilities of getting all the parts all by yourself and finding a way to fix the machine together, it would be highly challenging.
However, you have the other option too. You can opt for the 3D scanner kit from popular manufacturers. This way, you get all the parts in one place and shipped to your address.
So, how to assemble the kit step by step?
- Start with choosing the 3D scanner kit you would like to purchase (Check the recommendations listed below for help).
- After you receive the kit from the selected manufacturer, you must verify that you have got every part packed inside the box. You may get the list of included items. Just cross-check with the same. This would also help you understand the role of different parts. Hence, making the assembly easier and basic working of the machine clearer.
- Read the instructions carefully. Do not miss anything. Make sure you read all the instructions clearly and then proceed one step at a time. The assembly won’t take much time.
The good news is that hard work pays. You would be saving quite a handful of bucks when choosing to get a kit instead of an assembled 3D scanner. And, DIY 3D scanner is fun to work with too.
List of Different DIY 3D Scanners
Now that you have decided to assemble the DIY 3D scanner all by yourself, you must be looking forward to the right recommendation.
After all, there are so many options out there. And, ordering out of blue won’t be very wise. So, here is the list of most popular and powerful DIY 3D scanners you would love to work with.
FabScan Pi
FabScan is an open-source 3D laser scanner. The project started in 2010 at Germany’s first FabLab in Aachen. The FabScan PI is the next generation of the FabScan 3D Scanner.
A Raspberry Pi and a Raspberry Pi camera module are used to turn the FabScan PI into a stand-alone and web-enabled 3D Scanner.
Based on laser triangulation technology, the FabScan Pi is one of the best DIY 3D scanner options for those who are into doing the scanning themselves.
The original FabScan was a DIY 3D scanner that was built by Francis Engelmann as part of his Bachelor’s thesis back in 2011.
This is to show you how much amount of passion was involved in developing the source. Since then, there have been numerous improvements made in new iterations up to this newest model.
FabScan Pi uses a Raspberry Pi camera along with the new design to offer higher quality 3D scans. It depends on whether you go for one of the older models or the latest one.
The price can vary between $100 and around $200 to completely create the 3D scanner. Overall, it’s a really cool kit and the thesis which you can make at home.
What makes this scanner the most favorite amongst its users is its ease to assemble quality. Often 3D scanners come with a lot of complexity that is difficult to handle for a normal human.

Murobo Atlas
The 3D scanner’s body is made from PLA and ABS filaments which makes Murobo Atlas a flexible scanner.
Because of the availability of the filaments online, the 3D scanner is also purchased by users keeping in mind the ease of availability in resources.
According to the research, this 3D scanner has the highest quality of specifications that are possible to have in a 3D scanner.
One can save money on the build by choosing from the choices to purchase. Murobo Atlas’ Raspberry Pi camera which can keep a record of detailed scanning procedure with an accuracy of 0.25mm. The manufacturer,
Murobo is known to keep its machines simple to use for the users and Atlas DIY is no exception. What makes this 3D scanner most interesting is the collaboration of Murobo with Raspberry Pi.
As both the names are at the zenith of manufacturing in their respective manufacturing industries, the collaborative machine is bound to be great.
This DIY 3D scanner is based on laser triangulation technology which is the most trending technology currently when it comes to 3D scanning.
The working videos of this model are also available online which can show a user its ability of scanning. Its price range is from $200 to $250.

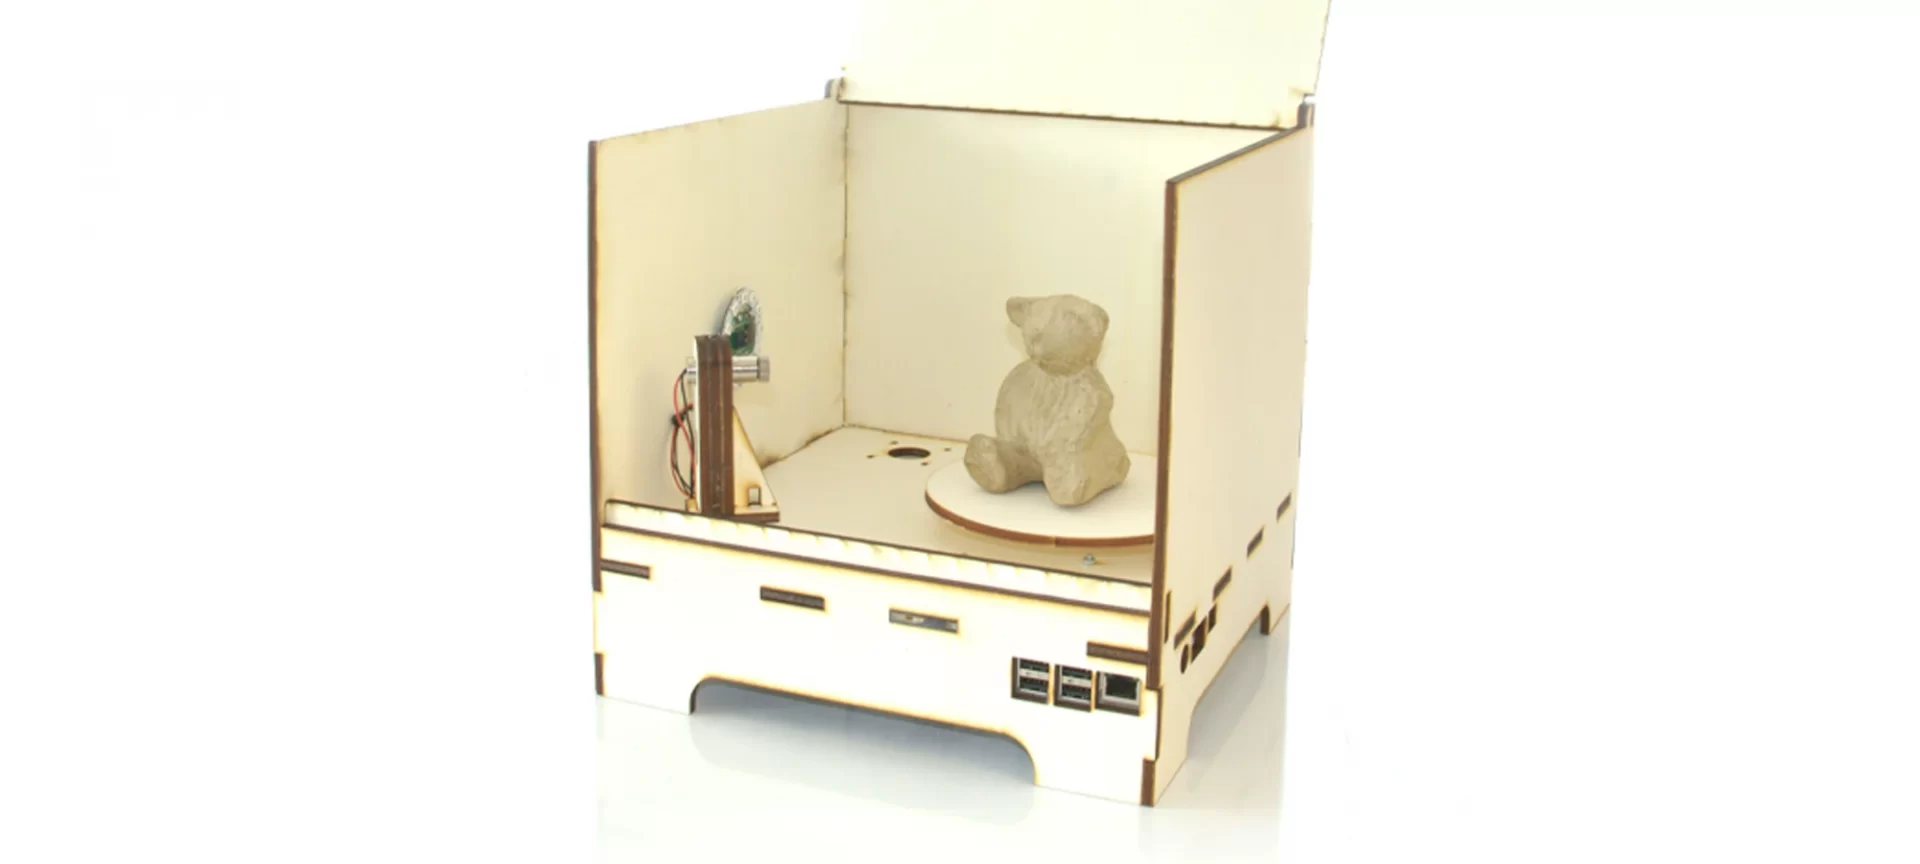
VirtuCube
 Credit: thingiverse.com
Seeing this 3D scanner puts you into nostalgia because of the 70s vibe. However, the latest technology that it possesses does justify the quote: Never judge a book by its cover, sheer truth.
This 3D scanner can be placed inside a cardboard box for optimal scanning conditions. This is because otherwise, other sources can create anomalies and errors in the scan.
Overall, it’s retro, not the prettiest, but it’s free and not too difficult to put together! Described on Thingiverse as a ‘David Laserscanner in a box’, the VirtuCube DIY 3D scanner is an interesting scanner which you can download all the parts to print out yourself here.
The VirtuCube uses structured light technologies with a pico projector instead of a laser to create high-quality scans of your favorite projects.
The use of structured light technologies with a pico projector makes VirtuCube standout in the list of these 3D DIY scanners.
Normally DIY 3D scanners come with a laser triangulation or photogrammetry, but the manufacturers of VirtuCube have paid special attention to the design and added this feature for increasing the ease of operation.
Overall, VirtuCube is a combination of traditions and innovation. Tradition because of the looks and innovation because of its built-in modern techniques.

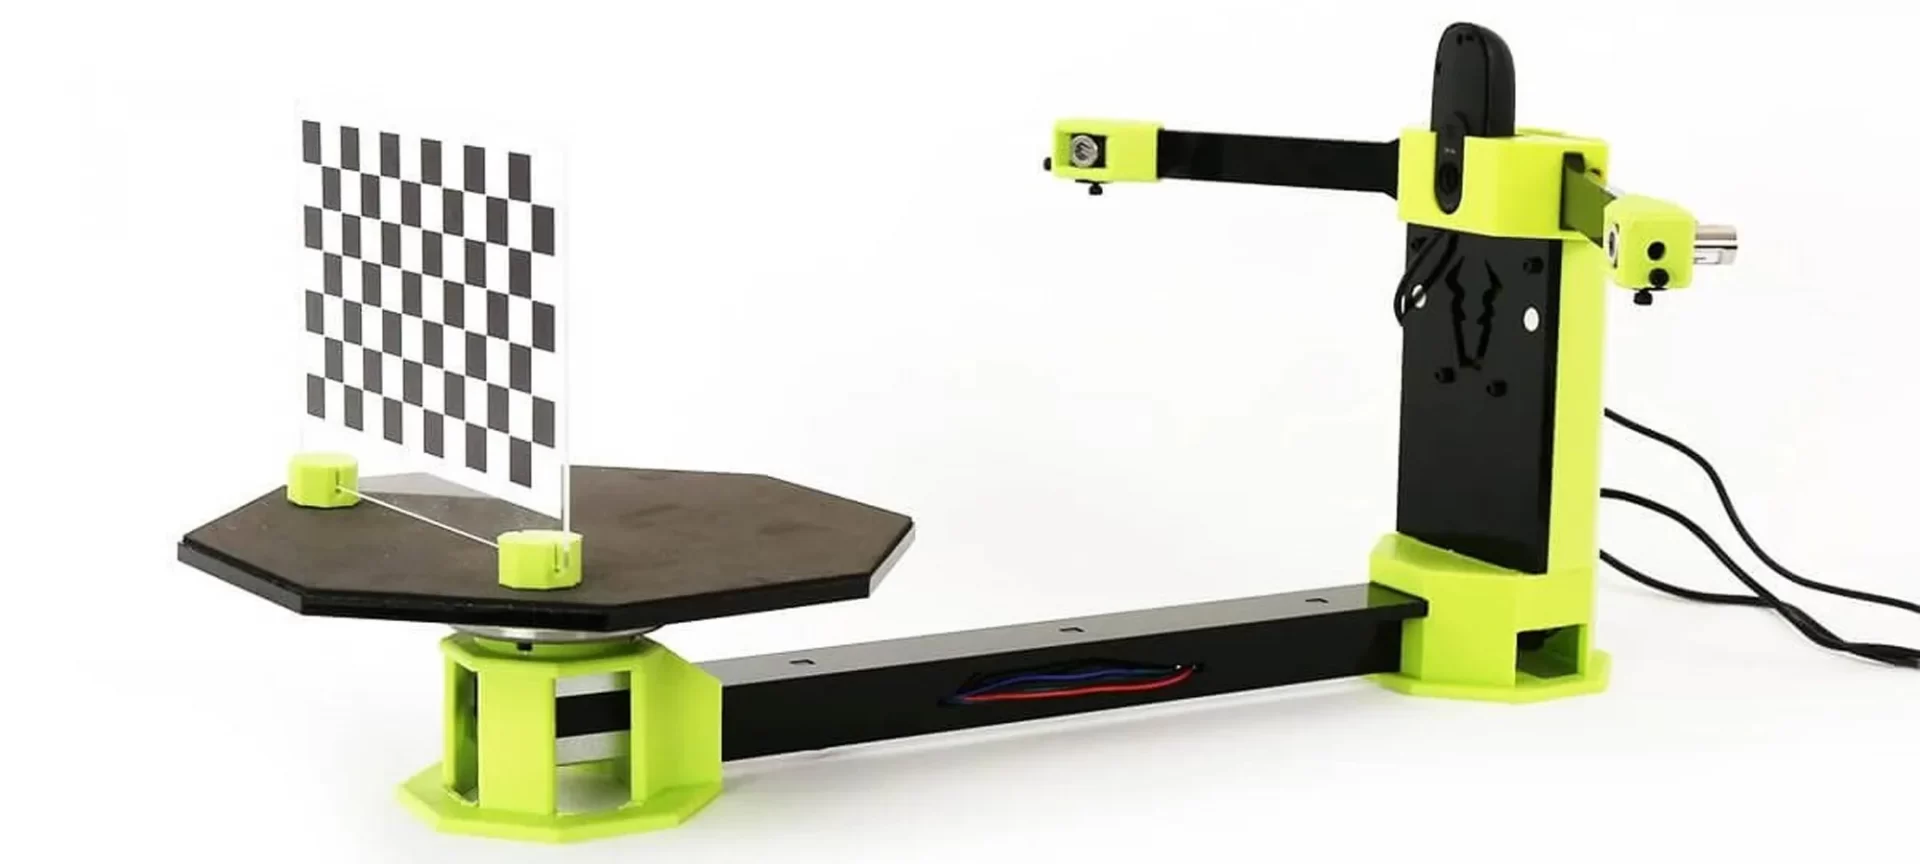
BQ Ciclop
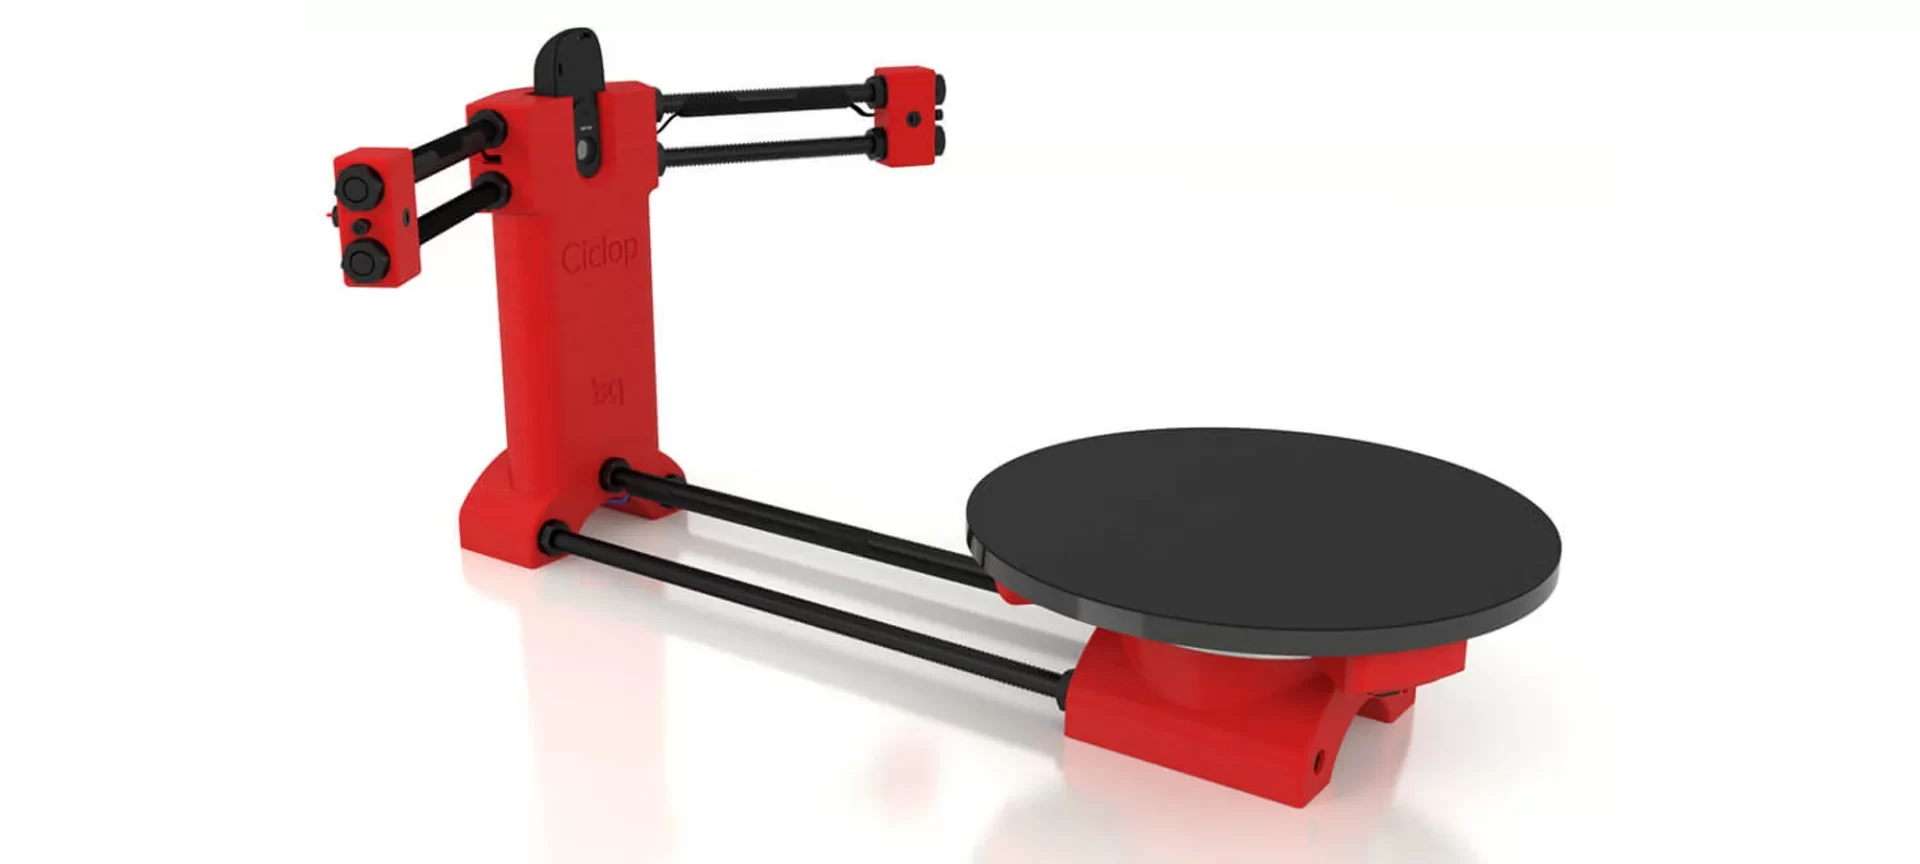
Known for their smartphones, tablets, and other electronics market in entire Europe, BQ Ciclop is BQ’s entry into the 3D scanning market.
An important feature of the BQ Ciclop is that it’s completely open-source. You’re free to modify it as you wish, following the RepRap philosophy. It’s easily accessible via USB or Bluetooth, and can 3D scan with a resolution of between 0.3-0.5mm.
Because of the ease of accessibility that is a provider in this 3D scanner, user preference towards this scanner has been the most.
However, it is worthy of note that the BQ Ciclop is notoriously difficult to assemble when compared to other DIY 3D scanners which are quicker and simpler to build. Although this does not make Ciclop any less- fantastic 3D scanner.
Another great addition to this DIY 3D scanner is that it works with Horus open-source 3D scanning suite which BQ also developed.
This makes scanning much easier with the compatible program. You can buy just the electronics (includes an Arduino, webcam, etc) and print the parts yourself for $115, or buy the whole kit for $240. At this price, it is very difficult to find a 3D scanner that performs as efficiently as BQ Ciclop does.

Microsoft Kinect 3D scanner
The results of this scanner operating in the market till now are fantastic. Microsoft Kinect has come up with this extremely affordable printer is a great boon for a beginner to 3D scanners.
This is a fantastic entry-level product, especially since you may already own one for your Xbox 360. Though Microsoft reacted to demand by creating their own 3D Scan app for the Kinect 3D scanner, there are a number of third-party options that may be preferable with this scanner.
However, it is best to stick to the rule and operate the app compatible with the 3D scanner. Another list of the app includes Skanect, made by Occipital who also sell the Structure Sensor, and ReconstructMe.
These provide a suite of tools that enable you to 3D scan for under $100. This DIY 3D scanner Kinect has the potential to surprise many.
Although not manufactured with the intention of being a low-cost DIY 3D scanner option, it has evolved to engage a community to swear by the Xbox accessory.
Microsoft is a company that does not need an introduction to the electronics market. However, in the field of 3D scanning, they are a new company but the legacy still follows. This scanner is proof of how companies can develop 3D scanners for cheap.

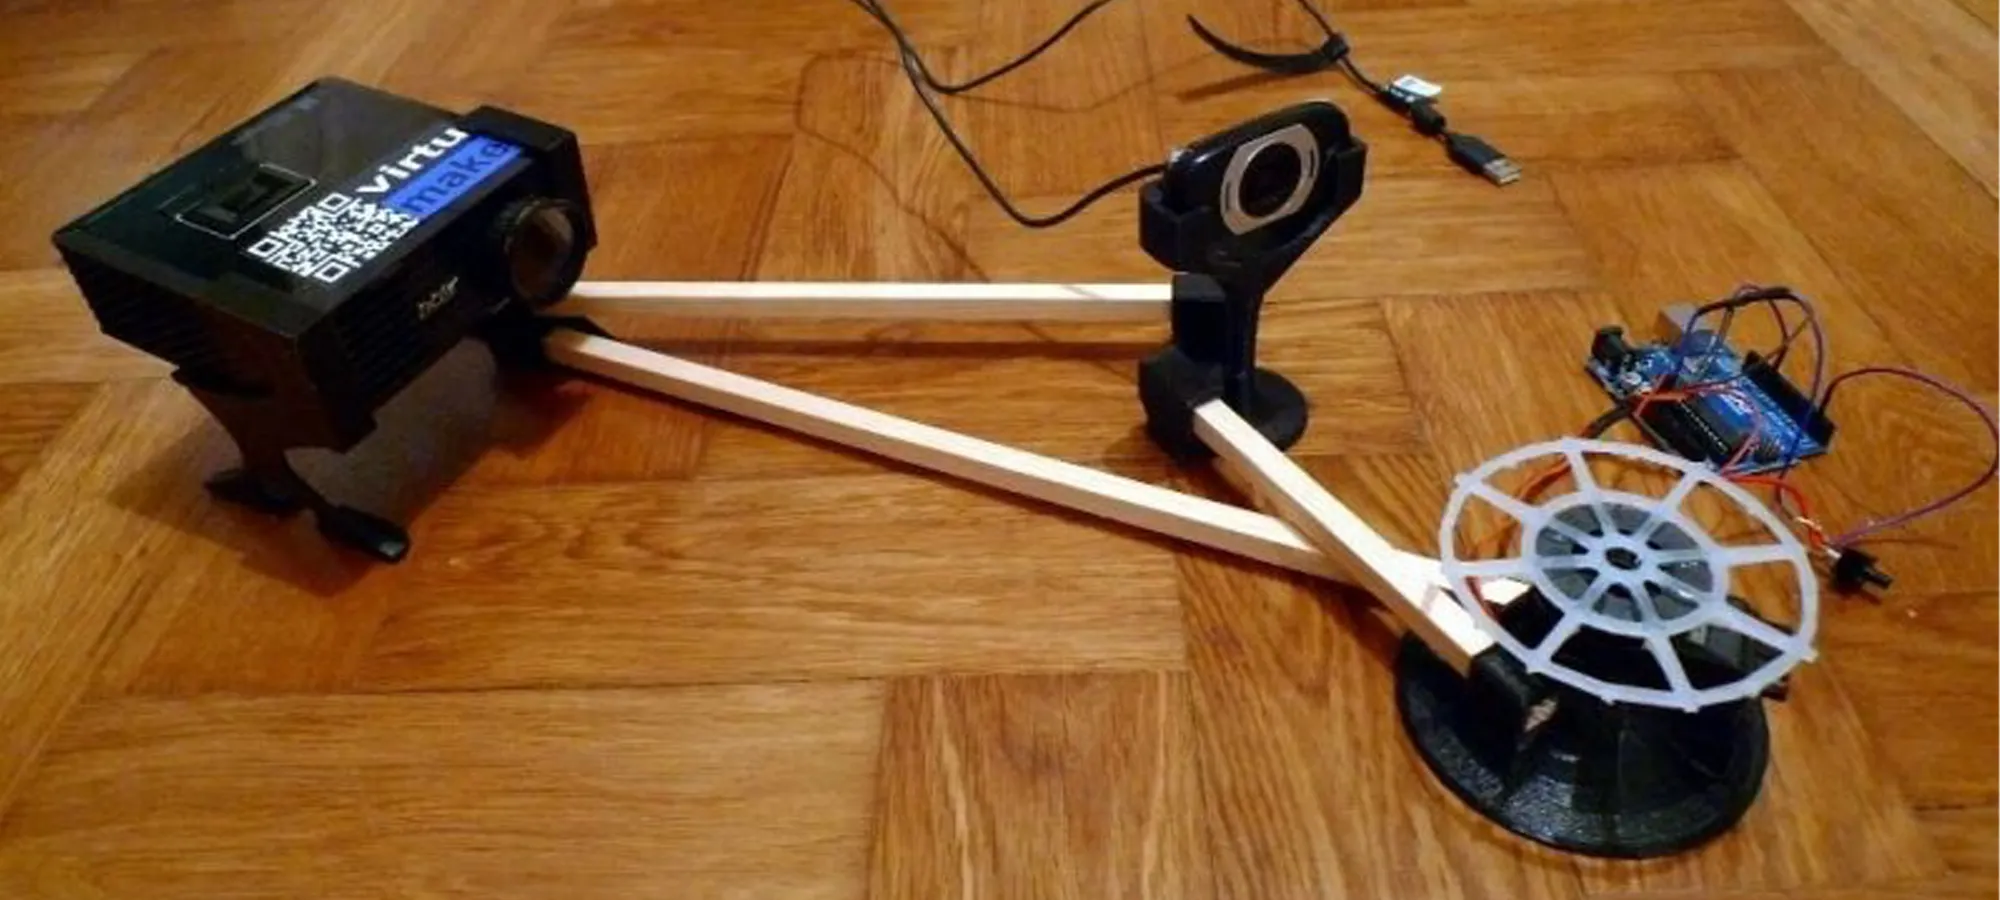
AA Scan Open Source 3D scanner based on Arduino and Android
 Credit: thingiverse.com
This 3D scanner is proof of automation and efficiency with user-friendliness. AAScan is a very recent (February 2020) DIY open source 3D scanner that’s fully automated in taking photos and moving the object around on the scan plate. It is because of this unique that the printer has been chosen on this list.
Interestingly, the creator of this 3D scanner has laid stress and made AAScan be a purposefully minimalist machine.
This 3D scanner is able to scan but is not filled with extra features beyond this primary capacity.
Often there are machines available in the market that offer the best operations but they come with a lot of resources that are to be maintained, AAscan is not amongst those scanners.
All the instructions for how to build, print, and assemble the AAScan are on the Thingiverse page, requiring an Arduino, some electronics, and either a 3D printer to print the plastic parts or someone else to print them for you — such as from a 3D printing service.

CowTech Ciclop
Remaining true to the open-source movement, CowTech had started a Kickstarter campaign to raise money. And to specially put their version as it is, original.
The CowTech Ciclop was produced in this unique manner. The manufacturing team set the lofty goal to raise $10,000 and were met with surprise and ecstasy when the community rallies raised $183,000.
This is how the CowTech Ciclop DIY 3D scanner kit was born. After saying this, little do I need to tell about the perseverance of the manufacturing team!
However, about the scanner, CowTech Ciclop uses the Horus 3D software program as it does a fantastic shop for 3D scanning objects.
Differences in this printer from the others, however, include a slightly different design. The team spent days designing this scanner so that the parts could be 3D printed on any FDM 3D printer.
Some desktop 3D printers only have a small build volume, so CowTech has all kept them in mind.
Compact, easy to operate, and from a reputed manufacturer makes CowTech the best choice to look out for in a 3D scanner.
This made the company design their parts in such a way that can be printed on any printer with a build volume of 115 x 110 x 65 mm, which almost all 3D printers have.
Releasing all proprietary information about the Ciclop 3D scanner will allow the community and the technology to learn and grow simultaneously. Now anyone and study and understand all aspects of 3D scanning.

The Conclusion
Not sure, which one to pick? All the mentioned DIY 3D scanners are worth the value. So, you can select the one falling in your budget.
Plus, you must also pay attention to your needs such as scan volume, precision, and other requirements. Once you do that, it would be easier to sort out the right DIY 3D scanner for your specific goals.


