Scan Pi is the updated version of FabScan 3D scanner. The machine uses an additional Raspberry Pi with a camera that gives you a better resolution. It also works as an independent device that can be controlled via a web browser. Because the scanner is wireless, it can be controlled via USB.
What separates the scanner from others is its community-driven 3D scanner system, the goal of which is to make 3D scanning more affordable and simpler. But whether it does achieve its goal or not? Well, we can only say after looking at it in depth. So, let’s get started.
Features
Below mentioned and explained are some of the most striking features of Fabscan Pi. This set of aspects differentiate it from others available in the same price range.
Community driven
The Fabscan Pi is part of a project that’s mostly community-driven. Be it in terms of:
- Code contribution
- Documentation
- Testing
- Designing 3D parts
- Supporting users with one’s own experience
- Conducting workshops and much more.
Independent platform
FabScan Pi is based on Raspberry Pi and comes with a ready-to-use sd-card image. All you need to do is install and boot it once.
In doing so, the server will be available as well as accessible with every modern web server present nearby. Moreover, there is the backend main server written in Python that makes the entire application highly portable which makes it work on every platform supporting Python.
Open-source
The Fabscan is an open-source project consisting of multiple components. Its source code not only plans but also files all the components that can be downloaded for free. They are released under the GPLv2 license.
Users have the freedom to modify, change as well as extend those components. And if these changes are helpful for the project, you can also share your improvements as well as designs with the community as it is completely community-driven.
High-density point cloud
Fabscan’s software generates a point cloud consisting of a couple of millions of points. Note that the more the number of points scanning an object, the more accurate a scanned image is.
Moreover, the point cloud is colorized which helps in capturing the object color for each scanned point. This gives you a complete idea assisting you in developing more real-life parts and functional prototypes.
Ply point cloud file format
The scanner gives an output in a PLY file format which is the most commonly used file format when it comes to storing three-dimensional data from 3D scanners.
Specifications
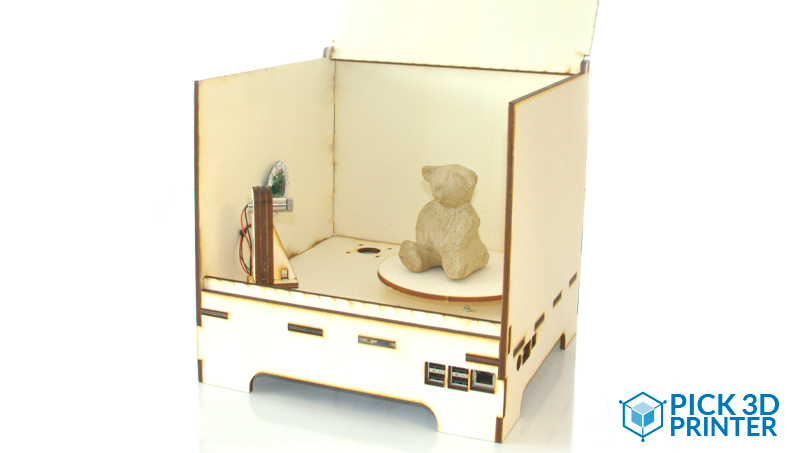
Fabscan Pi is the latest version of the popular DIY scanner named Fabscan 3D. It is a laser-based 3D scanner featuring a turntable that helps the object that you wish to scan, rotate. So, the cameras, as well as lasers, can capture all the views of the part or functional prototype.
It uses a Raspberry Pi camera which gives better resolution as well as works as an independent device that can be controlled via a web browser.
Price
As Fabscan Pi can be 3D printed, there isn’t any fixed cost at which it is available. However, the approximate price range is $95 to $120.
First Impression
The general components that you need for building Fabscan Pi are:
- NEMA 17 type Stepper Motor
- Polou Universal Aluminum mounting hub
- Motor Drivers Silent Step Stick preferable
- A 5 Volt red line laser module with an option for another laser source
- FabScan Pi HAT for Raspberry Pi
- 12V to 5V switching regulator
- Raspberry Pi 3 B+
- Raspberry Pi camera V2
- Raspberry Pi Camera Connection Cable – 50cm long
- FabScanPi Camera Mount with LED ring
- FaBScanPi Case
- Screw-Set or see the Screws and Washers table
- 1x 12V / 3A power supply
- Micro SD Card greater than or the equivalent of 8GB storage
Setup
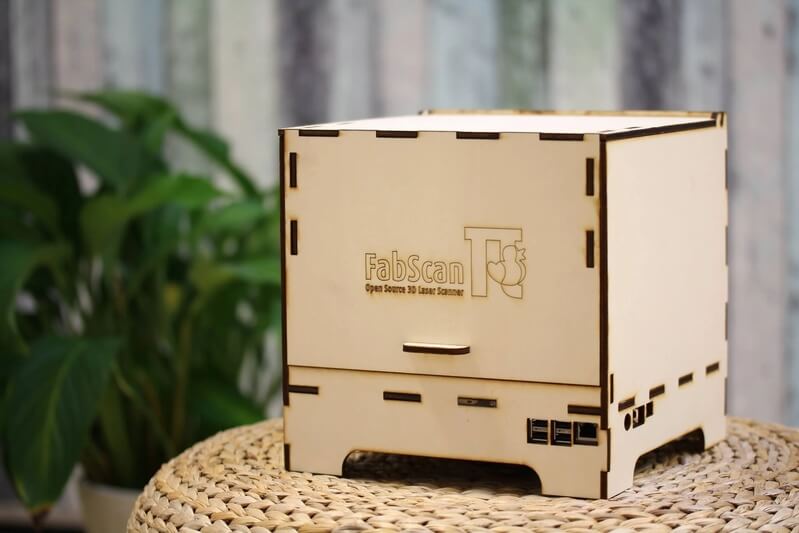
The assembly of a complete scanner starts by joining various parts of the lid. You’d need to typically glue the small bridge parts to the biggest part.
Once that is done, add the front part to finish the lid assembly by gluing the handle to it. Note that when the assembly of the lid is completed, keep it as it is for some time so that the glue hardens up.
After assembling the lid, start with the installation of the box. While doing so, notice that the holes in the front part should point to the right of the box. To help you with the same, find the small marks mentioned with RF and LF meaning the right and the left front.
That being done, proceed with gluing the back wall to the box to finally start with adding the right front and then the left one. The finished case would typically look like a box.
Now is the time to assemble the laser mounts. For accomplishing this task, you can use the interlocks for taking the parts together. Once that is done, you can start with the turntable’s assembling. The turntable consists of two parts:
- The part with bigger holes i.e. the top one
- The one with smaller holes i.e. the bottom one
Then start with assembling the camera. There is a small manual that’s available online to help you join the camera and LED ring combination.
Experts recommend taking more care while assembling the camera as it’s the main part of the camera. After the camera is assembled, you’d have to mount the LED ring with the Raspberry Pi camera.
The next step is mounting the motor using four 3mm screws. The motor has to be attached from the bottom side of the box by tightening the screws from the inner side of it.
After mounting the motor, mount the turntable. The last two steps consist of mounting the lasers and Raspberry Pi. The laser mounts can be pressed gently into the holes present on the bottom plate of the enclosure.
Mount the lasers with zip ties onto the laser mounts, finally pushing the laser cables through the holes present on the bottom plate behind them.
While mounting the Raspberry Pi underneath the bottom plate of the enclosure, use four spacer sleeves and four screws with nuts. After all of this is done, all you need to do is assemble the Fabscan Hat using the video presentation online and wiring.
Scan Type
 Credit: raspberrypi
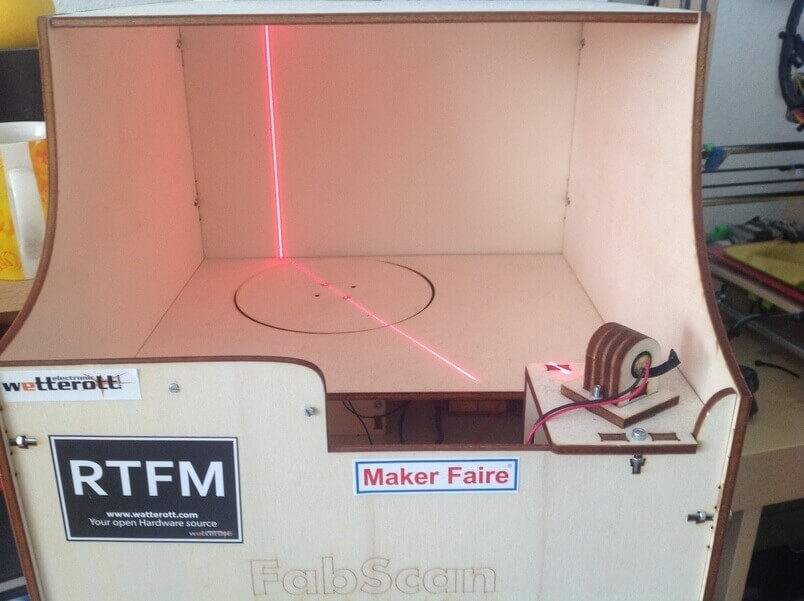
The scanner is based on the laser triangulation technique of 3D scanning. Herein high-quality laser points are projected on the object that you are willing to scan. And based on its reflection, a dotted pattern is generated, which, when connected, leads to the final scanned image of the object.
The laser is assisted with the camera to generate a high-quality resolution. This is the most common type of 3D scanning technology used by most affordable as well as DIY 3D scanners.
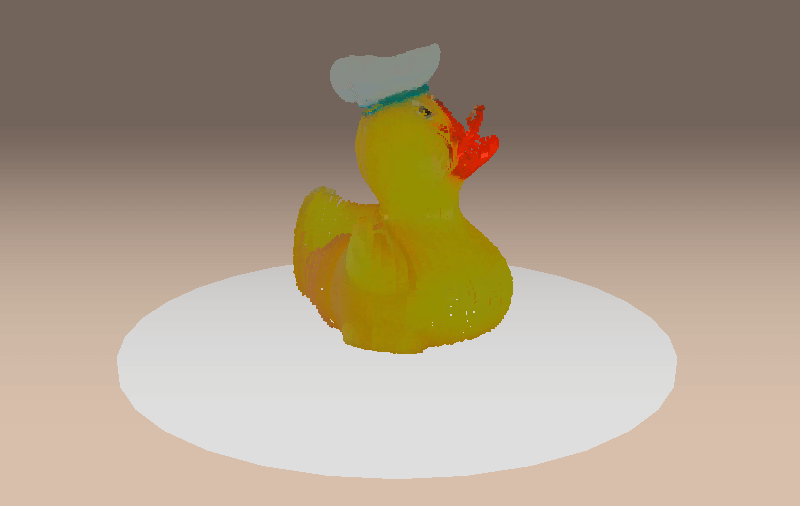
Scan Quality
 Credit: mariolukas
Being a DIY 3D scanner, FabScan Pi generates decent-quality scans.
Software
 Credit: fabscan
The most instantaneous way to start operating with FabScan Pi is to use the FabScan Pi Raspberry OS image. For installing the same you will need the following things:
- A computer with an integrated or connected card reader
- A micro-SD card has a capacity of at the least 8 GB
The latest image of FabScan Pi software can be downloaded online. Thereby, you need to install the Raspberry Pi imager which is also available from the same webpage.
After having done that, insert the SD card into the card reader that is connected to your computer and start the Raspberry Pi Imager software.
Customer Support
As Fabscan Pi is a community-driven 3D scanner, all the support that you get is from the active community of users. Of course, as far as the documentation and installation is concerned, you get all the information online.
Parameters Influencing Buying Decision
Below mentioned are the key factors that are good to know before buying Fabscan Pi.
3D Scanner Cost: Fabscan Pi is available in the price range at which most affordable 3D scanners generally are.
3D Scanner Speed: Average.
3D Scan Quality: Being a DIY kit, the scanner generates decent scan quality of varying geometries.
3D Scanner Capability: The turntable present on the scanner’s body makes it possible for the object to rotate while the lasers and cameras capture different views of it.
3D Scanner Practicality: Fabscan Pi can be used for household scanning as well as educational purposes.
3D Scanner User Expectations: Beginner users typically those who wish to learn 3D scanning can use Fabscan Pi to improve their skills.
The Verdict
Overall, Fabscan Pi makes up for a commendable DIY 3D scanner that can be constructed at an affordable price range.
The machine has good scan speed and can deliver accurate scan quality even while processing intricate geometries. A most intriguing aspect of the scanner is that it’s community-driven.


