The most important aspect of any 3D printing process is the first and the most foundational step i.e. making of a 3D design file.
It is obvious to say that the rest that happens is only a depiction of that 3D design file.
It is the 3D design file that communicates with the printer and tries to bring out the best from the machine.
A step that comes just before printing is slicing using slicing software. This is a step where the flaws in your design are recalled and pointed out.
So, if not equally important, this part is the second most important step in 3D printing a complete part or prototype. In this article, we are going to learn about Ender 3 Cura Settings.
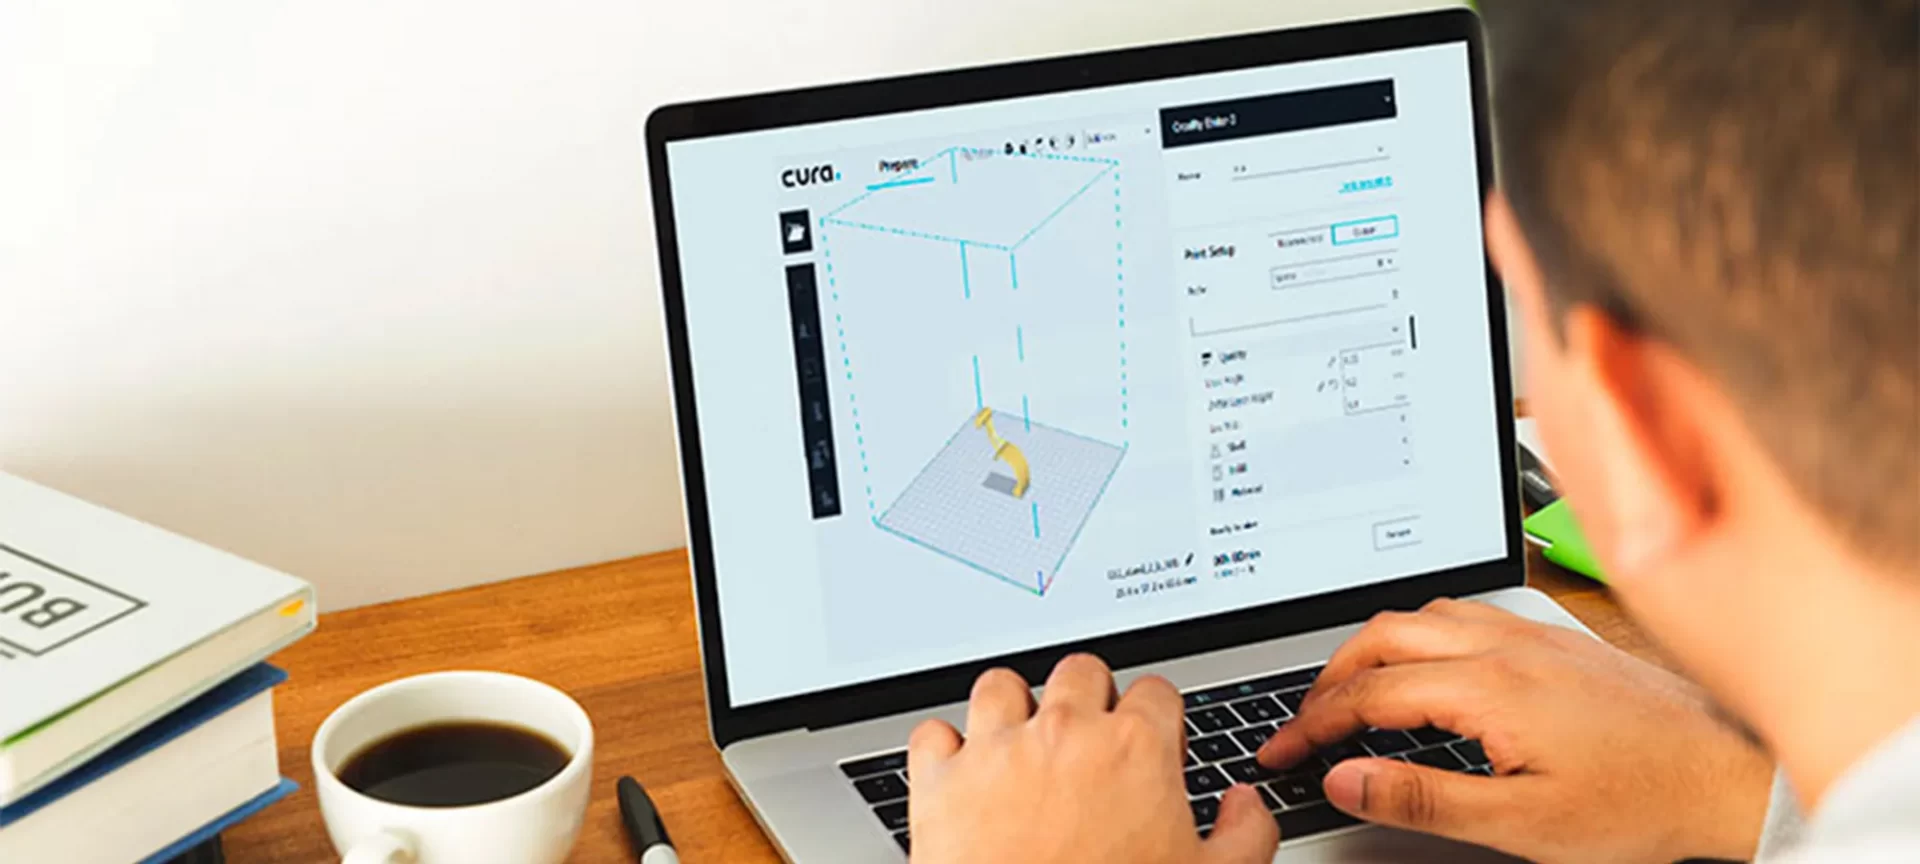
The software recommended by the company that has manufactured Ender 3 is Cura.
Cura is a software that is a product of Ultimaker, the company that, apart from designing software, also manufactures 3D printers.
And, Creality is the company that has manufactured Ender 3 under its Ender series of 3D printers.
The starting point of how to set this software on the printer we will look up at how to set up the stock profile on Cura for the Ender 3D printer. And finally, load it up as a foundation.
For doing so, you need to first click on the Settings option, search for Printer, and then click on Manage Printers. In the second step, you need to search for Add and then Adding a non-networked printer.
The third step requires you to search for “Creality 3D”, expanding the selection, and then Selecting Ender 3.
This place will show the settings that you need to change for building your perfect profile.
It is a cliche that you would require to adapt to individual filaments and resolutions.
In this article, we will show the complete profile keeping PLA material in mind, but we will also mention at places, the settings for ABS as well as PETG.
Recommended Ender 3 PLA Profile
All in all, you need to know about the printing temperature, bed temperature, Speed, layer height, retraction, infill, infill layer speed, and infill fan speed to know the complete ender 3 PLA profile.
The recommended print temperature for this printer using Cura is 200 degrees Celsius. And the bed temperature is 60 degrees Celsius.
The recommended print speed while using Cura for this printer is 50 millimeters per second. The layer height recommendation for this printer is 0.12 mm.
The retraction setting should be 6mm at 25 millimeters per second and infill has to be at 20 percent.
The initial layer speed needs to be at 20 millimeters per second and fan speed should be zero percent.
Specifics about Temperature and Bed Temperature

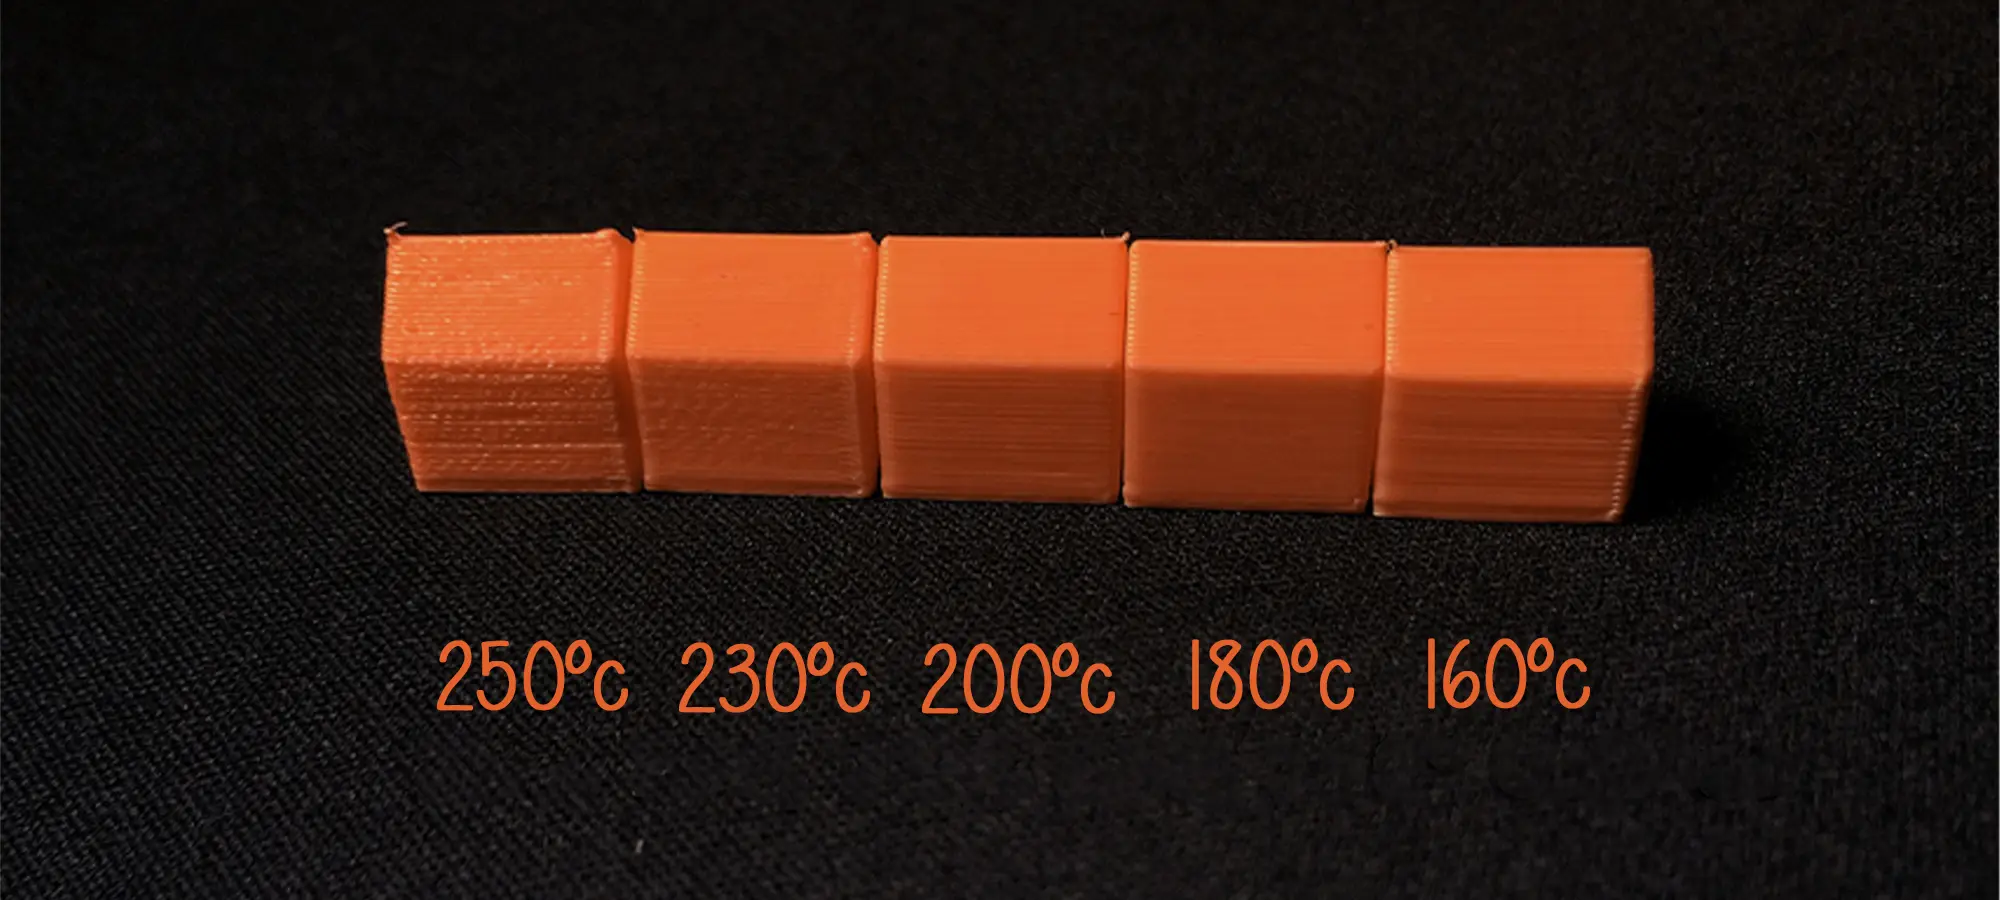
If the temperature of the 3D printer is not kept at the correct number, it can lead to over or under extrusion, depending upon whether it is kept higher than needed or lower.
Curling and blobs or zits are also some flaws that can take place by not keeping the temperature correct.
PLA filaments are known to require at least 180 degrees Celsius for a smooth extrusion and can stretch up to 220 degrees Celsius until over-extrusion becomes a problem.
Ideal temperatures for ABS is known to be in the range of 220 degrees Celsius and 250 degrees Celsius, whereas for PLA, the maximum temperature range decreases from 5 degrees Celsius.
Though, different brands of filaments can make a difference. Whenever you are trying to print with a new filament, the catch is to print with a temperature tower.
However, there is a general perception of using 200 degrees Celsius as an average printing temperature for PLA.
While you are calibrating your 3D printer you have to remember, not to change more than one setting at a time.
Overall, the general temperatures for PLA are 200 degrees Celsius, for ABS is 230 degrees Celsius and for PETG is 240 degrees Celsius.
This information goes in especially for Ender 3 Cura Settings and may change if the printer and slicer changes.
Click here for more about ABS vs PLA.
Why the Printing Bed Temperature is Important?
It is no myth in the industry that adjusting the bed temperature of your printer is one of the most important aspects of 3D printing.
The bed temperature of your printer should generally be always higher than ambient room temperature. But, overall, the bed temperature is something that varies as the material does.
Most of the materials benefit from preheating, this goes even for PLA. Especially when you are using something for bed adhesion, things like painter’s tape, hairspray, or glue, is when PLA benefits from preheating.
The point to note here is that PLA does not need preheating if you have so, it is beneficial.
Your printer’s bed temperature should be higher for ABS than for PLA filaments. The recommended temperature should be somewhere around 110 degrees Celsius.
Another thing to take care of while using Ender 3 for building parts and functional prototypes for ABS 3D printing is that you’ll need an enclosure for eliminating excess cooling and prevent warping and layer spitting.
The recommended level of pre-heating for PLA is 50 degrees Celsius, for ABS, it is 110 degrees Celsius and for PETS, it is 70 degrees Celsius.
How to set up the Speed for Ender 3 Cura?
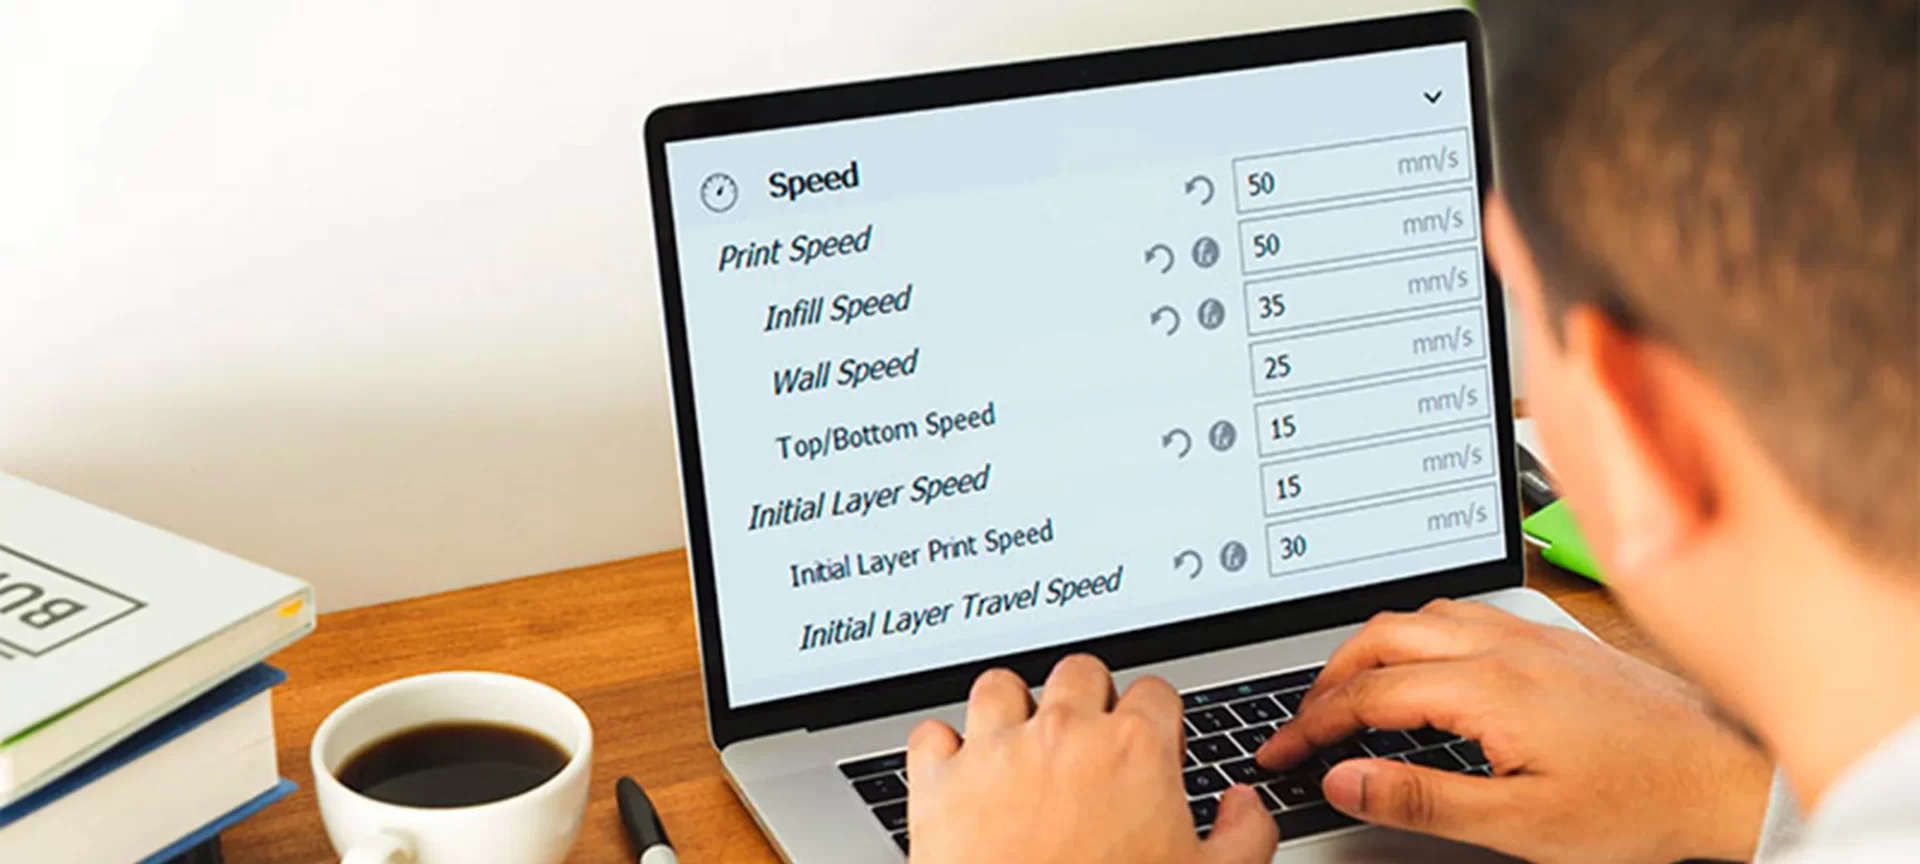
Speed is a factor that is dependent on two different variables i.e. quality and time taken to print per job.
The quality is inversely proportional to your print speed. The reason for this phenomenon to occur is because, a slower-moving hot end on finer details is less likely to mess something up and in today’s time, some lesser people wish to wait two weeks for a single print.
For printing PLA, most users are known to print between 45 millimeters per second and 65 millimeters per second.
By using Octoprint or alternative firmware such as Klipper or Marlin, you can increase the speed while printing parts and functional prototypes of PLA.
This is very specific information that goes in especially for Ender 3 Cura Settings and may change if the printer and slicer change.
A starting speed, while you are new with PLA, is recommended on websites to be 60 millimeters per second.
Flexible materials are known to print at a slower speed than non-flexible materials.
Websites recommend a print speed of 20 to 40 millimeters per second. PETG material is known to be stingier than PLA, so for this reason, you can drop your print speed by 20 millimeters per second or so.
Websites say how 30 to 55 millimeters per second works very well. It is always good to start at a slow speed and then scale up.
ABS is also known to have the same print speed as is required for PLA. 45 millimeters per second to 65 millimeters per second is ideal.
In case you wish to print on a larger scale and require less detailing, you can also raise the print speed on your printer and raise it to 120 millimeters per second.
The travel speed can be raised in Ender 3 up to 150 millimeters per second without causing any issue with printing.
Overall, the recommended print speed with PLA is 60 millimeters per second.
For flexible materials like TPU, it is 30 millimeters per second, PETG parts and functional prototypes can be 3D printing using a print speed of 40 millimeters per second.
The print speed for ABS is 60 millimeters per second whereas, as mentioned above, the travel speed recommended for this printer is 150 millimeters per second.
What Layer Height is Best For Ender 3 Cura?
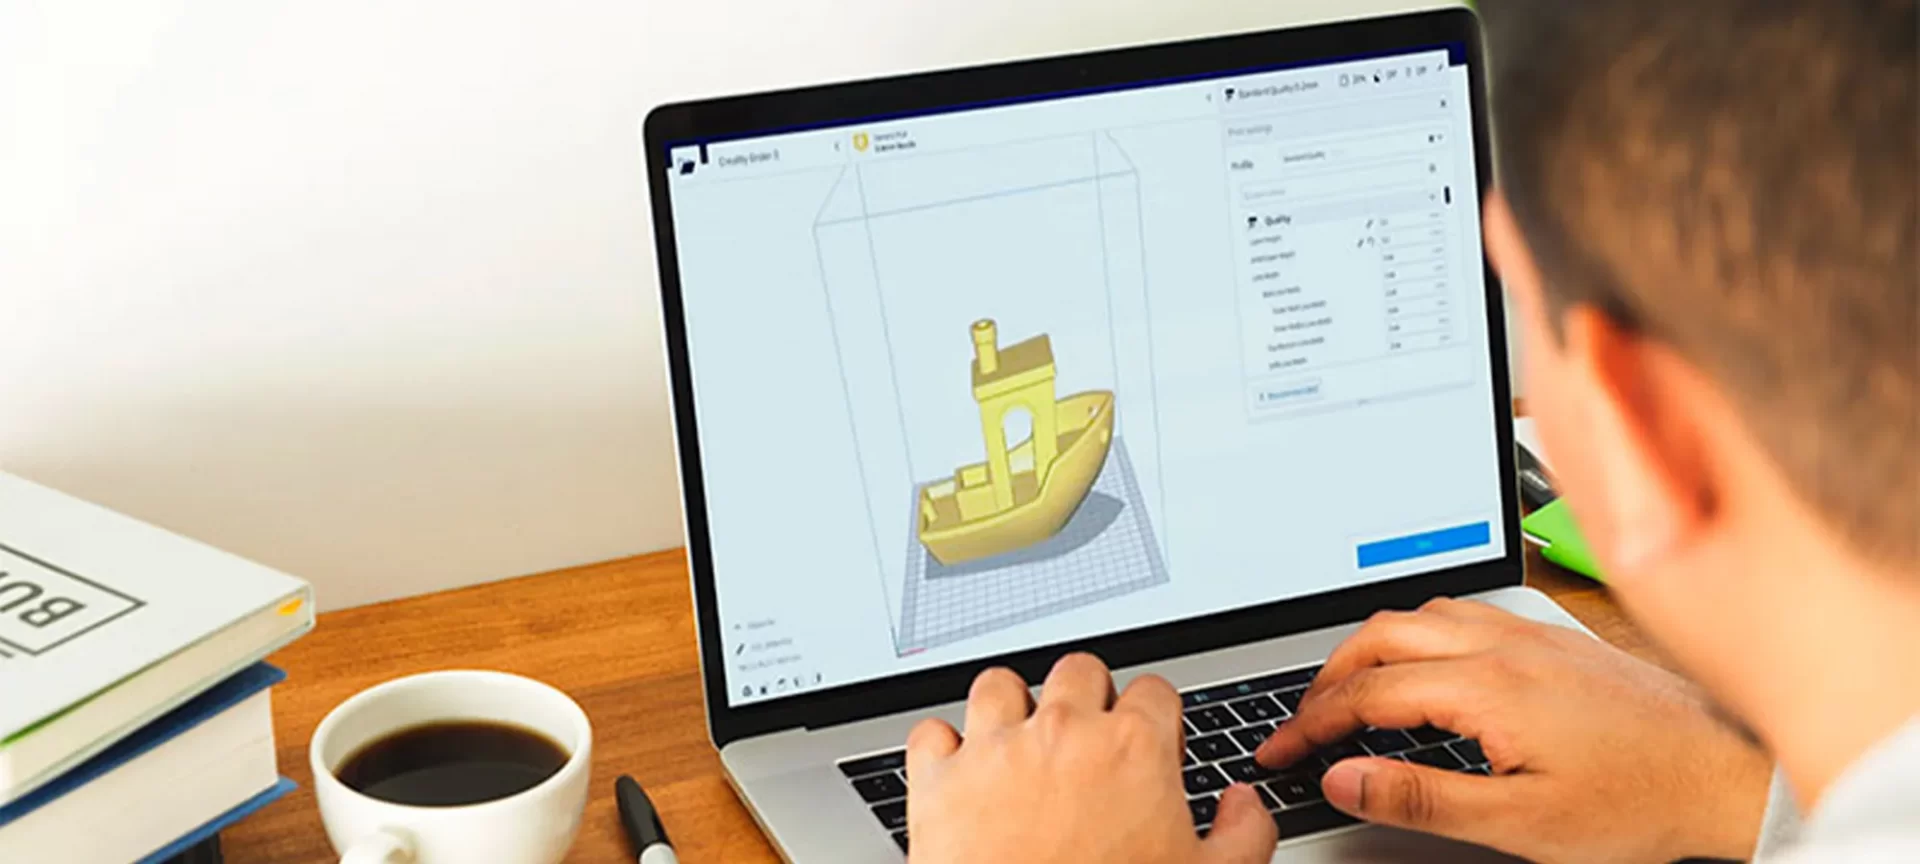
By all aspects, the layer height is an aspect of 3D printing which tells you a lot about how careful a company is in printing its parts or functional prototypes.
If the only limitation this technique has, it has to be layer height, because they are visible on all the parts and functional prototypes that are manufactured not just by Ender 3, but by any 3D printer.
In other words, this is an aspect that every manufacturer must take into account. When you make half the layer height, it doubles the print resolution.
The simple calculation is to make half the layer height, and in return fitting twice as many layers into a single print.
This information is something that goes in especially for Ender 3 Cura Settings and may change if the printer and slicer change.
However, having a greater resolution would bring you back to the same old problem of quality versus quantity, because the inverse to greater resolution is significantly slower print times.
So, the struggle is to constantly find the perfect combination of print speed vs layer height.
And that is something very very essential to high-quality prints in lower time frames. Layer height can be broken down into something called “magic numbers”.
Magic numbers are essentially layer heights that work best on this printer. These numbers are 0.24 mm, 0.20 mm, 0.16 mm, 0.12 mm, and 0.08 mm.
They are called magic numbers because all of them are multiples of 0.04mm. And the reason for associating it with 0.04mm is because the Z-axis stepper motor on the Ender 3 will raise the hot end by similar millimeters in every step.
If you wish to have fine detail on your part or functional prototype you need to keep 0.12 mm, whereas, for coarse detailing, you’ve got to keep 0.2mm.
Retraction Distance and the Retraction Speed
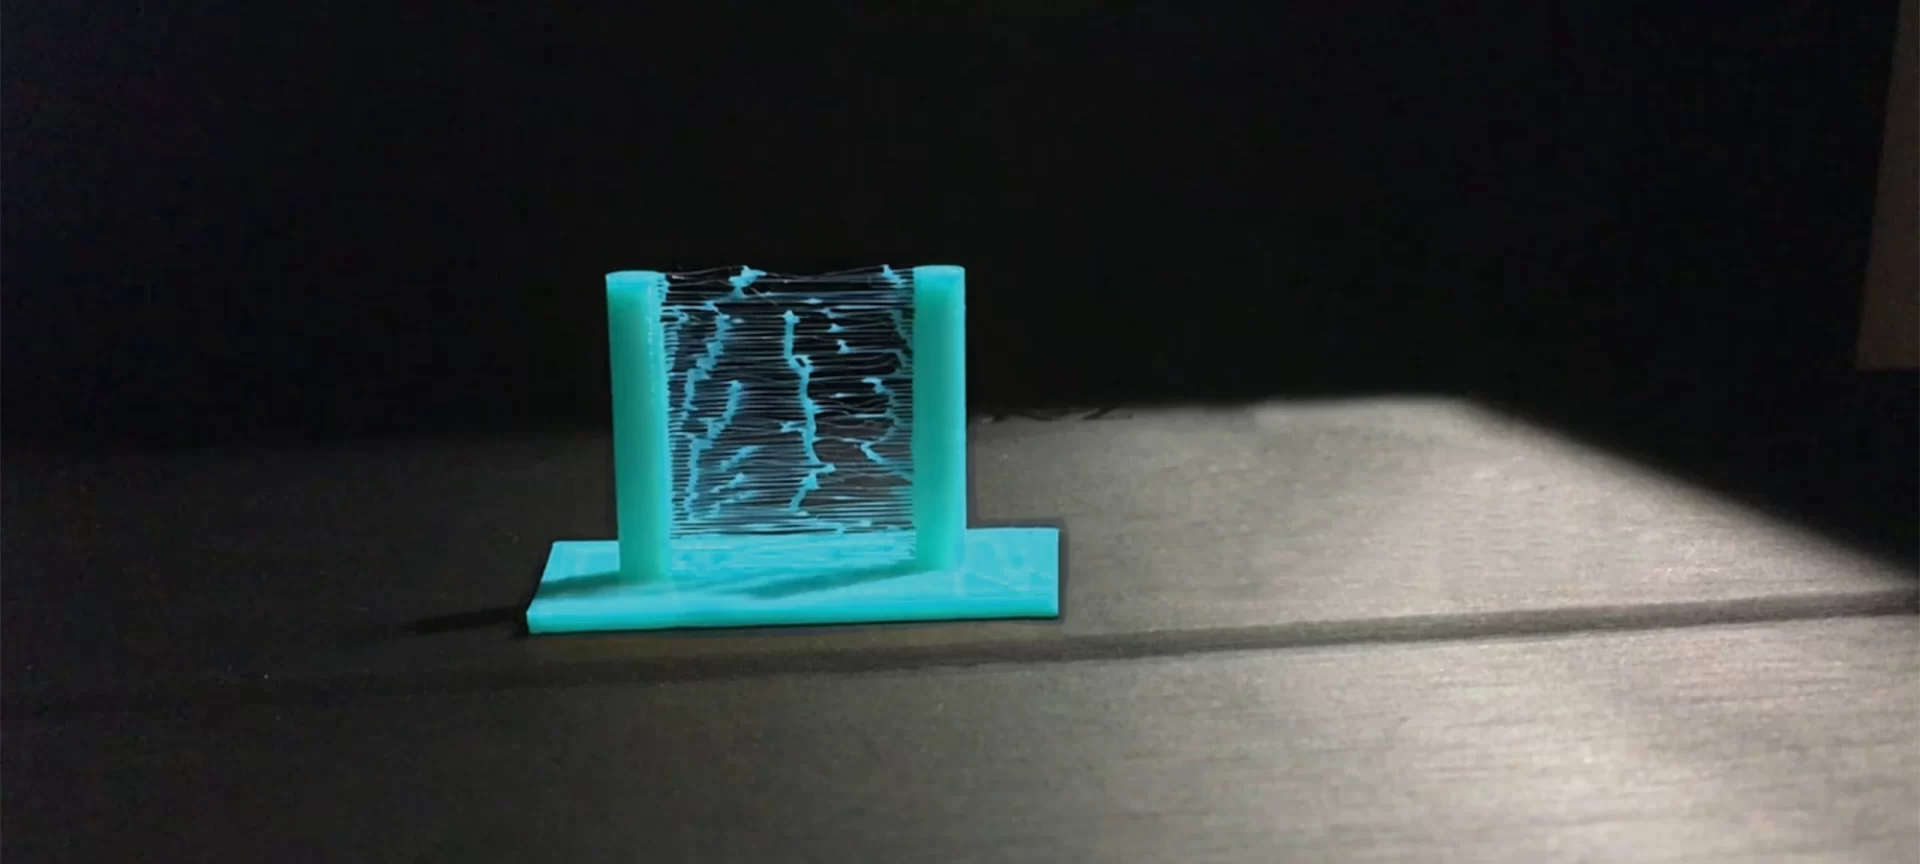
For combating oozing and stringing in 3D printing, the best weapon is Retraction.
In Ender 3, this weapon of yours is broken down into two main settings called the Retraction distance and the Retraction speed.
It is a tool that reverses the extruder motor for relieving pressure on the nozzle during travel. We should hope here that even without pressure on the nozzle, no excess material should be extruded.
Ender 3 has a history of getting known as a 3D printer that has terrible stringing and the perfect setting to combat this was hard to find.
But that has been dealt with and online users have what appears to be the perfect retraction setting for PLA. And that setting is a distance of 6 mm at a speed of 25 mm per second.
PETG is a material that prefers a shorter retraction distance, ideally, around 4 mm while ABS benefits from a 6-mm retraction distance, but a faster retraction at 40 mm per second.
You can play with these settings and find the best ones for you. The information that’s mentioned is something that goes in especially for Ender 3 Cura Settings and may change if the printer and slicer change.
So, overall, the best layer settings for PLA are 6mm at 25 millimeters per second, for PETG, it is, 4mm at 25 millimeters per second and ABS is, 6mm at 40 millimeters per second.
Infill Ender 3 Cura Settings
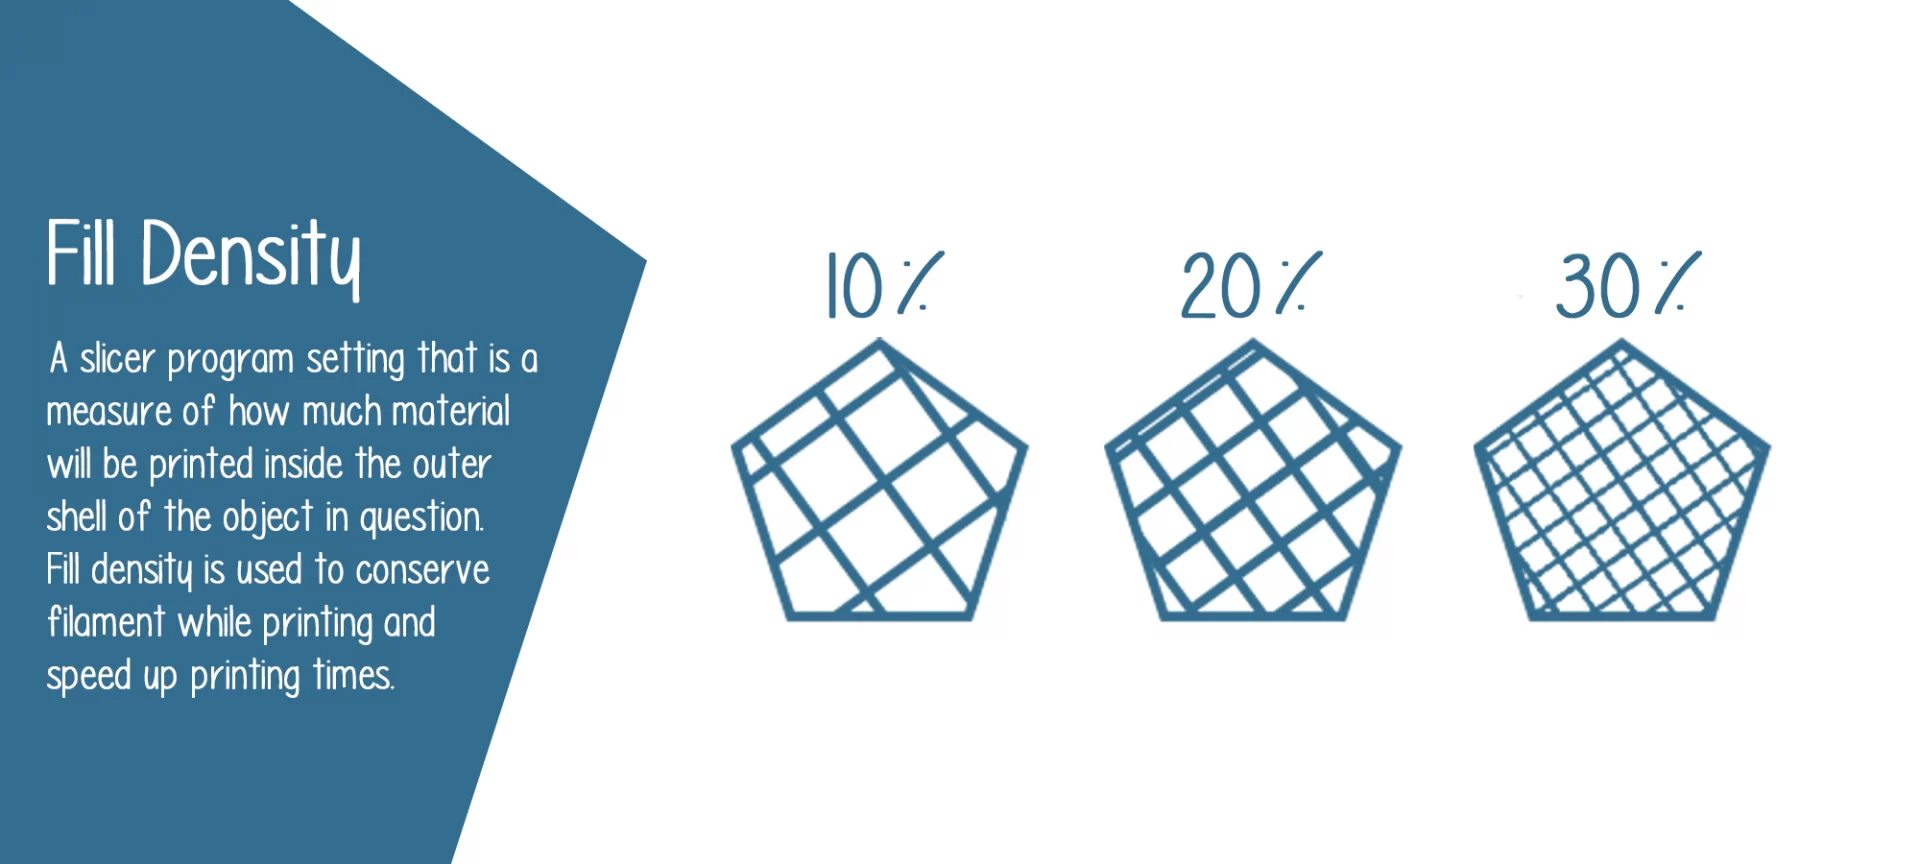
Infill is a setting in slicer software that is bound to affect, both the strength and weight of your print.
Although there is no ‘perfect’ setting for infill, and it purely depends on the purpose of the print.
If you wish to have a lightweight print that is decorative you can drop your infill down to 5% or 10%.
What this would lead to is decreasing the print time and making the print significantly lighter.
Whereas for functional prints, you’ll want a higher infill setting to increase strength and durability. In such scenarios anywhere from 20% to 60% is ideal. And some prints may even require 100% infill.
Suggested Articles
The Conclusion
Hope the Ender 3 Cura settings discussed in the complete article are beneficial to you in your print.
Always take care of some points in your mind that no matter what is recommended to you, it is not that specific to work with everything that you print.
It is important to understand the specificity of the information that is being catered to you. And it is only from there, that your expectations should start building up.
If things are recommended for PLA and you are applying it for ABS, it is bound to fail. Even in case of where things are not specified, means there are still scopes and we too do not have the specific information about it.
In those scenarios, it is best to contact the company with the various options that are mentioned on its website.
Rather than experimenting with Ender 3 Cura setting, especially, if you are a newbie. In short, it is important to see the specifics of the information mentioned in this article.


