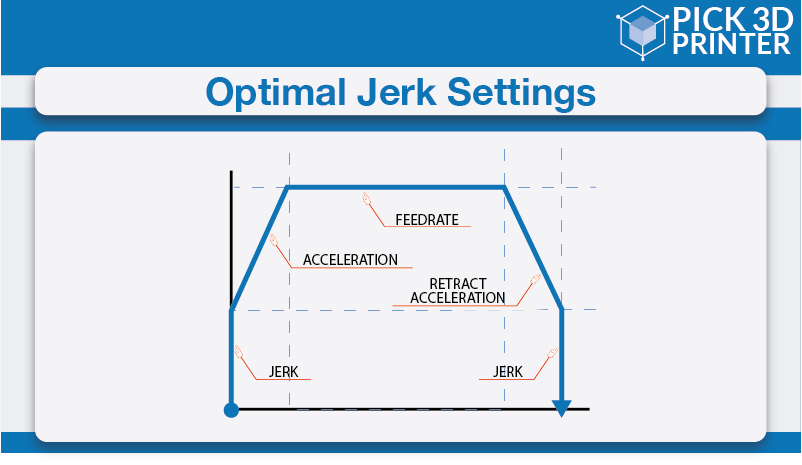
Jerk as we generally know it – some kind of random stop or start of a mechanical element – is implied in 3D printing as important settings for 3D printers. And it has different definitions depending on the firmware that your 3D printer is using.
As you may have guessed from the article’s title, it’s about Ender 3 jerk settings. And we will get to it later in the article. But before that, let’s talk about jerk settings in general, the basic definition of a jerk in 3D printing context, and what happens if the jerk settings are higher or lower than needed?
Basics About Jerk Settings
Jerk in a 3D printer applies to the print head – the part of the printer which starts the complete 3D printing process by moving at a specific speed. It starts from its state of inertia, moving at a particular speed depending on the printer that you own.
For Ender 3, the printing speed is 180 millimeters per second which implies that its print head moves at the least 180 millimeters per second. Add approximately 20 millimeters per second to it and you will get the travel speed i.e., the speed at which Ender 3’s print head moves.
All the print heads have to undergo a back-and-forth motion, from their start position to the print bed and back. One such motion completion would mean that the printer has printed one layer of the complete geometry of the 3D model.
And it is obvious that according to the filament that you are using to print a part or functional prototype, the print speed will change and so will be the jerk settings. In other words, jerk settings are the measurements of speed at which your print head moves from the still position.
- So, the higher your jerk settings are the faster it will move off from a stable position.
- The lower your jerk settings are the slower it will move off from a stable position.
What Does a Higher Jerk Value Mean to Any Printer?
- A reduction in overall printing time.
- Decrease the number of blobs in your printed part or a functional prototype.
- Increase in the amount of vibrations caused by instantaneous changes in direction.
- A smoother operation around the corners and circles of the geometries.
What Does a Lower Jerk Value Mean to Any Printer?
- A reduction in the total mechanical stresses to your printer.
- Overall smoother movements of the print head.
- Improved adhesion for your filament especially when the direction of printing changes.
- Lesser noise from your printer.
- Decrease in lost steps as you often get while having a higher jerk value.
Each and every one of that applies to Ender 3 as well. And that’s exactly why it’s important to know the best Ender 3 jerk settings.
Having so would mean a sort of neutralization i.e. neither less nor more amount value of any of the parameters mentioned in the above pointers.
And we will get to what would it mean to have the perfect Ender 3 Jerk settings, but before that let’s take a look at what are the perfect jerk settings for Ender 3.
What are the Optimal Ender 3 Jerk Settings?
The settings are we are about to disclose to you are tried tested and hence proven jerk settings for Ender 3. You can use these settings as a baseline, isolate jerk, and then based on your observations feel free to increase or decrease it little by little, and slowly you will start getting the exact desired quality of prints in parts that you plan to print with Ender 3.
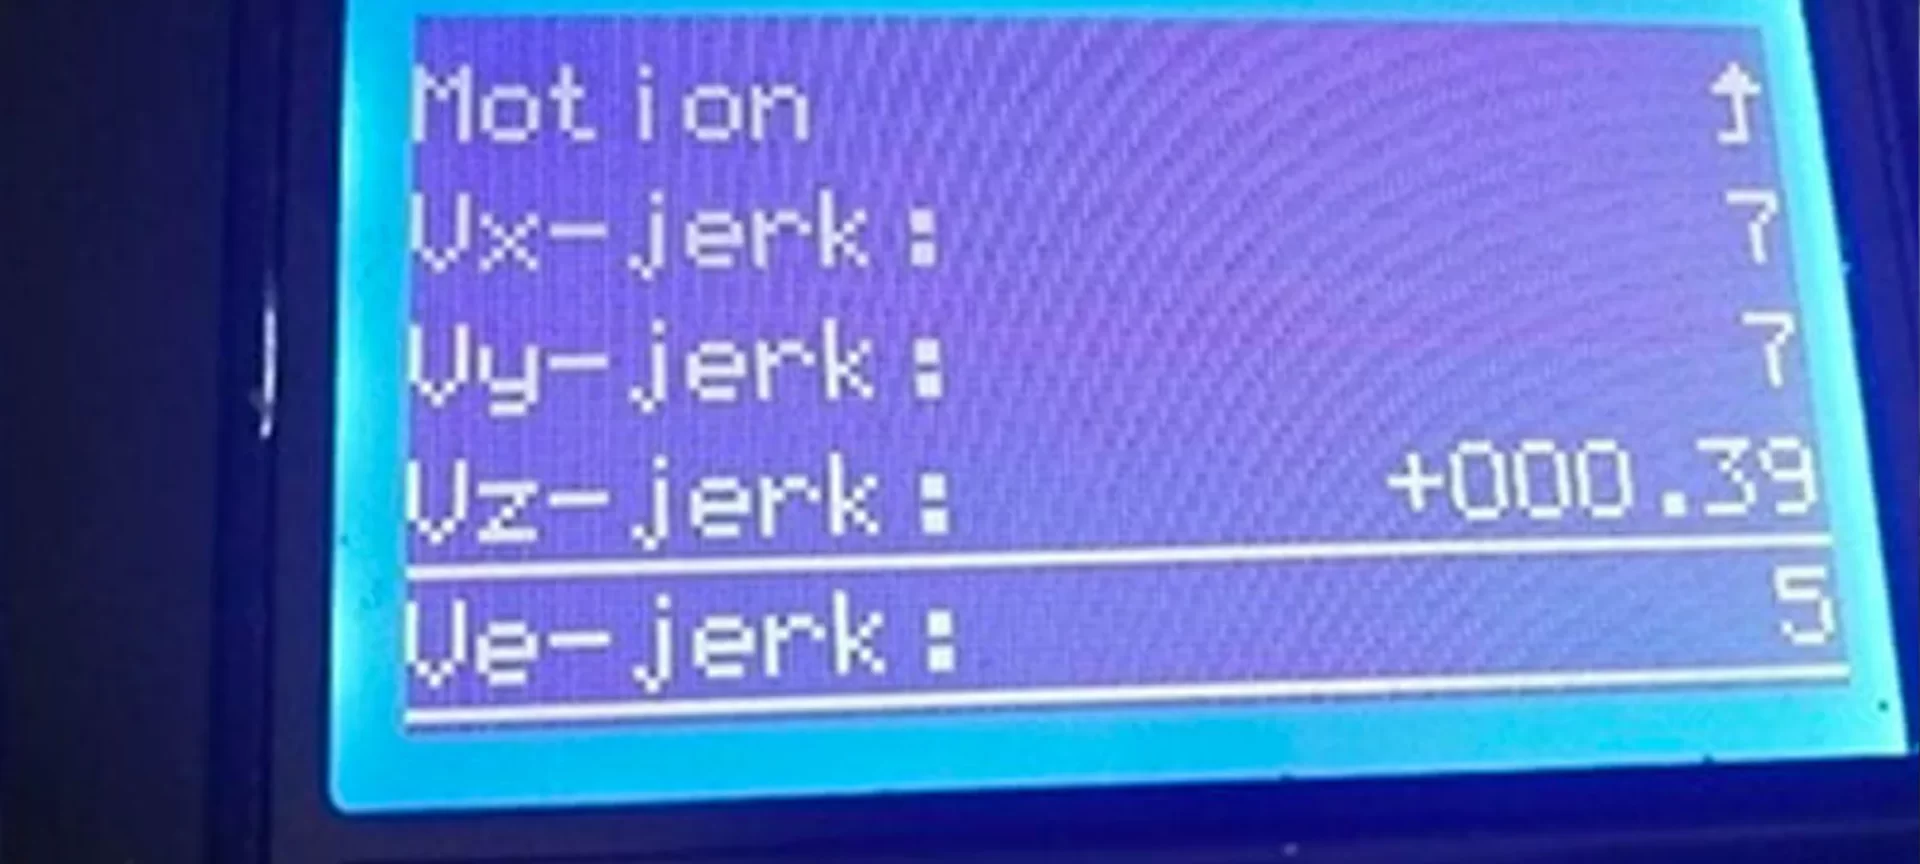
Firstly, for your Ender 3 jerk settings, you are recommended to try 7 millimeters per second and see how it works. This would mean that Ender 3’s X and Y axis would be at 7 millimeters per second.
After having ensured so, you should then select the control settings in which observe the option of motion and select it. You would get to see your Ender 3’s jerk as well as acceleration settings in there.
The majority of the setting change needs to be done here. Set your Vx = velocity for the X-axis at 7 millimeters per second, apply the same to Vy i.e. velocity for Y-axis. While doing so, leave Vz as it is. The next changes that you need to do are in the acceleration.
Set your Amax X at 700 millimeters per second square which is the acceleration of your Ender 3 printer in the X-axis. The same applies for Amax Y too, whereas Amax Z can be left alone.
Please note that if you are using one of the suggested 3D printer’s slicers with Ender 3 i.e., Cura, you can change these settings without flashing your firmware. All you need to do is:
Step 1: Click on Cura settings.
Step 2: Click on advanced settings or custom settings and you will get to see the jerk as well as acceleration values.
Step 3: Change them one by one to the above-mentioned settings and you will get a good start off with the jerk that Ender 3 is regularly known to produce.
In case your present jerk settings are higher than these which would mean that you are lowering your Ender 3 jerk settings and doing so makes overall creation happen slow, you can increase your print speed to compensate for the overall printing time increase.
In scenarios wherein lowering the jerk does not fix your problem, simply lower the acceleration to see what difference it makes! Some part of the Ender 3 community also recommends leaving the jerk settings at zero and having acceleration at 500 for getting good prints.
So, you see it’s really a matter of how old your printer is and how maintained it is. Having stated so, you will have to do a very little testing for getting the best Ender 3 jerk settings for your 3D printer yourself.
And only then will you be able to completely customize the print quality of parts and functional prototypes that you manufacture, on your own.
What Would it Mean to Have the Perfect Ender 3 Jerk Settings?
It would surprise how using optimal Ender 3 jerk settings solves a whole lot of issues and the list would include even those that weren’t seeming to you as issues before. To start with:
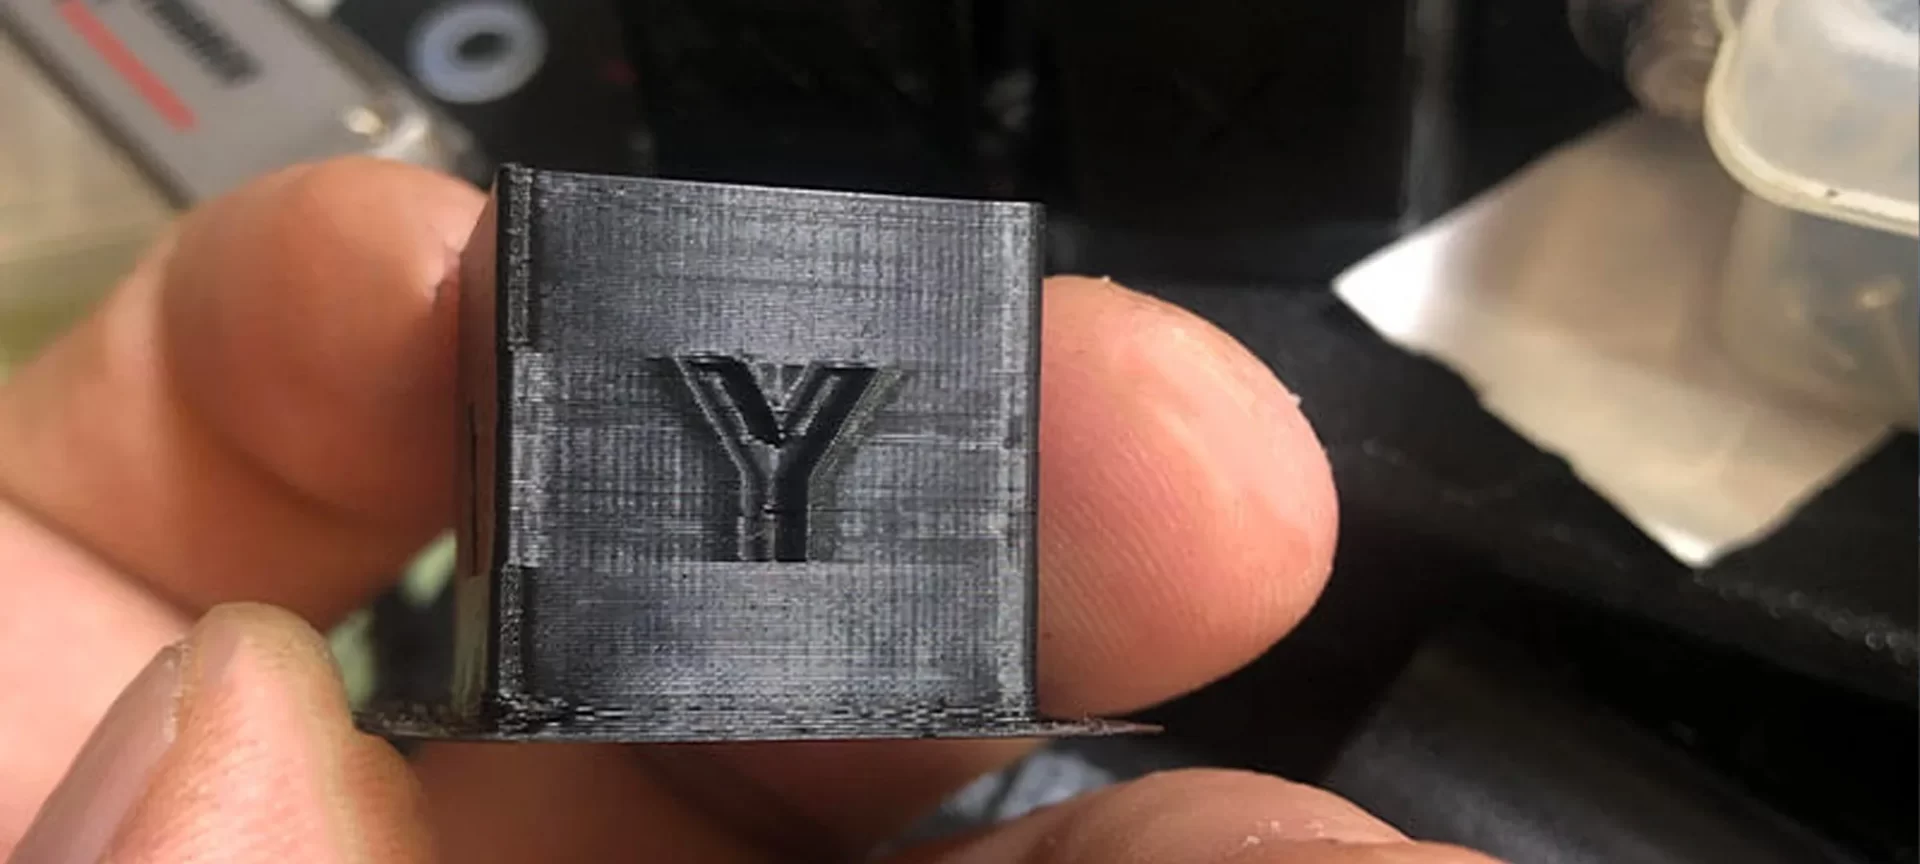
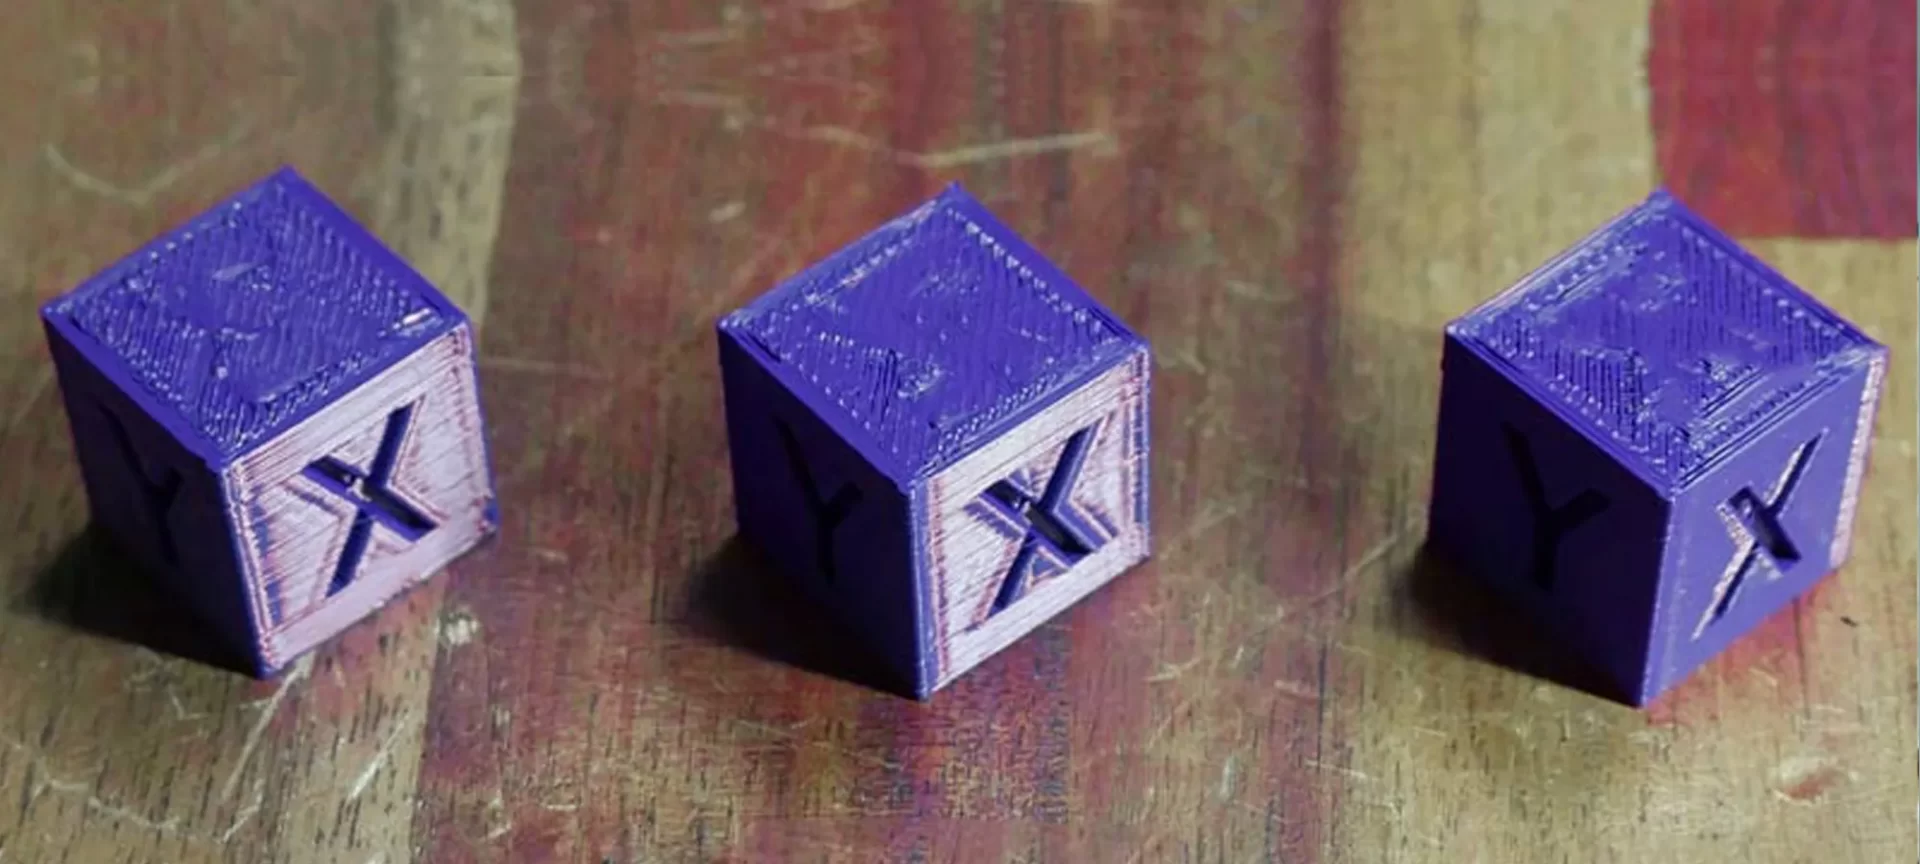
- It will ensure that your prints do not have a rough print surface.
- Perfect Ender 3 jerk settings will remove ringing or curves from the prints.
- They will make your Ender 3 much quieter than before.
- Neutral jerk settings would be the elimination of the Z-axis wobble in your prints.
- It will fix the layer line skips.
- Shaking or too violent running of your printer will not happen anymore.
By adjusting your Ender 3 jerk settings you can get some of the best print quality that might surprise you because you’d have never imagined your printer to have such a capability. And this is the reason why we recommend you and try these optimal jerk settings in your Ender 3.
Although they are not fixed and act as a baseline after which you need to experiment and get the best ones yourself, by doing so you would learn more about 3D printing. And it’s not that you need too much effort in your experimentation, a little bit of trial and error and you should be able to reduce issues and increase your overall print quality.
Also, higher or lower value of jerk settings in Ender 3 can result in a lot of issues as well as damaging the printer. It can also result in ghosting or echoing which are not at all good for the parts. So, it’s better to keep experimenting with your jerk settings to find out the best one for your Ender 3.
The Conclusion
For many of the printing issues that you’ve experienced on your Ender 3 and accepted it because you did a correct solution, neutralizing your jerk settings can be a cure.
Secondarily, acceleration settings are also something to look out for because they are interconnected with jerk settings.
And ultimately, both of them deal with the speed of your Ender 3, so they are directly going to affect the print quality of the parts that you are about to 3D print.
Above mentioned optimal Ender 3 jerk settings are a good baseline to start with. After doing your test prints, you can judge whether you increase, decrease or keep them as it is for getting desired print quality.
And we’ve also given you the judgment parameters based on which you can say whether the mentioned jerk settings are too high or low for your Ender 3. So, you are all sorted. All you got to do is an experiment to find out how suitable they are to your Ender 3.


