|
Prusa Research is one of those brands that enjoy a huge fan base and an impeccable reputation for its 3D printer designs. The company got its name from its owner, Josef Prusa, the man behind the wheels.
Josef Prusa is known to commit to the evergreen community of 3D printing lovers by gathering feedback on the products and coming up with upgradation based on that.
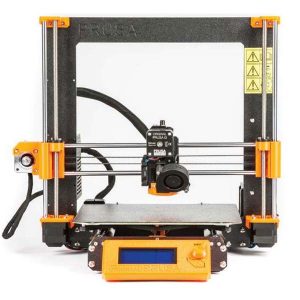
The original Prusa i3 MK3S is an example of the same commitment. This improved version is redesigned taking into consideration the problems users faced with its predecessor. With a new extruder system and few more changes, the Original Prusa i3 MK3S has impressed a lot of audiences.
Features
Original Prusa i3 MK3S may look exactly like its predecessor, both the machines are very different. There are few similarities though.
Apart from a few old features such as the magnetic heated bed, power recovery, and automatic bed leveling, Prusa has introduced some new features based on the overall feedback received from the 3D printing community.
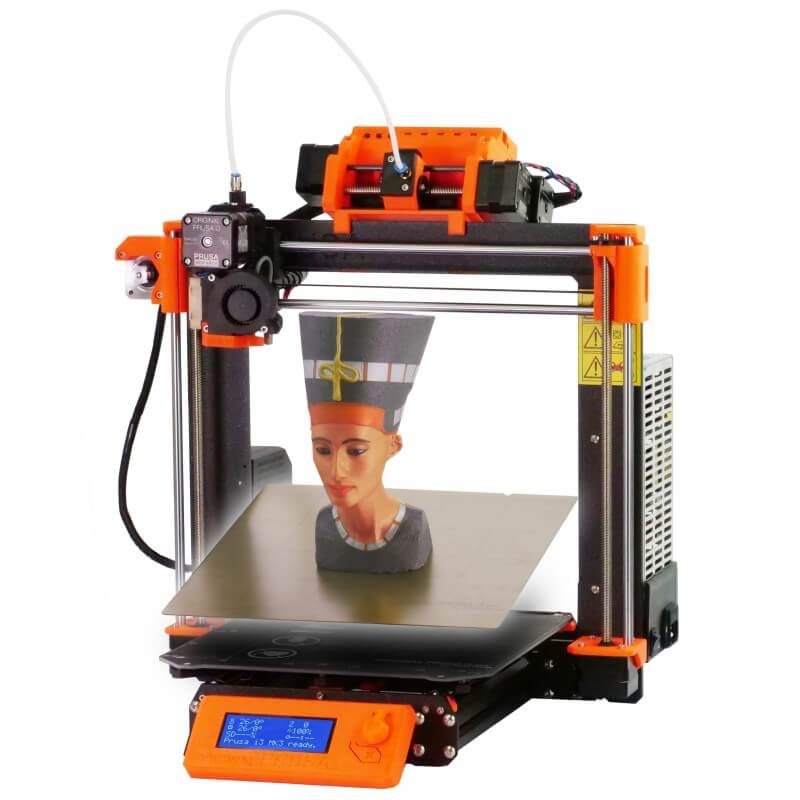
Extruder with New Design: With this upgrade, Prusa has come up with a completely redesigned assembly of the extruder. As per the suggestions from the users that the old machine was tricky when it came to assembling the extruder, Prusa took the notes right.
Prusa and its team worked to design an extruder that can let the user change the nozzle without a need to redo the extruder assembly every time. Moreover, the extruder nozzle and the nozzle have been placed close to the X-axis.
This is done to reduce resonance and increase the quality of the print. The extruder also provides better cooling as compared to its predecessor.
Sensor Detector for Filament: Although the old machines did have a filament sensor detector, it struggled for compatibility with some specific filament. The new sensor does not have this problem and can work smoothly.
The new machines have optical sensors that trigger itself by the mechanical lever and it much reliable.
Prusa has also introduced textile sleeves for replacing spiral wraps, genuine Gates belts, anti-rust coating for the PEI sheets, a new Einsy case, and a lot of other robust plastic parts.
Specifications
Specifications have not changed much. It is mostly the same as the older version. The build volume is exactly the same as 250 x 210 x 200 mm. The heated print bed with PEI coating is available that can be removed after every use.
The company based on open-source technology does allow the usage of third party filament. One can connect with the printer through UBS and SD Card.
The 3D printer is compatible to use with Mac, Windows, and Linux desktops. Prusa has provided its Prusa control software for slicing and other setting changes. The 3D printer also offers firmware inclusion called Marlin.
| Specifications | |
|---|---|
| Build Volume | 250 x 210 x 200 mm |
| Print Bed | Heated, Removable, PEI Coating |
| Host/Slicer Software | Prusa Control/Prusa Slic3r |
| Filament Diameter | 1.75 mm |
| Product Weight | 6.35 kg |
View full specifications here.
Price
Prusa has been known for offering the best for the price. The Original Prusa i3 MK3S kit comes for around $900. If you try and look for other options within the same range, you will have trouble finding anything as competitive as Original Prusa i3 MK3S for a price under $1000.
Based on open source technology, you always have the feasibility to build the printer parts for up-gradation yourself. This 3D printer has a lot to offer in such a price range.
Based on FDM technology, you will find it easy to work with the 3D printer. Even if you are a beginner, it would certainly be a good start with Original Prusa i3 MK3S.
First Impressions
Unlike those 3D printers that claim a plug and play setup, you will have to scratch your head with Original Prusa i3 MK3S for assembling the parts before starting your first 3D printing. The box is all sorted with different boxes for different parts.
The boxes are assembled in one bigger box. Once you will open that box, you will find different items labeled clearly for ease of assembly.
The component of each stage is lucidly itemized. However, you must not panic. All these parts would go right where they are intended to. All you need to do is check the note on the top of the box which points to the place where you would find the instruction manual.
The box is equipped with the essential tools that you may require during the setup. So, if you do not have the necessary toolkits, you do not need to rush to the store nearby.
Prusa Research has got your cover. You receive a set of hex keys, a pair of needle-nose pliers, plus two screwdrivers. You also get plastic zip-ties packed in a large packet.
Setup
Setup is the toughest part of the Original Prusa i3 MK3S model. However, it also gives you a chance to learn how 3D printers are made. Let’s go through the steps that you would require to set up your Prusa kit.
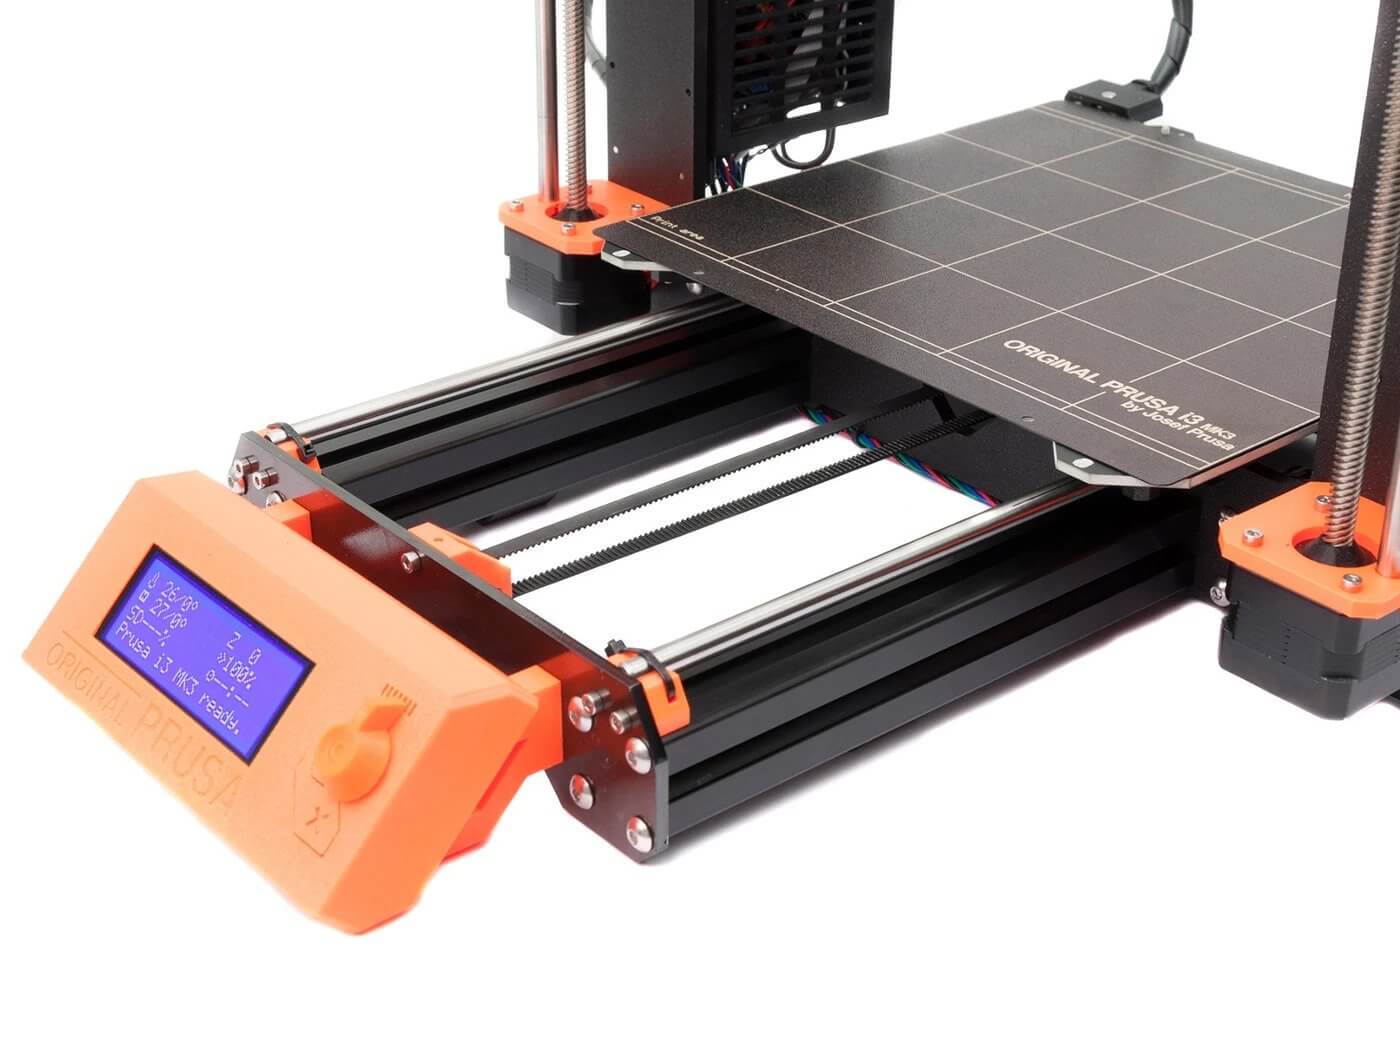
Assembling Y-Axis: This is the very first step when assembling the Prusa kit. With extruded aluminum rails along with aluminum front and back plates, the base provides extra frame stability and is highly reliable.
Assembling X-Axis: One of the easiest steps of the entire setup, assembling the X-axis requires less hard work and more of a delicacy. To put everything together, the step requires assembling seven linear bearings, a pair of linear rods, and an X-axis motor together.
Assembling Z-Axis: To do so, one must mount the X-axis over the Z-axis. Begin with mounting the X-axis motors to the sides of the frame, later the threaded rods and bearings. Finally, fixing the X-axis over the top of the frame.
Assembling E-Axis: This is the most tedious step. However, you get thorough instructions to complete the stage. This is the stage when most of the parts of the 3D printer come in conjugation and you can actually understand what your 3D printer is going to look like after the setup is completed.
Assembling LCD: You can relax a bit for this stage. This is the simplest one. All you need to do is insert the circuit board into the plastic case. Finally, add the button and fix it on the front.
Assembling PSU and Heated Bed: All the work is done by the magnets packed underside of the heated bed. With few cable management skills, affix the power supply and the heated bed to the frame.
Assembling Electronics: This is where you again feel like you need some thinking time. With all the instructions available, you may breathe a little, but the work still is tedious. With proper steps and following the directions correctly, you can accomplish this stage as well.
Calibration and Testing: After you have progressed to this stage, most of the task is already completed. This stage includes adjustment of PINDA probe, manual movement of the hotel on Z and X-axis, powering the machine and checking for the latest firmware. Finally, go for the setup wizard on the LCD screen. If the machine passes the steps you did before, it will prompt you to load the filament. Do that and 3D print your first model.
Printing Type/Cost
The Original Prusa i3 MK3S is based on the FDM process and offers ease of 3D printing with various features included with it.
With FDM, the material is melted and extruded and laid on the print bed layer by layer. After each layer solidifies, the next layer is deposited over the previous one until the entire object is 3D printed.
- Less Noisy Motors: Prusa has been known for making progressive changes to its 3D printer designs for improved results. The new model comes with Trinamic2130 drivers and cooling done through Noctua fans. The company has also added a stealth mode making this printer quieter.
- Recovering from Power Loss: Printing can be daunting when power cuts are more than often. 3D prints can take hours and sometimes days. In between, if the power runs out, everything goes for a toss. However, with the Prusa 3D printer, this problem has been taken care of. The printer will pause itself and start where left after the power comes back.
- No Skipped Layers: With FDM printers, the major problem remains with the skipped layers. As the machine becomes old, the problem surges. Finally, there are two thermistors installed on this 3D printer. One to manage the ambient temperature of the electronics. The other to help to adjust for temperature drift at the print level making sure that the first layer is always intact.
- Filament: The 3D printer is equipped to print with various materials available for FDM printers. Moreover, you can also choose to opt for third party filaments.
Print Quality
 Credits: Techradar.com
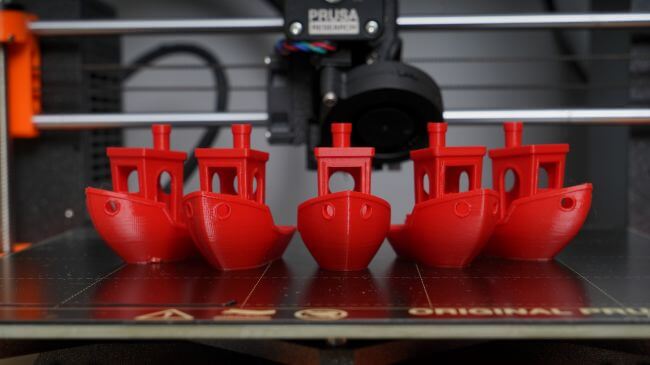
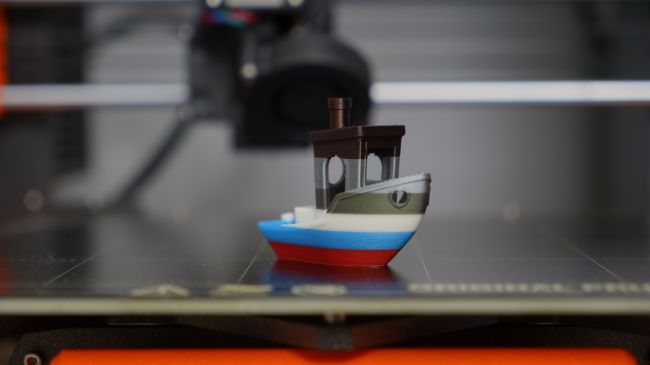
As mentioned earlier, the print quality of the Original Prusa i3 MK3S printer has been raised to an altogether new level. The printer has been recommended by many experts for those working with FDM technology.
The 3D printer comes with few models pre-loaded on the SD card of the machine. Printing these models will let you experience what are you going to work with. You can test your own models.
The simple models are easy to 3D print with low support requirements and less complexity. The 3D printer is able to produce great results with simple 3D printing models.
 Credits: Techradar.com
Even one can print parts that need to be assembled later or fixed over each other. The precision and accuracy of this 3D printer are amazing and one can expect it to work reliably for printing simple as well as complex parts.
Software
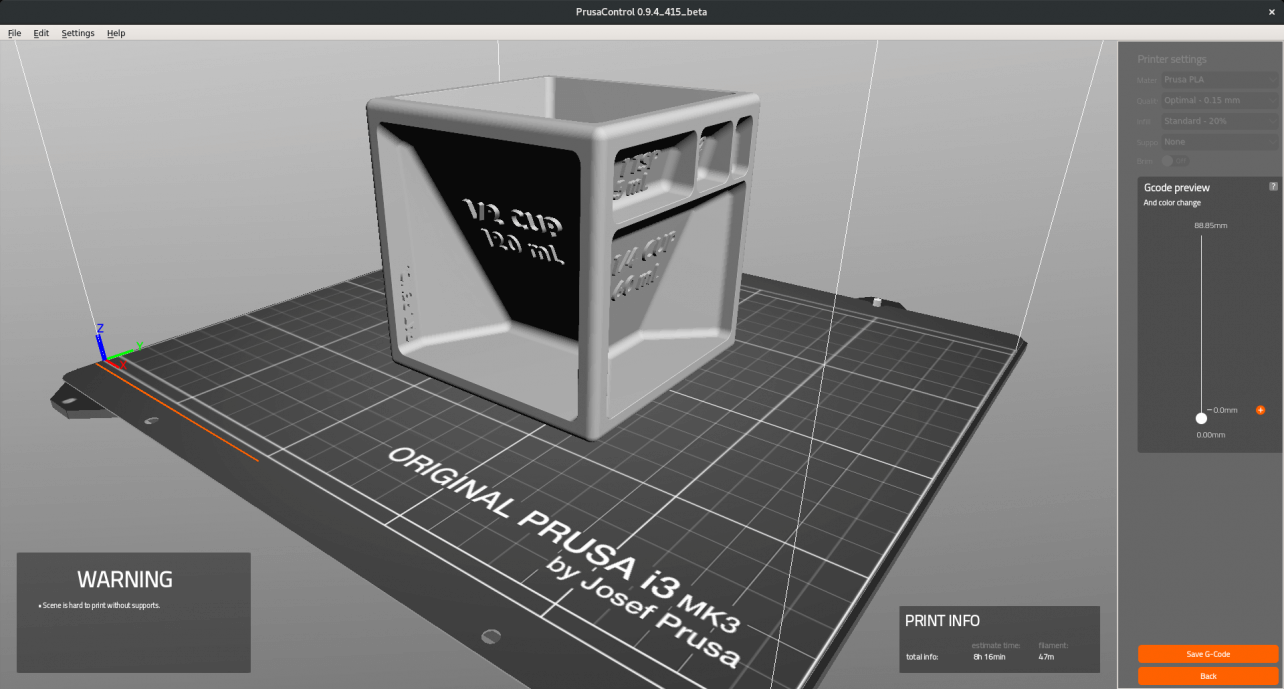
Prusa has come up with two versions of software for its users. One is the Prusa Control. This can be regarded as the right tool for beginners. The software is loaded with essential tools.
However, there are many things that are impossible to do with PrusaControl. One example is the absence of vase mode. So, you will need other software if you are printing a vase.
Another option is the Prusa3D Slic3r MK3. This is advanced software with much more functionality to toggle between. A bit tricky for beginners but could be a great option for those who are versed with slicing software.
Customer Service
The company provides live chat and email support in various languages. The support is also available 24×7 days.
Factors Influencing Purchase Decision
3D Printer cost: The cost of the printer is neither too low nor too high. You may find FDM printers for as low as $200 but they won’t compare to the ease and quality of printing as Prusa does.
3D Print quality: If compared to the objects printed with other FDM machines, you would certainly find this option much better. However, a few challenges with print quality that remains with FDM cannot be avoided completely. Still, Prusa has done a great job to overcome the challenges as far as possible.
3D Print speed: Decent print speed.
3D Printer capability: One can use this 3D printer for home use. If you are a beginner and starting hands-on 3D printing, this printer would be a great choice. The printer usage is not limited to beginners only and professionals can also take advantage of it.
3D Printer Practicality: Great for beginners. A lot to learn from. Best suited for miniatures as advertised by the company. So, one can print for fun or use it for business purposes.
3D Printer User expectations: As it is always a case with Prusa, user expectation is higher. Prusa has made every attempt to sort out the problems related to the older release by accepting feedback from the community and has succeeded in doing so.

