Every time there’s a birthday or an event of any kind where you need to buy a gift, aren’t you confused? We know and acknowledge your confusion of “What should you get him/her?”
The truth here is that there are very few ideas that are worth remembering, and even rare are those which are worth mentioning.
One of those very rare ideas is lithophane. It is easy to 3D print lithophane for all those, who have a 3D printer. Lithophane is the best gift that would be something personalized that you would be able to 3D print.
This is something that cannot be bought elsewhere and something that would make you proud to show off your printer’s creations! Also, you wouldn’t have to keep worrying about finding a good gift idea!
Lithophane is the most personalized item you can 3D print! For all those who do not know what a lithophane is, to put it simply, it’s a 3D print of a photo that uses the thickness of the print for showing varying shades of grey when illuminated from behind.
Lithophanes are unique, the receiver of Lithophane is sure to like it and it makes up for the perfect gift! If you are wondering if the question mentioned above, you can get this for your friends on their birthday and the family at Christmas.
Although there have been various experiments in which a lot of people have been trying to print photos and they haven’t always been successful. It is not a very difficult task to accomplish, but then it’s not a trivial task either.
There are many different ways of accomplishing it. Once you do the correct printing, the results are phenomenal! In this article, you have a compilation of experience from various printing experts so you don’t have to go through the learning curve yourself.
Step 1: Select an Appropriate Photo
This is the first thing that you need to do is choosing a photo/picture that, according to you would be appropriate for 3D printing. The point to remember here is that not all photos will look good when 3D printed.
So, to help you choose which photo is good and which one is not, you must follow the following things in mind.
The 3D printed photo that you choose will appear in shades of grey. So if there is any detail that requires color or the image is such that requires color, it would not look good after Lithophaning.
In this case, the other thing to keep in mind is that it is best to choose a picture with a fairly high contrast ratio. Also, an image with a lot of details might not look as good as a lithograph.
So, it’s better to choose a simple image, uniform background, etc. Although these things might look silly, they are very effective and you will know about it after the print comes.
So, as you know, prevention is better than cure. If you have a printed that’s well-calibrated, you can probably print any kind of picture.
Step 2: Use the Correct Application
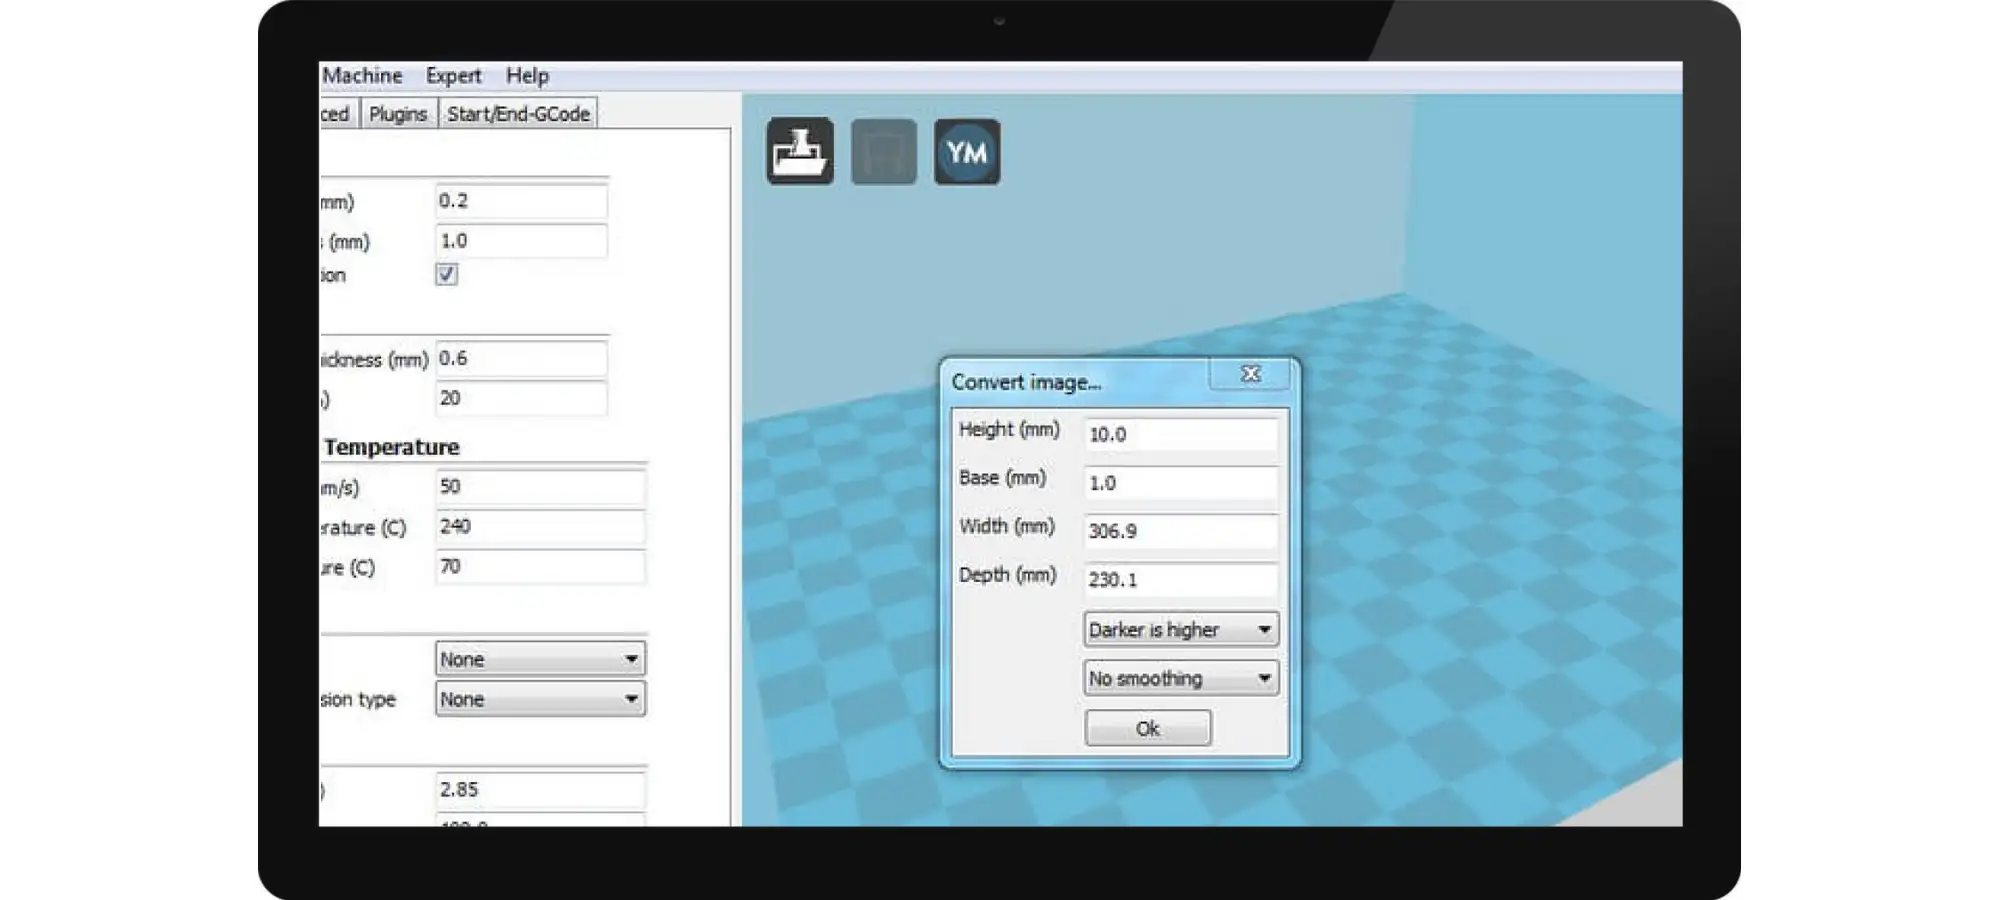
The few options available for software with which you can easily print are:
- Cura
- The Lithophanes application
- The Customizable Lithopane thing on Thingiverse
- The Image To STL Converter application
- The PhotoToMesh application
Facts About Cura
The easiest one amongst these applications is Cura. It is because of the user-friendliness that is offered by the application. Even the most non-technical person can use it with ease.
Cura supports importing images and conversion of the same into 3D meshes. All you have to do is simply, drag & drop. The other way to do is by selecting the Load Model from Cura’s menu and then selecting a jpg image instead of an STL file.
Doing this would pop up a window that will ask you to select the size of the picture. The preferred option here is the “Darker is Higher” option and also enable the “Light Smoothing” option depending on your preference.
Although Cura being the easiest solution, it does lack in terms of options when it comes to loading the image.
Facts About Other Applications
The best application for that use is the Lithophanes application. This is available from the Brazilian site after you install it, the application will be set to Portuguese by default, but you can set the language to English too.
Some other alternatives you can look include, the PhotoToMesh which allows you to create lithophanes on spheres, boxes, etc. Although, it is very expensive than its competitors.
You can use the Customizable Lithophane which is on Thingiverse. It is not that bad either, but we don’t recommend Thingiverse as their customizer is very slow to work with.
You also will have to wait until Thingiverse generates the STL file for you instead of having it generated directly by your computer.
We also expect that there might be some privacy concerns on this if the customized Lithophane suddenly gets published on Thingiverse.
To 3D Print Lithophane Make Its Model and Exporting the STL File
After the invention of Photoshop CS5, Adobe has been adding features to work with 3D elements in it. These features are such that they often help for turning a 2D object into a 3D.
That is the first requirement of any software you are using for producing a lithophane. You will have to download the “Make lithophane” action set because only after you do so you can drag and drop the .atn file onto your Photoshop window to install it.
Steps to Follow After Doing the Above-Mentioned Things
- Open the photo that you wish to Lithophane, using your Photoshop.
- Go to the Window menu and check actions for the actions tool to pop open it.
- Search open the Make Lithophane folder, choose the action, and click the play icon beneath.
- Photoshop will now go through a series of actions to 3D print lithophane. When this step is done you should be able to see the result.
Now that the complete process is based on Photoshop by guessing the right depth, therefore, pictures with sharper contrast will likely yield better results.
Doing this action will take some time, depending on your system specifications, and Photoshop might be unusable during the process. To avoid the software crashing, be patient, and don’t click on anything during this time.
Exporting
Now that you have the required model ready, all you need to do is print it. Even though Photoshop can 3D print this, we would recommend you to use your favorite slicer.
For exporting your work you need to go through the following steps:
- Click on the 3D menu, and go to 3D Print Settings.
- The Properties tab on it will have an option called “Local” in the “Print to” menu. Change that option in “Printers” to “STL File”.
- Set the printer units to millimeters and the detail level to high.
- Pressing the tiny “Start Print” button from the bar beneath, the export process will start.
Here, generally, the computers that aren’t technically adept are expected to cause some freeze for moments. But once this is done, your 3D lithophane will be available in STL format!
Step 3: Printing
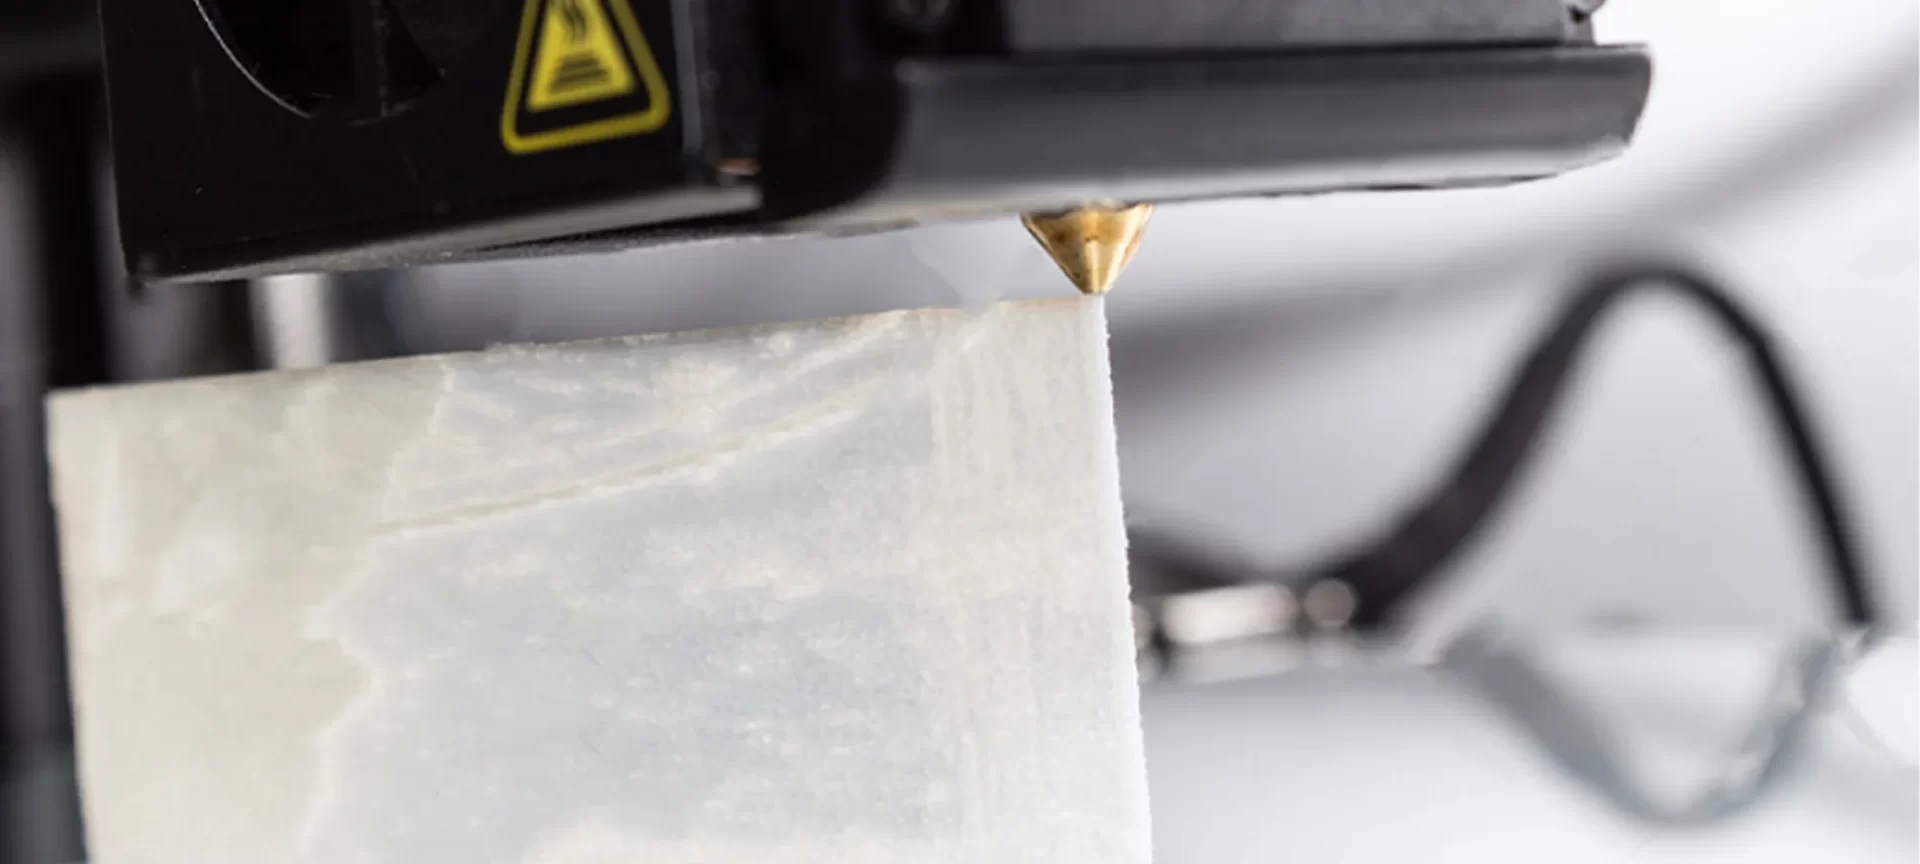
After you have exported the STL file, all you need to do is the same that you do with any other STL file for printing. However, there are some recommendations that we would like you to take care of before printing it finally.
Recommendations for Connecting with the Printer
After you’ve sliced your model, you can print it using many ways. If your printer has an SD card reader, then it is recommended to use it instead of using the USB connection to print your model.
The reason behind recommending this is because the print may have a lot of details on some layers. Also, the USB connection may not be fast enough to send all the G-codes to the printer.
Which will in turn start taking pauses while it’s receiving the G-code over USB. And these small pauses will leave blobs of filament in the print, which will affect the quality of the overall quality of the print.
Recommendations for Printer Settings
Bed leveling is something that has to be checked. Your printer should be well-calibrated in terms of filament width, flow rate, and/or extrusion multiplier.
The print temperature for your filament should also be set correctly to minimize any possible oozing. Another detail that you need to take in mind, is to use a white or natural filament.
Although if you wish to, you can also experiment with some light colors such as yellow. But as mentioned above, the image will be sort of black & white, it is recommended more to use white as the filament.
As it is for any other model, so with Lithophane, the printing should be simple. There aren’t any extra settings that are required, but some websites recommend few tips to keep in mind that are:
- If you’re going to print your lithophane vertically, the best thing to keep in mind is to keep the layer height as low as possible.
- As most of us would want all the details, it’s better if you don’t print at high speed.
- General recommendations for print speed are trying to keep it lower than 2000 mm/min.
- Not using transparent filaments.
- After each of these is ensured, go ahead and print. Ideally, a standard-sized lithophane can take up to 6 hours to print with the above settings.
Final Steps After Printing
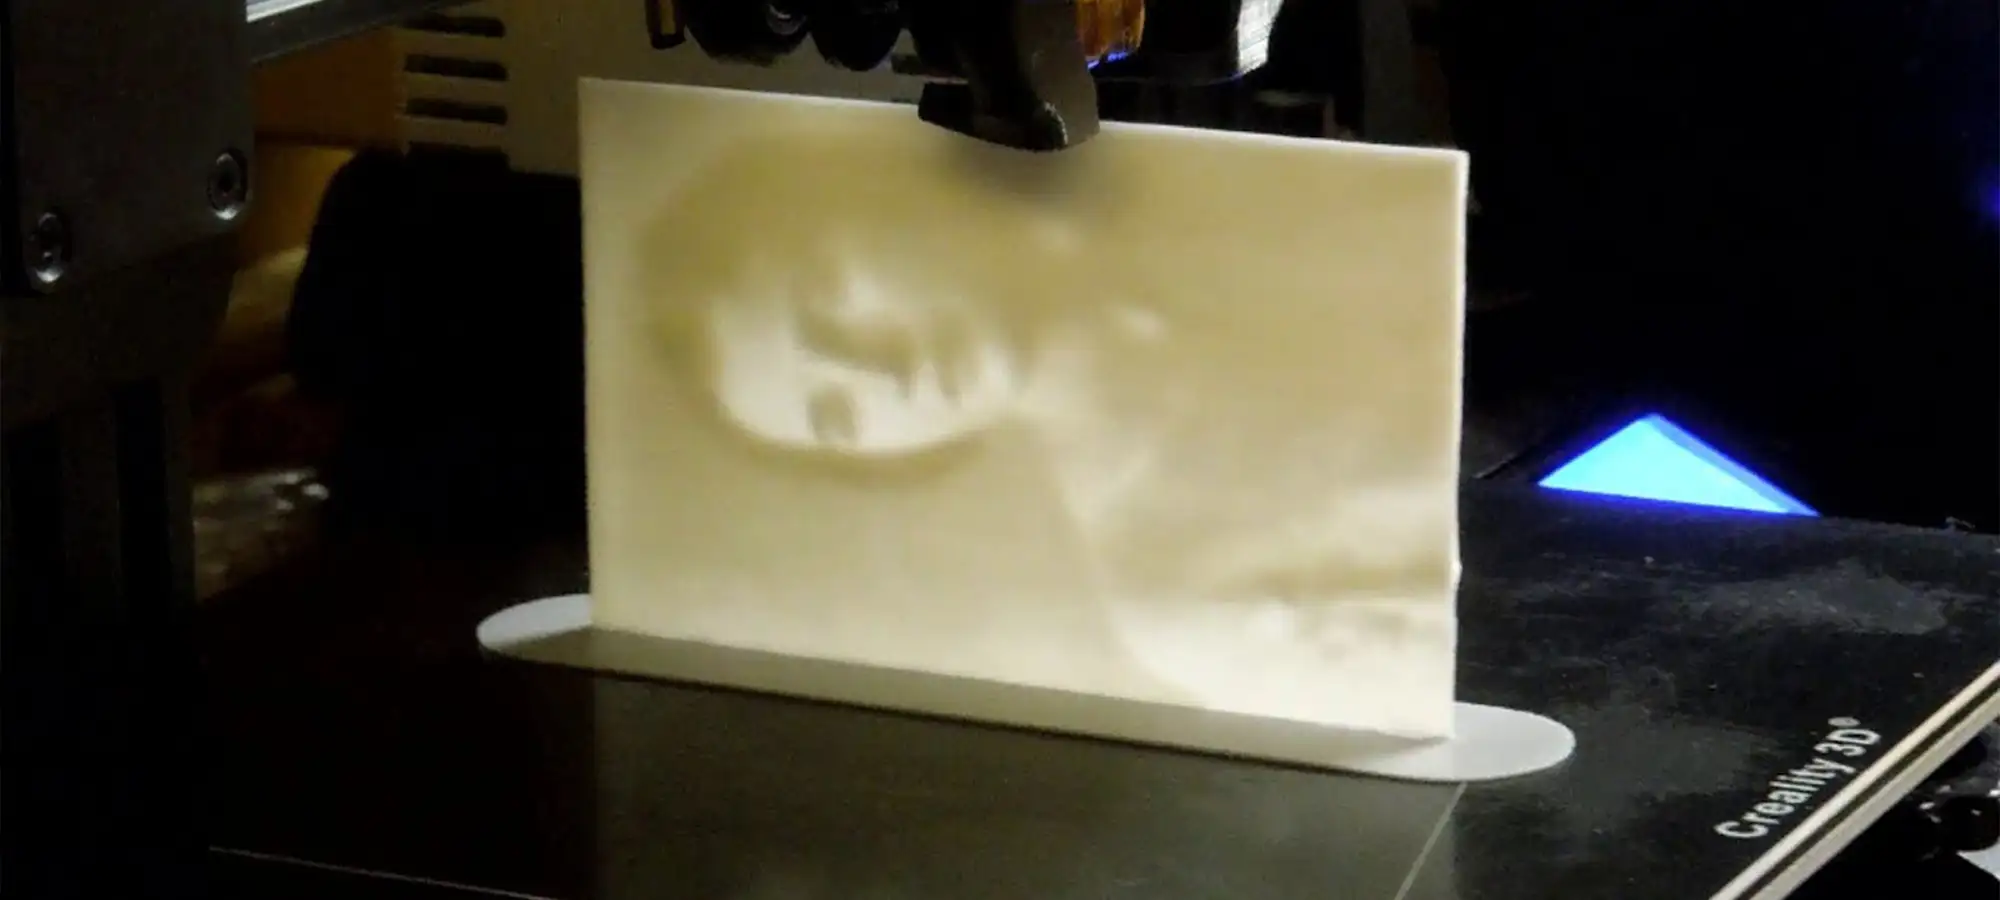
Once the print has finished, the important step is to shine a diffuse light on the back part of the lithophane. This allows you to finally see the print in all its glory.
As reported on some websites, their first attempts were just to 3D print an image and not actually 3D print lithophane. And, so they didn’t know all this and discovering this by accident is almost magical, but we couldn’t resist telling this to you.
The difference between lit and unlit lithophane is very much. The 3D printed lithophane usually appears much nicer in daylight than with a flashlight.
But as long as the light, whether its day or flash, is diffused and not too bright, it will look perfect.
Not only will you be able to see, the dimensions and the thickness affect greatly the print time, but also, the number of details in the photo will affect it as you might have seen with the koala photo.
The Conclusion
It is recommended that a good next step would be to try printing with different materials. Although websites have always printed used ABS, you can also try using HIPS to see how the print looks.
HIPS has better dimensional accuracy and so it is believed that the lithophane might have a better surface finish and better photo quality.
Printing with PLA is not that recommended because lithophanes will probably be placed on a window, and long exposure to direct sunlight could melt the PLA.
We hope that the information mentioned in this article is helpful for you to 3D print lithophane. We have tried to cover every step involved in it, in great detail that would help you.
Irrespective of the slicer or the 3D printer that you are using, the settings are not going to change much. So, you can pretty much stick with what’s mentioned in this article.
There are various purposes and occasions in with Lithophanes can be very appropriate. In recent times the art of developing a lithophane has been increasing.
People are creatively using them with various applications such as lamps. The credit to 3D print lithophane with lamps has been given to the Indian maker Prajjwal.
There have also been attempts to develop applications of it, like CreateLitho and 3DProcks. You can use them to get an idea of what is trending over and if you wish to implement that with your 3D printing tactic.


