Different 3D printing technologies have different types of problems while printing because their mechanisms are different.
While printing a part or functional prototype using an FDM 3D printer, you have to use a filament.
Whereas if you are 3D printing using an SLA 3D printer, you have to use a resin.
Similarly, while printing a part or functional prototype using DLP 3D printing technology you require a light source.
You require a high-powered laser while printing using DMLS technology and an electron beam when manufacturing using EBAM technology.
3D printing oozing is one of the most common problems while printing using FDM 3D printing technology.
In this article, we will be first learning about the overview of this problem and slowly progressing towards what can be done to prevent and fix 3D printing oozing. So, let’s start with getting enough knowledge about this problem.
Overview about 3D Printing Oozing
While the nozzle of your FDM 3D printer travels across an open space with the help of rails for getting to the next point where it is supposed to reach according to the design of the part or functional prototype, there are possibilities that it can ooze out the plastic that you do not wish it to ooze out according to the design.
This melted plastic will then result in a solid part inside your complete part or functional prototype that is actually unwanted. After this unwanted part gets solidified, it gets stuck to the printed part or functional prototype.
Just like we have weeds in our garden, which grows unwantedly with the grown part, just because it gets shared sunlight and water with the actual, wanted plant. So do we have 3D printing oozing?
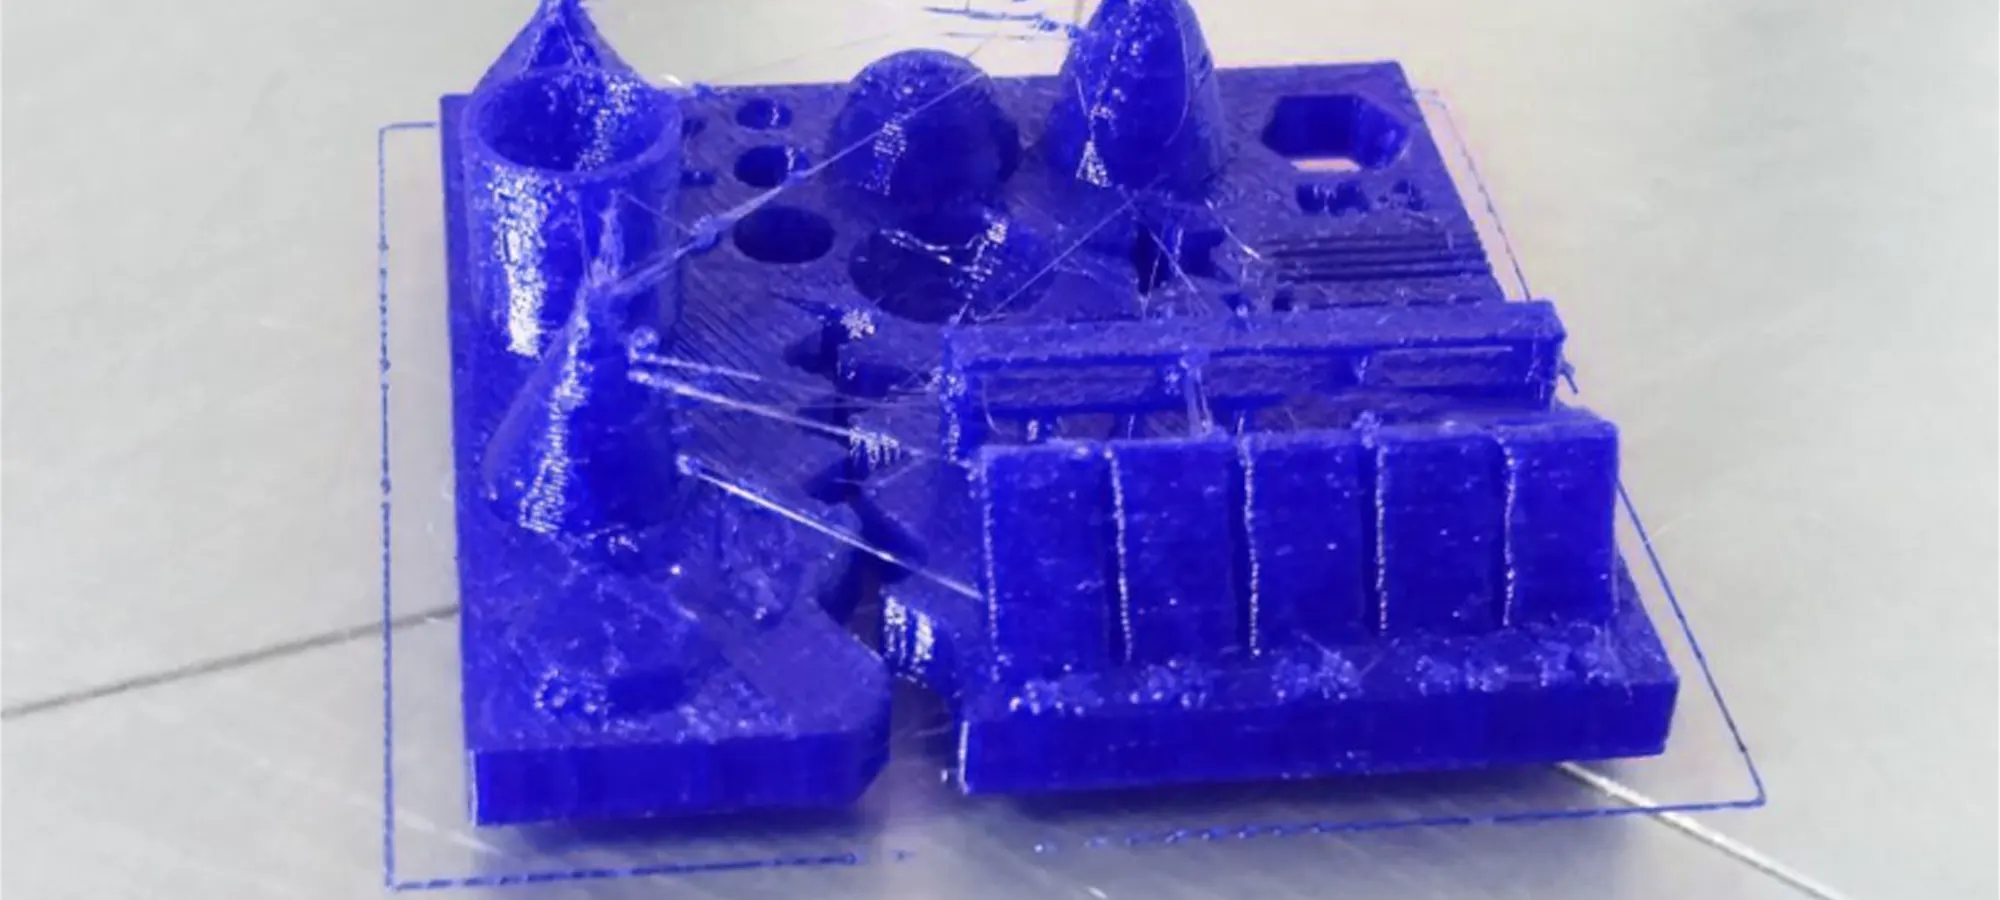
The other name for oozing is stringing. When this phenomenon happens, it leaves your 3D printed parts or functional prototypes with thin lines of plastic that resembles cobwebs or strands of hair.
As per the rules of this technology goes, the plastic is not supposed to be deposited on the print bed when it is traveling with the print head, by the plastic, you will find, often leaks onto the parts where it should not in while in practice. These unwanted parts are also known as whiskers.
There are some causes that make oozing possible. Although, arguably these are not the only causes, the more you know, the better it gets for 3D printing your part or functional prototype on an FDM 3D printer.
The first cause can be the use of incorrect retraction settings. The second one can be because of setting the hot end temperature too high than needed for printing that material.
Take, for example, the material PETG, this 3D printing material requires a higher temperature for melting it into liquid form before depositing it on the print bed.
It is also known in the market as the most notorious material causing 3D printing oozing to occur.
Such material, as well as PLA and ABS, are also known to have such an issue.
After having had a look at the overview of this problem, we will now look at the solutions which will prevent or fix the 3D printing oozing.
Retraction Enabling
There are three factors which you should consider while considering this solution: namely:
- Enabling Retraction.
- Retraction Distance.
- Retraction Speed.
We will explain them one after the other:
Enabling Retraction
This is one of the most common methods used for combatting 3D printer oozing.
Enabling retraction means that, the place where the extruder has to cross an empty space, at that place the filament will be pulled back a little bit by the use of the feeder.
Doing this prevents the molten plastic from trailing behind when the print head is moving.
Because the “pulling back” action serves as a countermeasure against the 3D printing oozing, once the extruder of your printer has arrived at the next location, the filament is pushed back out from where the printing resumes.
Retraction Distance
Retraction distance is known to be probably the most critical retraction setting for not letting the oozing happens as it determines how far the filament travels.
In case your nozzle can retract more, it means you are less likely to encounter 3D printer stringing.
But there is also a possibility where if you retract too far, the filament may be unavailable in the hot end when you need to resume printing.
This setting may vary depending on the type of extruder your 3D printer is using.
However, it is a general fact that a Bowden extruder will typically require a higher retraction distance, owing to the long distance between the nozzle and the drive gear.
Retraction Speed
This parameter determines how quickly the filament with which you wish to print is retracted.
Remember that a faster retraction speed would suggest that 3D printer stringing is less likely to occur.
This is because the filament is pulled back fast enough giving lesser chances for oozing to start.
However, when the retraction speed is too fast, the problem of the filament disconnecting with the other portion inside the nozzle might occur.
And if it is your most unlucky day, a quick movement of the drive gear may grind the molten plastic and jam the nozzle or create areas where the filament is not deposited.
So you should beware of the retraction speed the most. Your aim should be to find a sweet spot, where retraction is optimal which can vary depending on the printing material.
For being on the safer side, it is always advisable to perform a few test prints to determine the ideal retraction speed.
The research on various 3D printing materials has concluded that materials like ABS and PLA will do well with a speed range from 40-60 mm/s and a retraction distance range of 0.5-1.0 mm while using direct-drive extruders.
In case your printer has a Bowden extruder you will generally require a speed range of 30-50 mm/s, with a retraction distance range of around 2.0 mm.
Set the Right Temperature
An ideal temperature for 3D printing a part or functional prototype depends on the printing material and other printing settings.
However, according to the experts it is generally recommended to lower the temperature once you notice oozing.
You can try reducing the nozzle temperature range by five to ten degrees Celsius increments, but also you should take care to never reduce the temperature below the manufacturer’s minimum specifications.
The other point to remember is that as the temperature increases, the printing material becomes more liquefied and is more likely to drip from the nozzle.
This goes into saying even after adjusting the retraction settings.
A lower temperature does reduce the likelihood of this thing to happen, however, you must be careful to not set the temperature too low as very low temperatures could make the filament not melt enough, which in turn, could create issues with extrusion.
Adjusting the Print Speed
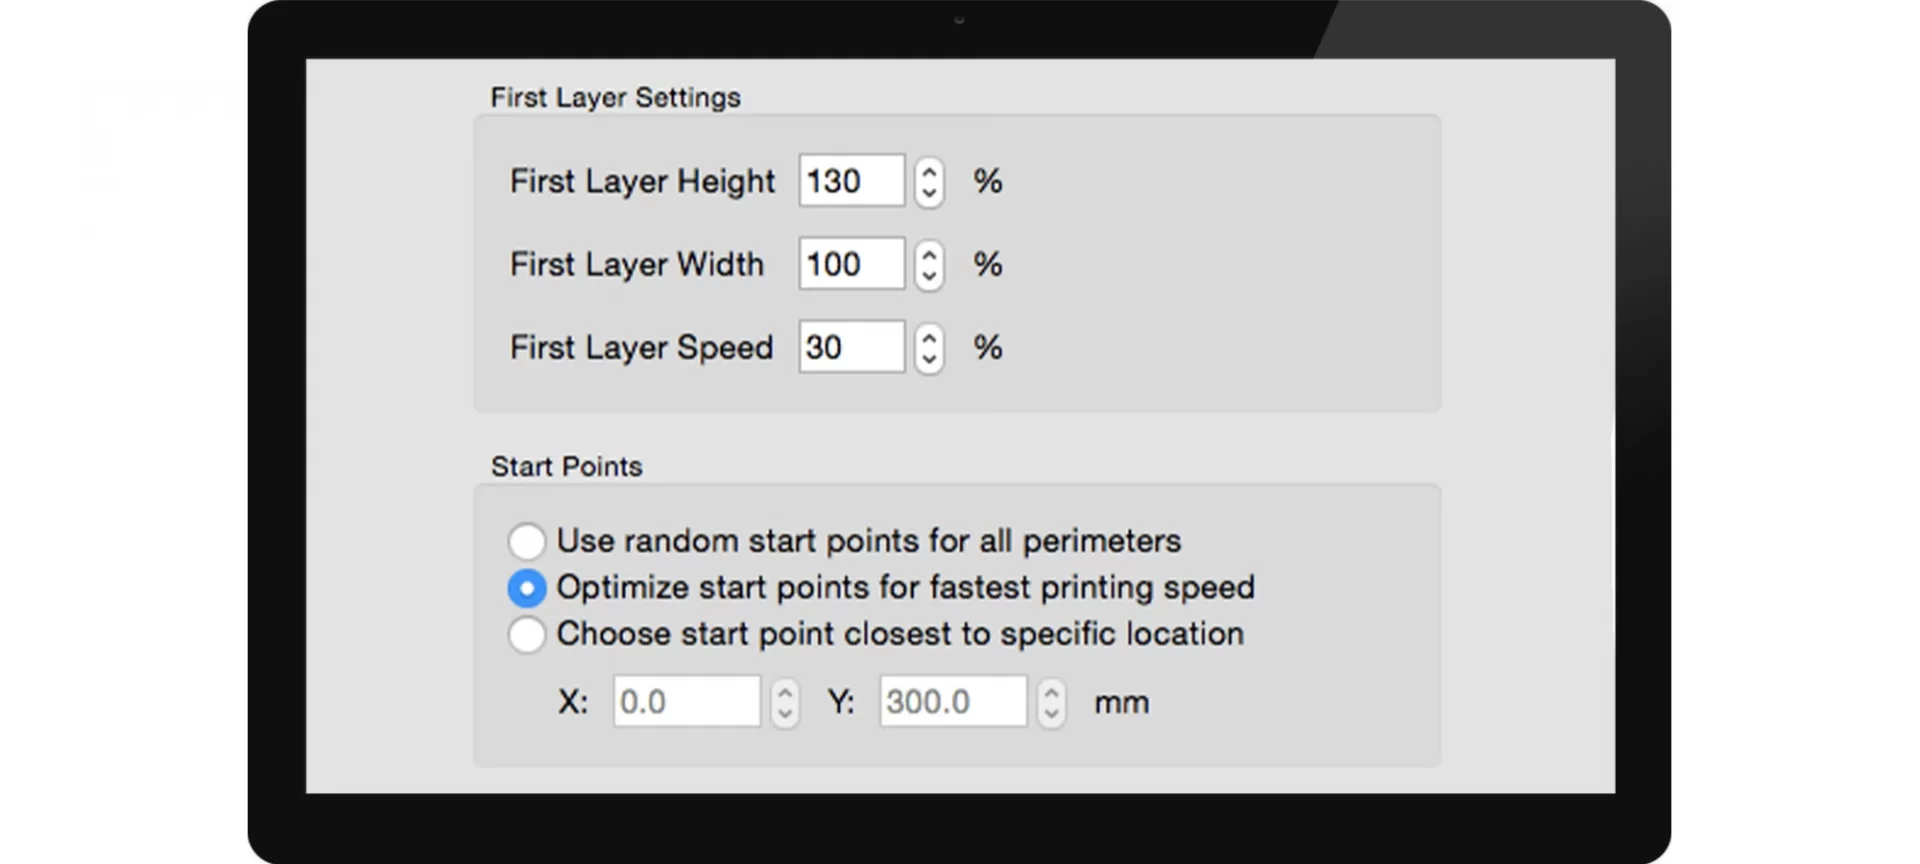
The trend to remember while adjusting the print speed is that increasing the travel speed of the nozzle when it is not trying to print can reduce 3D printer stringing.
But the point also to be taken care of is that if the temperature is low and the print speed is too high, you may end up with under extrusion because the plastic will lack enough time to drip from the filament.
The print speed can also affect 3D printer stringing in many ways to understand these ways consider this, for example, your nozzle takes too long to move between two points which are determined by your 3D design.
In such cases, stringing is likely to occur because molten plastic takes more time to ooze out of the nozzle.
But if the extruder of your printer can travel faster, the short moves like these may be quick enough that the filament will not have enough time to ooze.
Overall the print speed of 190 to 200 mm per second works completely fine with most 3D printing materials.
As a creator of the part or functional prototype, you will need to verify what speed your 3D printer is using before you can decide to make any adjustments.
Consider the example of the X/Y axis movement speed, it represents the travel speed from side to side, and the print speed is directly related to the length of time that the nozzle of your printer will spend moving across an empty space.
Cleaning the Nozzle of your Printer Before Printing

Cases wherein the printer on which you are printing a part or functional prototype for a long time, especially with a single kind of filament.
It could PETG, could be PLA, ABS, or any other filament. You need to see and observe the print bed, there must some thin layers on the nozzle as well as the print bed of your printer.
Also, there must be residue in the nozzle of your printer. This thin layer inside the nozzle can cause a 3D printer oozing because the filament strands will try to stick to the surface of your printed part.
So, although this part is not given much importance even by experts, if you want to print the upcoming part or functional prototype with dimensional accuracy, you need to make that you have cleaned the nozzle of your printer after printing a part or functional prototype and before printing another part or a functional prototype.
However, if you are into batch production, you would have to make a system of cleaning the nozzle after building a fixed number of parts or functional prototypes.
And then clean the nozzle, but make sure you do clean the nozzle and do not forget it.
Keeping the Filaments Free
This is another precaution to which experts do not pay much attention, but it is important, most of the filaments are hygroscopic which means they tend to absorb more moisture.
3D printing materials such as PLA is the main culprit because it generally tends to absorb more moisture compared to ABS which is the most famous material.
Remember that once the moisture is present in the complete printer system, it will tend to turn into steam and get heated up in temperature which is set up for melting the plastic filament.
The then called steam can mix with the melted plastic which will increase the probability of oozing even during non-printing movements of the print head and the complete nozzle system.
Once you develop the habit of keeping your filaments free, this problem does not occur.
Therefore it is recommended that you should store your filaments in an environment free of moisture so that even if you leave it open the moisture has no effect upon it, just like a plastic box.
Especially if you live in a humid environment, it is advisable to leave your filaments in an environment free of moisture.
The Conclusion
Lots of 3D printing problems arise from the 3D printing oozing problem from the extruder.
As the complete surrounding warms up the plastic grows more and more soft that begins to flow, and gravity takes hold, and molten plastic can ooze out from the hotend.
While bringing your 3D printer up to the temperature, your printhead is not all the way down to the Z-axis and rests on the build platform.
Such problems are usually easily resolved from the solutions mentioned above. These solutions are very specific so you need to take into account that thing.
And make sure that if your problem does not get solved even after applying these solutions, you should contact the printer manufacture via email, video call, or even phone call.
Your printer manufacturer will be able to tell you the perfect cause of your problem related to 3D printing oozing and the cure for the same.
Hope this article is useful to you and the information is given turns out to be fruitful.


