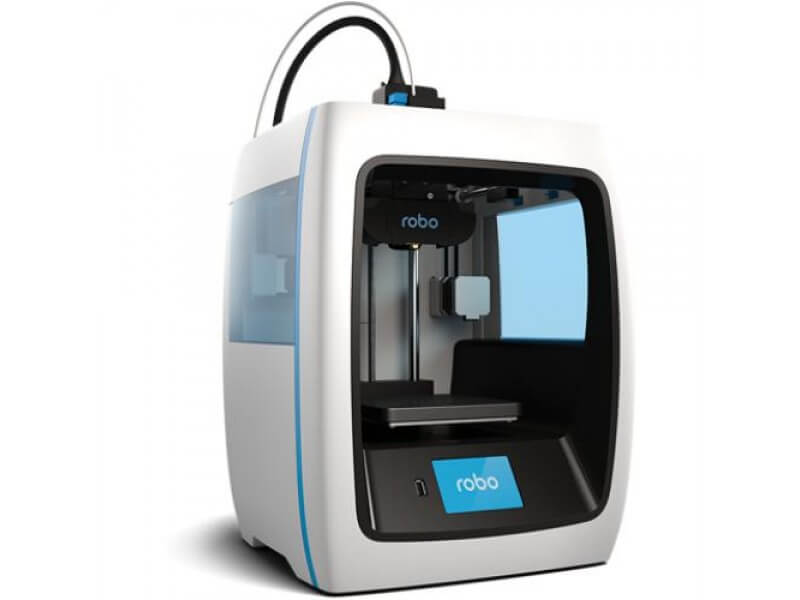
Manufactured by Robo 3D – a company based in San Diego, USA, Robo C2 is a desktop 3D printer. The machine has a simple design that provides easy access to its build platform. The printer is compatible with the Robo application and can be connected via Wifi for an overall smooth user experience.
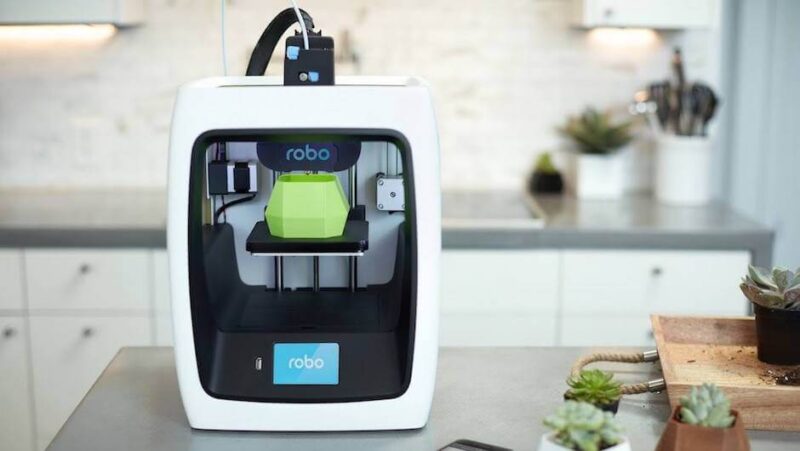
C2 is a compact 3D printer that is engineered to fit anywhere at your home or workplace. It provides an efficient print size of 5 inches * 5 inches * 6 inches that allow printing parts and functional prototypes in one go. A 3.5-inch built-in touch screen interface permits control of various functions of the printer with one touch.
The printer offers leading print speeds using which you can print parts and functional prototypes which can take tens of hours on other printers in lesser time.
An automatic self-leveling tool ensures adjustments of nozzle height with the print bed in one touch. Moreover, the printer lets users print with more than 20 materials that do not require a heated bed, amazing, yeah?
So, let’s take an in-depth look into the printer’s features to know more about this affordable and intriguing 3D printer.
Features
Robo C2’s print bed is removable which makes it easy for you to uplift the finished creations. The printer can print between layer resolutions 20 microns to 300 microns. Its hot end can reach a temperature up to 250 degrees Celsius.
Users can easily manage the 3D printer by downloading the free Robo application that allows the management of prints over Wifi. Files can be transferred via tethered or untethered USB connection.
The machine is completely packed with more such amazing features, let’s have a look at them one after the other.
Extraordinary resolution
Robo C2 prints parts and functional prototypes in resolutions ranging between 20 to 300 microns which is an anomaly for FDM desktop 3D printers falling in the same price range. Most 3D printers find it difficult to produce smooth angles and curves in these resolutions, but surprisingly Robo C2 excels in doing so.
The machine specializes in creating parts that fit into one another. Or typical objects that users need to print using duplication with extreme accuracy. In short, C2 delivers consistency with good part quality.
Straightforward design
The printer has a sleek and modern design that is enclosed on three sides which helps protect the prints. It uses a 3.5-inch touch screen interface for allowing a user easy control over various functions.
You can upload objects using a USB connection. Magnets in the printer’s body ensure that the print bed is attached and can be removed easily at the end of the print.
All of this is contained in a small build volume of 18 inches * 13 inches * 12.8 inches running quietly so that your office or home environment is not disturbed. Also, it is an anomaly to have an enclosed build area without any physical door between yourself and the print bed.
Printing from an iOS mobile application
This is among those features that will be loved by experienced as well as inexperienced users. It gives one the ability to monitor their prints remotely from mobile. The Robo application is all-inclusive and allows for easy-to-use operation.
When paired with the machine’s onboard slicing ability, users can easily download models straight from the source and start making them remotely without modifying the file manually. Moreover, operators can store up to 4 GB of memory on the Robo C2 and access the file library from the touch screen.
Error-free print process
There is no sticking of filament with the printhead or damaged printing. Each and every print is completed without any issues, the printed parts stick nicely over the print bed. Also, they are very easy to remove when printing is completed.
After the printer receives a print file from the software it starts the printing procedure. All the three stages of the 3D printing process i.e. pre-printing, in-printing, and after-printing are user-friendly.
High-quality prints
Apart from delivering prints at a considerable speed, C2 also guarantees high-quality prints, even at the lowest resolution.
Although the bed leveling of the printer is manual, it needs to be done only once till you decide to move the printer somewhere else. Moreover, the build area of the machine is considered large enough to allow users to print larger models.
Smart control
Robo C2 allows users to control every detail that is possible on the part in real-time. Thanks to the 3.5-inch long touch screen interface present on the printer’s body that is paired with precision sensor technology permitting complete control over every aspect of the print.
Wi-fi connectivity and printing over the phone
C2 connects with the Wi-fi network of the place it is accommodated which permits using Robo application for the most accurate 3D printing experience. So, users can easily print any object using their mobile phone even if they are not physically near the printer.
Easy to use interface
Robo C2 can be controlled either via the software or touch screen interface. The printer manufacturer recommends two software options:
- A version of Cura was tweaked for use with Robo C2.
- Matter Control – a program offered by the printer manufacturer.
While the former is a simple-to-use program providing a straightforward and clear way for loading a 3D model and preparing it, the latter also serves the purpose. Moreover, it allows C2’s users to prepare a 3D print by loading a 3D model downloaded from 3D printing repositories such as Thingiverse. C2 is adept enough to prepare the model for printing, slicing, and creating the path that the print head will then follow.
Specifications
Robo C2 prints parts and functional prototypes using FDM 3D printing technology. It offers a build volume of 5 inches * 5 inches * 6 inches while printing with materials such as PLA and 22 others. The minimum layer thickness offered by the machine is 0.02 mm. So, it’d be difficult to notice the layers on the surface with naked eyes.
Also, the printer offers an XY accuracy of 0.01mm, meaning that the printed parts will exhibit intimacy with the imagined one. The maximum print speed offered by C2 is 250 millimeters per second implying that the parts or functional prototypes that took more hours to be 3D printed will be printed in a shorter amount of time.
Users can connect with the printer using USB as well as Wi-fi. It has a standard nozzle diameter of 0.4 mm and can fit in filaments with a 1.75 mm diameter.
Price
Robo C2 is available for $679.
First Impression
Apart from the Robo C2 3D printer, users can find the following things:
- Quick Start Guide
- Autodesk Fusion 360 design software (1 year free)
- Test Print from the production line
- 10 Spare Bed Sheets (1 BuildTak sheet already applied to your print bed)
- Robo Stickers
- 19V Power Supply
- Filament Feed Tube
- 2 Filament Spool Holders
- Toolbox with Extruder Face Plate cover
- 3 Allen Wrenches
- Tweezers
- Lubricant
- Stylus and Z-Offset Tool Robo USB Drive
- 250g Robo Filament Spatula
C2 is generally housed in three Styrofoam pieces that are secured together using a nylon strap. So, all you need to do is simply lift the printer from the box via the strap and set it on a table.
Then unclip the black nylon strap and remove the two halves of the top Styrofoam shell. Lastly, lift the printer out of the bottom Styrofoam piece using the handholds on the bottom of your printer.
The printer’s accessories are carried in the blue accessories box present inside it. So, simply slide that box out and ensure to remove the foam. After doing so, you can easily take off the additional shipping materials as well as the zip ties. Four orange rod holders are also to be taken off. Then, simply using your thumb push the clip over that is present at each corner of the top gantry! Finally, remove the zip ties by securing the rods to their plastic brackets.
Setup
For the initial setup of C2, users need to access the toolbox present inside that is found on the extruder’s faceplate cover. Take the toolbox out from its place and keep it over the Extruder faceplate cover.
Observe how it is held with magnets and hence will pop right in. After doing so, connect the printer with a power supply and then plug it into the AC outlet and switch it on. You are good to go.
Print Type/Cost
FDM 3D printing technology procedure starts by heating a filament spool up to more than its glass transition so that it is converted from solid to liquid.
The melted filament is then allowed to flow from the nozzle system to the print bed, thereby depositing layers as per the part’s geometry. After the deposition of parts layer by layer, the 3D printed part is allowed to cool down and sent for post-processing, if needed.
The print cost per part is generally lower compared to other 3D printing technologies. It depends on various factors starting with the part geometry; the material used for 3D printing it, the amount of infill needed, and support structures.
Print Quality
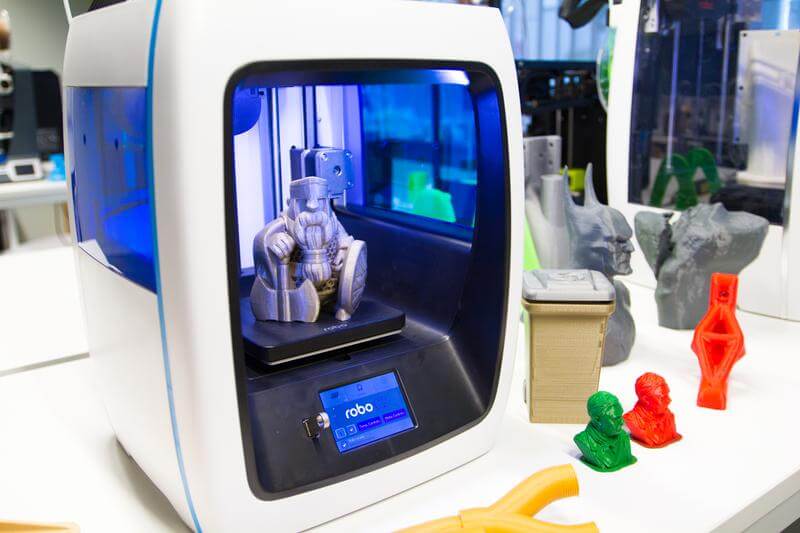
 Credit: digitaltrends.com
C2 manages to produce impressive prints with excellent surface quality. The layers are very well blended with each other, even especially tough prints as the ones like geometric sculpture are well-printed.
They possess clean and sharp points on the sculptures after the supports are removed. Test models like gears are also known to have a decent print quality.
Parts that are to be attached after 3D printing also fit together very well, you do not need to clean the prints or remove any sort of excess material.
Software
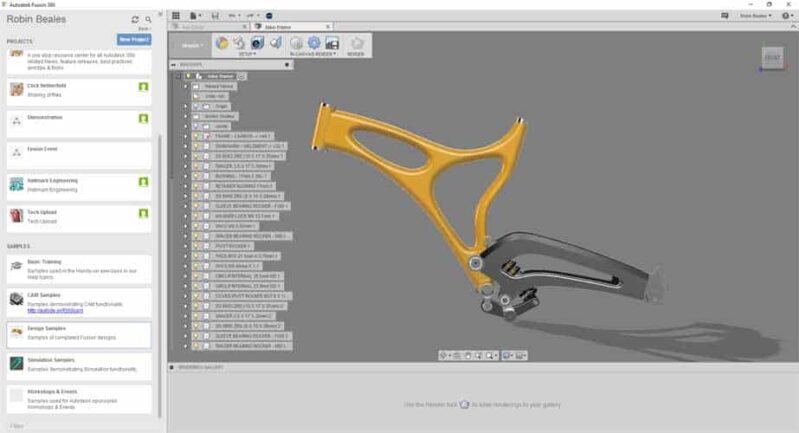 Credit: 3dbeginners.com
As mentioned above, there are two options for software i.e. Cura and Matter Control. The former is popular open-source software, whereas the latter is the one that Robo has come with itself. Cura is an easy-to-use program that offers a huge range of features as well as controls and is user-friendly.
Customer Support
Everything from manuals to tutorials, maintenance tips, and guides are also available on Robo’s website. In case you do not understand anything, you can always ask for assistance from the forum, or call/email Robo directly.
Parameters Influencing Buying Decision
The chief facets that are good to know before making a buying decision are mentioned below.
3D Printer Cost: Considering the print quality and build volume offering, the cost of Robo C2 is affordable.
3D Print Speed: C2 provides excellent print speed that allows users to create parts faster than 3D printers in the same price range.
3D Print Quality: Although being an FDM 3D printer, C2 manages to provide impressive surface finishes on parts and functional prototypes.
3D Printer Capability: Primary 3D printing users can print simple as well as complex geometries with basic knowledge in one go.
3D Printer Practicality: C2 has a very accessible construction that allows for hassle-free operation.
3D Printer User Expectations: The printer is mainly targeted towards first-time users of 3D printing and is willing to learn the basics.
The Verdict
Robo C2 produces excellent quality 3D prints using PLA filament and the software interface. It is a flexible and easy-to-use 3D printer that can print directly from online 3D printing repositories. From the list of 3D printers that are primarily meant for entry-level users, C2 stands out because of its eccentric feature offering.
Although the printer does not offer automatic bed leveling, its bed only needs to be leveled once when it settles at a particular dedicated place, not after that. So, it’s just a one-time hassle. Overall, it’s a very appealing option for those who are looking for an affordable FDM desktop 3D printer.


