What is the value of technology that a layman does not know to operate? To answer this question, imagine the Smartphone that you are currently using is yet to be a part of your life.
The discovery of this Smartphone has taken place, but the offering of the device to you will take time. What value would such a Smartphone have for you?
The conclusion by giving you the example of the discovery not being offered to a layman is simple: Beauty is in the sight of the beholder.
So, until all the important discoveries made by the scientists are not offered to the layman and aren’t found useful, they are not worth much value to them. In this article, we are going to share about desktop 3D printing.
The reason for our mention of the above example is to start this article with the history of desktop 3D printing.
The urge to build something essential for layman from the discovery of 3D printing technology was the foundation of desktop 3D printers.
The year 2008 was the starting year for the Rep Rap project that is an abbreviation for “replicating rapid prototype.”
This project began the idea of making low-cost desktop 3D printers that could print many of its components.
And the goal of this project was to get as many hands as possible on the 3D printing technology. Facing the challenges of that time led to discoveries.
Makerbot, in the year 2009, was one of the main companies that were driving the vision of transforming production through 3D printing.
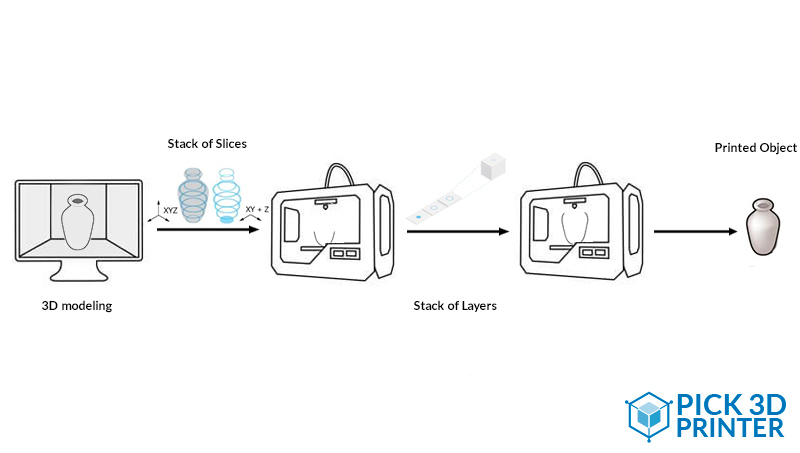
To know how a desktop 3D printing system works, you have to know its basic steps, which you will get to know in this article. Let’s start with the first and most important step.
How to Make Designs for your Desktop 3D Printer?
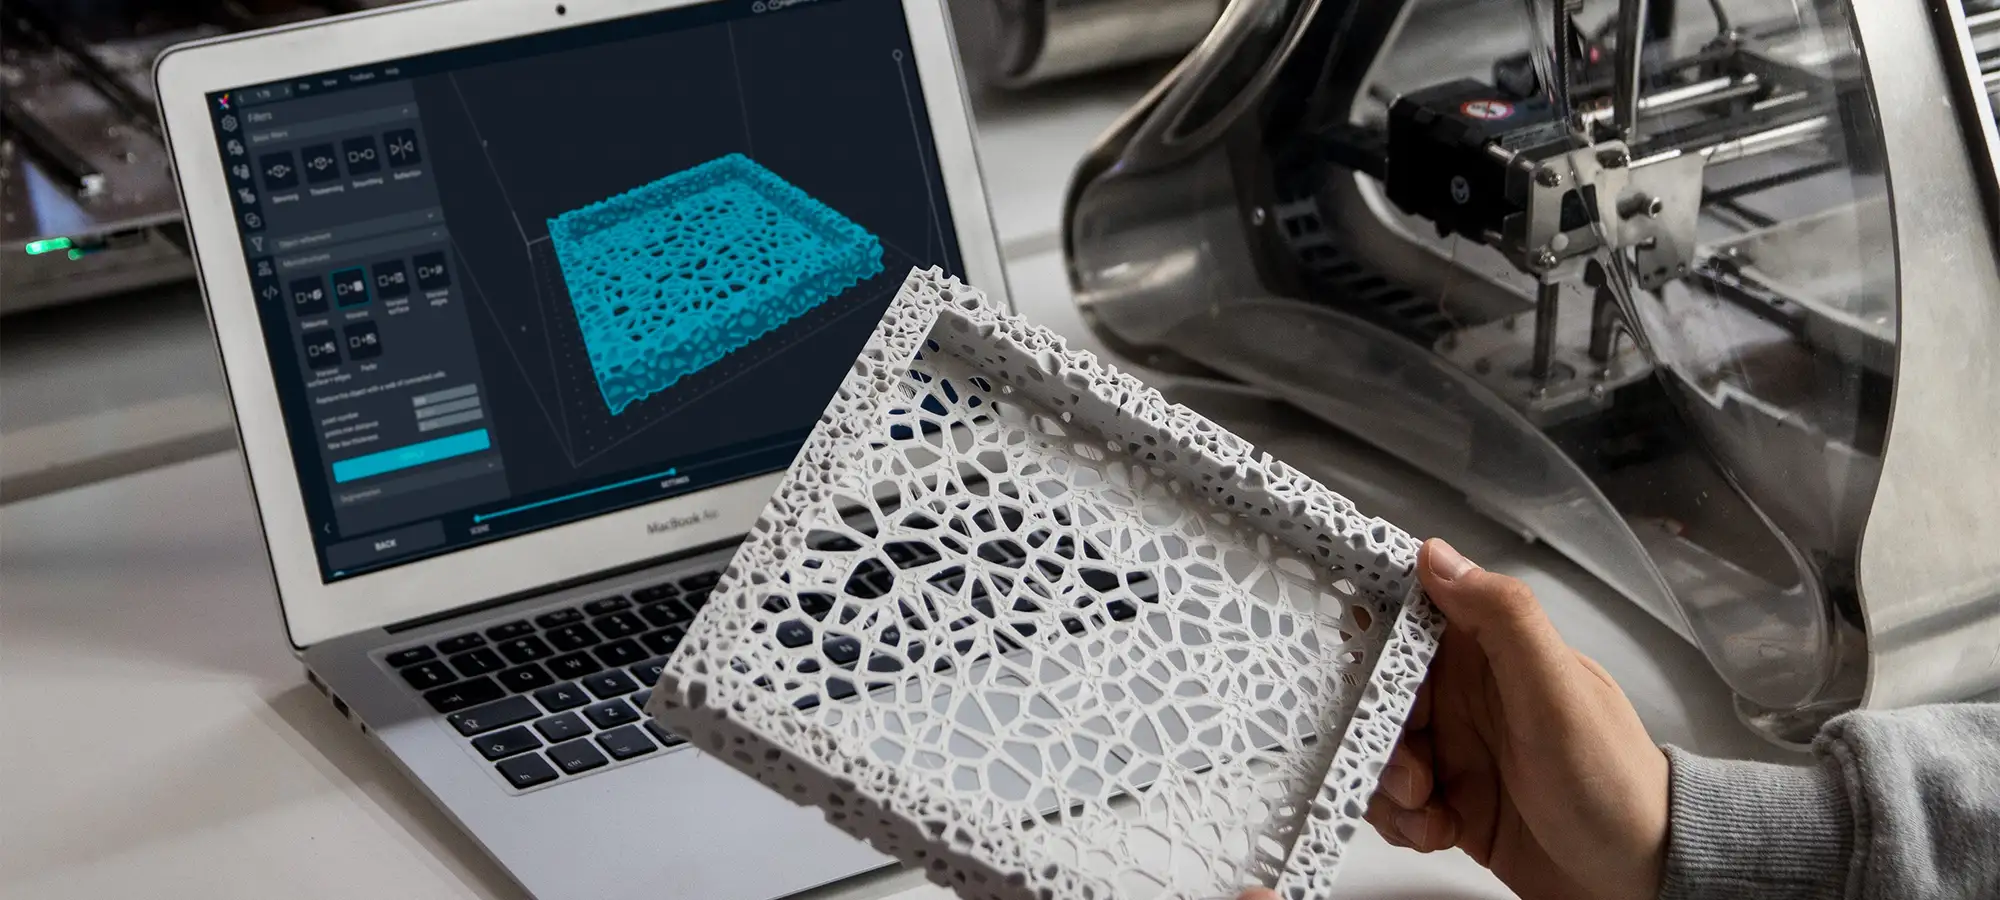
The first step in not only desktop 3D Printing but also industrial as well as medium-grade 3D printing is to create a blueprint slash three-dimensional digital file of the object we want to print.
The most common way of creating a digital model is with the available Computer-Aided Design software. And for assisting you with that, there is a large range of professional and entry-level software that can produce a file suitable for 3D Printing.
The first step for desktop 3D printing can be divided into three parts.
- Designing: Commonly used software for 3D modeling are Blender, SketchUp, AutoCAD, SolidWorks, Maya, PhotoShop, or ThinkerCad. You can also use others for creating your designs. There is no restriction on selecting anyone, you can use any 3D modeling software for creating a 3D printable file.
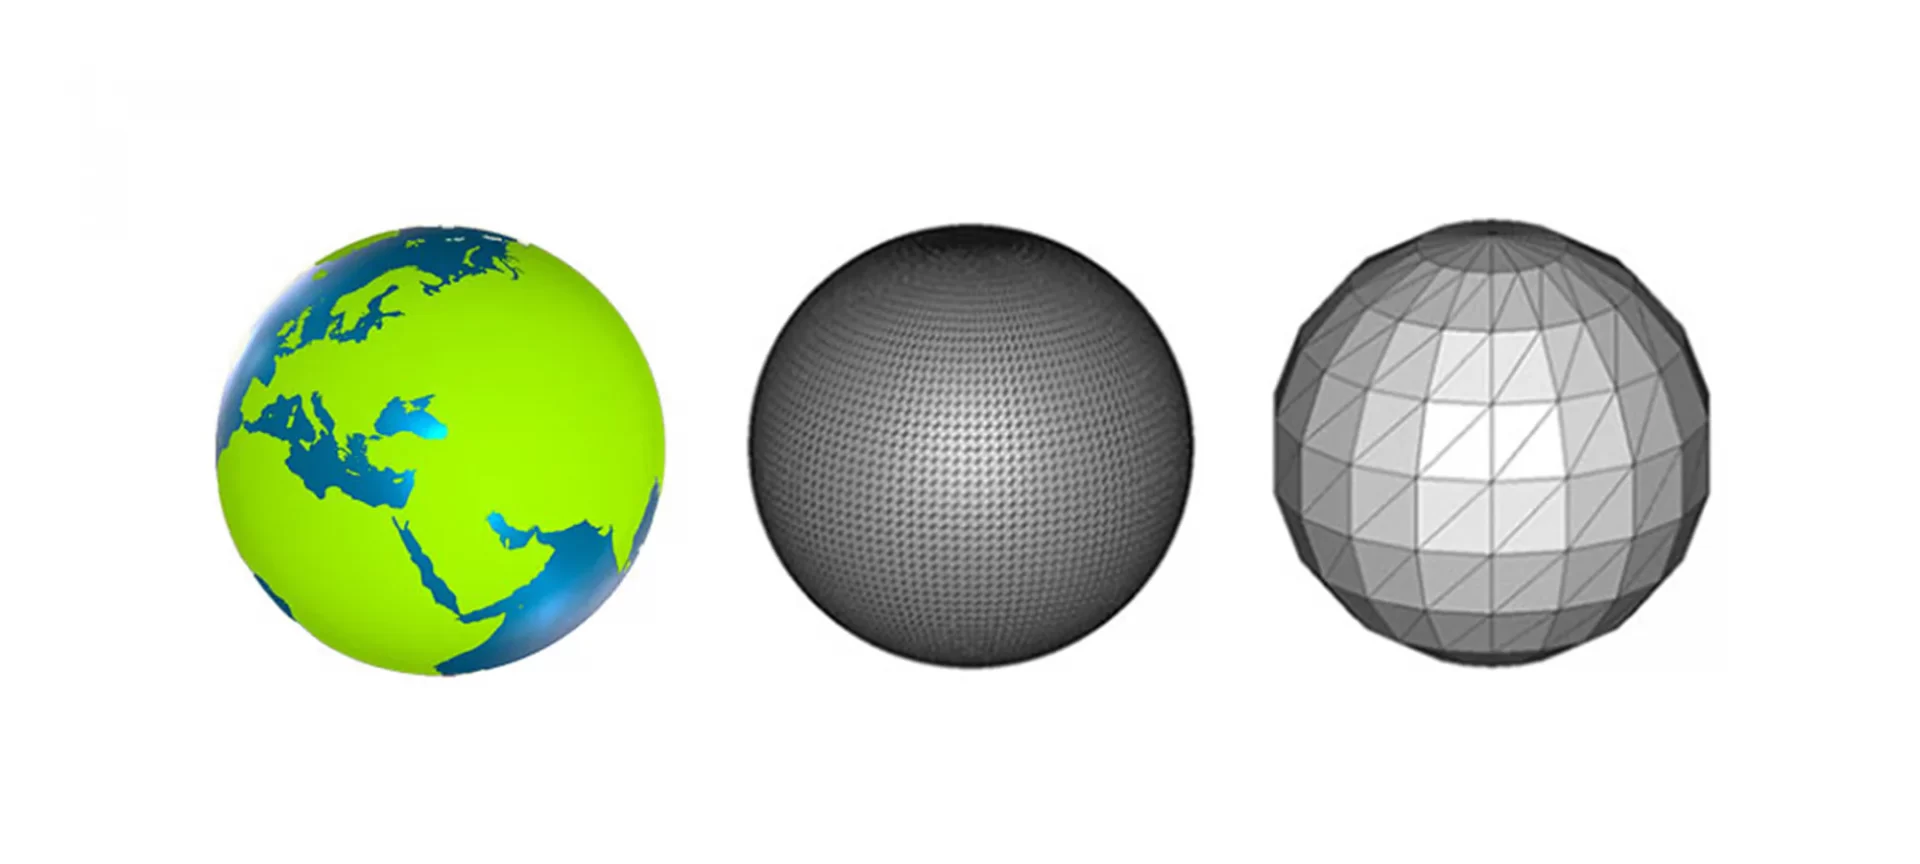
- Scan: Another way for creating a three-dimensional digital file is through 3D scanning. 3D scanning is an upcoming technology, closely related to 3D printing. This technology analyzes a real-world object and instantly creates a digital replica. It is widely used for reverse engineering tasks of industry professionals. In 3D Scanning, once an existing object is digitized, we also have the option to modify it before 3D printing the same. Provided, you need a 3D scanner for this process.
- Downloading: In case you need to complete your project minimally and do not want to go into much of technicalities. Say, you have minimal patience and just want to go ahead and print something; you can get lots of 3D print files from online 3D print file repositories like Thingiverse, YouMagine, CrabCad, and MyMinifactory Shapeways. You can download or buy files that other users have modeled. And almost all of these files are 3D Print ready in most cases!
Before starting to 3D print a file, you need to meet its design requirements for sending them to the printer.
Remember that designing for Additive Manufacturing should be done keeping in mind the real world.
So, you need to take into consideration things like proper scale size, minimum wall thickness, manifold/watertight just to name a few, which we are going to take a deeper look at a bit later.
Desktop 3D print file designing needs one more aspect to be focused upon i.e. the build volume.
As desktop 3D printers are mostly offered for home printing, they have a smaller build volume than industrial 3D printers.
So, if you have to print an object bigger than the desktop 3D printer’s build volume, you will have to think of assembling different parts.
And hence you will have to break the design into parts and then when all those parts are printed, assemble them into one.
Conversion of the File into STL File Format
Once you have finished doing the Computer-Aided Designing you can send it to the printer. The only thing that is remaining to ensure is that the file should be in an appropriate format.
Like we have.doc for a word file, the most common 3D Printing file format is called STL, that stands for Stereo Lithography, and named after the first-ever 3D printing process.
Of course, there are other meanings of STL such as “Standard Triangle Language” and “Standard Tessellation Language”.
But you do not need to remember all this, all you have to know is that your file should be converted from any other extension to .STL which is a usable file extension.
There are two things included in this file format:
- Triangular mesh (polygons).
- The data that describes the layout/surface of a three-dimensional object.
Alternatives to these file extensions are.OBJ and .3MF. You should also be informed that all these file formats don’t contain color information.
For getting 3D printing in full color, you need to use file formats like .X3D, .WRL, .DAE, .PLY. And then convert your file into .STL format.
Something you should also know is, not every STL or OBJ file is 3D printable by default.
Even these file formats need to meet certain criteria like a maximum polygon count, water-tightness, proper physical size, minimum wall thickness, etc.
However, with the advancement in desktop 3D printing, there are printers available that allow users to upload files in other formats as well.
So, important thing is to know whether the desktop 3D printer, the 3D file is meant to be printed on, allows the use of other formats than STL ones or not!
Slicing of 3D File for Desktop 3D Printer Using Computer-Aided Modeling
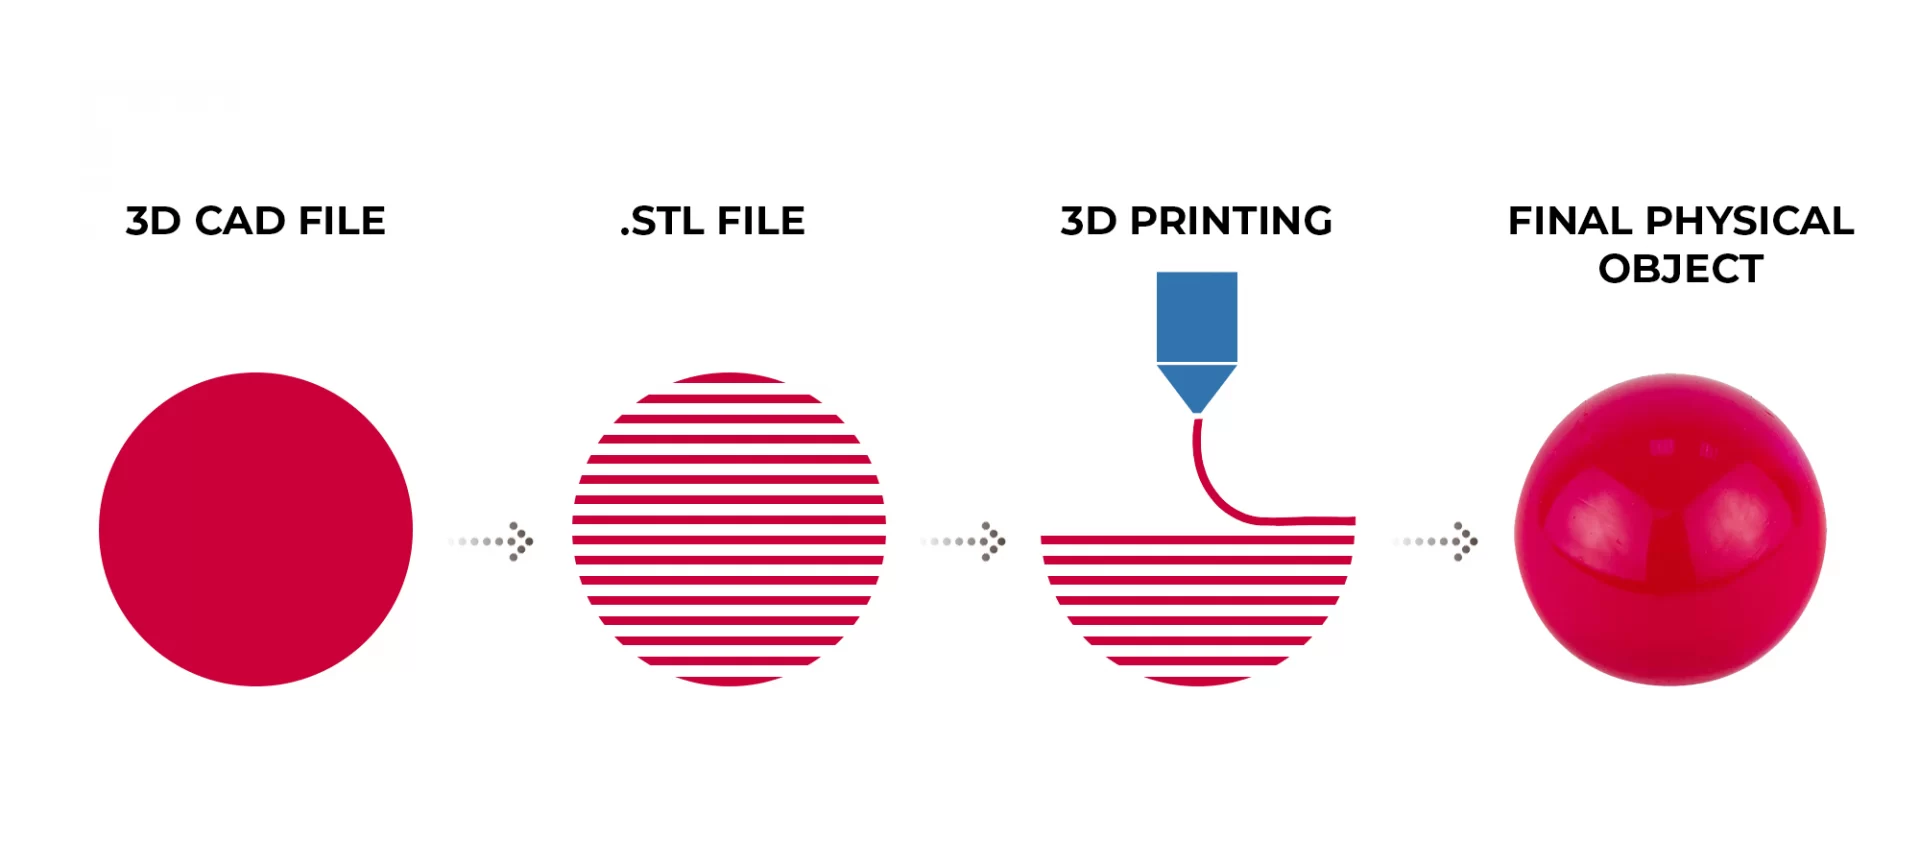
This process is also known as the process of decoding. Because in this process we translate the 3D File into specific instructions for the 3D printer to communicate.
Once you learn this, it is fun to go through this process. All you need is special software to do that.
Basically, Slicing as the word suggests, is dividing or chopping the 3D model into hundreds or thousands of horizontal layers. All of the 3D printing happens in layers.
So, there is a need for a file to tell the machine exactly what to do, step by step.
Once these files are Sliced, a new file format is generated called G-code and gains an extension .gcode.
G-code is also the numerical code programming that is not only used in computer-aided manufacturing to control automated machine tools like 3D Printers but also in CNCs.
Like we have language for humans, G-code is the language of the machine and what we use to communicate with it!
If you own a desktop 3D printer you will have to do the slicing on your own, there are a lot of settings you can adjust to get the best result out of the printer.
You do not require any coding though. In case you are using a 3D Printing Services Provider, you don’t have to worry about Slicing because the provider will do it for you.
For slicing a desktop 3D printing file, you do not need any special requirements.
If you are using it for your home, just make sure you are using the settings that your printer can easily associate with. The easier it would find, the faster the printing will happen.
Desktop 3D Printing
After slicing, you can freely upload your file on your desktop 3D printer using the connectivity settings it provides.
Most of the desktop 3D printers can be connected via Wi-fi, USB, or SD cards. Depending on what option your desktop 3D printer offers to connect you with, start transferring your file on that device.
And once that is done, do the step that you were waiting to do for long.
Also depending on your printer, you will have to see whether it can calibrate automatically or not.
If it cannot, you will have to manually calibrate the printer according to the part or functional prototype that you are willing to 3D print with.
These desktop 3D printing machines are made of many moving and intricate parts that demand correct maintenance and calibration to produce successful prints.
Most desktop 3D Printers do not need to be monitored after the printing has begun and almost all of them come with a touch screen interface that offers monitoring of the complete printing process via an inbuilt integrated camera.
As long as there is no software error or the machine does not run out of filament or resin, it will have no other issues during the printing process.
How to Remove Parts from the Desktop 3D Printer and Post-process them?
A desktop 3D printer used to only come based on Fused Deposition Melting 3D printing technology.
FDM uses a filament for producing parts and functional prototypes.
For building intricate parts and functional prototypes this technology needed its users to use support structures for manufacturing intricate parts and designs.
So, for every desktop 3D printer based on FDM 3D printing technology, you must take special care in post-processing for removing structure which is printed, separating them from the support structures, and taking extra care of the part or functional prototype not getting damaged.
But then, desktop 3D printers started coming into the market which was based on the Stereolithographic printing process.
And this process has some inherent benefit over the FDM 3D printing process. You do not need support structures for 3D printing intricate parts or functional prototypes.
Here manufacturing of the complete part is not done from a filament; instead, the liquid resin of the same material is used as a raw material for the creation of the complete part or functional prototype.
Due to such a characteristic, this technique guarantees to offer more layer resolution than FDM and higher quality of parts or functional prototypes than FDM 3D printing technology.
In the majority of cases, the 3D printed parts or functional prototypes are rough and do not have a finished feel.
And here is where the right techniques and craftsmanship makes a difference. You can increase the surface quality via sanding, painting, polishing, and other post-processing methods.
Doing these processes makes the printed parts accurate enough to be used in industries such as aerospace defense, medical, academic, and home use as well.
Post-processing can be a critical and time-consuming operation, and for the same reason, it is regarded to buy a desktop 3D printer that does not need to be post-processed if you are a novice.
But as the technology evolves, the automation of these steps is following up. Just as desktop 3D printing can now be done using SLA 3D printing technology.
The Conclusion
Desktop 3D printing is typically recommended for starters in the field of 3D printing technology.
People who are looking to experiment for doing business or starting their research work or want a manufacturing tool for their home are known to have desktop 3D printers.
The only reason why professionals look for a higher grade is larger build volume as well as high-quality assurance.
Some people also wish to print with specific technologies that are not yet available in desktop 3D printers.
That can also be a reason for choosing other printers and not desktop 3D printers.
But one thing is for sure, desktop 3D printing is the easiest when compared with moderate level 3D printing and industrial-level 3D printing.
And this is just because the level of risk involved with this type of printing is lesser than others.


