One of the industries that 3D Printing has connected within an inseparable manner is jewelry. 3D printing is compatible in fabricating with the most precious metals in the world and allows various 3D printers to develop intricate designs on the same.
And one of these preciously available rare materials with which you can 3D print jewelry is Silver. As the topic of this article hints, we are going to take you through the most basic yet important tour on Silver 3D printing.
The 3D printing technology with which Silver can be 3D printed is called DMLS i.e., Direct Metal Laser Sintering. If you haven’t explored this technique of 3D printing yet, don’t worry, because we are going to start exactly from there.
What is Direct Metal Laser Sintering?
As the name suggests, this technique is directly going to laser sinter the metal that you wish to 3D print with. In Silver 3D printing, that metal will be Silver of course.
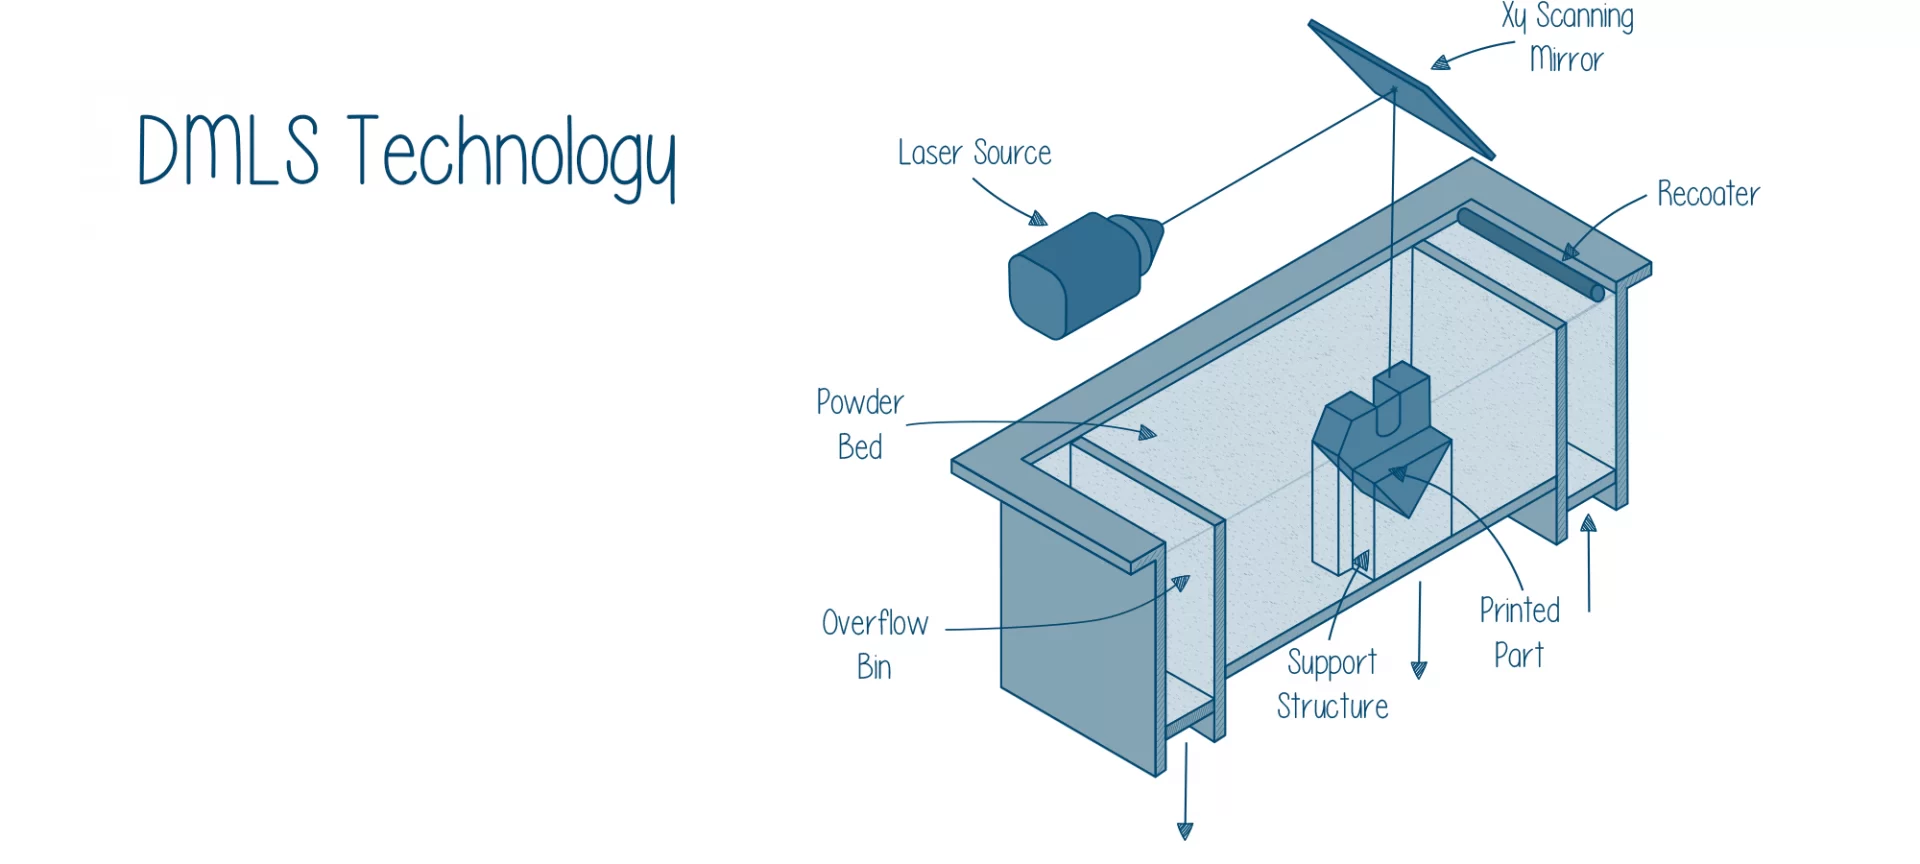
Direct metal laser sintering method of additive manufacturing involves blasting a bed of metal powder with a fine laser source of high power. It fuses the metal powder together one layer at a time for creating the finished part or prototype.
The resulting part can then be machined and finished in the same way as the one that’s produced by CNC.
This method was introduced in the early nineties and since then DMLS has been used to produce a wide range of prototypes and functional parts not just in the jewelry industry but all across the automotive, aerospace, and medical/dental industries.
Process of Manufacturing
Like all other 3D printing technologies, DMLS too follows a simple procedure that involves model making, slicing, and then printing layer-by-layer.
- Step 1: A DMLS 3D printing procedure starts by filling a hopper with a desired metal powder. In the case of silver 3D printing, the hopper will be filled with Silver. As soon as this is done, the heaters present inside the printer will bring the powder to a temperature near the sintering range of the metal or metal alloy. As you know, Silver is a precious metal with very high electrical and thermal conductivity. The metal is composed of 93% solid sterling silver and a 7% metal alloy of copper and zinc.
- Step 2: In step two, the building of geometry will begin with the silver, in case you are silver 3D printing and other metal in other cases. The metal will be spread on the build platform, and as soon as this would be the laser will begin its way to sinter the already laid down metal powder and convert it into a solid form. This would continue until the complete geometry would be made.
- Step 3: Now it’s time for the cooling process to start up. The already sintered part will be heated and hence could not be taken into use immediately. So, it has to be removed from the build plate and be cooled down. After this, its support structures have to be removed, and then the part can be sent for post-processing.
- Step 4: Post-processing the DMLS manufactured Silver parts can be done using techniques like machining, heat treatment, or surface finishing.
There are many 3D printing service providers which help in 3D printing Silver, such as iMaterialise, Shapeways, and Sculpteo. All three of these service providers can get to 3D printed silver parts using a mixture of 3D printing and the lost-wax casting method.
Because of this, the finished product made of sterling silver possesses high material density and ultimate tensile strength than traditionally produced sterling silver.
Also, because of extra polishing and casting, you will not get to see any printing layers and the complete object surface will be smooth and have the color and shine exactly like the ones that are present in your mind.
What are the Finishes of 3D Printing Silver?
Below mentioned are the five finishes in which Silver is available to 3D print.
Glossy
Gloss models are post-processed in a magnetic tumbler and undergone a technique that is the least aggressive process for silver.
The end result of this finish is ideal for maintaining a high level of detail; however, surfaces will not be completely even and as smooth as high-gloss models. But don’t worry there are high glossy models as well in existence.
High Glossy
High Glossy models undergo a particularly vigorous mechanical polishing process. Such a method will round off sharp corners of the 3D printed silver parts.
After any part undergoes this technique, the silver then will have the lowest level of detail, but in return will also have the highest level of smoothness and shine.
Satin
The main benefit of these models is that they are manually post-treated with a wire brush to obtain the effect of lines on the metal.
Sandblasted
3D printed silver models, to get a sandblasting finish are post-treated with an abrasive blasting operation that gives their surfaces an even and smooth, matted look.
Antique
This silver features very shiny and smooth outer surfaces. Its specialty is that even while doing that the deeper areas of the 3D printed silver parts will remain darker and unsmoothed.
How to 3D Print Silver Extraordinarily?
There are six basic tips and tricks that you need to keep in mind while making your first design or uploading it to make a part of any of mentioned 3D printing service providers.
- Suggestion regarding wall thickness: The recommended minimum wall thickness for Silver is 0.5 mm. It is to be noted that this is for building breakable parts. For making non-breakable parts, the experts advise adding some extra strength and choose a minimum wall thickness of 1 mm.
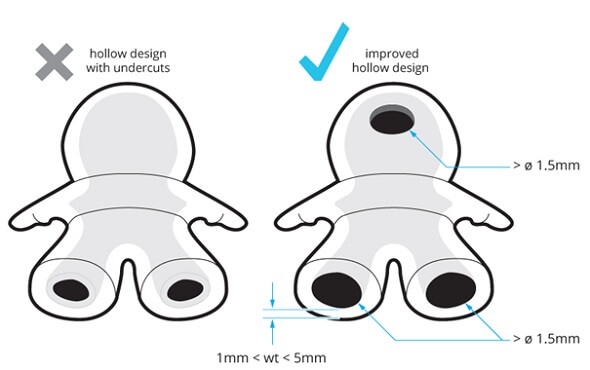
- To make a part with a hollow design: If you decide to print a hollow silver model, you need to include several escape holes in your design which will let the stress escape from that area. Each of these escape holes needs to be of a minimum diameter of 1.5mm. Hollow designs should always have escape holes.
- How many features Size to keep: According to the recommendation, the smallest features of your 3D printed Silver design need to be at least 0.3 mm in diameter and 0.4 mm in height, for unbreakable details. Otherwise, it is better to choose a diameter of 0.8 mm and make sure that the features of your 3D model are printable.
- Polishing & Post-Processing of 3D printed silver parts: Post-processing steps or finishing will have different effects on your 3D printed model. As mentioned in the section above this, the gloss finish will erode your model by a range of 0.05–0.075 mm. Similarly, the sandblasted and satin models will erode it by a range of 0.1–0.15 mm. Lastly, the high gloss and antique models will also erode the silver 3D printed part by 0.1–0.15 mm. Note that sharp corners on your part will be rounded.
- Interlinking Parts in a design: Keep in mind that for some parts interlinking would not be possible. This applies to printing objects, hinged, and interlinking parts such as chains. 3D Printing Silver by interlinking parts in it is not possible!
- For creating an Antique effect: To create a good amount of ‘antique effect’, ensure that sunken or darker parts of your design have a minimum area of 0.4 mm x 0.4 mm and that they are at the least 0.4 mm deep.
The Conclusion
Metal 3D printing is an extremely increasing concept. The whole idea to get metal parts with an unmatched level of quality that was never before seen using traditional manufacturing is brilliant.
It increases the efficiency of applications in which it is used such as jewelry, aerospace, automotive in particular. Various metals have experimented and their 3D printed parts are put into test and application in many industries.
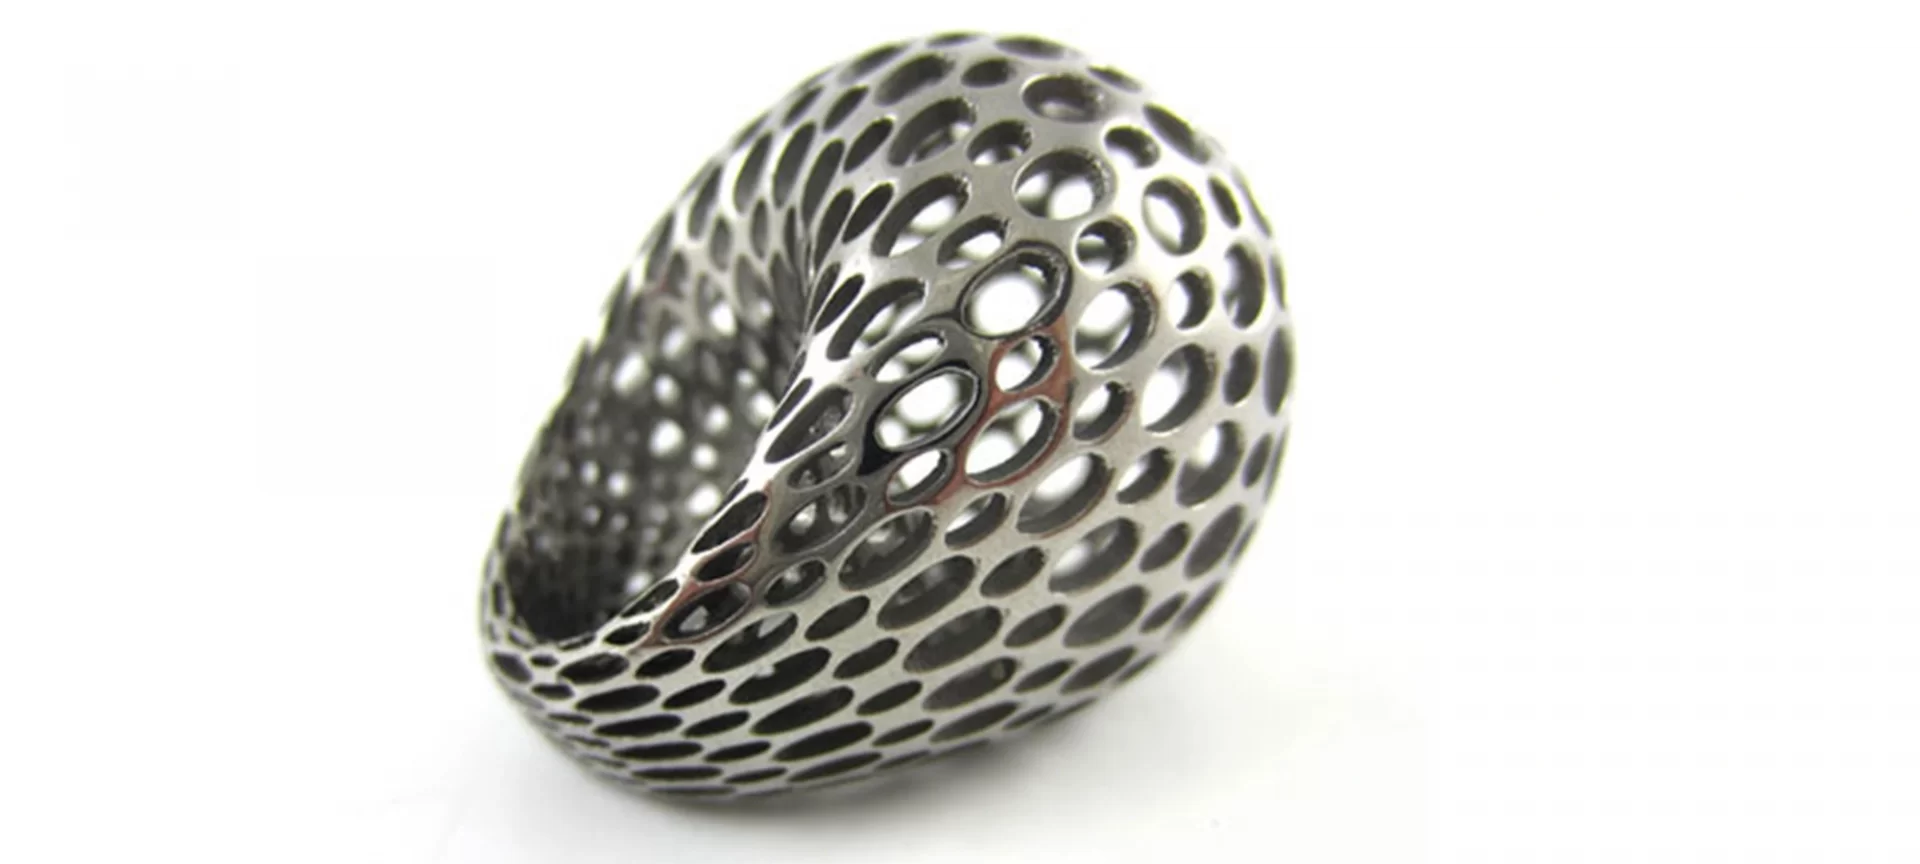
Silver 3D printing is particularly an outcome of a similar kind of experimentation. DMLS 3D printers of various companies manufacture rings and other jewelry-related accessories using this technique. And the result is mindboggling.
You can get dimensionally accurate designs that you’ve always wanted to encounter. It seems as if your complete idea in mind can be replaced by a physical silver-made part. And this has been possible because of the benefits 3D printing brings in.
You can also mass customize, create never before possible shapes and geometries, and a lot more. All you need to do is simply create its 3D model in the models available online.
The only limitation of 3D printing Silver is that it’s costly as DMLS 3D printers are available at a price of thousands of dollars.
But this problem of cost can be dealt with 3D printing service providers such as iMaterialise, Shapeways, and Sculpteo. They can deliver the parts to your place. All you need to do is simply upload a 3D file of the part that you are seeking to 3D print.


