|

From managing to unwrap the kit to fix every part of the printer at its place, Anet A8 is all about assembling and learning on your own.
It is a low-cost 3D printer that still manages to provide you some of the most amazing features.
Features
 Credit: ebay.co.uk
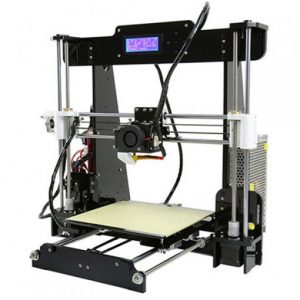
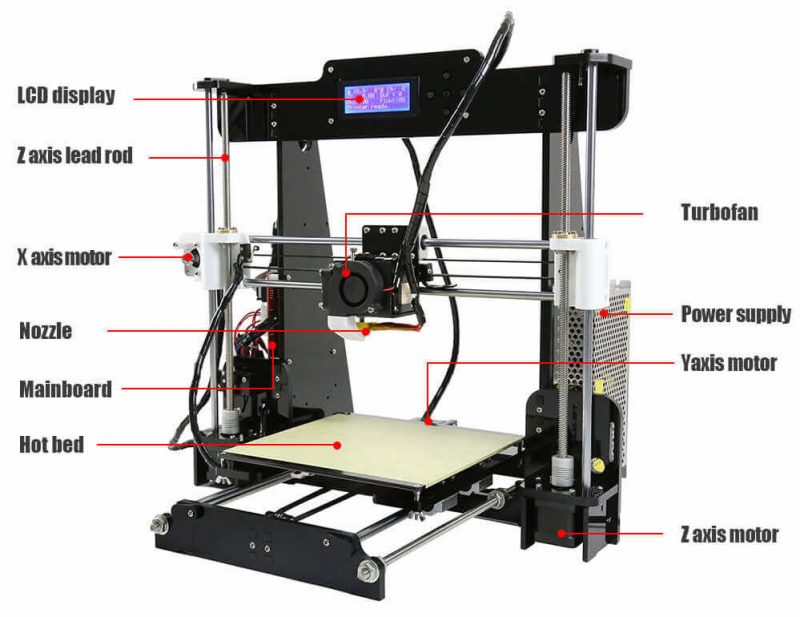
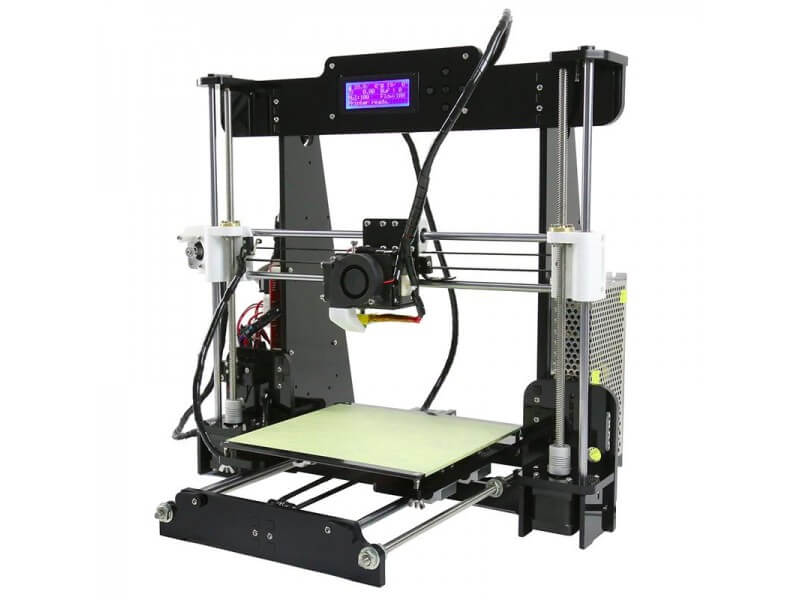
Anet A8 offers a step-by-step experience of a 3D printer kit. It features a laser-cut acrylic frame of 220 mm * 220 mm * 240 mm.
Offering huge build volume is just the start there are many more features to be unveiled.
Open Filament System
If you are someone who likes to play with various kinds of 3D printing materials, Anet A8 is the 3D printer you are searching for.
Its open filament system makes it compatible with a number of materials like ABS, PLA, Woodfill, Nylon PVA, PP, and many others.
This would enable you to make parts and functional prototypes that can find applications in various industries.
All-metal Pulley system
This feature is something you will rarely find in any other 3D printer of the same price range. All the rods, gears, bearings, and connectors used in Anet A8 are made up of stainless steel parts that allow for more precise and smoother printing.
It also provides an overall sense of stability while printing as opposed to any other material. All-metal pulleys provide enhanced functionality and performance, quick-release feed gears, and efficient filament extrusion which increases the print speed of the process.
Onboard LCD
There is an onboard LCD with five keys present at the top of the frame of Anet A8. These keys enable you to do functions on this 3D printer that would have otherwise taken a lot of human effort.
Because of this onboard LCD, the human intervention in the complete 3D printing process is lessened than the normal which increases the overall efficiency of the process.
DIY Kit
If you are someone who is willing to learn the complete construction and mechanism of a 3D printer, Anet A8 will satisfy you like no other.
It will provide you a great learning experience as it is available in parts that you need to assemble on your own.
So, you will get to know the placing of various parts and get a sense of accomplishment already before 3D printing your first part of a functional prototype.
Specifications
Anet A8’s dimensions are 500 mm * 400 mm * 450 mm. It features an LCD screen 2004. The nozzle diameter of this printer is 0.4 mm.
The printer weighs 8.8 kilograms and offers a maximum build volume of 220 mm * 220 mm * 240 mm.
It is able to give 0.004mm precision on the Z-axis whereas 0.012 mm precision on the X and Y-axis.
This 3D printer is able to show a print precision range of around 0.1 mm to 0.2 mm.
You can print a part or functional prototype within the printing speed range of 40 to 120 millimeters per second.
The layer thickness range that the printer is able to offer in each and every printed part or functional prototype is 0.1 mm to 0.4 mm.
Anet A8 should be kept in the temperature range of 10 degrees Celsius to 40 degrees Celsius. And the humidity range of 20 to 50 percent.
The filaments that are to be used with Anet A8 should have a diameter of 1.75 mm.
You can print using 3D printing materials such as PLA, ABS, HIPS, etc. The mainframe of this 3D printer is made using Acrylic.
It can be connected using a USB or TF card. You need to give it a power supply of 110 Volts/220 Volts, AC 250 Watts.
Price
At the time of writing this article, Anet A8 is available at $139.
First Impression
The printer has Cartesian-type open construction. There are two stands that are fixed at 50 centimeters apart from each other.
The top of these stands is connected by an acrylic body, in the middle of which the LCD screen is fixed.
These stands are also connected by a print head in the middle of which there is a nozzle system capable of moving from left to right, while the print head is capable of moving up and down using rails.
That’s how the printer can travel all along the board to print a part or functional prototype according to its geometry.
The print bed is supported by the base of this 3D printer because of which it manages to stand on a height. The filament spool holder can be placed beside or at the back of the 3D printer.
It needs to stay connected with the nozzle system of Anet A8. On opening the box you will find three styrofoam slates neatly compartmentalized with each piece to the puzzle.
Within the box, different parts are grouped together and clearly labeled for their classification.
The surface of every piece made of acrylic is protected with sticky tape which also helps you to protect the frame from being scratched and removing them also takes quite an amount of time.
On counting, you find out that there are thirty-eight acrylic parts starting from fixed plates for the motors to the actual frame.
The printer kit also comes with a lot of screws and nuts each type grounded together and labeled. Main parts such as extruder, bearings, motors, and mainboard as well as the power source are all tucked away and properly branded.
Setup
If you are someone who enjoys tinkering with DIY projects, you setting up Anet A8 will be a very enjoyable experience.
However, it will also pose some challenges in terms of understanding the function of all the parts and their placement in the printer.
And to ease up this challenge there is an instruction manual that’s provided with the printer. And there are some thirty-plus sections in this instruction manual, so you also need to beware of getting lost in it.
But there are photographs and videos which will help you ensure that you are on the right path.
The first step of this complete installation process is building the Anet A8’s foundation of the acrylic frame.
The bottom support plate is the one that acts as the rudiment for the two erect side support plates.
The step also includes getting in the plate the top support plate which is the place where the LCD display will be mounted towards the end of the assembly process.
For doing all these M3*18 screws will be at your disposal with M3 nuts. They will ensure that the acrylic frame connects together.
The Chinese manufacturer needs to be credited for sending some extra screws and nuts. After you are done with bringing together the acrylic frame, you will have to work for support lock plates.
These plates will finally be used for keeping the Z leading rod locked and in place. After the basic foundation of the frame is in place, it will be time for you to construct the Y-axis motor.
For doing which you will need the acrylic backplate and the Y-axis motor which will be fixed between the two support plates with the Y-axis limit switch.
If you already have some experience with the basics of FDM 3D printing, the adjustments suggested here are quite obvious.
Once you have assembled the motor on Anet A8’s backplate, you can connect the entire part to the mainframe structure.
Take two threaded rods along the array of M8 nuts and M8 spacers, you can run them from the backplate to the front plate.
They’d soon be covering the print bed so ensure that everything is tight enough and has secured moving.
After doing this, the two Y-axis rods, each with a pair lineage bearing need to inserted through the holes that rest beside it. They will play a vital role in assembling the heated print bed.
Anet A8’s print bed is made up of a fixed Aluminum plate mounted onto the bearings, while the actual print bed is on the top.
It is below this H-shaped Aluminum plate that the Y-axis fixation clamps will be attached. The tiny acrylic pieces are responsible for clinging the Y-axis together and tightly in place.
Printing Type/Cost
Anet A8 uses FDM 3D printing technology wherein parts and functional prototypes are manufactured from a solid 3D printing filament.
The spool holder holds the 3D printer filament with which you wish to 3D print a part or functional prototype.
The printing process starts with changing the temperature of this 3D printer filament from room to glass transition.
And once that is achieved, the melted 3D printer filament will be permitted to travel through the nozzle system and allowed to be laid down on the 3D print bed according to the geometry of part in the sliced file fed to this 3D printer.
After completion of one layer, the print head of Anet A8 would move one layer above for printing the other layer. This process will be repeated when the complete part will be 3D printed.
The cost of 3D printing a part or functional prototype will depend on many factors, starting with the geometry of the object, and the 3D printer filament used in making it.
Followed by the level of infill you wish to construct the object with, the use of support structures or raft, etc.
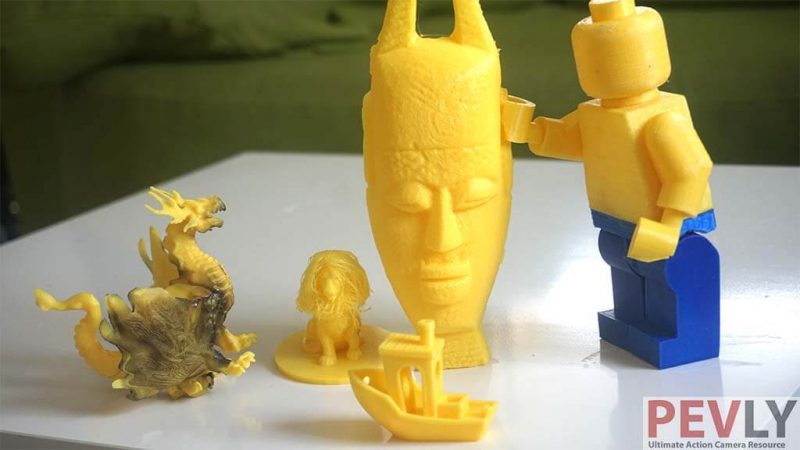
Print Quality
 Credit: pevly.com
Reliable websites report how subjecting Anet A8 to print common parts such as 3D Benchy, gives an extremely wavy print surface finish in the first attempt.
This is a result of the loose belt that’s present beneath the print bed. Even after you tight, this belt up there is a little bit of stringiness in the interior of the boat.
You will have to be cautious to adjust your retraction settings and print temperature in the Simplify3D to get the best printing results with Anet A8.
Software
 Credit: all3dp.com
Anet A8 is compatible with Cura as well as Simplify3D which can accept STL, OBJ as well as JPG file formats.
The output file formats that you will get from the printer will be Gco, Gcode. It can be operated on Windows as well as Mac system.
Customer Support
Massive tutorial videos and mod ideas about this 3D printer are easily accessible from the support team, individual users on Forums of the company as well as Facebook groups.
They sum up to provide extreme doubt-solving. Apart from this, the printer manufacturer can be contacted via their technical support team’s email.
Parameters Influencing Buying Decision
We have listed down Anet A8’s cost, quality, speed, capability, practicality, and user expectations in one-go.
3D Printer Cost: Anet A8 is extremely affordable and makes 3D printing a hobby possible.
3D Printer Quality: Coming at an affordable price, the printer manages to produce decent quality parts and functional prototypes.
3D Print Speed: Competitive.
3D Printer Capability: Anet A8 can produce parts and functional prototypes with different 3D printer filaments, thanks to its open filament system.
3D Printer Practicality: When printing a part or functional prototype using Anet A8, it doesn’t make too much noise or vibrate.
3D Printer User Expectations: Hobbyists and beginners in the field of 3D printing are mainly the two primary uses whose expectations would be satisfied by using Anet A8.
The Verdict
The great part about Anet A8 is that it’s available as a DIY kit so if you are new to 3D printing it will be a great learning opportunity.
Being a 3D printer priced lesser than $200, Anet A8 manages to be constantly upgradable which is great!


