NinjaFlex flexible filament drives the 3D printer filament industry because of its superior flexibility and longevity compared to non-polyurethane materials.
It is more consistent in diameter and overall roundness and that’s what separates it from other polyurethane materials.
Made from a specially formulated thermoplastic polyurethane (TPU) material, Ninjaflex boasts a low-tack, easy-to-feed texture and has uniquely flexible, strong prints ideal for direct-drive extruders.
With this 3D printer filament, you can easily make seals, gaskets, plugs, leveling feet, and protective applications. Let’s get started with reviewing the filament by looking at its key features, and printing guidelines with normal 3D printers and Bowden 3D printers.
We will also give you answers to questions such as why would you want flexible filament? How do you 3D print with Ninjaflex flexible filament, its applications, and in the end provide you with some points to take care of while printing with this 3D printer filament? So, let’s get started.
What are the Key Features of Ninjaflex Filament?
 Credit: imgix.net
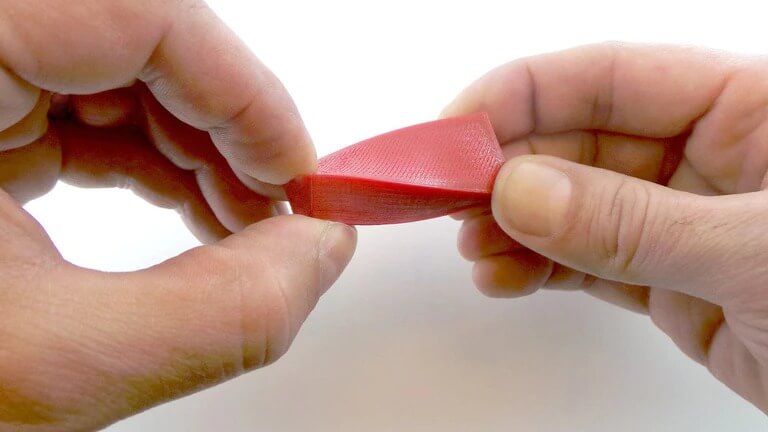
Having a Shore Hardness of 85A, Ninjaflex is a truly flexible 3D printer filament with no fills or layer manipulation required to achieve performance. It has a 660% elongation that allows for repeated movement and impact without wear or cracking.
The 3D printer filament’s polyurethane composition allows for excellent vibration reduction. Its patented low friction exterior allows for smooth feeding. Ninjaflex has an abrasion resistance of 20% which is better than ABS and 68% better than PLA.
The flexible filament has a consistent diameter and material properties providing reliable, high-quality prints.
It is chemically resistant to many materials, including naphtha, ASTM Oils #1-3, petroleum, and Freon and adheres to all standard build platforms without glue or tape REACH and RoHS 2002/95/EC and is directive compliant.
Printing Guidelines
- It is advisable to keep your printer’s extruder temperature in a range of 225°C to 235°C.
- The platform temperature of your 3D printer should be anywhere in between the room temperature – 40°C.
- For ensuring a good bed adhesion a glue and/ or blue painter’s tape is suggested if you do not have any of these, it is recommended that you use a heated bed.
- The suggested print speed for 3D printing top and bottom layers is as low as 10 mm per second – and as high as 20 mm per sec. whereas, the infill speed range should be from 15 mm per sec -35 mm per sec.
- You are advised to use the cooling fan in layer 2+ if available.
Printing with Bowden 3D Printers
In case you do not know what Bowden 3D printers mean, you can search for the Ultimaker 2+.
Ninjaflex offers a typical brand of filament by the name of the Cheetah type Ninjaflex which is a special blend of Ninjaflex optimized to 3D print with Bowden type extrusion setups.
Cheetah filament can be printed faster at print speeds like 60mm/s and perform better with overhangs.
Although not as efficient as Ninjaflex, it is still very flexible and durable. The difference in printing settings for this 3D printer filament is in the retraction distance.
You are requested to have an extruder temperature range of 235 degrees Celsius to 40 degrees Celsius, the print speed of 30mm/s by default printing speed 50% the first layer speed of that indirect drive 3D printers, 50% outline speed of the same, and 80% infill speed that that of direct drive 3D printer.
You are advised to keep a 2mm retraction distance and 30mm per second retraction speed.
Having discussed the key features and printer settings needed for Ninjaflex filament, it’s time to discuss the actual requirement of it.
When Will you Need a Ninjaflex Filament?
By now you know that Ninjaflex filament is a TPU i.e. thermoplastic polyurethane-based material that offers flexibility, elasticity, and high strength properties.
This rubbery 3D printer filament is ideal for projects that need to be both flexible and durable. Say, for example, it’s ideal for making bumpers for protecting your devices, making certain cosplay props such as horns, spikes, and other wearables.
In case you’re looking for a more useful approach, as mentioned at the start of this article, it can also be used for making seals, gaskets, plugs, and leveling feet.
Having stated so, there are some applications that can only be 3D printed with Ninjaflex, like Wearable wristbands. Because this material can be printed flat on a printing bed it can be worn around a wrist.
This is something that cannot at all be possible with PLA, ABS, or other hard-class plastic filaments. Ninjaflex has a class of its own that makes lots of things that weren’t possible, now 3D printable!
What are Ninjaflex filament’s Applications?
We’ll start with the most common ones.
Wearables and LED Diffusers
 Credit: thingiverse.com
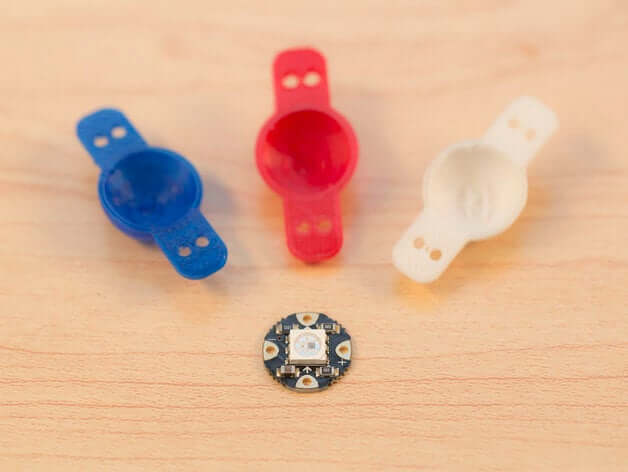
The flexible 3D printer filament works wonders for wearable projects like FLORA wrist band, sewable diffusers for NeoPixel LEDs like the one on Chemileon Scarf.
Ninjaflex works great as a diffuser if you are looking for a way to soften the super bright glow of a NeoPixel.
Bumpers, Stoppers, and Insulations
 Credit: adafruit.com
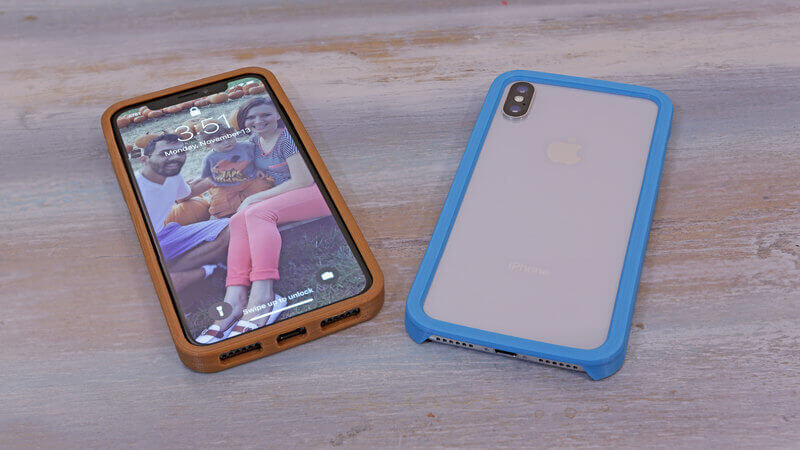
Ninjaflex is ideal for protecting objects against impact. You can make your own custom stoppers, gaskets for sealing junctions, insulation between two surfaces, or even add nonslip feet for projects.
If you make an iPhone Bumper design, you will know how elastic this material is. Using your bare hands, you cannot quite rip it apart. However, with enough thickness, you can design some really tough stuff!
What Points to Keep in Mind While Printing With Ninjaflex Filament?
 Credit: ekm.net
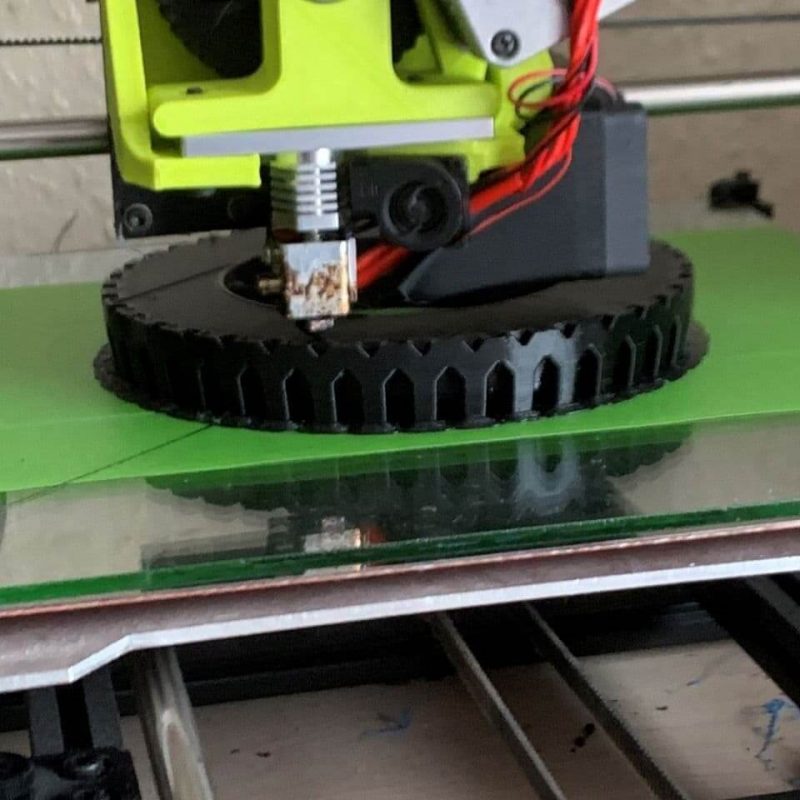
Below mentioned are some of the key parameters that will ensure your success while printing with Ninjaflex filaments.
Limit the Amount of Retraction
The latest extruders can be bought by making it very clear that they have a constrained filament path. While if you have older models of extruders, there was an open space after the extruder gear for the filament to move into.
However, it is noticed that with a newer extruder, after 3D printing some of your first calibration prints, you should be able to print Ninjaflexes with retraction settings comparable to your normal rigid filament settings.
The E3D Hemera is particularly known to show excellent results with 3D printing with Ninjaflexes, therefore being able to keep the filament tightly constrained and 3D print at high speeds without any kinks in the filament.
Stating about what happens when you print with an older extruder, you will have to disable retractions to achieve a good 3D print quality.
Meaning that you may experience some stringing as the nozzle moves around over the 3D print, but overall it will prevent you from having under extrusion.
The issue is particularly caused by the filament bunching up in the extruder from the constant back-and-forth motion it would experience with retracting.
Maintain Dryness at the Place Where they are Stored
You are advised to use a vacuum oven for drying your filament in a half-hour to an hour. Or, use a PrintDry for easily drying your filament and keep it dry.
Most flexible filaments like Ninjaflex, are hygroscopic to some degree, which means that they will pop and sizzle if you try extruding before the material is dried.
The sizzling and popping are caused by pockets of water that are absorbed into the filament instantly turning to steam as they hit the nozzle.
Such a phenomenon leaves voids in your print or causes excessive stringing along with your parts.
Not only does this significantly worsen the quality, but also the molecular chains within the material are broken down, which will end you up with a weaker part overall.
Maintaining 135 degrees Fahrenheit temperature for six hours in a conventional oven and then turning it off and letting it cool back to room temperature does the trick.
Printing it Slowly
As mentioned for the retraction settings, PLA or ABS can be printed fast as they’re a hard material. They offer a good amount of grip and push the filament through the nozzle.
Printing with Ninjaflex is like trying to guide one end of a rope by pushing the other. By slowing the overall print speed down, you decrease the pressure within the nozzle making the filament much less likely to bind up or even wrap around your extruder gear.
Like 3D printing with any other 3D printer filament, exact speed settings will differ from one printer to another.
So, you may need to experiment to determine what print speed is the upper limit that your specific 3D printer is capable of and vice versa.
For some 3D printers, the speed might be 10mm per second, while for others, a little more advanced 3D printers, might not need any changes at all and can print at 60mm per second with ease.
Printing the First Layer Accurately
You should know that printing the first layer is the most important part of any print. And there are a few things that you need to do to get it to stick well.
To start with, you need the print surface to be level, so, in case you are unfamiliar with how to level your 3D printer’s bed do look for sources online that offer this information.
Having your Z-Offset set to the right height is one of the most important things to get your first layer printed correctly.
But getting the Z-offset rightly will depend on the material that your 3D printer’s bed surface is made of. Some materials are known to bond too well to Ninjaflex, so much so that they can be permanently attached to them.
But for most surfaces, you will require a decent squish to your first layer, and a good base material for your Ninjaflex to adhere to.
In all of these conditions, a blue painter’s tape or a heated glass bed with PVA glue stick or MatterHackers Stick Stick are ideal surfaces.
Getting the Temperature Right
If the temperature is too high you will still see strings between the separate parts of your print, like cobwebs.
Remember whenever this happens you should try to incrementally lower the temperature by 5°C until the nozzle stops leaking any material.
At times when this isn’t treating the underlying problem, it could simply be retraction settings that aren’t quite aggressive enough, so, you’ll need just a small bump to get everything in tune.
In case the temperature is too low, the material being printed will have layers that didn’t bond together, either very well or at all, and therefore can be easily pulled apart. So, ensure that the filament is dry and try again.
You can also try raising the temperature of the nozzle in 5°C increments until you achieve strong layer adhesion.
The best way is to see if the perimeters and infill of the 3D prints aren’t sparse and are well connected to each other.
Pros & Cons of 3D Printing with Ninjaflex
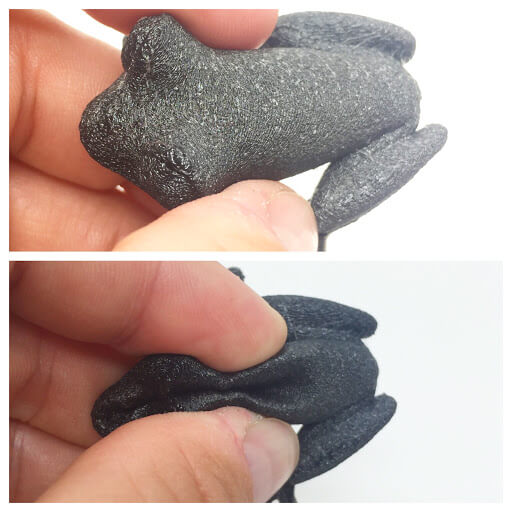 Credit: googleusercontent.com
- Recovers original shape even after completely deforming.
- Has good chemical resistance to a huge range of substances.
- Can be used with any 3D printers.
- Available in 10 colors.
- Requires no heated printed bed.
- Complicated to print with a direct-drive extruder.
- They do not provide protected filament packaging.
The Conclusion
Overall printing with Ninjaflex filaments lets you print parts and functional prototypes that aren’t possible with any other 3D printer filament.
But, as good things come at their own cost, these uniquely manufactured flexible filaments come at their own specific set of requirements.
If followed, they could turn out to give you the most excellent results that you can never imagine. They make 3D printing of rubber-quality parts with a decent surface finish possible.
However, if not printed with precise printer settings and taking into mind points like the ones mentioned above you will get some of the most horrible prints you have ever wondered to get. Also, because of this quality, it is recommended to not print with these filaments if you are a novice in this field.


